For your convenience Apress has placed some of the front
matter material after the index. Please use the Bookmarks
and Contents at a Glance links to access them.
Contents at a Glance
Chapter 4: Making It Move: Scripting the Cube
■
...
113
Chapter 5: Let’s Dance! Animation and Sound
■
...
149
Chapter 6: Let’s Roll! Physics and Controls
■
...
175
Chapter 7: Let’s Bowl! Advanced Physics
■
...
213
Chapter 8: Let’s Play! Scripting the Game
■
...
255
Chapter 9: The Game GUI
■
...
283
Chapter 10: Using Unity iOS
■
...
309
Chapter 11: Building for Real: Device Testing and App Submission
■
...
337
Chapter 12: Presentation: Screens and Icons
■
...
373
vi Contents at a Glance
Chapter 14: Game Center: Leaderboards and Achievements
■
...
417
Chapter 15: iAd: Banner Ads and Interstitial Ads
■
...
439
Chapter 16: Optimization
■
...
453
Chapter 17: Where to Go from Here?
■
...
499
Introduction
How I Met Unity
Technically, I first started programming on a TRS-80 in my junior high school library, but really I just typed in the same BASIC code listing from a magazine every day until the librarian mentioned I could save the program on a cassette. I’m embarrassed to recall my first reaction when I heard the library had a computer: “What’s it good for?”
A year later, I saw the light when I got my hands on an Apple II. After cracking open the user manual and learning how to draw graphics in BASIC, I was hooked. Soon I was writing Reversi games (one in BASIC, one in 6502 assembly) and even a 3D wireframe display program.
In the intervening years I wandered the Windows wasteland and worked in small and large groups developing computer graphics and games. But fast forward to six years ago, when I happily got back into the Apple fold (now with Unix!) and attended my first Apple World Wide Developer Conference. Joachim Ante, one of the cofounders and the CTO of Unity Technologies, gave me an impromptu demo of Unity 1.5, and it was exactly what I’d been looking for—an inexpensive 3D game engine that ran on a Mac and was able to target multiple platforms, including Windows, Mac, and web browsers.
So I bought a Unity 1.5 Indie license as soon as I returned home (this was when Unity Indie wasn’t free), later upgraded to Unity Pro, and was pleasantly surprised a couple of years later that Unity would support iOS. I love it when a plan comes together!
In the meantime, my former employers at Hyper Entertainment granted me a license to port HyperBowl, a 3D arcade bowling game I worked on over ten years ago, to Unity and various platforms supported by Unity, so now I had a meaty project to work with, besides the smaller apps I’d been experimenting with.
xxviii Introduction
With each new version of Unity, HyperBowl and my other games got faster and better-looking, utilized more iOS features and ran on more iOS devices (and, eventually, Android devices). I added capabilities using third-party plugins, a new pause menu, and even an entire new HyperBowl lane (level) with packages from the Unity Asset Store, which is conveniently integrated within the Unity Editor.
This has all taken place with a development team of one (not counting all the work put into the original licensed assets), and I didn’t have to learn a single line of Objective-C or create my own art. In a sense, I feel like I’ve returned to my programming roots, working on my own projects for fun, and as a bonus, profit! Hopefully, I can distill my experience with Unity over the past six years (both mistakes and successes) into this book.
comfy confines of Unity (except when we have to dabble in Xcode when making iOS builds). We will, however, do plenty of scripting with Unity’s version of JavaScript. Our focus will be on using the built-in Unity script functions, but I’ll point you to Unity plugins and packages that provide further capability.
You can find the source code on Apress.com at http://www.apress.com/9781430248750 or on
http://learnunity4.com/.
Explore Further
No one knows everything. That’s why a key to successful development is knowing how to find the tools, assets, information, and help you need. So at the end of each chapter, I’ll suggest some reading and resources for you to explore further.
I’ll start here, with a recommendation of other worthwhile Unity books. Even on the same topic, it’s useful to read different books for their different takes on the subject. For example, Will Goldstone wrote one of the first Unity books, Unity Game Development Essentials, Sue Blackman’s Beginning Unity 3D Development is a hefty tome from an artist’s viewpoint that presents an adventure game, and Jeff Murray covers Unity iOS in Game Development for iOS with Unity 3D, using a kart racing game as an example.
Since I waxed nostalgic on Apple computers, I should follow up with some Apple historical reading.
Revolution in the Valley is a fun collection of Mac development anecdotes by Andy Hertzfeld. iWoz
Apple Design: The Work of the Apple Industrial Design Group by Paul Kunkel portrays the lineup of classic Macs (and by classic, I mean everything before 1997).
1
Chapter
1
Getting Started
Unity is a cross-platform 3D game development system developed by a company called Unity Technologies (originally named Over the Edge). What does it mean to call Unity cross-platform, exactly? Well, it’s cross-platform in the sense that the Unity Editor, the game creation and editing tool that is the centerpiece of Unity, runs on OS X and Windows. More impressively, Unity is cross-platform in the sense that from the Unity Editor we can build games for OS X, Windows, web browsers (using either Flash, Google Native client, or Unity’s browser plug-in), iOS, Android, and game consoles. And the list keeps growing (shortly before this book’s publication, Unity Technologies announced support for the BlackBerry 10)!
As for 3D, Unity is a 3D game development system in the sense that Unity’s built-in graphics, sound, and physics engines all operate in 3D space, which is perfect for creating 3D games, but many successful 2D games have also been developed in Unity.
This book describes the latest version of Unity as of this writing, which is Unity 4.1.2, but Unity is a fast-moving target, with new features and user interface changes appearing even in minor releases (which are appearing more frequently, since Unity Technologies has introduced a faster incremental update schedule starting with Unity 4). This caveat applies to everything else, of course, including products, licenses, and prices from Unity, Apple, and third-party vendors.
Prerequisites
Prepare Your Mac
For iOS development, you’ll need a Mac running the Lion or Mountain Lion version of OS X (that is, version 10.7 and up). Unity 4 can still run on older versions of OS X, like Snow Leopard, but Lion and Mountain Lion are currently required to run the latest version of Xcode, the software tool required by Apple for iOS development. Typically, the latest or fairly recent version of Xcode is required to target the latest version of iOS.
Register as an iOS Developer
It’s worth visiting the Apple developer site to register as an iOS developer as soon as possible, since
http://developer.apple.com/. When you start building Unity iOS apps, I’ll go over the Xcode
Download Unity
To obtain Unity, visit the Unity web site at http://unity3d.com/ and go to the Download page. There you will find a download link for the latest version of Unity (at the moment, Unity 4.1.2) and also a link to the release notes (which are included with the installation). There is also a link to a list of older versions in case you need to roll back to a previous version of Unity for some reason.
Tip While you’re on the Unity web site, take a look around. Check out the demos, the FAQ, the feature comparisons among the various licenses, and the support links to the documentation, user forum, and other community support sites. You’ll certainly have to come back later, so you might as well figure out where everything is now!
There is only one Unity application, with additional features and platform support activated by licenses. For example, the product name Unity iOS Pro specifies Unity with an added Unity Pro license and also a Unity iOS Pro license. I’ll elaborate on the various licenses a little bit later in this chapter when I introduce the License Management window in Unity.
Unity version numbers are in the form major.minor.patch. So Unity 4.1.2 is Unity 4.0 with an
3 CHAPTER 1: Getting Started
Tip In general, once a Unity project has been upgraded, it may become incompatible with older versions of Unity. So it’s a good idea to make a copy of your project before upgrading it, just in case you need to revert back to the previous version of Unity.
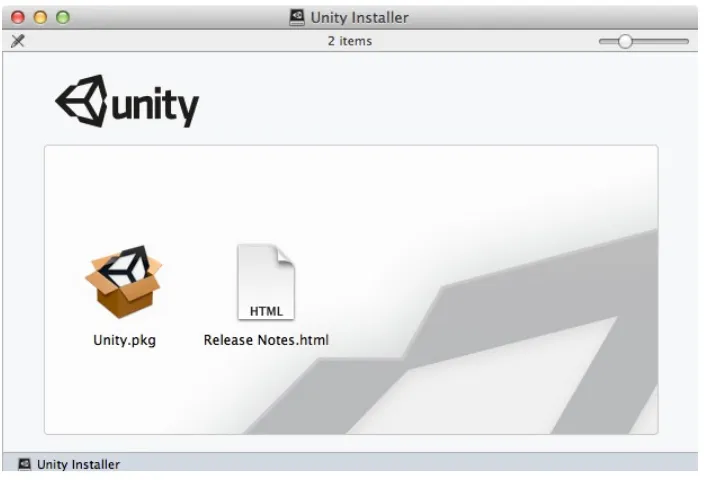
Figure 1-1. The Unity installer files
To start the Unity installation process, click the download link (as of this writing, it’s a button labeled Download Unity 4.1.2). The file is around 1GB in size, so the download will take a while, but we’re on our way!
Install Unity
The Unity download file is a disk image (DMG file), which at this time is a file named unity-4.1.2.dmg. Once the file is downloaded, double-click it to see the disk image contents (Figure 1-1).
Run the Installer
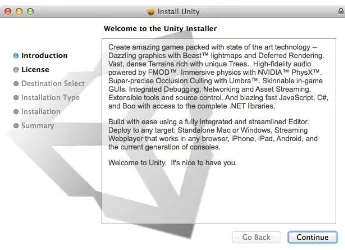
Double-click the Unity.pkg file to start to begin the Unity installation (Figure 1-2).
Figure 1-2. The Unity installer
The installer will proceed through a typical installation sequence (the steps are listed on the left side of the installer window), and at the end, a Unity folder will be placed in your Applications folder.
Tip If you happen to be upgrading from an older version of Unity, this process will just replace that old version. If you want to keep the previous copy around, rename the old folder first. For example, if you’re upgrading from Unity 3.5 to Unity 4, first rename your Unity folder to “Unity35” before performing the new installation. Then you can run both versions of Unity.
5 CHAPTER 1: Getting Started
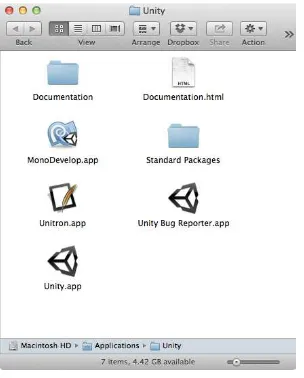
The most important file in the Unity installation folder, and the only one you really need, is the Unity app, which provides the environment used to construct your games. This app is sometimes more specifically termed the Unity Editor, as distinct from the Unity runtime engine, or Unity Player, that is incorporated into final builds. But usually when I just say “Unity,” the context is clear (I also refer to Unity Technologies as Unity).
The Documentation folder contains the same User Manual, Component Reference, and Script Reference viewable on the Unity web site (under the Learn tab). Each of these files can be brought up within a web browser from the Unity Help menu, and you can always double-click Documentation.html directly to see the front page of the documentation.
The Standard Packages folder contains several files with the .unityPackage extension. These Unity package files each hold collections of Unity assets and can be imported into Unity (and from Unity, you can export assets into a package file). For example, the Standard Package file named Scripts. unityPackage contains several generally useful scripts.
The MonoDevelop app is the default script editor for Unity and is a custom version of the open source MonoDevelop editor used for the Mono Project, known as Mono for short. Mono is an open source version of Microsoft’s .NET framework and forms the basis of the Unity scripting system. The Unitron app is an earlier and simpler script editor that is also derived from another program, a text editor called Smultron developed by Peter Borg. Although customized for Unity and still included in the Unity installation, Unitron is no longer officially supported.
Finally, there’s the Unity Bug Reporter app, which is normally run from the Report a Bug item in the Unity help menu. However, you can always launch the Unity Bug Reporter directly from the Unity installation folder. That’s pretty helpful if you run into a bug where Unity doesn’t even start up!
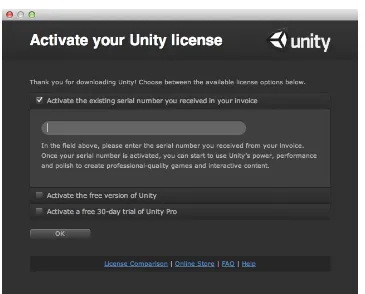
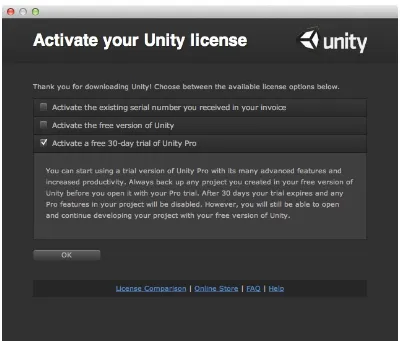
1-4) and registering for a free one-month
7 CHAPTER 1: Getting Started
The free version of Unity, which is Unity without the Pro features and is officially called just Unity (although sometimes it’s referred to as Unity Basic, and I still call it Unity Indie, since it’s only supposed to be used by entities making less than $100,000 a year), doesn’t include Unity iOS. You can still start with free Unity for the portion of this book leading up to the iOS chapters and then add Unity iOS for $400, but keep in mind the Unity Pro and Unity iOS Pro features won’t be available. To clarify, your license determines which core version of Unity is enabled and which add-ons, if any, are enabled. The core product and the add-ons are available in non-Pro and Pro versions, and Unity Pro must be licensed for any Pro version of the add-ons to be licensed. So, developing with the non-Pro version of Unity iOS will cost you $400 in Unity licenses, but developing with Unity iOS Pro will cost $1,500 for Unity Pro and another $1,500 for Unity iOS Pro, for a grand total of $3,000. Unity Technologies sometimes offers discounts, especially when they’re introducing a new major version of Unity, and prices can change, of course (after all, Unity Indie used to cost $400 and now it’s free). In any case, the availability of the free trial Pro license means you don’t have to worry about that immediately.
Welcome to Unity!
After you get the licensing taken care of, the Unity Editor window will appear with a friendly “Welcome To Unity” window appearing on top (Figure 1-6). The welcome window suggests some resources you should look at to get started. You can click each item to bring up that resource.
Figure 1-6. The Unity Welcome screen
9 CHAPTER 1: Getting Started
Manage Unity
Before getting into actual game development with Unity, this is a good time to look at some of the administrative features in the Unity Editor.
Change Skins (Pro)
The Unity Editor appears in one of two skins, Dark or Light. If you’re using Unity Pro, you’ll initially see the Dark skin (Figure 1-8), and if you’re using the non-Pro version of Unity, you’ll only see the Light skin (Figure 1-9).
11 CHAPTER 1: Getting Started
For the rest of this book, I use the Dark skin for screenshots, but aside from the hue, there is no difference in the user interface. If you’re using Unity Pro and prefer the Light skin, you can change skins in the Unity Preferences window. First select Preferences in the Unity menu (Figure 1-10).
Figure 1-10. The Preferences menu item in the Unity Editor
While you’re in the Preferences window, I recommend making sure “Always Show Project Wizard” is checked. That will ensure Unity brings up the project selection dialog when it starts up, instead of automatically opening the most recently opened project, which can be time-consuming and is not always what you want. In particular, you don’t want to accidentally upgrade a project to a new version of Unity before you’re ready.
Update the License
Eventually, you may need to update your license, either because you’re using the free trial and it has expired, to upgrade your license to Pro versions, to add another build platform, or because you need
1-12).
Figure 1-12. Bringing up the License Management window from the Unity menu
13 CHAPTER 1: Getting Started
A single Unity license can be used on two machines. In its early years, when the Unity Editor only ran on OS X, a Unity license was only good for one machine, but the number was increased to two after Windows support for the Unity Editor was added.
Report Problems
If you use Unity for a significant period of time, you’ll certainly encounter bugs, real or imagined. That’s not a knock on Unity. The 3D game engines are very complicated, at least internally, and the pace of their development is remarkable (I started with Unity 1.6 when it only ran on OS X and only deployed builds for Windows and OS X). Bugs don’t fix themselves, especially when they’re not reported. That’s where the Unity Bug Reporter comes in. As I mentioned when going over the Unity installation files, the Bug Reporter is available in the Unity folder but normally is launched from the Help menu in the Unity Editor (Figure 1-14).
Tip The Bug Reporter, as you can see in the list of files in the Unity installation, is a separate application from the Unity Editor. So if you encounter a bug that prevents the Unity Editor from starting up properly, you can always launch the Bug Reporter directly by double-clicking that file in the Finder.
The Report a Bug option in the Help menu
15 CHAPTER 1: Getting Started
Below that, in the middle of the window, is the list of attachments. Unity automatically starts off this list with the current project, and you might include supplemental files like screenshots or log files. You can remove the current project from this list, but normally you should include the project so that Unity support can reproduce the problem.
By the same token, you should fill in the problem description with a detailed enough explanation that Unity support would know how to replicate the undesired behavior and understand why it’s undesired. Basically, you want to avoid responses in the mode of “We can’t reproduce the problem” and “This is not a bug. It’s by design.”
Shortly after submitting a bug report, you should receive an e-mail confirmation from Unity
Technologies with a case number and a link to a copy of the report in the Unity bug database, which you can check to see the status of the bug.
Check for Updates
If you’re lucky, your bug report will result in a fix. And if you’re really lucky, that fix will show up in the next Unity update. You can always check if there’s a new update by selecting the Check for Updates command from the Window menu on the menu bar. The resulting window will display whether or not an update is available (Figure 1-16).
Figure 1-16. The Unity Editor Update Check
Notice the version number displayed in Figure 1-16 is Unity 4.1.2f1. The suffix represents the most granular releases, including emergency hot fixes. Out of some caution, Unity Technologies usually doesn’t make newly released updates immediately available to the Editor Update Check, so if you’re waiting anxiously for a bug-fix update, you can always check the Unity web site, too.
Explore Further
17 CHAPTER 1: Getting Started
get in the habit of finding Unity information on their own, and they need to know where to find that information, which isn’t always easy!
Therefore, at the end of each chapter, and including this one, I’ll direct you to documentation and other resources related to the topics you just learned, so you’ll know where to find the definitive and comprehensive information sources and can take things further when you’ve finished this book. I’ll focus on the official Unity manuals and the Unity web site but also mention some third-party resources. So now that you have Unity installed, before putting it to use in this book, take a break and browse the web sites and reference documentation that you will surely be utilizing heavily from now on. It’s always a good idea to figure out where to find what you need, before you need it!
iOS Development Requirements
At the beginning of this chapter, I mentioned it’s a good idea to get the ball rolling on downloading Xcode and registering for Apple’s iOS Developer Program.
Requirements for iOS development, including required hardware and details about the iOS Developer Program, are listed on Apple’s developer support page
(http://developer.apple.com/support).
Information about Xcode requirements and downloading Xcode can be found at
http://developer.apple.com/xcode.
The Unity Web Site
Along with the growth of Unity features and platforms, the Unity web site (http://unity3d.com/) has grown, too. It’s all worth browsing, but in particular, for general information about Unity, check out the FAQ section on the Unity web site (http://unity3d.com/unity/faq).
The license activation process and License Management window are documented on
http://unity3d.com/unity/activation. This chapter mentioned the distinct Pro and non-Pro versions of Unity and Unity iOS, but the license comparison table at http://unity3d.com/unity/licenses
provides a more comprehensive table of features and their availability for the various licenses. Many instructional videos are available on the Unity Video archive (http://video.unity3d.com/) and Unity has recently introduced a Learn tab on their web site for easy access to documentation and tutorials.
Unity Manuals and References
The top section of the Unity Help menu (Figure 1-17) lists the official Unity documentation consisting of three documents: the Unity Manual, the Reference Manual, and the Scripting Reference.
The Unity Community
The first three items in the middle of the Unity Help menu are links to the official Unity community sites. The forum (http://forum.unity3d.com) is where users can bring up just about anything related to Unity (the forum does have moderators, though).
The Unity Answers site (http://answers.unity3d.com/) follows the format of Stack Exchange and provides some quality control over questions and answers. The Unity Feedback site
(http://feedback.unity3d.com) allows users to post feature requests and vote on feature requests, whether they’re their own or posted by someone else.
The Help menu
Tip Although the bug type selector offers Feature Request as a Type of Bug, Unity encourages everyone to submit feature requests to their Feedback site.
19
Chapter
2
A Unity Tour
Now that you have Unity installed, it’s time to get acquainted with the Unity Editor. The Editor (I’ll use the terms Unity, Unity Editor, and Editor interchangeably, as long as the meaning is clear) is where you create, test, and build a game for one or more target platforms. The Editor operates on a single Unity project containing assets included in a game.
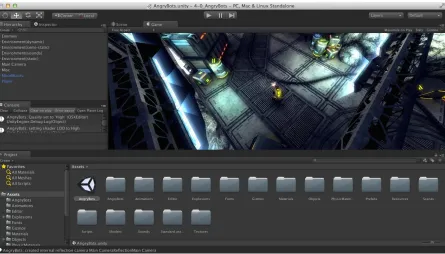
This chapter will introduce the Unity Editor using the Angry Bots demo project that is installed with Unity. I won’t delve into the inner workings of Angry Bots here, but it’s a convenient ready-made project you can use to get acquainted with Unity, even to the point of building Angry Bots as an OS X app to get a feel for the build process. Hopefully, this will get you comfortable with Unity’s workflow, user interface, and various file types before learning how to create a new project from scratch in the next chapter.
Tip Filename extensions are hidden by default in OS X, but anyone performing any kind of development should be looking at complete filenames. To ensure extensions are displayed, go to the Advanced tab in the Finder Preferences window and check “Show all filename extensions.”
Bring out the Angry Bots
first time. If for some reason Unity doesn’t immediately open Angry Bots, or if you want to return to it later (as we will in Chapters 10 and 11 where we will use Angry Bots to get acquainted with Unity iOS), select the Open Project item in the File menu on the Unity menu bar (Figure 2-2).
21 CHAPTER 2: A Unity Tour
The Project Wizard will appear (the same Project Wizard referred to by the Always Show Project Wizard item in the Preferences window). Select the AngryBots project from the list of recent projects in the Project Wizard (the same one that will show up every time you start Unity if you left the box checked) or click the Open Other button (Figure 2-3).
Figure 2-3. Selecting Angry Bots from the Open Project wizard
Open the Angry Bots Scene
The scene name is displayed along the upper border of the Editor window, and the scene contents are reflected in the Hierarchy View, Scene View, and Game View. I’ll explain views in a bit and spend a good portion of this chapter going over each view in detail.
A scene is the same as a level in a game (in fact, the Unity script function that loads a scene is called
Application.LoadLevel). The purpose of the Unity Editor is to construct scenes, and thus it always has one scene open at a time.
If the Editor doesn’t open an existing scene at startup, it will open a newly created scene, the same as if you had selected New Scene from the File menu on the Unity menu bar.
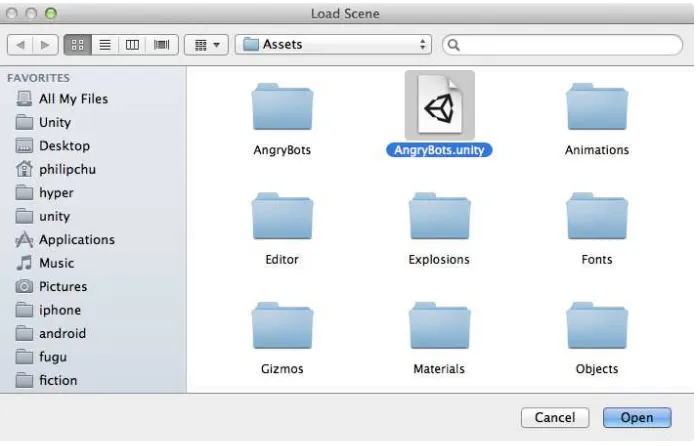
If you’re not looking at the AngryBots scene right now, then select the Open Scene command in the File menu (Figure 2-5).
23 CHAPTER 2: A Unity Tour
The resulting file chooser will start off in the top level of the project’s Assets folder, where you can select the AngryBots scene file (Figure 2-6). All scene files are displayed with a Unity icon and have the .unity filename extension.
Figure 2-5. The Open Scene menu item
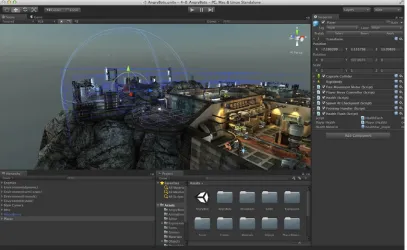
Play Angry Bots
With the desired scene open, click the Play button at the center top of the Editor to start the game. The Game View will appear and display the running game, which can be played with standard keyboard and mouse controls (Figure 2-7).
Figure 2-7. The Play mode in the Editor
25 CHAPTER 2: A Unity Tour
The upper portion of the window lists the scenes to include in the build. Just the scene you have open should be checked. Any unchecked or unlisted scenes won’t be included in the build (Figure 2-9).
Figure 2-8. Bringing up the Build Settings window
Build Angry Bots
During normal development, you would alternate between editing a scene and playing it.
The default platform selected in the Platform list on the left is PC, Mac & Linux Standalone, matching the platform listed on the Editor title bar. The default specific Target Platform on the right is set as a Windows executable, but since you’re operating on a Mac, let’s set the Target Platform in the menu on the right to Mac OS X. Then click the Switch Platform button on the lower left. This will initiate a conversion of the project assets to formats suitable for use on a Mac. After the conversion is complete, the title bar of the Editor will update to reflect the new platform.
27 CHAPTER 2: A Unity Tour
Now you can click either the Build or Build and Play button in the Build Settings window. Clicking Build will generate an OS X app version of our game. Clicking Build and Play will do the same but also run the game, which just saves the effort of bringing up a Finder window and double-clicking the new app. Unity will prompt you for a file name and location for the app, defaulting to the top level of the project directory, which is fine (Figure 2-10).
Figure 2-10. Saving an OS X app build
After selecting the desired resolution and clicking Play!, you’ll see a game window with the size you just specified. Now you have Angry Bots running in its own Mac window (Figure 2-12).
29 CHAPTER 2: A Unity Tour
The Editor Layout
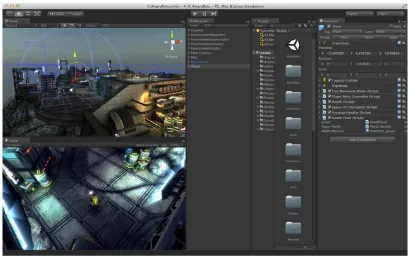
Now that you’ve got a feel for the Unity test-and-build workflow with the Angry Bots project, let’s take a closer look at the layout of the Unity Editor. The main window is divided into areas (I’m used to calling them panes, but I’ll call them areas since that’s the term used in Xcode). Each area holds one or more tabbed views. The currently displayed view for an area is selected by clicking the view’s tab. Views can be added, moved, removed, and resized, and the Editor supports switching among layouts, so a layout essentially is a specific arrangement of views. For example, the default layout of the main window (Figure 2-13) has an area containing a Scene View (Figure 2-14) and a Game View (Figure 2-15).
Figure 2-12. Angry Bots as an OS X app Mac app
31 CHAPTER 2: A Unity Tour
Preset Layouts
The default layout is just one of several preset layouts. Alternate layouts can be selected from the menu in the top right corner of the main window (Figure 2-16). Go ahead and try them out. Figures 2-17 through 2-20 show the resulting layouts.
Figure 2-15. The Game View selected in a multitabbed area
33 CHAPTER 2: A Unity Tour
Figure 2-20. The Wide layout
I’ll describe the individual types of views in more detail shortly, but for now note that the 2-by-3 layout (Figure 2-17) is an example of a layout where the Scene View and Game View are in separate areas instead of sharing the same one. The 4-split layout (Figure 2-18) has four instances of the Scene View (reminiscent of tools used for computer-aided design), demonstrating that a layout is not restricted to one of each type of view.
Custom Layouts
The preset layouts provide a variety of workspaces, but fortunately you’re not restricted to using them exactly as they are. Unity provides the flexibility to completely rearrange the Editor window as
2-20). Fortunately, you can click the
35 CHAPTER 2: A Unity Tour
Detach Views
You can even drag a view outside the Editor window so that it resides in its own “floating” window, which can be treated just like any other area. Drag the Scene tab outside the Editor so it resides in a floating window, and then drag the Game tab into its tab region. The result should look like Figure 2-22. Likewise, dragging a tab into a docking region of the floating window will add another area to the window.
Figure 2-21. A workspace customized with views moved
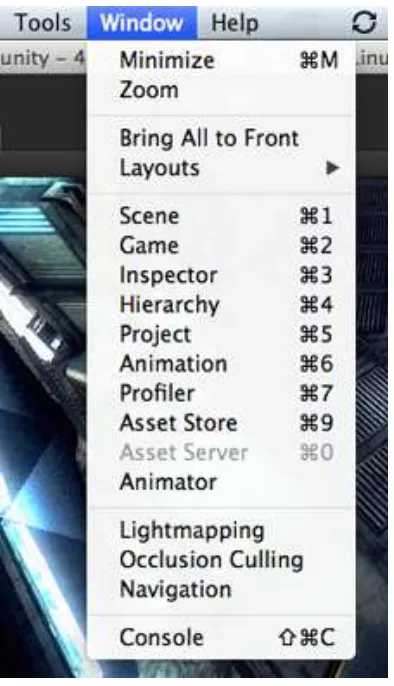
Floating windows are often covered up by other windows, so the Windows menu on the menu bar has menu items for making each view visible (Figure 2-22). Notice there is a keyboard shortcut for each, and there is also a Layouts submenu that is identical to the layout menu inside the Editor.
Add and Remove Views
You can also add and remove views in each area using the menu at the top right corner of the area (Figure 2-23). The Close Tab item removes the currently displayed view. The Add Tab item provides a list of new views for you to choose from.
37 CHAPTER 2: A Unity Tour
You may want to have different layouts for different target platforms, or different layouts for development vs. play testing, or even different layouts for different games. For example, I have a custom layout specifically for HyperBowl that preserves the Game View in a suitable portrait aspect ratio. It would be a hassle to manually reconfigure the Editor every time you start up Unity. Fortunately, you can name and save layouts by selecting the Save Layout option in the layout menu, which will prompt you for the new layout name (Figure 2-24).
Figure 2-23. Adding a view to an area
Figure 2-24. The Save Layout menu
2-26). This will also delete any custom layouts. The Delete Layout menu
Figure 2-26. The Restore Factory Settings prompt
If you change a layout and haven’t saved the changes, you can always discard them by just reselecting that layout in the layout menu.
The Inspector View
The best view to describe in detail first is the Inspector View, since its function is to display information about objects selected in other views. It’s really more than an inspector, since it can typically be used to modify the selected item.
39 CHAPTER 2: A Unity Tour
But if you aren’t using a version control system (or if you are using the Unity Asset Server, which is a product from Unity Technologies and requires another license), you can turn off version control compatibility in the Editor Settings and get rid of those unsightly files. Bring up the Editor Settings by going to the Edit menu and selecting Editor Settings from the Settings submenu (Figure 2-28).
Now the Inspector View displays the Editor Settings. If the project currently has meta files, then the Version Control Mode is set to Meta Files (and if you’re using the Asset Server, this option is set to Asset Server). To remove the meta files, set the Version Control Mode to Disabled (Figure 2-29).
41 CHAPTER 2: A Unity Tour
With the Version Control Mode set to Disabled, Unity will remove the meta files (Figure 2-30). The asset tracking is now handled within binary files inside the Library folder of the project.
Figure 2-29. Editor Settings in the Inspector View
Note Unity Pro users who are using meta files for version control support also have the option of setting Asset Serialization Mode to Force Text. In that mode, Unity scene files are saved in a text-only YAML (YAML Ain’t Markup Language) format.
Normally, the Inspector View displays the properties of the most recently selected object (when you bring up the Editor Settings, you really selected it). But sometimes you don’t want the Inspector View to change while you’re selecting other objects. In that case, you can pin the Inspector View to an object by selecting the Lock option in the menu at the top right of the view (Figure 2-31).
Figure 2-31. Locking the Inspector View
The Project View
43 CHAPTER 2: A Unity Tour
Switch Between One-Column and Two-Columns
Before Unity 4, the Project View had only a one-column display. That option is still available in the menu for the Project View (click the little three-line icon at the top right of the view), so you can now switch between one and two columns.
Notice how the Project View of Angry Bots project (Figure 2-32) resembles how the project’s Assets folder looks in the Finder (see Figure 2-30). It actually looks more like a Windows file view, where you navigate the folder hierarchy in the panel on the left and view the contents of the selected folder in the right panel.
Scale Icons
The slider on the bottom scales the view in the right panel—a larger scale is nice for textures and smaller is better for items like scripts that don’t have interesting icons. This is a good reason to partition assets by asset type (i.e., put all textures in a Textures folders, scripts in a Script folder, and so on). Chances are, a single-scale slider setting won’t be good for a mixture of asset types.
Inspect Assets
Selecting an asset on the right will display the properties of that asset in the Inspector View. For example, if you select a sound sample, the Inspector View displays information about the sound format, some of which you can change, like the compression, and it even lets you play the audio in the Editor (Figure 2-33). I’ll explain the sound properties in a later chapter, but for now feel free to select various types of assets in the Project View and see what shows up in the Inspector View.
45 CHAPTER 2: A Unity Tour
The right panel displays the search results for everything under Assets (i.e., all of our assets). The search can be narrowed further by selecting one of the subfolders in the left panel. For example, if you know you’re looking for a texture, and you’ve arranged your assets into subfolders by the type of asset, you can select the Textures folder to search (Figure 2-35).
Search for Assets
In a large and complex project, it’s difficult to manually search for a particular asset. Fortunately, just as in the Finder, there is a search box that can be used to filter the results showing in the right panel of the Project View. In Figure 2-34, the Project View displays the result of searching for assets with “add” in their names.
Notice just below the search, there is a tab with the name of the folder that was selected. You can still click the Assets tab to the left to see the search results for all your assets, both locally and on the Unity Asset Store, which we’ll make copious use of in this book.
You can also filter your search by asset type, using the menu immediately to the right of the search box. Instead of just searching in the Textures folder, you could have selected Texture as the asset type of interest (Figure 2-36). Notice how that resulted in “t:Texture” being added to the search box. The “t:” prefix indicates the search should be filtered by the following asset type. You could have just typed that in without using the menu.
47 CHAPTER 2: A Unity Tour
The button to right of the asset type menu is for filtering by label (you can assign a label to each asset in the Inspector View), which is also pretty handy for searching the Asset Store. And the rightmost button, the star, will save the current search in the Favorites section of the left panel.
Operate on Assets
Assets in the Project View can be manipulated very much like their corresponding files in the Finder. Double-clicking an asset will attempt to open a suitable program to view or edit the asset. This is equivalent to right-clicking the asset and selecting Open. Double-clicking a scene file will open the scene in this Unity Editor window, just as if you had selected Open Scene in the File menu.
You can also rename, duplicate and delete, and drag files in and out of a folder just as you can in the Finder. Some of the operations are available in the Unity Edit menu and in a pop-up menu when you right-click on an asset. You’ll get some practice with that in the next few chapters.
Likewise, in the next chapter you will work on adding assets to a project. That involves importing a file or importing a Unity package, using the Assets menu on the menu bar or just dragging files into the Assets folder of the project using the Finder.
The Hierarchy View
Every game engine has a top-level object called a game object or entity (CryEngine, for example) or something else (Second Life has prims) to represent anything that has a position, potential behavior, and a name to identify it. Unity game objects are instances of the class GameObject.
Note In general, when we refer to a type of Unity object, we’ll use its class name to be precise and make clear how that object would be referenced in a script.
49 CHAPTER 2: A Unity Tour
Parent and Child GameObjects
Notice that many of the GameObjects are arranged in a hierarchy, hence the name of this view (in computer graphics, this is commonly known as a scene graph). Parenting makes sense for game objects that are conceptually grouped together. For example, when you want to move a car, you want the wheels to automatically move along with the car. So the wheels should be specified as children of the car, offset from the center of the car. When the wheels turn, they turn relative to the movement of the car. Parenting also allows us to activate or deactivate whole groups of game objects at one time.
The Scene View
Whereas the Hierarchy View allows you to create, inspect, and modify the GameObjects in the current scene, it doesn’t provide a way to visualize the scene. That’s where the Scene View comes in. The Scene View is similar to the interfaces of 3D modeling applications. It lets you examine and modify the scene from any 3D vantage point and gives you an idea how the final product will look.
Navigate the Scene
If you’re not familiar with working in 3D space, it’s a straightforward extension from working in 2D. Instead of just working in a space with x and y axes and (x,y) coordinates, in 3D space you have an additional z axis and (x,y,z) coordinates. The x and z axes define the ground plane and y is pointing up (you can think of y as height).
Note Some 3D applications and game engines use the z axis for height and the x and y axes for the ground plane, so when importing assets you might have to adjust (rotate) them.
camera. Clicking the x, y, and z arrows of the
2-38), and the text under the Scene Gizmo says “Top.”
51 CHAPTER 2: A Unity Tour
The camera here is not the same as the Camera GameObject in the scene that is used during the game, so you don’t have to worry about messing up the game while you’re looking around in the Scene View.
Clicking the box in the center of the Scene Gizmo toggles the camera projection between
perspective, which renders objects smaller as they recede in the distance, and orthographic, which renders everything at their original size whether they are close or far. Perspective is more realistic and what you normally see in 3D games, but orthographic is often more convenient when designing (hence its ubiquity in computer-aided design applications). The little graphic preceding the text under the Scene Gizmo indicates the current projection.
You can zoom in and out using the mouse scroll wheel or by selecting the Hand tool in the upper right toolbar of the Editor window and click-dragging the mouse while holding the Control key down. When the Hand tool is selected, you can also move the camera by click-dragging the view, and you can rotate (orbit) the camera by dragging the mouse while holding the Option (or Alt) key down, so you’re not restricted to just the axis camera angles, like in Figure 2-39.
Figure 2-39. A tilted perspective in the Scene View
The other buttons on the toolbar activate modes for moving, rotating, and scaling GameObjects. There’s no reason to change the Angry Bots scene, so those modes will be explained in more detail when you start creating new projects.
Tip If you accidentally make a change to the scene, you can select Undo from the Edit menu. If you made a lot of changes you don’t want to keep, you can just decline to save this scene when you switch to another scene or exit Unity. In the meantime, note that you can still move the camera while in those modes, using alternate keyboard and mouse combinations. Table 2-1 lists all the possible options.
Available Scene View Camera Controls
1-button mouse or trackpad 2-button mouse 3-button mouse
Hold Alt-Command and
There are a couple of other handy keyboard-based scene navigation features. Pressing the Arrow keys will move the camera forward, back, left, and right along the x–z plane (the ground plane). And holding the right mouse button down allows navigation of the scene as in a first-person game. The AWSD keys move left, forward, right, and back, respectively, and moving the mouse controls where the camera (viewpoint) looks.
When you want to look at a particular GameObject in the Scene View, sometimes the quickest way to do that is to select the GameObject in the Hierarchy View, then use the Frame Selected menu item in the Edit menu (note the handy shortcut key F). In Figure 2-40, I clicked on the x axis of the Scene Gizmo to get a horizontal view, then selected the Player GameObject in the Hierarchy View, and pressed the F key (shortcut for Frame Selected in the Edit menu) to zoom in on and center the player character in the Scene View.
53 CHAPTER 2: A Unity Tour
Scene View Options
The buttons lining the top of the Scene View provide display options to assist in your game development. Each button configures a view mode.
The leftmost button sets the Draw mode. Normally, this mode is set to Textured, but if you want to see all the polygons, you can set it to Wireframe (Figure 2-41).
Figure 2-40. Selecting a GameObject in the Scene View
The next button sets the Render Paths, which controls whether the scene is colored normally or for diagnostics.
The three buttons to the right of the Render Paths mode button are simple toggle buttons. They each pop up some mouse-over documentation (otherwise known as tooltips) when you let the mouse hover over them.
The first of those controls the Scene Lighting mode. This toggles between using a default lighting scheme in the Scene View or the actual lights you’ve placed in the game.
The middle button toggles the Game Overlay mode, whether the sky, lens flare, and fog effects are visible.
2-42 shows several gizmos (not to be confused with the Scene Gizmo that
Figure 2-42. Gizmos in the Scene View
55 CHAPTER 2: A Unity Tour
The Game View
Now let’s go back to the Game View, which you encountered when playing Angry Bots in the Editor. Like the Hierarchy View and Scene View, the Game View depicts the current scene, but not for editing purposes. Instead, the Game View is intended for playing and debugging the game.
The Game View appears automatically when you click the Play button at the top of the Unity Editor window. If there isn’t an existing Game View when you click Play, a new one is created. If the Game view is visible while the Editor is not in Play mode, it shows the game in its initial state (i.e., from the vantage of the initial Camera position).
The Game View shows how the game will look and function when you actually deploy it, but there may be discrepancies from how it will look and behave on the final build target. One possible difference is the size and aspect ratio of the Game View. This can be changed using the menu at the top left of the view. Figure 2-43 shows what happens when you switch from the Free Aspect ratio, which adjusts to the dimensions of the view, to a 5:4 aspect ratio, which results in the scaling down the game display so that it fits within the area and maintains the chosen aspect ratio.
Figure 2-43. The Game View
Maximize on Play
Game View with Maximize on Play
Stats
57 CHAPTER 2: A Unity Tour
Figure 2-46. The Game View with Gizmos
Game View Gizmos
The Gizmos button activates displays of diagnostic graphics associated with the Components. The Game View in Figure 2-46 shows two icons that are gizmos for lights. The light gizmo located at the player’s position also reveals the light radius (i.e., the area affected by the light). The list to the right of the Gizmos button allows you to select which gizmos you want displayed.
Both the Game View and Scene View are both depictions of the current scene. A Unity project consists of one or more scenes, and the Unity Editor has one scene open at a time. Think of the project as a game and the scenes as levels (in fact, some Unity script functions that operate on scenes use “level” in their names). Unity GameObjects are made interesting by attaching Components, each of which provides some specific information or behavior. That’s where the Inspector View comes in. If you select a game object in the Hierarchy View or Scene View, the Inspector View will display its attached components.
The Console View
Tip Warning messages are easy to ignore, but you ignore them at your peril. They are there for a reason and usually indicate something has to be resolved. And if you let warnings accumulate, it’s difficult to notice when a really important warning shows up.
The Console View
The Console can get cluttered pretty quickly. You can manage that clutter with the leftmost three buttons on top of the Console View. The Clear toggle button removes all the messages. The Collapse toggle button combines similar messages. The Clear on Play toggle will remove all messages each time the Editor enters Play mode.
The Error Pause button will cause the Editor to halt on an error message, specifically when a script calls a Log.LogError.
59 CHAPTER 2: A Unity Tour
Figure 2-48. The Unity logs in the Mac Console app
Explore Further
We’ve come to the end of this Unity tour and our play time with Angry Bots demo. Beginning with the next chapter, you’ll be creating Unity projects from scratch to learn the game engine features. But this won’t be the last you’ll see of Angry Bots, as we’ll return to that project in Chapters 10 and 11, repeating this process to introduce Unity iOS development. Until then, starting with the next chapter, you’ll be creating Unity projects from scratch and exploring general and mostly cross-platform Unity game engine features. And from this point on, there are plenty of official Unity resources that expand on the topics I will be covering.
Unity Manual
As you can see, there’s a lot of Unity user interface, and we’ve hardly covered it all. This is a good time to get serious about reading the Unity Manual, either from within the Unity Editor (the Welcome screen or the Help menu) or on the Unity web site (http://unity3d.com/) under the Learn tab in the “Documentation” section. The web version is pretty handy when you want to look something up or just read about Unity without having a Unity Editor running nearby.
Most of what was covered in this chapter matches topics in the “Unity Basics” section of the Unity Manual, particular the sections on “Learning the Interface,” “Customizing Your Workspace,” “Publishing Builds,” and “Unity Hotkeys” (although I think a better reference is just to check the keyboard shortcuts listed in the menus).
Tutorials
Besides the “Documentation” section, the Learn tab on the Unity web site also includes a “Tutorials” section that features an extensive set of Beginning Editor videos. As the name implies, these videos provide an introduction to the Unity Editor, and in fact the set of videos cover much of what was discussed in this chapter, including descriptions of the most important views (the Game View, Scene View, Hiearchy View, Inspector View and Project View) and even the process of publishing a build.
Version Control
Although I only discussed version control briefly, in the context of explaining how to remove
http://bitbucket.org/) for
( ).
To say Unity VCS support is product agnostic is really another way of saying Unity doesn’t have any particular version control system integrated into the Unity Editor (although Perforce and Subversion integration is in-progress at the time of this writing). The meta files, and YAML scene files for Unity Pro users, simply provide better compatibility with text-oriented version control systems that are commonly used for source code. You still have to run the VCS operations yourself outside of Unity. You can find out more about YAML, by the way, on http://yaml.org/
In the meantime, I find it convenient to use the Mac GitHub app provided on the GitHub web site and similarly Sourcetree for Bitbucket, also available on that web site.
And as I mentioned while explaining the options for Version Control Mode in the Editor Preferences, Unity also offers a VCS designed specifically for Unity called the Unity Asset Server.
61
Chapter
3
Making a Scene
Playing Angry Bots was fun, but this book is about making games in Unity, not playing games in Unity! Finally, it’s time to get started in game development. It’s a long journey starting from nothing and ending up with a playable game, and this is the beginning. In this chapter, you’ll start with an empty scene in the Unity Editor and populate it with the basic building blocks of a 3D environment: models, textures, lights, a sky, and a camera.
One of the challenges facing a game developer, especially one on a limited budget, is how to obtain these building blocks. The Unity Editor provides some primitive models, and any image can be used as a texture (in the tradition of the Internet, I’ll provide you a picture of my cat as a sample texture). And, as mentioned in Chapter 1, the Unity installation includes a set of Standard Assets that can be imported into your project at any time. All of that can only take you so far, though.
Fortunately, the folks at Unity Technologies recognized this need and created the Asset Store, an online marketplace of Unity-ready assets with its storefront integrated directly into the Unity Editor. It turns out that a lot of these assets are free, so we’ll take advantage of that fact and incorporate some of these free assets into the Unity project created in this chapter.
Each chapter in this book (with the exception of Chapters 10 and 11 where the Angry Bots project stages a brief comeback) builds upon the project from the previous chapter. So by the end of this book, the simple static scene created in this chapter will have evolved into an optimized bowling game with sound and physics, running on iOS with leaderboards, achievements and ads. The project created in this chapter, along with the projects for each consecutive chapter, is available on http://learnunity4.com/ but minus any assets from the Asset Store or Standard Packages. So without further ado, let’s get started!
Create a New Project
63 CHAPTER 3: Making a Scene
The Project Wizard prompts for the file name and location of the new project, defaulting to your home folder and the name New Unity Project (if the folder already exists, a number is appended, e.g., New Unity Project 1, or if that also exists then New Unity Project 2, and so forth). The Set button brings up a file chooser so you can browse for a directory location instead of typing it in. You can name the project as you please or just use the default for now. The Unity project itself doesn’t care about its name, so you can rename the project folder in the Finder later (just make sure you exit Unity or switch to another project first, to avoid wreaking havoc with your current session).
Tip If you have a project that you want to keep around for a while, it’s a good idea to give it a meaningful name. More than once, I’ve discovered an old New Unity Project folder on my Mac and wondered if it was something important.
The Project Wizard presents a list of Unity packages that we can immediately import into our new project. These are the Standard Assets that were installed with Unity in the previous chapter. You don’t need to select any right now, as you can always import what you need later.
The Unity Editor will now appear, showing a new and empty project (Figure 3-3). The Project View displays no assets (you can confirm in the Finder that the Assets folder in your project contains no files), and the current scene is an untitled and unsaved scene consisting only of a GameObject named Main Camera.
The first thing you should do is save and name this scene. The Save Scene option is found in the File menu (Figure 3-4) and has the same Command+S shortcut that is conventional with application save operations (you could think of scenes edited and managed by Unity as analogous to documents edited and managed by a word processing application).
Figure 3-4. The Save Scene menu item
65 CHAPTER 3: Making a Scene
When you exit Unity or switch scenes or projects, Unity will prompt you to save the scene if there are unsaved changes (sometimes those changes are innocuous user interface changes, so don’t be alarmed). But it’s a good practice to save frequently, in case there’s a crash.
The File menu also has a Save Scene As command that is similar to the Save As command of other applications. It lets you save the scene under a new name at any time, effectively making a copy of the scene.
Tip Instead of using the Save Scene As command, it’s often simpler to select the scene file in the Project View and either rename (press Return) or duplicate (Command+D) the scene in the Project View.
You might be wondering about the difference between Save Scene and Save Project in the File menu. Save Project saves any changes to the project but not the current scene, while Save Scene also saves any changes in the current scene, i.e., changes to the GameObjects in the scene or changes to per-scene settings (Render Settings). Save Scene is what you’ll want to use most of the time. Save Project is appropriate when you’ve made some changes to project settings or assets that you want to save but have scene changes you’re not ready to save or maybe even have a new scene open that you don’t want to save at all.
The Main Camera
The Hierarchy View of the new scene lists just one GameObject, named Main Camera. Every new scene starts with that Camera GameObject, which acts as our eyes in the scene when we play the game. The Main Camera is special in that it’s easily accessible by scripts (it’s referenced by the variable Camera.main).
Multiple Cameras
The fact that the camera’s name is Main Camera might lead you to believe that multiple Cameras can exist in a scene, and you would be correct. It might seem strange to have multiple simultaneous viewpoints, but multiple Cameras make it possible to have a split-screen display or a window within the screen. Those usages aren’t actually supported in Unity for iOS (see the section “Viewport” below), but multiple Cameras are still useful for situations like rendering the game world with the Main Camera and rendering a user interface with another, effectively overlaying one set of GameObjects over another.
Anatomy of a Camera
67 CHAPTER 3: Making a Scene
Starting from the top, you can see the name Main Camera. The check box to the left specifies whether this GameObject is active or inactive. If you uncheck the check box, the Camera is deactivated, indicated by a grayed-out appearance in the Hierarchy View, and you won’t see
anything in the Game View. You can check the check box labeled Static on the right if you know this GameObject will never move. Marking GameObjects as static can facilitate optimization, although that rarely applies to Cameras.
Below the name, you can see this GameObject has MainCamera as its tag, which is really what designates this GameObject as a Main Camera. The name is just for display purposes, so you could edit the name here in the Inspector View without any repercussions.
The Layer menu for this GameObject is on the right. While names are used for description and tags for identification, layers are used to group GameObjects. You can think of these layers sort of like Photoshop layers. This Layer menu should not be confused with the Layers menu at the top right of the Editor window (they are unfortunately close to each other in the Default layout). The Layers menu at the top right controls which GameObjects are visible in the Scene View (it really should be located in the Scene View).
The Transform Component
Like every other GameObject, the Main Camera has a Transform Component that specifies the position, rotation, and scale of the GameObject. Scale is meaningless for Cameras, but the position and rotation allow you to place and point the Camera.
Click the little question mark icon on the top right of the Component. That will bring up the Reference Manual documentation for the Transform Component in a web browser window.
Tip Every time you encounter a new Component, the first thing you should do is check the documentation.
The Reference Manual page for each Component describes the properties of the Component and explains the usage of the Component. Each Reference Manual page also features a link to the corresponding Script Reference page for the Component, detailing how to access the Component from within a script.
The Camera Component
The Camera Component is what makes this GameObject a Camera. To be perfectly precise,
Main Camera is a GameObject that has a Component which specifically is a subclass of Component called Camera. But it’s convenient to say Main Camera is a Camera (since that is its function), and say Camera Component to make clear that we’re talking about the Component.
Clear Flags
The Clear Flags property specifies how the Camera initializes the color and depth buffers at the beginning of each rendering pass. The color buffer contains the pixels the Camera renders, and the depth buffer holds the distance from the Camera of each pixel (this is how it determines if a newly drawn pixel should replace the previous pixel at that location).
Solid Color indicates the color buffer will be cleared to the specified color, essentially using it as a background color, and the depth buffer will be cleared.
Skybox also clears the depth buffer and renders the specified Skybox textures in the background (defaulting to Solid Color if no Skybox is supplied).
might define an HUD Layer for all your HUD GameObjects and set the Culling Mask for the HUD Camera to only render the HUD Layer. And then you would set the Culling Mask of the Main Camera to include everything except the HUD Layer.
Projection
By default, the Camera is set to use a perspective projection, which as I mentioned in describing the Scene View in the previous chapter, means objects are smaller as they recede from the Camera (the effect is called foreshortening). In this mode, the Camera has a viewing volume resembling a four-sided pyramid (not counting the base of the pyramid) emanating from the Camera position in the view direction. This viewing volume is called a frustum and is defined by a Field of View (FOV), near and far plane.
The Field of View is analogous to the FOV of a real-world camera. The FOV is the vertical viewing angle, in degrees. The horizontal viewing angle is implicitly defined by the combination of the FOV and the aspect ratio of the Camera. The near and far planes specify how far the screen is in front of the Camera and how far away the base of the frustum is. Nothing outside the frustum is visible to the Camera.
69 CHAPTER 3: Making a Scene
The Scene View also displays a Camera Preview in the lower right corner. This is what the Camera would render right now, which is also what the Game View would display right now (you can take a look at the Game View right now to confirm). There’s nothing visible in this scene yet, but this will be a handy feature later.
Note that the frustum outline and the Camera Preview only display when the Camera is selected and the Camera Component in the Inspector View is open (every Component in the Inspector View can be opened or closed by clicking the little triangle in the upper left). This is generally true of any Component that has an extra graphic display in the Scene View. Opening and closing the Component in the Inspector View will toggle that display.
The alternative to perspective is orthographic, which has no foreshortening and thus is appropriate for 2D games, isometric games user interfaces, and HUDs. The only Camera property specific to orthographic mode is the orthographic projection size, which is the half-height of the orthographic view in world units.
Viewport
The Viewport of (0,0,1,1) indicates the Camera covers the whole screen. The numbers are normalized screen coordinates, meaning the coordinates across the width and height of the screen range from 0 to 1. For a split screen or a window within the screen, you would have multiple Cameras, each with different viewports, (0,0,1,.5) covers half of the screen. However, Unity iOS doesn’t support
Note GUILayer, GUIText and GUITexture (and GUIElement, which is the parent class of GUIText and GUITexture) have nothing to do with UnityGUI, which is a newer built-in GUI system.
Depth
Depth is another property useful when there are multiple Cameras in the scene. During each
rendering update, the Cameras will perform their rendering passes in the order of their depth values, lowest to highest. So if you had a second Camera for viewing an HUD, for example, you might specify that the Main Camera has a depth of 0 and the HUD Camera a depth of 1 to ensure the game world renders first and the game HUD renders on top of that.
Rendering Path
The Rendering Path determines how the scene is rendered. Each Camera can have its own
outside the normal 0-to-1 range and facilitates rendering of extremely high-contrast scenes. HDR is not available in Unity iOS.
FlareLayer Component
When a Camera GameObject is created from the GameObject menu, both a Camera Component and a FlareLayer Component are automatically attached. The FlareLayer Component allows the Camera to render Light Flares (described later in this chapter).
The FlayerLayer Component is a little unusual in that it’s not exposed to scripting, so it does have a Reference Manual page, but no Script Reference page. However, a FlareLayer Component can still be accessed from a GameObject using its class name, i.e., by calling GetComponent(“FlareLayer”).
GUILayer Component
A GUILayer Component is also automatically attached to a Camera GameObject. This component allows the Camera to render GUIText and GUITextures, which are 2D elements often used for user interfaces.
71 CHAPTER 3: Making a Scene
FlareLayer but not GUILayer. In any case, this book will stick to the original class name, since that is what will be referenced in scripts.
AudioListener Component
The AudioListener Component is only automatically attached to the Main Camera, since there can only be one active AudioListener at a time. Whereas the Camera Component is analogous to your eyes, responsible for rendering everything visible to it on your computer screen, the AudioListener Component is like your ears, responsible for routing all the audible AudioSources in the scene to the computer speakers.
Add a Cube to the Scene
You’ll already have noticed the Camera Preview and Game View display nothing, and the same happens in the Game View when you click the Play button. Of course, that’s because you don’t have anything in the scene besides the Camera. Let’s rectify that with the time-honored tradition of creating a cube.
Make the Cube
Under the Create Other submenu of the GameObject menu, Unity provides a number of GameObjects bundled with Components. Among these is a Camera GameObject, if we wanted to add another one. There is also a Cube GameObject along with a number of other primitive shapes (Figure 3-8).
Select the Cube item from the GameObject menu. That will create a Cube GameObject and add it to the current scene. The Cube will appear in the Hierarchy View (Figure 3-9) as the second GameObject of the scene.
A new cube GameObject in the Hierarchy View
73 CHAPTER 3: Making a Scene
Move the Cube
Remember, the Frame Selected command moves the Scene View camera, not the GameObject you’re looking at. The Cube may have been created at an arbitrary position, so set its position to the world origin, (0,0,0) in the Inspector View, by typing those coordinates into the x,y,z Position fields of the cube’s Transform (Figure 3-11). Don’t worry if you make a mistake.You can always Undo and Redo changes like this with the Undo and Redo commands in the Edit menu. In this case, you can Undo the Position change and then Redo it.
Anatomy of a Cube
While you have the Cube displayed in the Inspector View, take a look at what it’s made of. Or, in other words, see what Components of the Cube make it a Cube.
Transform Component
Of course, as with every GameObject, there’s a Transform Component, which provides the position, rotation, and scale of the Cube.
, which consists of
The MeshRenderer also controls whether the Mesh receives shadows or casts shadows (I’ll introduce shadows later in this chapter).
BoxCollider Component
The MeshFilter and MeshRenderer Components together only make the Cube visible. The
75 CHAPTER 3: Making a Scene
Camera Control
Now if you click the Play button, you can see the Cube, but there’s not much going on. The Cube just sits there, and there is no interactivity. The first thing I like to do with a scene that has just one object like this is add a Camera orbit script so I can inspect the object from all angles. Conveniently, Unity comes with several Camera control scripts in the Standard Assets, including a MouseOrbit script.
Figure 3-13. The Align With View command
Align With View
Since you moved the Cube, you can press the F key again to center it in the Scene View. But that doesn’t affect the Main Camera, as you can see from the Camera Preview in the Scene View and if you check the Game View.