Backbone.js Blueprints
Understand Backbone.js pragmatically by building
seven different applications from scratch
Andrew Burgess
Backbone.js Blueprints
Copyright © 2014 Packt Publishing
All rights reserved. No part of this book may be reproduced, stored in a retrieval system, or transmitted in any form or by any means, without the prior written permission of the publisher, except in the case of brief quotations embedded in critical articles or reviews.
Every effort has been made in the preparation of this book to ensure the accuracy of the information presented. However, the information contained in this book is sold without warranty, either express or implied. Neither the author, nor Packt Publishing, and its dealers and distributors will be held liable for any damages caused or alleged to be caused directly or indirectly by this book.
Packt Publishing has endeavored to provide trademark information about all of the companies and products mentioned in this book by the appropriate use of capitals. However, Packt Publishing cannot guarantee the accuracy of this information.
First published: May 2014
Production Reference: 1130514
Published by Packt Publishing Ltd. Livery Place
35 Livery Street
Birmingham B3 2PB, UK.
ISBN 978-1-78328-699-7
www.packtpub.com
Credits
Author
Andrew Burgess
Reviewers Marc D. Bodley
Ivano Malavolta
Lorenzo Pisani
Commissioning Editor Gregory Wild
Acquisition Editor Gregory Wild
Content Development Editors Balaji Naidu
Larissa Pinto
Technical Editors Miloni Dutia
Siddhi Rane
Copy Editors Sayanee Mukherjee
Deepa Nambiar
Laxmi Subramanian
Project Coordinator Wendell Palmer
Proofreaders Simran Bhogal
Ameesha Green
Indexer
Hemangini Bari
Graphics Yuvraj Mannari
Production Coordinator Aparna Bhagat
About the Author
Andrew Burgess writes code and writes about code. While he dabbles with
around half a dozen different programming languages, JavaScript is his favorite and is also his first love. He's been writing tutorials for Nettuts+ since 2009, and he has been creating screencasts for Tuts+ since 2012. He's written a few small e-books on other web development topics; some of them are:• Getting Good with Git, Rockable Press
• Getting Good with JavaScript, Rockable Press
• Getting Good with PHP, Rockable Press
I'd like to thank Gregory Wild, Wendell Palmer, Larissa Pinto, and all the other great people from Packt Publishing, for making the book-writing process such a breeze. Thanks have to go to Jeremy Ashkenas for creating the amazing Backbone and Underscore libraries.
About the Reviewers
Marc D. Bodley is a passionate User Experience Engineer and a jack-of-all-trades
developer with over eight years of experience within JavaScript and frontend technologies. He is excited to see JavaScript being adopted as more of a mainstream development language and not just an accessory to development. He is equally excited to see the structure and thought process of more conventional, strongly typed languages being applied to JavaScript to bring order to what is potentially a large and disorganized JS-driven code base. He has worked on large- and small-scale applications for a range of organizations, from Belk.com, to start-up style data-heavy applications, and continues to look for, learn, and enforce JavaScript and programming best practices. He is grateful to be a contributor towards this effort.Ivano Malavolta is postdoctoral researcher at the Gran Sasso Science Institute,
Italy. He has a PhD in Computer Science from the University of L'Aquila, Italy. Currently, his research activity is positioned in three main fields: software architecture, Model-Driven Engineering, and mobile-enabled systems. He has co-authored scientific publications in international journals, and international conferences, and workshops in using these themes. He is a program committee member and reviewer of international conferences and journals in his fields of interest. Ivano is an instructor at the University of L'Aquila, and he is teaching these topics in dedicated courses for both the Bachelor's and Master's degree students.He is a strong advocate of applying academic research results in real scenarios, and he is working on projects that have been awarded as the most innovative solutions in both national and international venues. He is a member of the ACM and the IEEE.
www.PacktPub.com
Support files, eBooks, discount offers, and more
You might want to visit www.PacktPub.com for support files and downloads related to your book.Did you know that Packt offers eBook versions of every book published, with PDF and ePub files available? You can upgrade to the eBook version at www.PacktPub. com and as a print book customer, you are entitled to a discount on the eBook copy. Get in touch with us at [email protected] for more details.
At www.PacktPub.com, you can also read a collection of free technical articles, sign up for a range of free newsletters and receive exclusive discounts and offers on Packt books and eBooks.
TM
http://PacktLib.PacktPub.com
Do you need instant solutions to your IT questions? PacktLib is Packt's online digital book library. Here, you can access, read, and search across Packt's entire library of books.
Why Subscribe?
• Fully searchable across every book published by Packt • Copy and paste, print, and bookmark content
• On demand and accessible via web browser
Free Access for Packt account holders
Table of Contents
Preface 1
Chapter 1: Building a Simple Blog
7
Setting up the application 7
Starting with the server 9
Creating the template 11
Adding the public folder 12
Beginning the Backbone code 13
Creating a model and collection 13
Performing a quick and dirty test 15
Writing some views 16
The PostListView class 17
The PostsListView class 18
Using our views 19
Creating a router 20
Viewing a post 23
Creating new posts 26
Adding comments 28
Serving comments 29
Comment views 30
Summary 34
Chapter 2: Building a Photo-sharing Application
37
Creating user accounts 37
Creating our application navigation 45
Uploading photos 48
Sending photos from the server to the client 54
Creating profile pages 55
Following users 62
Displaying a followed user's photos 67
Summary 69
Chapter 3: Building a Live Data Dashboard
71
Planning our application 72
Setting up precompiled templates 72
Creating the models 74
Creating controls 76
Including Bootstrap 78
Starting the router 78
Building the CreateEventView class 80
Creating the events table 84
Deleting a record 88
Editing event records 89
Making it live 94
Sorting events 96
Summary 100
Chapter 4: Building a Calendar
101
Planning our application 101
Creating the model and collection 102
Creating the month view 106
Building the week row 108
Building the day cells 112
Creating the individual day screen 116
Writing the server code 132
Summary 134
Chapter 5: Building a Chat Application
135
Outlining the application 135
Setting up the application 136
Preparing our template 137
A word about Socket.IO 137
Creating modules 138
Creating users 140
Building the layout 142
Starting the router 144
Letting users join the fun 146
Joining a room 152
Building the chat module 158
Adding some other routes 162
Writing CSS 164
Summary 167
Chapter 6: Building a Podcast Application
169
What are we building? 169
Building user accounts 170
Subscribing to and storing podcasts 174
Preparing index.ejs 182
Creating our models and collections 183
Building the navigation 185
Displaying podcasts 186
Creating a layout 189
Beginning the router 190
Subscribing to new podcasts 190
Displaying the list of episodes 193
Displaying episodes 198
Summary 200
Chapter 7: Building a Game
201
What are we building? 201
User accounts 202
Templates 203
Creating the game data 205
Writing the models 207
Splitting up words 208
Writing the tokens view 211
Views of the clues 215
Creating the guess view 218
Building the info view 224
Wrapping our views in a GameView class 228
Starting the router 229
Creating the home view 230
Building a scoreboard 232
Writing the navigation 235
Adding new words 236
Preface
There was a time when if you wanted to build a web application, you were pretty much on your own. You had to start from scratch and figure it all out on your own. However, now there are plenty of libraries and frameworks that you can use to build amazing web apps that are full of features; Backbone is just one of those libraries.
Backbone is a client-side library that offers models to manage data records,
collections to use when working with sets of models, and views to display that data. Strictly speaking, it's not an MVC library, it's a relatively loose toolbox that you can use in many different ways.
This book is not an introduction to Backbone. We won't be going through every feature in the library as if it were a friendly version of the documentation. Instead, we'll be looking at Backbone in the context of building an entire web application from start to finish. This means that there are a few features of Backbone—a few obscure methods or properties—that we won't use at all. If you want to learn every nook and cranny of Backbone, you should read the documentation at http://backbonejs.org/.
The other goal of this book is to teach you how Backbone thinks. As we build an application, we'll use as many different techniques as we possibly can. While there are many Backbone conventions, most of them are not actually necessary for your code to work. By learning what is required, you can fulfill those requirements and write the rest of your code as you see fit, following convention or not.
What this book covers
Chapter 1, Building a Simple Blog, introduces you to each of the main components of Backbone and how they work together. If you haven't used Backbone before, this is important groundwork; if you have, this will be your refresher on the purpose of each Backbone piece.
Chapter 2, Building a Photo-sharing Application, shows you how to build a photo sharing website similar to Instagram. Among other things, you'll learn how to customize the way Backbone models are sent to and received from the server. This is because we'll be using a Backbone model to upload files.
Chapter 3, Building a Live Data Dashboard, takes things to the next level by building an application that continually polls the server for changes to a dataset, effectively creating a live application. We'll also look at better code organization.
Chapter 4, Building a Calendar, will continue the theme of building apps with well-organized code. We'll also learn about properly distributing application functionality.
Chapter 5, Building a Chat Application, goes in a different direction by using Socket.IO to control the transfer of data between the client and the server. Also, we'll use the Marionette framework to make our jobs a little easier.
Chapter 6, Building a Podcast Application, shows that not every Backbone application is client-side code, some applications will have a lot of server code. We'll also look at building some custom infrastructure to work with Backbone.
Chapter 7, Building a Game, wraps up the book with a fun project. We'll review all
What you need for this book
Since this book is mostly about client-side code, the main tools are a text editor and a browser. However, there are a few others you'll need. You'll have to install Node.js (http://nodejs.org), which comes with npm, the Node package manager. If you're on a Mac, that's all you'll need. However, if you are on Windows, you'll also want to have a version of Python 2 (preferably 2.7.3) and Express 2013 for Windows Desktop; you'll need these to install the bcrypt Node.js package for some of the chapters.
Who this book is for
This book is written for anyone who wants to learn the Backbone library proficiently; by building seven very different applications, you'll quickly learn all the ins and outs of Backbone. Hopefully, you'll also improve your coding skills, for both client and server coding.
Of course, you'll need to know a few things before we get started. You should have a decent working knowledge of JavaScript. More nuanced language features will be explained in the text, but you should be able to hold your own most of the time. Also, all the server code we write will be in Node.js, so you'll want to be familiar with that. If you understand that Node.js code is often asynchronous and that's why it uses callbacks, you'll be fine. You'll want to be familiar with HTML and CSS; while they will not feature heavily, they will have their parts to play.
You might wonder if you need to be familiar with Backbone at all to benefit from this book. You'll probably be a little more comfortable with it all if you understand the basics of Backbone, and what the general purposes of its main components are. However, if you've not used it, don't worry. The very first chapter will introduce you to all the parts of Backbone by using them in a simple application.
Conventions
In this book, you will find a number of styles of text that distinguish between different kinds of information. Here are some examples of these styles, and an explanation of their meaning.
A block of code is set as follows:
var Posts = Backbone.Collection.extend({ model: Post,
url: "/posts" });
When we wish to draw your attention to a particular part of a code block, the relevant lines or items are set in bold:
var User = Backbone.Model.extend({ url: function () {
return '/user-' + this.get('id') + '.json';
} });
Any command-line input or output is written as follows:
npm install passport --save
New terms and important words are shown in bold. Words that you see on the screen, in menus or dialog boxes for example, appear in the text like this: "Type in a name and click on Join, and the name will appear above in the list."
Warnings or important notes appear in a box like this.
Tips and tricks appear like this.
Reader feedback
Feedback from our readers is always welcome. Let us know what you think about this book—what you liked or may have disliked. Reader feedback is important for us to develop titles that you really get the most out of.
To send us general feedback, simply send an e-mail to [email protected], and mention the book title via the subject of your message.
Customer support
Now that you are the proud owner of a Packt book, we have a number of things to help you to get the most from your purchase.
Downloading the example code
You can download the example code files for all Packt books you have purchased from your account at http://www.packtpub.com. If you purchased this book elsewhere, you can visit http://www.packtpub.com/support and register to have the files e-mailed directly to you.
Errata
Although we have taken every care to ensure the accuracy of our content, mistakes do happen. If you find a mistake in one of our books—maybe a mistake in the text or the code—we would be grateful if you would report this to us. By doing so, you can save other readers from frustration and help us improve subsequent versions of this book. If you find any errata, please report them by visiting http://www.packtpub. com/submit-errata, selecting your book, clicking on the erratasubmissionform link, and entering the details of your errata. Once your errata are verified, your submission will be accepted and the errata will be uploaded on our website, or added to any list of existing errata, under the Errata section of that title. Any existing errata can be viewed by selecting your title from http://www.packtpub.com/support.
Piracy
Piracy of copyright material on the Internet is an ongoing problem across all media. At Packt, we take the protection of our copyright and licenses very seriously. If you come across any illegal copies of our works, in any form, on the Internet, please provide us with the location address or website name immediately so that we can pursue a remedy.
Please contact us at [email protected] with a link to the suspected pirated material.
We appreciate your help in protecting our authors, and our ability to bring you valuable content.
Questions
Building a Simple Blog
We're going to begin by assuming that your experience in Backbone is very minimal; in fact, even if you've never used Backbone before, you should still be able to follow along just fine. The application we're going to build in this chapter is a very simple blog. As blogs go, it's going to have very few features; there will be posts that viewers can read and make comments on. However, it will introduce you to every major feature in the Backbone library, get you comfortable with the vocabulary, and how these features work together in general.
By the end of this chapter, you'll know how to:
• Use Backbone's model, collection, and view components
• Create a Backbone router that controls everything the user sees on the screen • Program the server side with Node.js (and Express.js) to create a backend for
our Backbone app So let's get started!
Setting up the application
Every application has to be set up, so we'll begin with that. Create a folder for your project—I'll call mine simpleBlog—and inside that, create a file named package. json. If you've used Node.js before, you know that the package.json file describes the project; lists the project home page, repository, and other links; and (most importantly for us) outlines the dependencies for the application.
Here's what the package.json file looks like:
{
"name": "simple-blog",
"version": "0.1.0", "scripts": {
"start": "nodemon server.js" },
"dependencies": { "express": "3.x.x", "ejs" : "~0.8.4", "bourne" : "0.3" },
"devDependencies": { "nodemon": "latest" }
}
Downloading the example code
You can download the example code files for all Packt books you
have purchased from your account at http://www.packtpub. com. If you purchased this book elsewhere, you can visit
http://www.packtpub.com/support and register to have
the files e-mailed directly to you.
This is a pretty bare-bones package.json file, but it has all the important bits. The name, description, and version properties should be self-explanatory. The dependencies object lists all the npm packages that this project needs to run: the key is the name of the package and the value is the version. Since we're building an ExpressJS backend, we'll need the express package. The ejs package is for our server-side templates and bourne is our database (more on this one later).
So, now that we have a package.json file, we can install the dependencies we've just listed. On the command line, change to the current directory to the project directory, and run the following command:
npm install
You'll see that all the necessary packages will be installed. Now we're ready to begin writing the code.
Starting with the server
I know you're probably eager to get started with the actual Backbone code, but it makes more sense for us to start with the server code. Remember, good Backbone apps will have strong server-side components, so we can't ignore the backend completely. We'll begin by creating a server.js file in our project directory. Here's how that begins:
var express = require('express'); var path = require('path'); var Bourne = require("bourne");
If you've used Node.js, you know that the require function can be used to load Node.js components (path) or npm packages (express and bourne). Now that we have these packages in our application, we can begin using them as follows:
var app = express();
var posts = new Bourne("simpleBlogPosts.json"); var comments = new Bourne("simpleBlogComments.json");
The first variable here is app. This is our basic Express application object, which we get when we call the express function. We'll be using it a lot in this file.
Next, we'll create two Bourne objects. As I said earlier, Bourne is the database we'll use in our projects in this book. This is a simple database that I wrote specifically for this book. To keep the server side as simple as possible, I wanted to use a
So, as you can see here, we need two databases: one for our blog posts and one for comments (unlike most databases, Bourne has only one table or collection per database, hence the need for two).
The next step is to write a little configuration for our application:
app.configure(function(){ app.use(express.json());
app.use(express.static(path.join(__dirname, 'public'))); });
This is a very minimal configuration for an Express app, but it's enough for our usage here. We're adding two layers of middleware to our application; they are "mini-programs" that the HTTP requests that come to our application will run through before getting to our custom functions (which we have yet to write). We add two layers here: the first isexpress.json(), which parses the JSON requests bodies that Backbone will send to the server; the second is express.static(), which will statically serve files from the path given as a parameter. This allows us to serve the client-side JavaScript files, CSS files, and images from the public folder.
You'll notice that both these middleware pieces are passed to app.use(), which is the method we call to choose to use these pieces.
You'll notice that we're using the path.join() method to create the path to our public assets folder, instead of just doing __dirname and 'public'. This is because Microsoft Windows requires the separating slashes to be backslashes. The path. join() method will get it right for whatever operating system the code is running on. Oh, and __dirname (two underscores at the beginning) is just a variable for the path to the directory this script is in.
The next step is to create a route method:
app.get('/*', function (req, res) { res.render("index.ejs");
});
This function takes two parameters; the first is the request object from the client and the second is the response object that we'll use to send our response back. These are often abbreviated to req and res, but that's just a convention, you could call them whatever you want.
So, we're going to use the res.render method, which will render a server-side template. Right now, we're passing a single parameter: the path to the template file. Actually, it's only part of the path, because Express assumes by default that templates are kept in a directory named views, a convention we'll be using. Express can guess the template package to use based on the file extension; that's why we don't have to select EJS as the template engine anywhere. If we had values that we want to interpolate into our template, we would pass a JavaScript object as the second parameter. We'll come back and do this a little later.
Finally, we can start up our application; I'll choose to use the port 3000:
app.listen(3000);
We'll be adding a lot more to our server.js file later, but this is what we'll start with. Actually, at this point, you can run npm start on the command line and open up http://localhost:3000 in a browser. You'll get an error because we haven't made the view template file yet, but you can see that our server is working.
Creating the template
All web applications will have templates of some kind. Most Backbone applications will be heavy on the frontend templates. However, we will need a single server-side template, so let's build that.
While you can choose from different template engines, many folks (and subsequently, tutorials) use Jade (http://jade-lang.com/), which is like a Node.js version of the Ruby template engine Haml (http://haml.info/). However, as you already know, we're using EJS (https://github.com/visionmedia/ejs), which is similar to Ruby's ERB. Basically, we're writing regular HTML with template variables inside <%=%> tags.
As we saw earlier, Express will be looking for an index.ejs file in the views folder, so let's create that and put the following code inside it:
<!DOCTYPE html> <html>
<head>
<title> Simple Blog </title> </head>
<div id="main"></div>
<script src="/jquery.js"></script> <script src="/underscore.js"></script> <script src="/backbone.js"></script> <script src="/app.js"></script> </body>
</html>
At this point, if you still have the server running (remember npm start on the command line), you should be able to load http://localhost:3000 without getting an error. The page will be blank, but you should be able to view the source and see the HTML code that we just wrote. That's a good sign; it means we're successfully sending stuff from the server to the client.
Adding the public folder
Since Backbone is a frontend library, it's something we'll need to be serving to the client. We've set up our Express app to statically serve the files in our public directory, and added several script tags to the index.ejs file, but we haven't created these things yet.
So, create a directory named public in your project directory. Now download the latest versions of Underscore (http://underscorejs.org), Backbone (http:// backbonejs.org), and jQuery (http://jquery.com) and put them in this folder. It's very likely that newer versions of these libraries have come out since this book was written. Since updates to these projects could change the way they work, it's best to stick to the following versions:
• Backbone: Version 1.1.2 • Underscore: Version 1.6.0 • jQuery: Version 2.0.3
I will mention here that we're including Underscore and jQuery because Backbone depends on them. Actually, it only really depends on Underscore, but including jQuery does give us a few extra features that we'll be happy to have. If you need to support older versions of Internet Explorer, you'll also want to include the json2. js library (https://github.com/douglascrockford/JSON-js), and switch to a version of jQuery 1 (jQuery 2 doesn't support older versions of IE).
Everything up to this point will be the same for each of the applications
we are going to build in this book. In the downloaded files for this
Beginning the Backbone code
Once you have these three files in the public folder, you're ready to create the app.js file. In most of our Backbone applications, this is where the major portion of the work is going to be done. Now that everything else is in place, we can begin the app-specific code.
Creating a model and collection
When building a Backbone app, the first thing I like to think about is this: what data will I be working with? This is my first question because Backbone is very much a data-driven library: almost everything the user will see and work will in some way be related to a piece of data. This is especially true in the simple blog we're creating; every view will either be for viewing data (such as posts) or creating data (such as comments). The individual pieces of data that your application will work on (such as titles, dates, and text) will be grouped into what are usually called models: the posts and comments in our blog, the events in a calendar app, or the contacts in an address book. You get the idea.
To start with, our blog will have a single model: the post. So, we create the appropriate Backbone model and collection classes. The code snippet for our model is as follows:
var Post = Backbone.Model.extend({}); var Posts = Backbone.Collection.extend({ model: Post,
url: "/posts" });
There's actually a lot going on in these five lines. First, all the main Backbone
components are properties of the global variable Backbone. Each of these components is a class. JavaScript does not actually have proper classes; the prototype-backed functions pass for classes in JavaScript. They also have an extend method, which allows us to create subclasses. We pass an object to this extend method, and all properties or methods inside that object will become part of the new class we're creating, along with the properties and methods that make up the class we're extending.
I want to mention early in the book that a lot of the similar code
you see between Backbone apps is just convention. That's one of the reasons I love Backbone so much; there's a strong set of conventions
to use, but you can totally work outside that box just as easily.
Throughout the book, I'm going to do my best to show you not only
In this code, we're creating a model class and a collection class. We actually don't need to extend the model class at all for now; just a basic Backbone model will do. However, for the collection class, we'll add two properties. First, we need to associate this collection with the appropriate model. We do this because a collection instance is basically just a glorified array for a bunch of model instances. The second property is url: this is the location of the collection on the server. What this means is that if we do a GET request to /posts, we'll get back a JSON array of the posts in our database. This also means that we will be able to send a POST request to /posts and store a new post in our database.
At this point, now that we have our data-handling classes on the frontend, I'd like to head back to the server.js file to create the routes required by our collection. So, in the file, add the following piece of code:
app.get("/posts", function (req, res) { posts.find(function (results) { res.json(results);
}); });
First off, I'll mention that it's important that this call to app.get goes above our /* route. This is because of the fact that Express sends the requests through our routes sequentially and stops (by default, anyway) when it finds a matching one. Since /posts will match both /posts and /*, we need to make sure it hits the /posts route first.
Next, you'll recall our posts database instance, which we made earlier. Here, we're calling its find method with only a callback, which will pass the callback an array of all the records in the database. Then, we can use the response object's json method to send that array back as JSON (the Content-Type header will be application/ json). That's it!
While we're here in the server.js file, we add the POST method for the same route: this is where the post data will come in from the browser and be saved to our database. The following is the code snippet for the post() method:
app.post("/posts", function (req, res) { posts.insert(req.body, function (result) { res.json(result);
The req object has a body property, which is the JSON data that represents our post data. We can insert it directly into the posts database. When Backbone saves a model to the server in this way, it expects the response to be the model it sent with an ID added to it. Our database will add the ID for us and pass the updated model to the callback, so we only have to send it as a response to the browser, just as we did when sending all the posts in the previous method using res.json.
Of course, this isn't very useful without a form to add posts to the database, right? We'll build a form to create new posts soon, but for now we can manually add a post to the simpleBlogPosts.json file; this file may not exist yet because we haven't written any data, so you'll have to create it. Just make sure the file you create has the right name, that is, the same name as the parameter we passed to the Bourne constructor in our server.js file. I'm going to put the following code in that file:
[ {
"id": 1,
"pubDate": "2013-10-20T19:42:46.755Z", "title": "Lorem Ipsum",
"content": "<p>Dolor sit amet . . .</p>" }
]
Of course, you can make the content field longer; you get the idea. This is the JSON field that will be sent to our Posts collection instance and become a set of the Post model instance (in this case, a set of only one).
Performing a quick and dirty test
We've actually written enough code at this point to test things out. Head to http://localhost:3000 in your browser and pop open a JavaScript console; I prefer Chrome and the Developer tools but use whatever you want. Now try the following lines:
var posts = new Posts();
posts.length // => 0
We can create a Posts collection instance; as you can see, it's empty by default. We can load the data from the server by running the following line:
A collection instance's fetch method will send a GET request to the server (in fact, if your in-browser tools allow you to see a network request, you'll see a GET request to /posts). It will merge the models that it receives from the server with the ones already in the collection. Give a second to get a response and then run the following lines:
posts.length // => 1
var post = posts.get(1);
post.get("title"); // Lorem Ipsum
Every collection instance has a get method; we pass it an ID and it will return the model instance with that ID (note that this is the id field from the database, and not the index number in the collection). Then, each model instance has a get method that we can use to get properties.
Writing some views
In simple applications like the one we're creating in this chapter, most of the
Backbone code that we write will be in views. I think it's fair to say that views can be the most challenging part of a Backbone app, because there are so many ways that almost everything can be done.
It's important to understand that a Backbone.View instance and a screen full of web apps aren't the same thing. One view in the browser may actually be many Backbone views. The first view that we want to create is a list of all the posts; these will be links to individual post pages. We could do this in two ways: as one big view or as multiple smaller views put together. In this instance, we're going to be using multiple views. Here's how we'll break it down: each list item will be generated by its own view instance. Then, the wrapper around the list items will be another view. You can picture it as looking something like this:
Model View 1 Model View 2 Model View 3
The PostListView class
Let's start with the child views. We'll call this PostListView class. Naming views can be a little tricky. Often, we'll have a view for the collection and a view for the model, and we'll just append View to the end of their names, for example, PostView and PostsView. However, a model or collection will have multiple views. The one we're about to write is to list our models. That's why we're calling it PostListView:
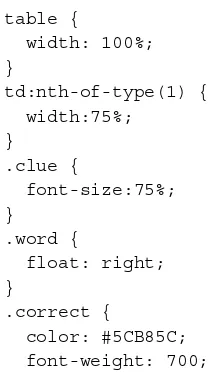
var PostListView = Backbone.View.extend({ tagName: "li",
template: _.template("<a href='/posts/{{id}}'>{{title}}</a>"), render: function () {
this.el.innerHTML = this.template(this.model.toJSON()); return this;
} });
Just like Backbone.Model and Backbone.Collection, we create a view class by extending Backbone.View. We have three properties in the extending object that make up our PostListView. The first one to look at is the template property; this property holds the template that our view will render. There are plenty of ways to create a template; in this case, we're using the Underscore's template function; we pass a string to _.template, and it returns a function which we can use to generate the correct HTML. Take a look at this template string: it's regular HTML with variables placed within double curly braces.
Next, let's look at the render method. By convention, this is the method that we call to actually render the view. Every view instance has a property named el. This is the base element for the view instance: all other elements for this view go inside it. By default, this is a div element, but we've set the tagName property to li, which means we'll get a list item instead. By the way, there's also a $el property, which is a jQuery object wrapping the el property; this only works if we have jQuery included in our application.
We end our render function by returning the view instance. Again, this is just convention. Because of this, we can use the convention where we get the element for this view via view.render().el ; this will render the view and then get the el property. Of course, there's no reason you couldn't return this.el directly from render.
There's one more thing to address here, but it's about Underscore and not Backbone. If you've used the Underscore's template function before, you know that curly braces aren't its normal delimiters. I've switched from the default <%=%> delimiters, because those are the delimiters for our server-side template engine. To change Underscore's delimiters, just add the following code snippet to the top of our app.js file:
_.templateSettings = {
interpolate: /\{\{(.+?)\}\}/g };
Of course, you realize that we could make the delimiters whatever we want, as long as a regular expression can match it. I like the curly braces.
The PostsListView class
Now that we have the view for our list items, we need the parent view that wraps those list items:
var PostsListView = Backbone.View.extend({
template: _.template("<h1>My Blog</h1><ul></ul>"), render: function () {
this.el.innerHTML = this.template(); var ul = this.$el.find("ul");
this.collection.forEach(function (post) { ul.append(new PostListView({
model: post }).render().el); });
return this; }
});
As views go, this is pretty simple, but we can learn a few new things from it. First, you'll notice that our template doesn't actually use any variables, so there's no reason for us to actually use a template. We could directly assign that HTML string as this. el.innerHTML; however, I like to do the little template dance anyway because I might change the template string to include some variables in the future.
Next, we're looping over each item in the collection that we'll associate with this view (when we instantiate it). For each post in the collection, we will create a new PostListView class. We pass it an options object, which assigns the view's model as the current post. Then, we render the view and return the view's element. This is then appended to our ul object.
We'll end by returning the view object.
Using our views
We're almost ready to actually display some content in the browser. Our first stop is back in the server.js file. We need to send the array of posts from the database to our index.ejs template. We do this by using the following code snippet:
app.get('/*', function (req, res) { posts.find(function (err, results) {
res.render("index.ejs", { posts: JSON.stringify(results) }); });
});
Just as we do in the /posts route, we call posts.find. Once we get the results back, we render the view as before. But this time, we pass an object of values that we want to be able to use inside the template. In this case, that's only the posts. We have to run the results through JSON.stringify, because we can't serve an actual JavaScript object to the browser; we need a string representation (the JSON form) of the object.
Now, in the index.ejs file of the views folder, we can use these posts. Create a new script tag under the other ones we created before. This time, it will be an inline script:
<script>
var posts = new Posts(<%- posts %>); $("#main").append(new PostsListView({ collection: posts
}).render().el); </script>
The next line should be pretty straightforward. We're using jQuery to find our main element and appending the element of a new PostsListView instance. In the options object, we'll set the collection for this view. We then render it and find the element to append.
Now, make sure your server is running, and go to http://localhost:3000 in the browser. You should see the following screenshot:
You're using the three main Backbone components—collection, models, and views—to create a mini-application! That's great, but we've only just got started.
Creating a router
Go ahead and click on the link that we've just rendered. You'll find that the URL changes and the page refreshes, but the content is still the same. This is because of a choice we've made in how our application works, that is, we made a catchall route that matches every GET request to our server. This means that /, /posts/1, and /not/a/meaningful/link show us the same content. This is what's often called a
single-page web application, that is, as much as possible is done on the client side, with JavaScript doing the heavy lifting, and not a different language on the server. With this kind of application, the whole thing could work off a single URL that never changes. However, this makes it hard to bookmark parts of the application. So, we want to make sure our application uses good URLs. To do this, we need to create a Backbone router as follows:
var PostRouter = Backbone.Router.extend({ initialize: function (options) {
this.posts = options.posts; this.main = options.main; },
routes: { '': 'index',
'posts/:id': 'singlePost' },
index: function () {
var pv = new PostsListView({ collection: this.posts } this.main.html(pv.render().el);
},
console.log("view post " + id); }
});
Here's the first version of our PostRouter. You should see a familiar pattern as we begin: we extend the component Backbone.Router. The next important piece is the initialize method. We never add one of these to our model, collection, or views, but they can all take an initialize method. This is the constructor function for our router. In good old Backbone convention, we expect to get a single options parameter. We'll expect this object to have two properties: posts and main. These should be the posts collection and the div#main element, respectively. We'll assign these as properties on our router instance.
Technically, the initialize function isn't the constructor
function. It's a function that is called by the constructor
function. To completely replace the default behavior, write a method called constructor, not initialize.
The next important part is the routes object. In this object, the keys are routes and the values are the router methods to call when those routes are used. So, the same page will be loaded from the server, but then the client-side router will look at exactly what URL was requested and show the right content.
The first route is an empty string; this is the / route (but it's best practice not to include the slash in the front, so that the router will work with both hash URLs and the pushState API). When we load that route, we'll run the router's index function. So what does this function do? It should look familiar; it's like what we put in our index.ejs file as a quick test. It creates our PostsListView instance and puts it on the page. Notice that we're using the this.posts and this.main properties that we just created.
The other route we're creating here is /posts/:id, which runs the singlePost function. The colon-label portion of that route will catch the content after that slash and pass it to the route method as a parameter. Right now, all we're doing in the singlePost method is logging a message to the console, but there's more to come.
Now that we've written a router, we need to start using it. You know that inline script in the index.ejs file? Replace its content with the following code:
var postRouter = new PostRouter({ posts: new Posts(<%- posts %>), main: $("#main")
});
Once again, we're creating the posts collection and the references to the main <div> element. This time, however, they're properties of the router. We actually don't have to do anything with the router instance, just create it. However, we do have to start the history tracking: that's what the last line does. Remember, we're using a single-page app, so our URLs are not actual routes on the server. This used to be done with a hash in the URL, but the better and more modern way to do this is with the pushState API, which is a browser API that let's you change the URL in the browser's address bar without actually changing the contents of the page. So, that's what we do with the options object, where we set pushState to true.
If you browse your way over to http://localhost:3000/, you'll see our post listing. Now, click on the post link, and well, the page still reloads. However, on the new link, you see no page content but a line logged to the console. So, the router is working but it isn't stopping the reload. When the page reloads, the router sees the new route and runs the right method.
So the question now is, how do we keep the page from refreshing, but still change the URL? To do this, we have to prevent the default behavior of the link that we clicked on. To do this, we need to add the following pieces to our PostListView (in the app.js file):
events: {
'click a': 'handleClick' },
handleClick: function (e) { e.preventDefault();
postRouter.navigate($(e.currentTarget).attr("href"), {trigger: true});
}
The events property is important here, as it handles any DOM events that happen within the base element of our view. The keys in this object should follow the pattern eventName selector. Of course, eventName can be any DOM event. The selector should be a string that jQuery can match. Part of the beauty of this selector is that it only matches elements within this view, so you often don't have to make it very specific. In our case, just 'a' is good enough.
What we're doing here isn't a completely good idea, but it will work for now. We're referencing the postRouter variable, which isn't created in this file; in fact, it's created after this file is loaded on the client. We can get away with this because this function won't be called until after the postRouter variable is created. However, in a more serious application, we would probably want better code decoupling. However, for our skill level, this is okay.
We're calling the router's navigate method. The first parameter is the route to navigate to: we get this from the anchor element. We also pass an options object, which sets trigger to true. If we don't trigger the navigation, the URL will change in the browser's location bar, but nothing else will change. Since we are triggering the navigation, the appropriate router method will be called, if one exists. One does in our case, singlePost, so you should see our message printed to the JavaScript console in the browser.
Viewing a post
Now that we have the right URL for a post page, let's make a view for individual posts:
var PostView = Backbone.View.extend({
template: _.template($("#postView").html()), events: {
'click a': 'handleClick' },
render: function () {
var model = this.model.toJSON(); model.pubDate = new
Date(Date.parse(model.pubDate)).toDateString(); this.el.innerHTML = this.template(model);
return this; },
handleClick: function (e) { e.preventDefault();
postRouter.navigate($(e.currentTarget).attr("href"), {trigger: true});
return false; }
This view should mark an important milestone in your Backbone education: you understand most of the conventions that you're looking at in this code. You should recognize all the properties of the view, as well as most of the method content. I want to point out here there's much more convention going on than you may realize. For example, the template property is only ever referred to inside the render method, so you could call it something different, or put it inside the render method, as shown in the following line of code:
var template = _.template($("#postView").html());
Even the render method is only used by us when rendering the view. It's convention to call it render, but really, nothing will break if you don't. Backbone never calls it internally.
You might wonder why we follow these Backbone conventions if
we don't have to. I think it's partly because they are very sensible defaults, and because it makes reading other people's Backbone code
much easier. However, another good reason to do it is because there are many third-party Backbone components that depend on these conventions. When using them, conventions become expectations that are required for things to work.
However, there are a few things in this view that will be new to you. First, instead of putting the template text in a string that gets passed directly to _.template, we're putting it in the index.ejs file and using jQuery to pull it in. This is something you'll see often; it's handy to do because most applications will have larger templates, and it's hard to manage a lot of HTML in JavaScript strings. So, put the following code in your index.ejs file related to your "actual" script tags:
<script type="text/template" id="postView"> <a href='/'>All Posts</a>
<h1>{{title}}</h1> <p>{{pubDate}}</p> {{content}}
</script>
The other different piece of this view is that we're not passing this.model. toJSON() directly to the render method. Instead, we're saving it to the model variable, so that we can format the pubDate property. When stored as JSON, dates aren't very pretty. We use a few built-in Date methods to fix this up and reassign it to the model. Then, we pass the updated model object to the render method. If you're wondering why we're using events and handleClick to override the anchor action again, notice the All Posts link in our template; this will be displayed above our post content. However, I hope you notice the flaw in this pattern: this will sabotage all links that might be in the content of our post, which might lead outside our blog. This is another reason why, as I said earlier, this pattern of view-changing isn't that great; we'll look at improvements on this in future chapters.
Now that we've created this view, we can update the singlePost method in our router:
singlePost: function (id) { var post = this.posts.get(id);
var pv = new PostView({ model: post }); this.main.html(pv.render().el);
}
Instead of just logging the ID to the console, we find the post with that ID in our this.posts collection. Then, we create a PostView instance, giving it that post as a model. Finally, we replace the content of the this.main element with the rendered content of the post view.
If you do a simple click-through test now, you should be able to go to our home page, click on the post's title, and see this:
Creating new posts
Now that we can show posts, let's create a form to make new posts. It's important to realize that we're just going to create a form. There's no user account and no authentication, just a form that anyone could use to make new posts. We'll start with the template, which we'll put in the index.ejs file:
<script type="text/template" id="postFormView"> <a href="/">All Posts</a><br />
<input type="text" id="postTitle" placeholder="post title" /> <br />
<textarea id="postText"></textarea> <br />
<button id="submitPost"> Post </button> </script>
It's a very basic form, but it will do. So now, we need to create our view; use the following code:
var PostFormView = Backbone.View.extend({ tagName: 'form',
template: _.template($("#postFormView").html()), initialize: function (options) {
this.posts = options.posts; },
events: {
'click button': 'createPost' },
render: function () {
this.el.innerHTML = this.template(); return this;
},
createPost: function (e) { var postAttrs = {
content: $("#postText").val(), title: $("#postTitle").val(), pubDate: new Date()
};
this.posts.create(postAttrs);
postRouter.navigate("/", { trigger: true }); return false;
It's pretty big, but you should be able to understand most of it. We start by making the view a <form> element through the tagName property. We fetch the template we just created in the template property. In the initialize method, we take a Posts collection as an option and assign it as a property, much like we did in the router. In the events property, we listen for a click event on the button. When that happens, we call the createPost method. Rendering this view is pretty simple. Actually, the real complexity here is in the createPost method, but even that is pretty simple. We create a postAttrs object that has all the properties of our post: the content and the text from the form and a date that we add.
After creating this postAttrs object, we pass it to the Posts collection's create method. This is a convenience method, really, that creates the Post model instance, saves it to the server, and adds it to the collection. If we wanted to do this "manually", we'd do something similar to the following lines of code:
var post = new Post(commentAttrs); this.posts.add(post);
post.save();
Every Backbone model constructor takes an object, which is a hash of attributes. We can add that model to the collection using the add method. Then, every model instance has a save method, which sends the model to the server.
In this case, it's important to add the model to the collection before saving it, because our model class doesn't know the server route to POST to on its own. If we wanted to be able to save model instances that aren't in a collection, we'd have to give the model class a urlRoot property:
urlRoot: "/posts",
Finally, we navigate back to the home page.
The next step is to add a new route to the router. In the routes property of the router class, add the following line:
'posts/new': 'newPost'
Then, we add the newPost method, which is very simple:
newPost: function () {
var pfv = new PostFormView({ posts: this.posts }); this.main.html(pfv.render().el);
},
Adding comments
Let's take things one step further, shall we? Let's add some (very primitive) commenting functionality.
Once again, we should start by thinking about the data. It's obvious, in this case: our basic data object, if you will, is the comment. However, we also need to think about how our data needs to interact with other data in the application, that is, every post that we have needs to be able to have multiple comments connected to it. Backbone doesn't have any conventions for inter-model-and-collection relationships, so we'll come up with something on our own.
We start with model and collection, as shown in the following code:
var Comment = Backbone.Model.extend({}); var Comments = Backbone.Collection.extend({ initialize: function (models, options) { this.post = options.post;
},
url: function () {
return this.post.url() + "/comments"; }
});
You remember the initialize function, right? This will run when we instantiate the collection. Conventionally, it takes two parameters: an array of models and an options object. We'll expect a collection of comments to be related to a single post, and we get that post as an option.
In our Posts collection, url was a string property; however, it can also be a function that returns a string if we need a more dynamic URL. This is exactly what we need for our Comments collection because the URL is dependent upon the post. As you can see, the server location of a collection of comments is the URL for the post, plus /comments. So, for a post with ID 1, it's /posts/1/comments. For a post with ID 42, it's /posts/42/comments, and so on.
The url method on a model instance checks to see whether our model class has the property urlRoot; if so, it will use that. Otherwise, it
The next step is to loosely connect the Comments collection to the Post model. We need to add an initialize method to our Post model as shown here:
var Post = Backbone.Model.extend({ initialize: function () {
this.comments = new Comments([], { post: this }); }
});
I say "loosely" because there's no actual relation here between a post and its own comments (apart from setting post: this in the options object, which helps set the current URL); all this does is create a new Comments collection whenever a post is created. It's important to realize that this comments property is not like the other properties of a model. To be specific, it's a regular JavaScript property of the object, but not an attribute of the post model itself. We can't get it with the model's get method.
Serving comments
The next step is to prepare the server to send and receive comments. Sending comments to the client is actually pretty; see here:
app.get("/posts/:id/comments", function (req, res) { comments.find(
{ postId: parseInt(req.params.id, 10) }, function (err, results) {
res.json(results); }
); });
What about saving comments? These will be POSTed back to the server as the request body, and they're POSTed to the same URL, you can see in the following code:
app.post("/posts/:id/comments", function (req, res) { comments.insert(req.body, function (err, result) { res.json(result);
}); });
Since we're parsing the request body as JSON (see the middleware we added), we can insert it directly into our database. In our callback, we're taking a result parameter and sending it back to the client as JSON. This is important, because the id property on Backbone models should be set on the server. Our database does this automatically, so the result we send back is the same object we received with a new id property. This is the response Backbone expects.
Comment views
Now, we're ready to create the comment views. This could be done in many ways, but we're going to do it with three view classes. The first is to display individual comments. The second is the form to create new comments. The third wraps these two views and adds some important functionality.
The first is the simplest, so let's start with it:
var CommentView = Backbone.View.extend({
template: _.template($("#commentView").html()), render: function () {
var model = this.model.toJSON();
model.date = new Date(Date.parse(model.date)).toDateString(); this.el.innerHTML = this.template(model);
return this; }
});
We're formatting the date, as we did previously, for posts. Also, we're once again putting the template content in a script tag. Here's the script tag that goes in the index.ejs file:
<script type="text/template" id="commentView"> <hr />
<p><strong>{{name}}</strong> said on {{date}}: </p> <p>{{text}}</p>
</script>
Next up is the CommentFormView class. This is the form that viewers will use to add a comment to post. We'll start with the template this time by using the following code:
<script type="text/template" id="commentFormView">
<input type="text" id="cmtName" placeholder="name" /><br /> <textarea id="cmtText"></textarea><br />
<button id="submitComment"> Submit </button> </script>
Nothing too special: a textbox for the name, a text area for the text, and a submit button. A very basic form, you'll agree. Now we have the class itself:
var CommentFormView = Backbone.View.extend({ tagName: "form",
initialize: function (options) { this.post = options.post; },
template: _.template($("#commentFormView").html()), events: {
'click button': 'submitComment' },
render: function () {
this.el.innerHTML = this.template(); return this;
},
submitComment: function (e) {
var name = this.$("#cmtName").val(); var text = this.$("#cmtText").val(); var commentAttrs = {
postId: this.post.get("id"), name: name,
text: text, date: new Date() };
this.post.comments.create(commentAttrs); this.el.reset();
This form view is long, but pretty similar to the other form, the one for creating posts. The tagName property sets the view's base element to a form. Since the
comments this form makes need to be related to a post, we set the post as a property via the options object in the initialize method.
Instead of creating a post property on this view, we could use the model property. As you may have noticed, this is a specially-named
property that gets assigned automatically when it's part of the
options object (so we wouldn't need an initialize method). However, that property is usually the model that is displayed
in this view. Since that's not what we're using here, I prefer to make a custom property, so someone reading this code wouldn't
misunderstand the purpose of the post model in this view.
Of course, we'll need to capture the click event on the Submit button. When that happens, the submitComment method will be run. The first portion of this method is simple; we're getting the values from the textbox and text area. Then, we're putting together a commentAttrs object with four properties: the ID of the post this comment belongs to, the name of the commenter, the text, and the date and time of the
comment's creation (right now).
After creating this commentAttrs object, we pass it to the post's comment collection's create method, just as we did in the PostFormView. The final line in the submitComment method is a built-in DOM method that resets the form; it clears all fields.
The last view is CommentsView, which pulls these two view classes together, as shown here:
var CommentsView = Backbone.View.extend({ initialize: function (options) {
this.post = options.post;
this.post.comments.on('add', this.addComment, this); },
addComment: function (comment) { this.$el.append(new CommentView({ model: comment
}).render().el); },
render: function () {
this.$el.append(new CommentFormView({ post: this.post
}).render().el);
this.post.comments.fetch(); return this;
} });
Just like CommentFormView, this view will be given a Post instance when it's created. In the render method, we first append a heading to the view element, and then we render and append our comment form. All this should look relatively familiar, but the rest is new. The second-last line in render calls the fetch method of the post's comments collection. This makes a GET request to the server and fills the collection with the comments that are returned from the server.
Now, look back at the initialize method; the last line is the first we've seen of Backbone's event capabilities. As we perform different tasks and call different methods of Backbone objects, different events are triggered, and we can listen for those events and react when they occur. In this case, we're listening for the comment collection's add event. This event occurs whenever we add a new model to this collection. If you think about the code we've written, you'll see that there are two places where we add models to this collection:
• When calling comments.create in the submitComment method in CommentFormView
• When calling comments.fetch in the render method in this view
So, whenever a model is added to our collection, we want to call the this.addComment method. Notice that we're passing a third parameter to the on method: this. This is the context for the function we want to call. By default, there will be no value for this inside functions called by the on method, so we want to tell it to use this view instance as context.
Well, it's all there now. You can go ahead and give it a try, that is, load a post page and add a few comments. Each time, you should see the comment appear below the form. Then, if you refresh the page, the comments you made will again appear under the post. You might notice a little delay in the loading of the comments. This is because we aren't loading them with the initial page load. Instead, they are loaded during the rendering of CommentsView. Granted, this is milliseconds after the page load, but you might see a quick flash. You will see the following on your screen:
Summary
This brings us to the end of the first chapter. If you hadn't dug into Backbone much before this, I hope that you're starting to feel comfortable with the basics of the library.
Besides the nitty-gritty of the Backbone API, I hope you picked up some of the bigger ideas. One of these is the options object, as almost every Backbone component constructor function takes an options object as the final parameter, and many functions that interact with the server do as well. There are some magic property names—such as model or collection—that Backbone handles automatically, but you can also pass your own options and work with them inside the classes.
Building a Photo-sharing
Application
You've done a great job of understanding the most basic Backbone features. I think you're ready to level up and build something a little bigger, a little tougher. So in this chapter, we'll be building an Instagram clone of sorts; users will be able to create accounts, upload photos, follow other users, and comment on photos. We'll use a lot of the features that we used in the last chapter, but we'll also look at a bunch of new ones. We'll cover the following topics:
• How user accounts affect a Backbone application • Writing your own model sync function
• Alternate uses for models • Uploading files via AJAX
Creating user accounts
The main difference between this application and the one we wrote in the last
chapter is that this app has a much more significant server component; we want to be able to create user accounts and allow users to log in and log out. In fact, that's where we have to start. There's a really great Node.js package called Passport (http:// passportjs.org/), which makes authentication easy. We'll begin by installing the library, as well as the bcrypt package, which we'll use to encrypt users' passwords. Do this with these commands:
npm install passport --save
npm install passport-local --save
npm install bcrypt --save
The --save flag will add these packages to the package.json file.
There are several dozen lines of setup for this, so we're going to put them in their own file. In the project folder, create a signin.js file. The first step is to pull in the libraries that we need:
var bcrypt = require("bcrypt");
var LocalStrategy = require("passport-local").Strategy; var salt = bcrypt.genSaltSync(10);
A strategy, in the Passport terminology, is a method of authentication. We're authenticating locally, as opposed to using Twitter or Facebook. The salt variable will be used when we encrypt a user's password; it's a good practice in encryption to ensure our user's passwords are stored safely.
Next, we'll create our strategy object, like so:
exports.strategy = function (db) {
return new LocalStrategy(function (username, password, done) { db.findOne({ username: username }, function (err, user) { if (!user) {
done(null, false, { message: "Incorrect username." }); } else if(!bcrypt.compareSync(password,user.passwordHash)) { done(null, false, { message: "Incorrect password." }); } else {
done(null, user); }