I Linux Basics
1 Introducing the Shell 5
2 Entering Commands 19
3 Navigating the Linux File System 35
4 Using Text Editors 63
5 Printing Files 87
II Configuring Your System 6 Configuring Your Environment 99
7 Working with Hard Drives 113
8 Adding Tape and Zip Drives 129
9 Enabling a PC Card Device 137
10 Adding a Pointing Device 147
11 Configuring a Modem and Fax Service 153
III The X Window System 12 Running and Configuring X 169
13 Using a Window Manager 189
14 Performing Common X Operations 197
15 Using Graphics and Multimedia Tools 215
IV Connecting to Your Internet Service Provider 16 Connecting to Your Internet Service Provider 249
17 Using Electronic Mail 265
18 Using FTP 283
19 Using Web Browsers 295
20 Using telnet and Internet Relay Chat 309
V System Administration 21 Basic Shell Programming 321
22 Using Basic Programming Tools 339
23 Using Boot Managers 351
24 Managing Users and Groups 361
25 Managing Scheduling Services 389
26 Managing Network Connections 405
27 Managing Daemons 431
28 Managing the File System 453
29 Managing Applications 481
30 System Maintenance 503
31 Managing the Kernel 527
VI Appendixes A Resources 579
B Using Linux HOWTO Documents 585
C Top 50 Linux Commands and Utilities 597
D Glossary 621
A Division of Macmillan USA 201 West 103rd Street
Contents
at a Glance
All rights reserved. No part of this book shall be reproduced, stored in a retrieval system, or transmitted by any means, electronic, mechanical, photocopying, recording, or otherwise, without written permission from the publisher. No patent liability is assumed with respect to the use of the information contained herein. Although every precaution has been taken in the preparation of this book, the publisher and author assume no responsibility for errors or omissions. Nor is any liability assumed for damages resulting from the use of the information con-tained herein.
International Standard Book Number: 0-7897-2251-8 Library of Congress Catalog Card Number: 99-068220 Printed in the United States of America
First Printing: June, 2000 02 01 00 4 3 2 1
Trademarks
All terms mentioned in this book that are known to be trademarks or service marks have been appropriately capitalized. Que cannot attest to the accuracy of this information. Use of a term in this book should not be regarded as affecting the validity of any trademark or service mark.
Warning and Disclaimer
Saving Keystrokes with Shell History 21 Using the Tab Key to Complete
Commands 21
Entering Multiple Commands 22 Breaking Long Command Lines 22 Entering Commands in GNOME 23 Entering Commands in KDE 23
Creating Shell Commands 24 Using the >, >>, and < Redirection Operators 24
Redirecting Error Output by the Numbers 26 Using Pipes to Build Commands 26
Running Programs in the Background 27 Creating Shell Commands with
autoexpect 28
Controlling Programs 29 Using Job Control 29
Using the ps and kill Commands 30
Using Wildcards 31
Building Regular Expressions 31
Selecting a Shell 32
Changing Shells with the chsh Command 33
3 Navigating the Linux File System 35
Printing the Current Working Directory 36
Changing Directories with the cd Command 36
Listing Directories 37
Listing Directories and Files with the ls Command 38
Echoing Directory Contents with the echo Command 39
Viewing Text Files 39
Viewing Text Files with the cat Command 40 Introduction 1
I Linux Basics
1 Introducing the Shell 5
Welcome to Linux 6
What Is a Shell? 7
Logging in to Linux 8
Creating a User Account at the Command Line 9
Creating a User Account in X11 with the usercfg Command 9
Changing Your Password 11 Running Commands as the Root Operator 11
Using Virtual Consoles 12
Logging Out of Linux 13 Rebooting Linux 13 Shutting Down Linux 13
Getting Help 14
Getting Help with the man Command 14 Getting Help in X11 with the xman Client 15
Getting Help with the info Command 15 Getting Help with the GNOME Help Browser 16
Getting Help Using the KDE Help Browser 17
Getting Help with the whatis Command 17 Getting Help with the apropos Command 18
2 Entering Commands 19
Creating Files and Directories 43 Using touch to Create and Update Files and Directories 43
Creating Directories with the mkdir Command 43
Copying Files and Directories 44 Copying Files with the cp Command 44 Copying Directories with the cp
Command 44
Moving and Renaming Files and Directories 45
Moving and Renaming Files and Directories with the mv Command 45
Creating Symbolic Links 46
Linking Files with the ln Command 46 Linking Directories with the ln
Command 48
Deleting Files and Directories 49 Deleting Files with the rm Command 49 Deleting Directories with the rmdir Command 49
Deleting Directories with the rm Command 50
Finding Files and Directories 50 Finding Files with the find Command 50 Finding Files and Directories with the locate Command 51
Finding Programs and Manual Pages with the whereis Command and the which Command 52
Using the GNOME gmc Client 52 Creating Directories Using the GNOME gmc Client 53
Copying, Moving, and Renaming Files and Directories Using the GNOME gmc Client 54
Creating Symbolic Links Using the GNOME gmc Client 54
Deleting Files and Directories using the GNOME gmc Client 54
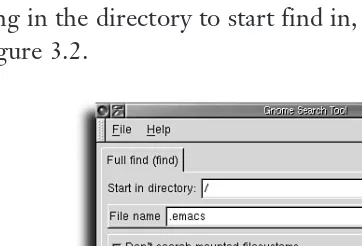
Searching for Files with GNOME’s Search Tool 55
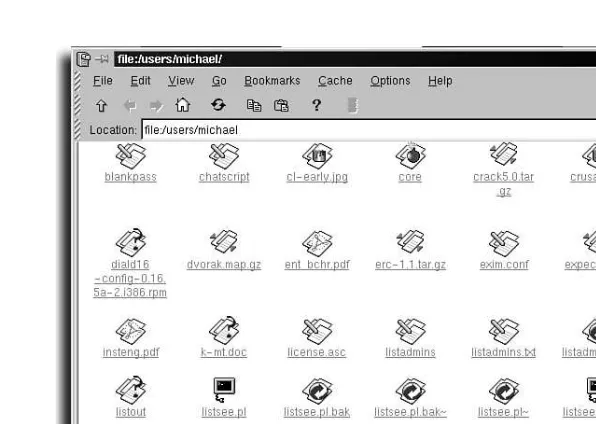
Using the KDE File Manager kfm 55 Creating Directories Using KDE’s kfm 56 Copying Files and Directories Using kfm 56 Moving and Renaming Files and Directories and Creating Symlinks Using kfm 57
Deleting Files and Using KDE’s Trash Can 57 Searching the File System with KDE’s kfind Client 57
Searching Text Files 58 Using the grep Command 58 Using the egrep Command 60 Using the fgrep Command 60 Using the strings Command 61
Using the egrep and fgrep Commands 61
4 Using Text Editors 63
Selecting an Editor 64
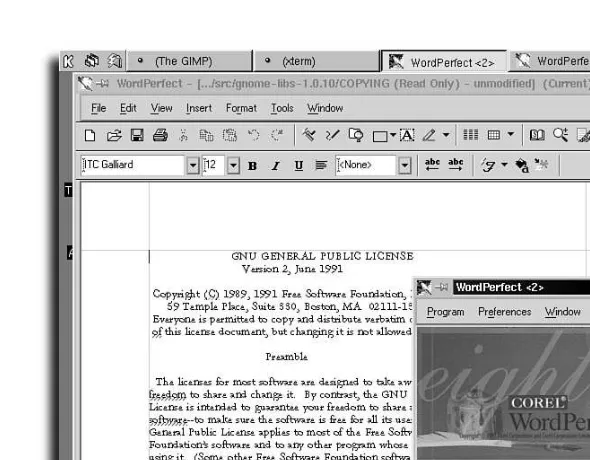
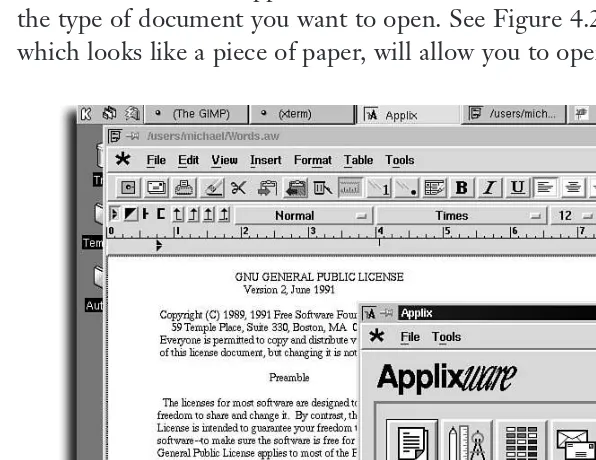
Commercial Linux Word Processors 64 Using Screen Editors 67
Using Stream Editors 75
Using Linux Dictionaries 77 Getting the web2 Dictionary 77 Dictionaries: Rolling Your Own 78 Spell Checking with the ispell Command 78 Using Internet Dictionaries with the dict Clients 79
Saving Paper with the mpage Command 79
Creating Formatted Documents 80
5 Printing Files 87
Adding Printers 88 Checking Your Printer 88 Adding a Local Printer by Editing /etc/printcap 90
Configuring Printers for WordPerfect for Linux 91
Spooling Files to Your Printer 92 Printing Files at the Command Line 93 Listing the Print Queue 93
Controlling Printers and Print Jobs 93 Reordering Print Jobs 95
Stopping Print Jobs 95
Sending Faxes with the lpr Command 95
II Configuring Your System
6 Configuring Your Environment 99
Displaying Environment Variables with the printenv Command 100
Displaying Environment Variables with the env Command 102
Setting an Environment Variable on the Command Line 102
Deleting an Environment Variable from the Command Line 103
Using the linuxconf Utility 109
7 Working with Hard Drives 113
Determining the Volume Device and Partition 114
Hard Drive Devices 115
Choosing a File System 118
Adding a Hard Drive 119
Identifying Hard Drives and Devices 119
Partitioning a Hard Drive with the fdisk
Command 120
Manipulating Partitions with the sfdisk
Command 123
Mounting a Hard Drive or Other Device 124
Mounting and Unmounting Remote NFS Hard Drives 126
Mounting File Systems with linuxconf 126
8 Adding Tape and Zip Drives 129
Adding a Tape Drive 130 Installing a Tape Drive 130 Using the mt Command 131
Adding a Zip Drive 132
Before Installing a Zip Drive 133 Ejecting, Password-Protecting, and Read-Write–Protecting Zip Disks 134
9 Enabling a PC Card Device 137
Enabling PCMCIA Services 138
Determining Your PCMCIA Controller 139
Using the cardctl Command 142 Obtaining the Status of PC Cards 143 Listing Your PC Card Configuration 143 Inserting a PC Card 144
Ejecting a PC Card 144 Suspending and Restoring PC Card Power 145
10 Adding a Pointing Device 147
Adding a Mouse 148
Using and Configuring gpm 148 Configuring a Synaptics Touchpad 149
Installing a Joystick 151 Configuring a Joystick 152
11 Configuring a Modem and Fax Service 153
Selecting a Modem for Linux 154 Using the dmesg Command to Check Serial Port Status 154
Testing Your Modem with the echo Command 155
Creating the /dev/modem Device 156 Creating /dev/modem with the ln Command 156
Getting Serial Port Information with the set-serial Command 156
Enabling Dial-In Service 157
Configuring Linux for Dial-in Service 157 Configuring Linux for Dial-in PPP Service 160
Configuring Fax Service 161 Configuring the fax Shell Script 162 Testing Your Fax Configuration 163 Sending a Fax Using the fax Shell Script 164
Setting Up to Wait for Incoming Faxes 164
Checking the Status of Incoming or Outgoing Faxes 164
Viewing Received Faxes 164 Printing a Received Fax 165 Deleting a Received Fax 165
III The X Window System
12 Running and Configuring X 169
Configuring XFree86 with XF86Setup 170
Configuring Xfree86 with XConfigurator 170
Configuring Your Graphics Card 170
Starting X11 171
Using the startx Command 171 Using Virtual Consoles with X 172 Starting Multiple X Sessions 172
Stopping X 173
System and X Session Control with Display Managers 173
Logging In with xdm 173
Customizing the xdm Banner Screens 176
Customizing the .xinitrc Startup Script 178
Customizing Your Workspace 179 Setting a Screen Saver 179
Setting the Background Desktop Color 182 Setting the Background Desktop
Pattern 182
Using a Desktop Wallpaper 182 Setting the Mouse Pointer 184 Configuring the Mouse 185 Configuring Terminal Windows 186
13 Using a Window Manager 189
Window Managers and Desktop Environments 190
Selecting an X11 Window Manager 190 The K Desktop Environment and kwm 191 Enlightenment 192
Window Maker 193
Starting a Window Manager 193 Starting KDE 194
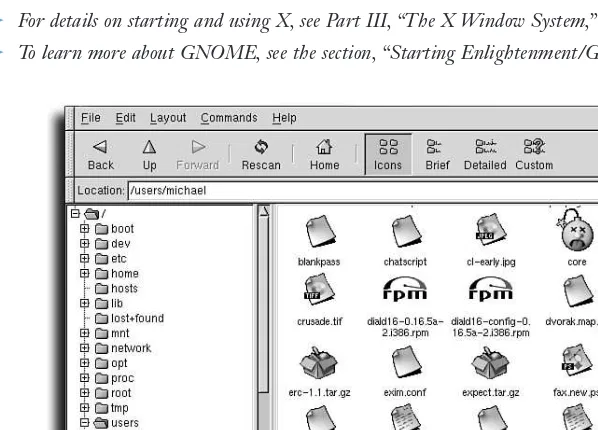
Starting Enlightenment/GNOME 194 Starting Window Maker 195
14 Performing Common X Operations 197
Using X11 Toolkit Command-Line Options 198
Using Geometry Settings to Set Window Size 198
Setting Foreground and Background Colors 199
Moving, Resizing, and Managing Windows 200
Specifying an X11 Window Title 200 Minimizing, Maximizing, or Closing Windows 201
Viewing X11 Fonts 202
Viewing X11 Fonts with the xfontsel Client 203
Using the xfd Client to View Font Character Maps 203
Copying and Pasting Text 206
Using the xcutsel Client to Copy Text 206 Copying Text with the xclipboard Client 207
Capturing Windows and the Desktop 208 Using xwd to Capture Windows 208 Using xwud to Display Window Dumps 209
Using the xloadimage Client to View Captures 210
Capturing and Viewing Screens with the xv Client 210
Using the xmag Client to Capture Magnified Images 212
15 Using Graphics and Multimedia Tools 215
Selecting a Graphics Program 216 Using the GIMP Client 216 Using ImageMagick 224
Translating or Converting Graphics 229 Using the pbm, ppm, and pnm Utilities 233
Previewing Graphics and PostScript Documents 234
Using the gv PostScript Previewer 234 Using Adobe Acrobat 237
Playing Music CDs 240
Watching and Listening to Internet TV and Radio 243
Using RealPlayer 244
Playing Animations and Movies with the xanim Client 245
IV Connecting to Your Internet Service Provider
16 Connecting to Your Internet Service Provider 249
Configuring a PPP Connection 250 Checking Your Serial Port and Modem 251 Checking Your Linux Kernel and File System for PPP Support 251
Configuring Your PPP Connection Scripts 254
Editing the ppp-on Connection Script 254
Configuring PPP with kppp 255
Starting a PPP Connection 257
Starting a PPP Connection Using the minicom Program 257
Starting a PPP Connection with the ppp-on Script 258
Starting a PPP Connection with kppp 258 Closing Your PPP Connection 258
Checking Your PPP Connection 259 Checking PPP Connections with the ifconfig Command 259
Getting PPP Statistics with the pppstats Command 260
Getting PPP Statistics with kpppload 260 Testing PPP Connection Speed with the ping Command 260
Getting PPP Interface Information with the route Command 261
Troubleshooting PPP Connections with Your System Log 261
17 Using Electronic Mail 265
Retrieving Electronic Mail 266 Using fetchmail 266
Selecting a Mail Program 269 Using mail 269
Using pine 271
Using Netscape Messenger to Create, Send, and Read Mail 274
Managing Electronic Mail 280
Configuring procmail to Filter Mail 281
18 Using FTP 283
Using ftp to Download Files 286 Using ftp Help Commands 291
Using the ncftp Command 292
Downloading with the ncftp Command 292
Using Netscape to Download Files 293
19 Using Web Browsers 295
Configuring the Lynx Browser 298
Using Netscape Communicator 300 Downloading and Installing Netscape Communicator 300
Working with Netscape Communicator 303
20 Using telnet and Internet Relay Chat 309
Using the telnet Command 310 Connecting to Other Computers 310 Downloading Files During telnet Sessions 313
Chatting with Internet Relay Chat 314 Starting an irc Session 314
V System Administration
21 Basic Shell Programming 321
What Shell Scripts Are Used For 322
Writing Shell Programs 323 Good Programming Practice 323 A Sample Program 323
Using Shell Variables 327 Using Variables in Scripts 328 A Sample Script 328
Using Shell Constructs 332 Conditional Constructs: The if Statement 333
Repeating Commands with while 336 Repeating Commands with for 336
22 Using Basic Programming Tools 339
Recompiling Code 340
Compiling Programs with gcc 340
Linking Programs with the ld Linker 341
Building Programs with the make
Command 342
A Sample Program 343 make Options 344
A Sample Program: the make Command 345
A Sample Program 345
Specifying Different Makefiles 347
Getting Started Quickly with New Programs 347
Specifying Different Makefiles 349
Building X11 Makefiles with the xmkmf Script 349
23 Using Boot Managers 351
How Linux Boots: LILO/LOADLIN 352
Configuring LILO 352
Changing the Default Boot 354 Passing Kernel Parameters 354 Booting to a Specific Run Level 355
Using LOADLIN 356
Booting from DOS to Linux 356 Setting Up LOADLIN 357 Passing Kernel Parameters with LOADLIN 359
24 Managing Users and Groups 361
Users, Groups, and Their Relation to the System 362
Using the usercfg Tool 363 Adding a User with usercfg 365 View/Edit Users 367
Locking a User 368 Unlocking a User 369 Removing a User 370 Adding a Group 371
Editing an Existing Group 373 Removing a Group 373 Finishing Up with usercfg 373
Adding, Editing, and Deleting Users Using the Command Line 373
Adding Users with useradd 374 Modifying Users with the usermod Command 374
Deleting Users with the userdel Command 375
Adding, Editing, and Deleting Groups 376 Adding Groups with the groupadd
Command 376
Modifying Groups with the groupmod Command 376
Deleting Groups with the groupdel Command 376
Changing User and Group Ownership 377 Managing Groups with gpasswd 377 Using the chgrp Command 378
Changing File Ownership and Permissions 378
Using the chown Command 378 Using the chmod Command 379
Advanced Concepts: Password Authentication Module 382
Improving System Security Using PAM 382
25 Managing Scheduling Services 389
Configuring crontab Scheduling Service 395
Enabling crontab Service 396 crontab Entries 396
Allowing and Preventing Access to the crontab Service 399
Configuring the at Command Service 400 Enabling at Command Service 400 Common Problems with the at Command 401
Allowing and Preventing Access to the at Command Service 403
26 Managing Network Connections 405
Configuring Network Connections Manually 406
Configuring the Loopback Interface 406 Configuring an Ethernet Card 407 Setting a Default Route 408 Configuring Hostname and DNS Information 409
Using DHCP to Configure Your Network Settings 411
Configuring Network Connections with linuxconf 411
Using the Network Configuration Tool 412 Setting the Hostname and the Domain Name 413
Setting the Name Servers 413 Adding a PPP Interface 413 Adding a SLIP Interface 416
Adding a PLIP Interface 418
Adding an Ethernet Interface 420 Setting Up a Router 421
Connecting Two Linux Systems 423 Connecting a Mac OS Machine to a Linux System 423
Connecting a Windows Machine to a Linux System 424
Enabling the Network File System Service 425
Enabling Dial-In Service 427
Setting Up the PPP Options Files 427 Configuring Getty Devices 428
27 Managing Daemons 431
Editing and Creating Run Levels 434
Editing inittab 435
Using chkconfig 436
Listing Services by Using chkconfig 436 Removing a Service by Using chkconfig 437 Adding a Service by Using chkconfig 437 Resetting Service Information 437
Editing Startup and Shutdown Scripts 438 A Sample init Script 438
init Script Checklist 440
Customizing the Login Greeting 441 Customizing the Login Greeting for Network Connections 442
Enabling and Customizing the MOTD 443
Using the tksysv Tool 443 Adding a Service with tksysv 444 Using ksysv 446
Starting and Stopping Network Services 447
Using the ntsysv Tool 448
Enabling FTP Access 448
Enabling a Web Server 450
28 Managing the File System 453
Mounting and Unmounting File Systems 454
Using the usermount Command 454 Formatting a Floppy Using the kfloppy Command 456
Using the mount Command 457
Setting Up New File Systems 461 Starting linuxconf 462
linuxconf 466
Editing /etc/fstab Manually 467
Creating New File Systems 469 How to Organize Your File System Tree 472
Repairing File Systems 473
Disaster Recovery 476
What’s Vital and What Isn’t? 476 When to Back Up 477
What to Do with the Backups 478 Reviewing Your Backup Strategy 478 Coping with Disaster 478
29 Managing Applications 481
Package Management with rpm 482 The rpm Command’s Major Modes and Common Options 482
Using KDE’s kPackage System to Manage RPMs 493
Installing and Using the xrpm Client 496
Converting Between Different Package Methods 500
30 System Maintenance 503
Performing System Backups 504 Compressing and Decompressing Files and Directories 504
Compressed Archiving with the tar Command 505
Using find to Locate Files for tar Backups 509
Using taper for Backups 513 Backing Up with Floppy Disks 517 Backing Up with Removable Drives 518
Performing File System Maintenance 521 Deleting Unnecessary Files 521
31 Managing the Kernel 527
Adding a Module to the Kernel Configuration 528
Editing the Linux Kernel Configuration Files 531
Configuring Your Sound Card 532 Plug and Play Devices 534
Managing Modules 535 Installing Modules 535 Listing Loaded Modules 535 Creating Module Dependencies 536 Enabling Modules at Boot Time 537
Managing Processes 538
Using the /proc Directory Information 539 Viewing the System Load Average 540 Viewing Processes with the top
Viewing Processes with the ps Command 542
Using the kill and killall Commands and Process IDs 543
Recompiling the Kernel 545
Installing the New Kernel Source 545 Before Configuring the Kernel 546 Using make config 547
Using make xconfig 562
Building and Installing the Kernel 570 Installing the Kernel 573
VI Appendixes
A Resources 579
Usenet Resources 580
World Wide Web Resources 581
B Using Linux HOWTO Documents 585
C Top 50 Linux Commands and Utilities 597
pwd 614 rm 614 rmdir 615 set 615 shutdown 615 su 615 swapoff 616 swapon 616 tail 616 talk 616 tar 616 telnet 616 top 617 umount 617
unalias 617 unzip 617 wall 617 who 617 write 618 xhost 618 xmkmf 618 xset 618 zip 619
Summary 619
D Glossary 621
Linux Systems (http://www.valinux.com), the system administrator for Linux International (http://li.org), and a senior programmer for SourceForge
(http://sourceforge.net). He also contributes to many open-source projects in his free time. Drew programs in several languages but now spends most of his time in PHP, C, and Perl.
When Michael Turnerwas ten years old, his father bought an Apple II. Since then, not even his fianceé has managed to drag him away from behind a monitor. He cur-rently works for VA Linux Systems where his business card reads “Geek.” Michael lives in Silicon Valley, California with his fianceé, his cat, a few pet reptiles, and a home LAN that puts many corporations to shame.
Michael discovered Linux and the open source movement in 1995 when he was look-ing for a cheap and reliable OS for his company’s firewall. Five years have passed and he’s proud to say that he and his fianceé run Linux on every computer and server in the house.
John Rayis an award-winning Web application developer and network programmer for The Ohio State University. He holds a computer engineering degree from OSU and oversees network operations for one of its colleges. There, he implemented a campus-wide database for maintaining TCP/IP information for a wide range of net-worked computers. For the past five years, John has used Linux exclusively for his programming efforts and has championed its use for projects inside and outside the University. He provides customized Linux and UNIX-based TCP/IP programming solutions to businesses nationwide. His other publications include Sams Teach Yourself Linux in 10 Minutes, Special Edition Using Red Hat Linux, Special Edition Using
TCP/IP, and Linux Maximum Security.
Bill is a member of the Northern Virginia Linux Users Group (NOVALUG), and lives in the Shirlington area of Arlington County, Virginia.
Tony Guntharp is a site manager of http://coldstorage.orgfor VA Linux Systems.
Jan Walteris a Senior Systems Architect for the Adrenaline Group in Washington, D.C. He formerly consulted in the Vancouver, Canada area. His work in Vancouver included work with Internet e-commerce systems as well as support of smaller clients using Windows NT, OS/2, and of course Linux.
Steve Shahis a systems administrator at the Center for Environmental Research and Technology at the University of California, Riverside. He received his B.S. in computer science with a minor in creative writing, and is currently working on his M.S. in computer science there as well. Occasionally, Steve leaves his console to pur-sue analog activities such as deejaying and spending time with his better half, Heidi.
Sriranga Veeraraghavanworks in the area of network management at Cisco Systems, Inc. He enjoys developing software using Java, C, Perl, and Shell for both Linux and Solaris. His pastimes include playing Marathon and debugging routing problems in his heterogeneous network at home. Sriranga graduated from the University of California at Berkeley in 1997 with an engineering degree and is pur-suing further studies at Stanford University. His most recent book is Sams Teach Yourself Shell Programming in 24 Hours.
Tad Bohlsenis currently the technology manager for a nonprofit organization, and also a consultant on technology issues. In the past he has served as a UNIX system administrator and shell script developer, and worked with companies such as Juno Online Services and HBO.
To Dan, Patti, and Dave, who have always supported me.
Michael Turner:
introduction
L
inux has enjoyed incredible growth as an operating system in the past few years. Years of refinement have helped it to grow out of a niche market and into the mainstream. You can now find Linux in mission-critical servers and on home desktops. Taking the time to learn about Linux will help increase your productivity and will enhance your overall computer experience.This book is designed for all Linux users, from Linux newcomers to seasoned system administrators. New users will want to start at the beginning and follow the tutorial-style nature of the book. More experienced users will get more out of the later book chapters. The entire book makes an excellent reference manual for common (and some not-so-common) tasks.
Rather than choose a specific distribution for Practical Linux, we have chosen to be as distribution neutral as possible. Plenty of excellent programs are available that span all major distributions. Learning these tools ensures that you will never be locked into one company’s version of Linux. We should note, however, that some of the tasks in this book can also be accomplished with distribution-specific tools, often times more easily than with standard programs. You should learn and use these tools if they make you more productive, realizing that they might not be available in another Linux distribution.
We wrote this book in a task-oriented fashion, explaining the steps required to complete each task. Learning by example can be very easy and is often the best way to understand computer skills. Practical Linuxis organized in a manner that makes it a good reference.
Part I, “Linux Basics,” introduces you to Linux, explains initial setup and use of common command-line functions and familiarizes you with the operating system.
Part III, “The X Window System,” explains X Window, the graphical environment for Linux, including setup, configuration, and use.
Part IV, “Connecting to Your Internet Service Provider,” connects you to the Internet, helping you set up your ISP connection and explaining many network pro-grams available in Linux.
Part V, “System Administration,” contains advanced system setup information including user management, shell programming, and system optimization.
I hope that you get as much out of Linux as I have. Open source software has shown that it can succeed in the commercial market. After you learn the basics of Linux, I would encourage you to give something back to the open source community. Programmers can of course contribute source code, but non-programmers can also play an important role by telling authors about the bugs they find, writing documen-tation, or simply telling others about what open source products work well.
IV
LINUX BASICS
I
Introducing the Shell
5
1
Entering Commands
19
2
Navigating the Linux File System
35
3
Using Text Editors
63
4
Introducing the Shell
Welcome to Linux
•
What is a shell?
•
Logging in to Linux
•
Logging out of Linux
•
Getting help
•
Welcome to Linux
Congratulations on choosing and using Linux, today’s newest, most popular, flexible, and powerful free computer operating system. Hang on, because you’re riding along the crest of a rising tidal wave of new users, as Linux spreads around the globe. While governments and corporations publicly battle one another over commercial software issues, Linux has been steadily gaining worldwide acceptance and respect as a viable alternative computer operating system. Linux quietly sidesteps the restric-tions that hold commercial software hostage in the marketplace in a number of ways:
■ Linux is distributed under the terms of the Free Software Foundation’s General Public License, or GPL. This license preserves software copyrights, but ensures distribution of programs with source code.
■ Linux is distributed over the Internet, and is easy to download, upgrade, and share.
■ Programmers all over the world create, distribute, and maintain programs for Linux, and much of this software is also distributed under the GPL.
Linux continues to evolve, and major improvements to the last several versions make using, installing, and maintaining this operating system easier than ever. With Linux’s increasing popularity, kernel bug fixes and new versions of free software appear every day on more and more Internet servers. New features of the latest ver-sions of the Linux kernel and distributions include the following:
■ Support for dynamic code-module loading and unloading. If a printer or sound card is needed, the appropriate code module is loaded from a disk and then released after use as appropriate.
■ Increased support for a wide variety of devices such as sound cards, scanners, hard disks, tape drives, printers, digital cameras, and joysticks.
■ Increasingly easier installation, configuration, and system maintenance with dozens of different GUI (graphical user interface) programs, many of which sur-pass commercial software peers in convenience and ease of use.
What is Linux?
There are now versions of Linux for Intel-based PCs, the Apple PowerMacintosh, Digital’s Alpha PCs, and Sun SPARC-compatibles. Each version of Linux comes with complete source code, so you can customize, correct bugs, or recompile the operating system.
SEE ALSO
➤ To learn how to rebuild the Linux kernel, see page 527. ➤ To learn how to manage kernel modules, see page 535.
What Is a Shell?
This chapter, which introduces you to Linux, assumes that you’ve just booted Linux for the first time after installation. The shellis a program started after you log in to Linux that provides a command-line interface between you and the Linux kernel. Typed commands are interpreted by the shell and sent to the kernel, which in turn opens, closes, reads, and writes files. There are a number of shells for Linux; the default shell for most distributions, however, is called bashand is found under the /bindirectory. The shell’s internal commands and functions can also be used to write programs.
SEE ALSO
➤ To learn how to write shell programs, see page 323. ➤ To learn about how to use the shell, see page 20.
What does open sourcemean anyway?
The Linux operating system belongs to a genre of software called freeor open source. Open-source software operates on a simple concept: Software must be accompanied with the source code that makes it work. Open-source software is synonymous with the term free software. In this case, freerefers to freedom (as in “free speech” not “free beer”).
Shipping source code with software allows users to easily make changes, run bug fixes, install patches, and make improvements to make the software work better. As a result, software evolves quickly and efficiently. Open-source software taps into the brain power of developers all over the world, rather than just a few who work for any one company. Patches and bug fixes seem to appear overnight rather than years later.
The open-source movement has been growing over the past 15–20 years and has now gained enough momentum to pose a serious threat to corporate giants in the software industry. Products such as Linux, the GIMP (an image-manipulation package), and GNU Emacs are testaments that the free software model works.
Logging in to Linux
When you sit down at your Linux terminal, the first thing you should see is a login prompt. Linux was written with your computer’s security in mind. Each user should have her own account and appropriate access privileges. When you log in, keep in mind that the computer attempts to match your username and password to the ones it has on file. Spelling and punctuation count, so be sure to pick a username and password you will remember!
Working from the login and password prompt at a text console interface
1. After you boot Linux for the first time, you’ll see login and password prompts on your display. To access Linux, type rootat the login prompt and press Enter. localhost login: root
Password:
2. At the password prompt, type the password you chose when you installed Linux.
3. After you press the Enter key, the screen will clear, and you’ll be presented with a command line:
#
Some Linux configurations present you with a graphical login rather than a command-line prompt. After entering your username and password, you will boot directly into X (the Linux windowing system). If this happens and you’d prefer to use the command line, you can simply press Ctrl+Alt+F2. To escape back to X, press Ctrl+Alt+F7.
SEE ALSO
➤ For more information about X, see page 189. ➤ To learn about virtual consoles, go to page 12.
Although you can manually edit system files to create, add, edit, or delete users and user information, Linux comes with several command-line and graphical interface tools that make the job a lot easier. The first thing you should do after booting Linux following installation is to create your own user account.
Starting to work with Linux
1. Create a username for yourself or others. Optionally, enter user account infor-mation.
2. Create a password for yourself or new users.
3. Exit or log out of Linux.
Creating a User Account at the Command Line
When you first log in to Linux, you will probably be logged in as the root operator. A few distributions, such as Debian and OpenLinux, give you the option to create a user account during installation. Nevertheless, part of effectively administering a Linux box includes managing user accounts.
Create a username foryourself with the useraddcommand, found under the /usr/sbindirectory, like so:
# useradd mike
The useraddcommand creates a user entry in a file called passwd, under the /etc directory. This entry lists the user’s name and password, along with a home directory and default shell:
mike:x:501:501:Michael Smith:/home/mike:/bin/bash
Some versions of useraddask you for details about the user, such as the user’s full name and password. Other versions leave this extra information blank and expect you to fill it in later.
Creating a User Account in X11 with the usercfg
Command
If you’re running the X Window System, the linuxconfutility in its graphical form will provide an easy way to add or modify user accounts. If you have linuxconf installed, you might have an icon available to launch it, or you can type the following in a terminal window:
# linuxconf
The linuxconfutility provides an easy way to control the configuration of your system. For more information about using the linuxconfutility, see “Using the linuxconfUtility” in Chapter 6, “Configuring Your Environment.” If you select User Accounts, Normal, User Accounts from the command tree on the left, you are
Running as root can be dangerous!
presented with a list of current users. Now click the Add button and you’ll see a form similar to Figure 1.1.
FIGURE 1.1
The linuxconfadd user utility provides an intuitive GUI for managing user accounts. This is an example of the GNOME version. There are several other versions of linuxconf, so don’t panic if yours looks a little different. See Chapter 6 for more information.
To create a User Account
1. Fill in the user’s login name and full name. You can fill in the other information in the form if you want, or let linuxconfprovide default answers.
2. Click the Acceptbutton.
3. Now choose a password for the user account.
4. Retype the password to make sure you didn’t make a typing error.
5. Click the Quit button when you are finished creating accounts to close that tab in linuxconf.
SEE ALSO
Changing Your Password
As a user, you can change your own password, or as the root operator, you can change the password for any user on your system. To change a password, use the passwdcommand, as follows:
$ passwd
(current> UNIX password:
New UNIX password:
Retype new UNIX password:
passwd: all authentication tokens updated successfully
If you are logged in as the root user, you can set the password for another account by using passwdfollowed by the username, like so:
# passwd amy
The passwdcommand, found under the /usr/bindirectory, prompts for a new pass-word, and then asks you to type it again to verify the change. If the password you’ve chosen is too easy to guess, the system might not allow you to change it. If this hap-pens, try choosing a password that would not be similar to any word in the dictio-nary. After you make the change, the /etc/passwdentry reflects the password as an encrypted string like so:
mike:Qzq/xNwYPy0OU:501:501:Michael Smith:/home/mike:/bin/bash
On some systems, the encrypted string might appear, instead, in the file /etc/shadow. If you are using shadow passwords, the encrypted string will appear as an xin /etc/passwd, like so:
mike:x:501:501:Michael Smith:/home/mike:/bin/bash
SEE ALSO
➤ To learn more about passwords, see page 382.
Running Commands as the Root Operator
After you’ve logged in under your new username, you’re just like any other user, with one important exception: You know the root password. From now on, when-ever you have to accomplish important system tasks or run programs as root, you don’t have to exit Linux and log back in as the root operator. Instead, you can use the su, or superuser, command to temporarily become the root user. The su com-mand can be used by itself or with the -c(command) option to run a program: $ whoami
Password:
# whoami
root # exit
$ su -c ‘useradd michael’
Password:
$
In this example, the whoamicommand, found under the /usr/bindirectory, reports on who you are. The sucommand prompts for a password before allowing you to become the root operator.
After you run root commands, use the shell’s exitcommand to return to your origi-nal shell and identity. When the sucommand is used with the -coption, the speci-fied root command, enclosed in quotes, is run and you’re immediately returned to your shell. Always use caution when running commands as the root operator.
Using Virtual Consoles
Linux also allows you to log in multiple times, and as different users, through the use of virtual consoles. Virtual consolesoffer a way to run two or more shells at the same time. Virtual consoles are handy when you want to run two or more programs simul-taneously, or if you must have a root shell open at all times.
Linux allows you to open at least six virtual consoles at once. When you start Linux, the login prompt is presented at virtual console number 1. You select virtual consoles by pressing the Alt keys along with a Function key (from F1 to F6).
Use a virtual console after starting Linux
1. Type your username at the login prompt, and then press Enter.
2. Type your password, and then press Enter.
3. At any point, you can press the F2, F3, F4, F5, or F6 function key to start using a new virtual console. A new login prompt will appear.
4. Repeat the login process using your username, the root operator username, or another username.
Logging Out of Linux
After you create a new user account and a new user’s password, log out of Linux by using the either the logoutor exitcommand, as follows:
$ exit
$ logout
After you enter either of these commands, the display will clear, and the Linux login prompt will be redisplayed.
Rebooting Linux
To reboot your system, always use the shutdowncommand, which is found under the /sbindirectory. Just powering off your computer can cause severe disk errors, and is an unsafe practice. I cannot stress enough the importance of properly shutting down your system. You must be the root operator or use the sucommand to use the shutdowncommand.
The shutdowncommand takes several command-line options. For example, using the -r, or reboot, option followed by the word nowwill reboot your system immediately: # shutdown -r now
Many systems are configured to treat the Ctrl+Alt+Del combination the same as if you had typed the above command as root.
Shutting Down Linux
The shutdowncommand’s -h, or halt, option shuts down Linux. As with the -r option, a time (in seconds) or the word nowcan be used to specify when you want Linux to shut down. Using the following command will enable you to shut down your system immediately:
# shutdown -h now
Reboot: Controlling the Vulcan nerve pinch: Ctrl+Alt+Del
Getting Help
Linux distributions include documentation about nearly all the programs, com-mands, and files installed on your hard drive. Each distribution also comes with a number of commands and programs designed to help you learn about your system. These commands are discussed in the following sections.
Getting Help with the man
Command
The mancommand is used to display help, or documentation called manual pages, about a command, file, or other Linux function. To read a manual page, specify a program name on the command line. To learn about the mancommand, follow it with the word man, like so:
$ man man
The man pages are displayed using an application called less. Manual pages (some-times called man pages) are text files written using a special format. To read about the format of these pages, use the mancommand’s sectionoption to read the manmanual page under the /usr/man/man7directory, as follows:
$ man 7 man
SEE ALSO
➤ For more information about navigating through less, see page 41.
Manual pages and documentation are located under the /usr/mandirectory in several sections organized by task or type. Table 1.1 lists these different sections.
Table 1.1 Manual Page Sections
Section Type of Documentation
1 Commands (general programs)
2 System calls (kernel functions)
3 Library calls (programming functions)
4 Special files (/devdirectory files)
5 File formats (/etc/passwdand others)
6 Games
7 Macro packages (man page formats, and so on)
8 System management (root operator utilities)
Getting Help in X11 with the xman
Client
To read manual pages while using the X Window System, simply start the xmanclient from the command line of the terminal window:
$ xman &
Figure 1.2 shows a man page viewed within the X Window System.
FIGURE 1.2
The xman X11 client displays manual pages in a scrolling window.
Getting Help with the info
Command
Some commands might be documented in a format readable with the infocommand. The infoutility is a robust browser for finding detailed information on a topic. To start using info, type the infocommand with no arguments:
$ info
The introductory page that appears mentions that pressing the hkey will give you a tutorial on navigating and using the infosystem. The first time you use info you should go through the tutorial to get a feel for info’s powerful features. Table 1.2 shows the basic navigation key bindings for info. After you’ve become comfortable with the infosystem, you can jump straight to the topic you’re interested in by fol-lowing the infocommand with a keyword:
Table 1.2 Basic Navigation Keys for Info
Description Key
Go to the next page n
Go to the previous page p
Scroll down a page space
Scroll up a page delete
Return to the top of the page b
Select a link Enter
Getting Help with the GNOME Help Browser
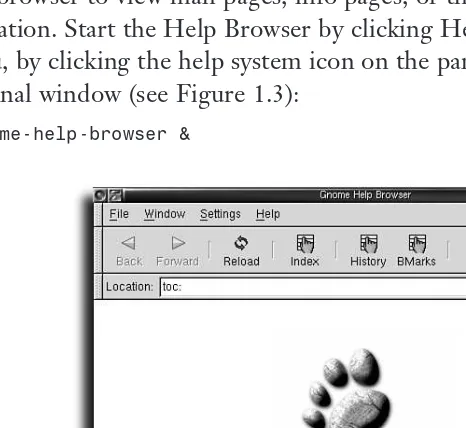
If you are using the GNOME Desktop Environment, you can use the GNOME help browser to view man pages, info pages, or the GNOME user guide and docu-mentation. Start the Help Browser by clicking Help System in the GNOME main menu, by clicking the help system icon on the panel, or from the command line in a terminal window (see Figure 1.3):
$ gnome-help-browser &
FIGURE 1.3
The Help Browser functions much like a Web browser. As seen in Figure 1.3, links on the index page will take you to the sections you choose. For example, clicking the link Man Pages brings you to a list of documentation provided by the mancommand.
Getting Help Using the KDE Help Browser
The K Desktop Environment (KDE) Help Browser looks and works like a Web browser (see Figure 1.4). You can access documentation about the KDE workspace and applications by clicking the underlined links. KDE’s help browser provides the same information you would find in the manor infopages, plus other KDE-specific tips and documentation.
FIGURE 1.4
The KDE Help Browser gives you a graphical view of system documentation. Navigate much as you would in a Web browser.
Getting Help with the whatis
Command
Use the whatiscommand if you’re unsure about what a program does. Using this command prints a short synopsis of each specified command. For example, issuing the command # whatis calreturns the following result:
The synopsis of the specified command is extracted from the command’s manual page and is located in a database called whatis. The whatisdatabase, located under the /usr/mandirectory, is built each day by a crontabscript run each week by the makewhatis.cronscript in the /etc/cron.weeklydirectory. This script runs the
make-whatiscommand, found under the /usr/sbindirectory. If you find that whatis does-n’t work the first time, you might need to manually run makewhatis.
Getting Help with the apropos
Command
The aproposcommand uses the whatisdatabase to display all related matches of the command’s name. Use this command to find related commands or actions for pro-grams installed on your system. For example, issuing the command
# apropos bell
returns the following result:
beep, flash (3) - Curses bell and screen flash routines
bell (n) - Rings a display’s bell
Entering Commands
Entering commands at the shell
•
command lineCreating shell commands
•
Controlling programs
•
Using wildcards
•
Selecting a shell
•
Entering Commands at the Shell Command Line
Using Linux means using a command line. Even if you always run the X Window System, you’ll need to know how to use the shell at one time or another. By under-standing how the shell interprets your keystrokes, you’ll learn how to work faster and more efficiently when you enter commands.Case Sensitivity
All shells for Linux are case sensitive. (Actually, Linux is always case sensitive, not just shells.) This means filenames must be specified exactly as they exist, using uppercase, mixed-case, or lowercase letters and characters. Filenames can be as much as 256 characters long, and can contain many different types of characters. For example, the following are valid (but not necessarily good) sample filenames:
a_long-filename+a-long=extension
averylongfilenamethatistoolongformostfilenames
pAymEoRyOuWiLlnEvErsEeyOurCaTaGain
a file
a[file]
file:name
filename file.txt
file2.txt.extension
~@#^
Reserved characters, or characters not to be used in filenames, include the following: “ , ‘ * & ) ( | ! ` ? \ / < > ;
Note that it is possible to create a filename with a leading space, an embedded space, or that consists entirely of spaces. Nevertheless, this is not a good practice; it could cause problems later on, especially if you need to manipulate a list of filenames or you want to delete a file.
SEE ALSO
➤ To learn how to delete files and directories, see page 49.
Editing the Command Line
on your keyboard or by using a Ctrl+key combination. Occasionally, keyboard map-pings might be a little different. Check the distribution documentation if standard key mappings don’t seem to work for you.
Table 2.1 bashShell Command-Line Editing Keys
Action Key or Keystroke Combination
Move forward one character right cursor, Ctrl+F
Move forward one word Alt+F
Move backward one character left cursor, Ctrl+B
Move backward one word Alt+B
Move to beginning of line Ctrl+A
Move to end of line Ctrl+E
Delete next character Ctrl+D
Delete next word Alt+D
Delete to end of line Ctrl+K
Delete to beginning of line Ctrl+U
Saving Keystrokes with Shell History
If your shell supports command-line history, you can scroll through previously entered commands. The default shell, bash, saves the last 1,000 command lines in a file called .bash_historyin your homedirectory. To quickly reenter a command line, use the up or down cursor keys to scroll through the list.
SEE ALSO
➤ To increase or decrease the number of command histories for bash, see page 102.
Using the Tab Key to Complete Commands
Another feature of the bashshell is command completion. To quickly type or find the name of a command or all commands with similar spellings, type the first few letters of a command’s name, and then press the Tab key on your keyboard. For example, type the following:
Pressing the Tab key results as follows: $date
If you enter enough unique letters of a program’s name, the shell will complete the program’s name for you. If you enter only the first few letters, you’ll have to press Tab twice in succession. For example, type the following:
$ pi
Then press the Tab key twice in succession for results similar to this:
pi1toppm pic pick picttoppm pilot ping pi3topbm pic2tpic pico pidof pine
The shell will print all commands that could be a completion of the letters you typed.
Entering Multiple Commands
To enter several commands on a single command line, use the semicolon (;), like so:
$ ls ; cat file.txt
This runs the ls(list directory) command, followed by the display of the file, file.txt, by the cat(concatenate) command.
SEE ALSO
➤ To learn how to create, copy, or delete directories, see Chapter 3, “Navigating the Linux File System.”
Breaking Long Command Lines
Although most shells automatically wrap long command lines when you reach the end of a line, you can use the backslash character (\) with the semicolon to type mul-tiple commands, or single commands on separate lines:
$ ls /tmp ;\ >ls /boot ;\
>ls /var/log/uucp
Entering Commands in GNOME
When working in X11, you can keep a terminal emulator open if you are entering many shell commands. There are times, however, when you might want to just run a single quick command. GNOME provides some additional command tools for this or other special situations.
The GNOME panel menu provides an option called Run Command. Selecting this will launch a dialog box like the one in Figure 2.1. Using this client, you can type in any command, just as you would at a shell prompt. Because the client disappears as soon as the command is run, it is best used for commands where you are opening a standalone program, rather than asking for output that would be displayed as text immediately following your command. For example, use grunto open Emacs or xcalc, but not to ping another computer or run lson a directory.
FIGURE 2.1
The GNOME Run Program utility keeps a list of recently entered commands, which you can access from the drop-down menu.
Besides the text input field, grunprovides two other ways to enter commands. You can use the drop-down menu to select from a command history. You can also use the Browse option to select a program from the directory tree.
Another quick command tool can be invoked from the command line by typing grun. This will evoke a single text field (without the browse or down arrow options). You can type the command you want to run in the text field and press Enter. This is a particularly useful method of opening an application which you do not intend to close when you exit your terminal session.
Entering Commands in KDE
Creating Shell Commands
The shell recognizes a number of special characters on the command line. This sec-tion shows how to use these characters to do the following:
■ Send a program’s output to a file.
■ Have a program read text from a file.
■ Append a program’s output to a file.
■ Run a program in the background.
Using the >, >>, and <
Redirection Operators
Shell redirection operators are used to direct a program’s input and output. The shell can be used to feed a program input from another application, from the command line, or even from another file. These operators are used to copy, create, or over-write files; to build reports; or to create databases.
The cat(short for concatenate) command is used to print one or more files to your display. When used with the >, known as thestandard output redirection operator, the catcommand will copy a file by sending its output to another file:
$ cat report.txt >newreport.txt
This is called redirecting the standard output. Through use of redirection, the output of the catcommand is sent to a specified file in the current directory.
You can also combine the catcommand and shell command-line redirection as a method to quickly create and enter text in a file.
Quick text entry
1. Use the catcommand along with output redirection on the command line to send all typed input from the keyboard directly to a text file:
$ cat >myfile.txt >This is a line of text.
>This is the second line of text. >This is the last line of text.
2. When you’ve finished typing your text, press Ctrl+D to enter an end-of-file mark:
3. To check your text, use the catcommand: $ cat myfile.txt
This is a line of text.
This is the second line of text. This is the last line of text.
The <(standard input) redirection operator feeds information to a program as follows:
$ cat <report.txt
Here, the catcommand reads the contents of the file report.txtand sends its con-tents to your display. To build a largerreport, use the >>append operator to add out-put to existing files like so:
$ cat <report.txt >>newreport.txt
If the file newreport.txtdoes not exist, it will be created. If the file exists, the con-tents of the file report.txtwill be appended to the end of the file newreport.txt.
A more obscure redirection operator is the <<, known as the here operator. Use this operator to tell the shell when to stop reading input:
$ cat <<end > this is
> the
> end
this is the
$
When the shell reads the specified word following the <<operator, it stops reading input. In this case, the catcommand echoes all entered input until the word endis specified, and then properly echoes to the display.
Output redirection can be dangerous!
Redirecting Error Output by the Numbers
The standard input and output have assigned file numbers in the shell. The standard input uses the number 0, and the standard output uses the number 1. Another type of output is standard error, and its number is 2.
Most commands for Linux report errors using the standard error output, and send the error message to your display as follows:
$ cat report.txt >newreport.txt
cat: report.txt: No such file or directory
By properly redirecting a program’s output, you can build a log of any errors. Specify that the standard error output is always sent and appended to a file like so:
$ cat report.txt >newreport.txt 2>>errors.log
$ cat errors.log
cat: report.txt: No such file or directory
Because the error output has been redirected to a file, no error message is printed on the display. Although the file newreport.txtwill be empty, the file errors.logwill contain a list of errors.
Using Pipes to Build Commands
The vertical bar (or pipe) character (|) is called the pipe operator, and is used to send output from one command to the input on another. Use input and output redirec-tion with pipes to quickly build custom commands.
Pipes can save time and effort, and work with many commands found under Linux. In order for you to be able to use a command in a pipe, the program must be able to read the standard input and write to the standard output. Such programs are also called filters.
SEE ALSO
➤ To learn more about text processing filters, see page 80.
Pipes range from simple to complex, and are used for many purposes. The following are some examples of how pipes can be used:
$ cat report.txt | wc -l >number_of_lines.txt
This command line counts the number of files on your system, starting at the /or root directory.
$ find / | sort | uniq -d >duplicate_filenames.txt
This example generates a report of your system’s duplicate files (files with the same name).
$ strings /usr/lib/ispell/american.hash | sort | tee uppercase.dict |
\ tr A-Z a-z >lowercase.dict
This example extracts a list of words from the system’s dictionary by using the stringscommand and the output is sorted. The teecommand is then used to save a copy of the dictionary, still in its original, uppercase form, while the output is con-verted to lowercase by the trcommand, and then saved in lowercase. This creates two different dictionaries: one containing uppercase words, and the other containing lowercase words.
Not all programs work the same way
Not all commands for Linux read from the standard input and write to the standard output. Make sure to read a program’s manual page before using the program to build important or complex pipes. See the section “Using Pipes to Build Commands” for more information.
Running Programs in the Background
Use an ampersand (&) to start and run a program in the background. Although you can use a virtual console to run other programs at the same time, background pro-grams can be started quite easily from a single terminal or command line.
You’ll use background processes quite often if you use the X Window System. Most X11 clients do not offer a terminal window or command line, so it is necessary to run the client in the background to free your terminal for further input like so:
$ xcalc &
$
This command starts the X11 xcalc(calculator) client, leaving your terminal free for other command lines.
SEE ALSO
Creating Shell Commands with autoexpect
The scripting language, expect, can be used to create a script that automates tasks normally requiring user input. The expectscripts will look for screen output match-ing a pattern you’ve specified and generate a response as if you’d typed it at the key-board. For example, if logging in to your ISP requires you to enter a username and password, you might consider creating a script that looks for the prompt username: and types michaelas a response. The intricacies of writing an expectscript are beyond the scope of this book, but the autoexpectutility can automate the process of creating simple scripts. The autoexpectprogram, when run, records what you type along with the prompts you received, and creates an expectscript based on it. $autoexpect
autoexpect started, file is script.exp
$ftp ftp.us.kernel.org
Connected to ftp.us.kernel.org. 220
Name (ftp.us.kernel.org:michael): anonymous
331 Anonymous login ok, send your complete e-mail address as password.
Password:
230 Anonymous access granted, restrictions apply.
Remote system type is UNIX.
Using binary mode to transfer files.
ftp> cd /pub/linux/kernel/v2.2 250 CWD command successful.
ftp> ls
200 PORT command successful.
150 Opening ASCII mode data connection for file list.
-r--r--r-- 1 merlin merlin 0 Aug 26 00:45 LATEST-IS-2.2.12
-r--r--r-- 1 merlin merlin 27 Jan 26 1999 README
-r--r--r-- 1 merlin merlin 10592549 Jan 26 1999 linux-2.2.0.tar.bz2
-r--r--r-- 1 merlin merlin 344 Jan 26 1999 linux-2.2.0.tar.bz2.sign -r--r--r-- 1 merlin merlin 13080195 Jan 26 1999 linux-2.2.0.tar.gz
...
-r--r--r-- 1 merlin merlin 32992 May 13 23:54 patch-2.2.9.gz
-r--r--r-- 1 merlin merlin 344 May 13 23:54 patch-2.2.9.gz.sign 226 Transfer complete.
ftp> exit
221 Goodbye.