Learning Web App Development by Semmy Purewal
Copyright © 2014 Semmy Purewal. All rights reserved. Printed in the United States of America.
Published by O’Reilly Media, Inc., 1005 Gravenstein Highway North, Sebastopol, CA 95472.
O’Reilly books may be purchased for educational, business, or sales promotional use. Online editions are also available for most titles (http://my.safaribooksonline.com). For more information, contact our corporate/ institutional sales department: 800-998-9938 or corporate@oreilly.com.
Editors: Simon St. Laurent and Meghan Blanchette
Production Editor: Kara Ebrahim
Copyeditor: Kim Cofer
Proofreader: Kiel Van Horn
Indexer: Judy McConville
Cover Designer: Randy Comer
Interior Designer: David Futato
Illustrator: Rebecca Demarest February 2014: First Edition
Revision History for the First Edition:
2014-02-10: First release
See http://oreilly.com/catalog/errata.csp?isbn=9781449370190 for release details.
Nutshell Handbook, the Nutshell Handbook logo, and the O’Reilly logo are registered trademarks of O’Reilly Media, Inc. Learning Web App Development, the image of German Grey Heath, and related trade dress are trademarks of O’Reilly Media, Inc.
Many of the designations used by manufacturers and sellers to distinguish their products are claimed as trademarks. Where those designations appear in this book, and O’Reilly Media, Inc. was aware of a trademark claim, the designations have been printed in caps or initial caps.
While every precaution has been taken in the preparation of this book, the publisher and author assume no responsibility for errors or omissions, or for damages resulting from the use of the information contained herein.
To my parents.
Table of Contents
Preface. . . xi
1. The Workflow. . . 1
Text Editors 1
Installing Sublime Text 2
Sublime Text Basics 4
Version Control 6
Installing Git 7
Unix Command-Line Basics 8
Git Basics 12
Browsers 20
Installing Chrome 20
Summary 21
More Practice and Further Reading 21
Memorization 21
Sublime Text 22
Emacs and Vim 22
Unix Command Line 23
More About Git 23
GitHub 23
2. The Structure. . . 25
Hello, HTML! 25
Tags Versus Content 26
<p> Is for Paragraph 27
Comments 28
Headings and Anchors and Lists, Oh My! 29
Generalizations 32
The Document Object Model and Trees 33
Summary 246
More Practice and Further Reading 246
Poker API 246
Other Platforms 247
9. The Application. . . 249
Refactoring Our Client 249
Generalizing Meaningful Concepts 250
AJAXifying Our Tabs 253
Ridding Ourselves of Hacks 254
Handling AJAX Errors 256
Refactoring Our Server 257
Code Organization 257
HTTP Verbs, CRUD, and REST 259
Setting Up Routes by ID 260
Using jQuery for put and delete Requests 261
HTTP Response Codes 262
Model-View-Controller 263
Adding Users to Amazeriffic 264
Building the User Model 264
Building the User Controller 265
Setting Up Routes 266
Improving Our ToDo Controller Actions 268
Summary 270
More Practice and Further Reading 271
Removing ToDos 271
Adding a User Admin Page 272
Views Using EJS and Jade 273
Build Another App 273
Ruby on Rails 273
Preface
In early 2008, after about six years of grad school and teaching part-time, I found myself hoping to land a job as a full-time computer science professor. It didn’t take me long to realize that professor jobs are really hard to come by, and obtaining a good one has almost as much to do with luck as it has to do with anything else. So I did what any self-respecting academic does when faced with a scary academic job market: I decided to make myself employable by learning how to develop web applications.
This may sound a little strange. After all, I had been studying computer science for about nine years at that point, and had been teaching students how to develop software for about six years. Shouldn’t I have already known how to build web applications? It turns out that there’s a pretty large gap between practical, everyday software engineering and programming as taught by computer science departments at colleges and universities. In fact, my knowledge of web development was limited to HTML and a little CSS that I had taught myself at the time.
Fortunately, I had several friends who were actively working in the web development world, and most of them seemed to be talking about a (relatively) new framework called Ruby on Rails. It seemed like a good place to focus my efforts. So I purchased several books on the topic and started reading online tutorials to get up to speed.
And after a couple months of really trying to get it, I nearly gave up.
Why? Because most of the books and tutorials started out with the assumption that I had already been developing web apps for years! And even though I had a pretty solid background in computer programming, I found all of the material extremely terse and difficult to follow. For example, it turns out you can take an awful lot of computer science classes without ever coming across the Model-View-Controller design pattern, and some of the books assumed you understood that in the first chapter!
Nevertheless, I managed to learn enough about web app development to get a few con‐ sulting gigs to support me until I managed to land a professor job. And through that, I
realized I enjoyed the practical aspects of the field so much that I continued consulting outside of teaching.
After a few years of doing both, I was offered the opportunity to teach my first class in Web Application Development at the University of North Carolina at Asheville. My initial inclination was to start with Ruby on Rails, but when I started reading the latest books and tutorials, I realized that they hadn’t improved much over the years. This isn’t to say that they aren’t good resources for people who already have a background in the basics, it’s just that they didn’t seem suitable for the students I was teaching.
Sadly, but not surprisingly, the academic books on web development are far worse! Many of them contain outdated concepts and idioms, and don’t cover the topics in a way that make platforms like Ruby on Rails more accessible. I even reviewed one book that was updated in 2011 and still used table-based layouts and the <font> tag!
I didn’t have much of a choice but to develop my course from scratch, creating all the material myself. I had done a little work in some consulting gigs with Node.js (server-side JavaScript) at the time, so I thought it would be interesting to try to teach a course that covered the same language on the client and server. Furthermore, I made it my goal to give the students enough background to launch into the self-study of Ruby on Rails if they decided to continue.
This book consists largely of the material that I created while I was teaching this course at UNCA. It shows how to build a basic database-backed web application from scratch using JavaScript. This includes a basic web-development workflow (using a text editor and version control), the basics of client-side technologies (HTML, CSS, jQuery, Java‐ Script), the basics of server-side technologies (Node.js, HTTP, Databases), the basics of cloud deployment (Cloud Foundry), and some essential good code practices (functions, MVC, DRY). Along the way we’ll get to explore some of the fundamentals of the Java‐ Script language, how to program using arrays and objects, and the mental models that come along with this type of software development.
Technology Choices
For version control, I picked Git, because—well—it’s Git and it’s awesome. Plus, it gave my students the opportunity to learn to use GitHub, which is becoming immensely popular. Although I don’t cover GitHub in this book, it’s pretty easy to pick up once you get the hang of Git.
On the server-side, I chose Express because it’s (relatively) lightweight and unopinio‐ nated. I decided against covering client- and server-side templating, because I think it’s essential to learn to do things by hand first.
I decided against relational databases because it seemed like I couldn’t give a meaningful overview of the topic in the time I allotted to that aspect of the course. Instead, I chose MongoDB because it is widely used in the Node.js community and uses JavaScript as a query language. I also just happen to really like Redis so I provided coverage of that as well.
I selected Cloud Foundry as the deployment platform because it was the only one of the three that I considered (including Heroku and Nodejitsu) that offered a free trial and didn’t require a credit card to set up external services. That said, the differences between the platforms aren’t huge, and going from one to another shouldn’t be too hard.
Is This Book for You?
This book is not designed to make you a “ninja” or a “rock star” or even a particularly good computer programmer. It won’t prepare you for immediate employment, nor can I promise that it will show you “the right way” to do things.
On the other hand, it will give you a solid foundation in the essential topics that you’ll need in order to understand how the pieces of a modern web app fit together, and it will provide a launching point to further study on the topic. If you work your way through this book, you’ll know everything that I wish I had known when I was first starting out with Rails.
You’ll get the most out of this book if you have a little experience programming and no previous experience with web development. At minimum, you probably should have seen basic programming constructs like if-else statements, loops, variables, and data types. That said, I won’t assume that you have any experience with object-oriented pro‐ gramming, nor any particular programming language. You can obtain the necessary background by following tutorials on Khan Academy or Code Academy, or by taking a programming course at your local community college.
In addition to being used for self-study, I hope that this book can serve as a textbook for community classes in web application development, or perhaps a one-semester (14-week) college-level course.
Learning with This Book
Developing web applications is definitely a skill that you’ll need to learn by doing. With that in mind, I’ve written this book to be read actively. What this means is that you’ll get the most out of it if you’re sitting at a computer while reading it, and if you actually type in all the examples.
Of course, this particular approach is fraught with peril—there is a danger that the code examples will not work if you don’t type them exactly as they appear. To alleviate that risk, I’ve created a GitHub repository with all of the examples in this book in working order. You can view them on the Web at http://www.github.com/semmypurewal/Lear ningWebAppDev. Because the full examples live there, I try to avoid redundantly in‐ cluding full code listings throughout.
In addition, I leave big portions of the projects open-ended. When I do that, it’s because I want you to try to finish them on your own. I encourage you to do that before looking at the full examples I’ve posted online. Every chapter concludes with a set of practice problems and pointers to more information, so I encourage you to complete those as well.
Teaching with This Book
When I teach this material in a 14-week class, I usually spend about 2–3 weeks on the material in the first three chapters, and 3–4 weeks on the material in the last three. That means I spend the majority of the time on the middle three chapters, which cover Java‐ Script programming, jQuery, AJAX, and Node.js. The students that I teach seem to struggle the most with arrays and objects, so I spend extra time on those because I think they are so essential to computer programming in general.
I definitely cover things in a more computer-sciency way than most books on this topic, so it might be a good fit for a course in computer science programs. Specifically, I cover mental models such as trees and hierarchical systems, and I try to emphasize functional programming approaches where they make sense (although I try not to draw attention to this in the narrative). If you find yourself teaching in a computer science program, you might choose to focus more clearly on these aspects of the material.
I currently have no plans to post solutions to the practice problems (although that may change if I get a lot of requests), so you can feel comfortable assigning them as homework and out-of-class projects.
Where to Go for Help
As mentioned before, there is a GitHub repository with all of the code samples contained in this book. In addition, you can check out http://learningwebappdev.com for errata and other updates as they are necessary.
General Comments on Code
I’ve done my best to stay idiomatic and clear wherever possible. That said, those two goals are sometimes in conflict with each other. Therefore, there are times when I didn’t do things “the right way” for pedagogical reasons. I hope that those places are self-evident to experienced developers, and that they don’t cause any grief for novice devel‐ opers in the long run.
All of the code should work fine in modern web browsers, and I’ve tested everything in Chrome. Obviously, I can’t guarantee things will work in older versions of Internet Explorer. Please let me know if you find any browser compatibility issues in the Internet Explorer 10+ or modern versions of any other browser.
For the most part, I’ve followed idiomatic JavaScript, but there are a few places I’ve strayed. For example, I preferred double quotes instead of single quotes for strings, primarily because I’ve been working under the assumption that students may be coming from a Java/C++ background. I choose to use quotes around property names in object literals so that JSON doesn’t look too different from JavaScript objects. I also use $ as the first character in variables that are pointing to jQuery objects. I find that it maintains clarity and makes the code a little more readable for novices.
Conventions Used in This Book
The following typographical conventions are used in this book: Italic
Indicates new terms, URLs, email addresses, filenames, and file extensions.
Constant width
Used for program listings, as well as within paragraphs to refer to program elements such as variable or function names, databases, data types, environment variables, statements, and keywords.
Constant width bold
Shows commands or other text that should be typed literally by the user. Constant width italic
Shows text that should be replaced with user-supplied values or by values deter‐ mined by context.
This element signifies a tip or suggestion.
This element signifies a general note.
This element indicates a warning or caution.
Using Code Examples
Supplemental material (code examples, exercises, etc.) is available for download at
http://www.github.com/semmypurewal/LearningWebAppDev.
This book is here to help you get your job done. In general, if example code is offered with this book, you may use it in your programs and documentation. You do not need to contact us for permission unless you’re reproducing a significant portion of the code. For example, writing a program that uses several chunks of code from this book does not require permission. Selling or distributing a CD-ROM of examples from O’Reilly books does require permission. Answering a question by citing this book and quoting example code does not require permission. Incorporating a significant amount of ex‐ ample code from this book into your product’s documentation does require permission. We appreciate, but do not require, attribution. An attribution usually includes the title, author, publisher, and ISBN. For example: “Learning Web App Development by Semmy Purewal (O’Reilly). Copyright 2014 Semmy Purewal, 978-1-449-37019-0.”
If you feel your use of code examples falls outside fair use or the permission given above, feel free to contact us at permissions@oreilly.com.
Safari® Books Online
Safari Books Online is an on-demand digital library that delivers expert content in both book and video form from the world’s leading authors in technology and business.
Technology professionals, software developers, web designers, and business and crea‐ tive professionals use Safari Books Online as their primary resource for research, prob‐ lem solving, learning, and certification training.
from publishers like O’Reilly Media, Prentice Hall Professional, Addison-Wesley Pro‐ fessional, Microsoft Press, Sams, Que, Peachpit Press, Focal Press, Cisco Press, John Wiley & Sons, Syngress, Morgan Kaufmann, IBM Redbooks, Packt, Adobe Press, FT Press, Apress, Manning, New Riders, McGraw-Hill, Jones & Bartlett, Course Technol‐ ogy, and dozens more. For more information about Safari Books Online, please visit us online.
How to Contact Us
Please address comments and questions concerning this book to the publisher:
O’Reilly Media, Inc.
1005 Gravenstein Highway North Sebastopol, CA 95472
800-998-9938 (in the United States or Canada) 707-829-0515 (international or local)
707-829-0104 (fax)
We have a web page for this book, where we list errata, examples, and any additional information. You can access this page at http://oreil.ly/learning-web-app.
To comment or ask technical questions about this book, send email to bookques tions@oreilly.com.
For more information about our books, courses, conferences, and news, see our website at http://www.oreilly.com.
Find us on Facebook: http://facebook.com/oreilly
Follow us on Twitter: http://twitter.com/oreillymedia
Watch us on YouTube: http://www.youtube.com/oreillymedia
Acknowledgments
Thanks to the nice folks in the Computer Science department at UNC Asheville for letting me teach this class twice. And, of course, thanks to the students who took the class for being patient with me as this material evolved.
Thanks to my editor Meg Blanchette for doing her best to keep me on track and—of course—her constant patience with missed deadlines. I’m going to miss our weekly email exchanges!
Thanks to Simon St. Laurent for offering lots of advice early on and helping me get the idea approved by O’Reilly.
Sylvan Kavanaugh and Mark Philips both did a very careful reading of every chapter and gave lots of very helpful feedback along the way. Emily Watson read the first four chapters and gave lots of thoughtful suggestions for improvements. Mike Wilson read the last four chapters and gave invaluable technical advice. I owe you all a debt of grat‐ itude and hope I can repay the favor one day.
Bob Benites, Will Blasko, David Brown, Rebekah David, Andrea Fey, Eric Haughee, Bruce Hauman, John Maxwell, Susan Reiser, Ben Rosen, and Val Scarlata read various revisions of the material and provided helpful suggestions. I sincerely appreciate the time and effort they put in. You rock!
CHAPTER 1
The Workflow
Creating web applications is a complicated task involving lots of moving parts and interacting components. In order to learn how to do it, we have to break down these parts into manageable chunks and try to understand how they all fit together. Surpris‐ ingly, it turns out that the component we interact with most often doesn’t even involve code!
In this chapter, we’ll explore the web application development workflow, which is the process that we use to build our applications. In doing so, we’ll learn the basics of some of the tools that make it a manageable and (mostly) painless process.
These tools include a text editor, a version control system, and a web browser. We won’t study any of these in depth, but we’ll learn enough to get us started with client-side web programming. In Chapter 2, we’ll actually see this workflow in action as we’re studying HTML.
If you’re familiar with these tools, you may want to scan the summary and the exercises at the end of the chapter and then move on.
Text Editors
The tool that you’ll interact with most often is your text editor. This essential, and sometimes overlooked, piece of technology is really the most important tool in your toolbox, because it is the program that you use to interact with your code. Because your code forms the concrete building blocks of your application, it’s really important that creating and modifying it is as easy as possible. In addition, you’ll usually be editing several files simultaneously, so it’s important that your text editor provide the ability to quickly navigate your filesystem.
In the past, you may have spent a good deal of time writing papers or editing text documents with programs like Microsoft Word or Google Docs. These are not the types
of editors that we’re talking about. These editors focus more on formatting text than making it easy to edit text. The text editor that we’ll use has very few features that allow us to format text, but has an abundance of features that help us efficiently manipulate it.
At the other end of the spectrum are Integrated Development Environments (IDEs) like Eclipse, Visual Studio, and XCode. These products usually have features that make it easy to manipulate code, but also have features that are important in enterprise software development. We won’t have the occasion to use any of those features in this book, so we’re going to keep it simple.
So what kinds of text editors should we explore? Two primary categories of text editors are commonly used in modern web application development. The first are Graphical User Interface (GUI) editors. Because I’m assuming that you have some background in programming and computing, you’ve most likely experienced a Desktop GUI environ‐ ment. Therefore, these editors should be relatively comfortable for you. They respond well to the mouse as an input device and they have familiar menus that allow you to interact with your filesystem as you would any other program. Examples of GUI text editors include TextMate, Sublime Text, and Coda.
The other category of text editors are terminal editors. These editors were designed before GUIs or mice even existed, so learning them can be challenging for people who are used to interacting with a computer via a GUI and a mouse. On the other hand, these editors can be much more efficient if you’re willing to take the time to learn one of them. The most commonly used editors that fall into this category are Emacs (shown in Figure 1-1) and Vim (shown in Figure 1-2).
In this book, we’ll focus on using a GUI text editor called Sublime Text, but I encourage everyone to get some experience in either Emacs or Vim. If you continue on your web application development journey, it’s highly likely you’ll meet another developer who uses one of these editors.
Installing Sublime Text
Figure 1-1. An HTML document opened in Emacs
Figure 1-2. An HTML document opened in Vim
To install Sublime, visit http://www.sublimetext.com and click the Download link at the top. There you’ll find installers for all major platforms. Even though Sublime Text 3 is
in beta testing (at the time of this writing), I encourage you to give it a try. I used it for all the examples and screenshots in this book.
Sublime Text Basics
Once you have Sublime installed and run it, you’ll be presented with a screen that looks something like Figure 1-3.
Figure 1-3. Sublime Text, after being opened for the first time
The first thing you’ll want to do is create a new file. Do that by going to the File menu and clicking New. You can also do that by typing Ctrl-N in Windows and Linux or using Command-N in Mac OS. Now type Hello World! into the editor. The editor will look similar to Figure 1-4.
Figure 1-4. Sublime after a new file is opened and Hello World! is typed into the file
You probably noticed that Sublime changed the tab name from “untitled” to “Hello World!” as you typed. When you actually save, the default filename will be the text that appears in the tab name, but you’ll probably want to change it so that it doesn’t include any spaces. Once saved with a different name, the tab at the top will change to the actual filename. Notice that when you subsequently make any changes you’ll see the X on the right side of the tab change to a green circle—this means you have unsaved changes. After you’ve changed your theme and saved your file as hello, the editor will look similar to Figure 1-5.
Because we’ll be working from the command line, it’s a good idea to avoid spaces or special characters in filenames. We’ll occasionally save files using the underscore ( _ ) character instead of a space, but try not to use any other nonnumeric or nonalphabetic characters.
We’ll spend a lot of time editing code in Sublime, so we’ll obviously want to make sure we’re saving our changes from time to time. Because I expect that everyone has a little experience with code, I’ll assume that you’ve seen the edit-save-edit process before. On the other hand, there’s a related essential process that many new programmers don’t have experience with, and that’s called version control.
Figure 1-5. Sublime after the theme has been changed to Solarized (light) and the file has been saved as hello
Version Control
Imagine that you’re writing a long piece of fiction with a word processor. You’re peri‐ odically saving your work to avert disaster. But all of the sudden you reach a very im‐ portant plot point in your story and you realize that there is a significant part of your protagonist’s backstory that is missing. You decide to fill in some details, way back near the beginning of your story. So you go back to the beginning, but realize that there are two possibilities for the character. Because you don’t have your story completely out‐ lined, you decide to draft both possibilities to see where they go. So you copy your file into two places and save one as a file called StoryA and one as a file called StoryB. You draft out the two options of your story in each file.
This is a rudimentary approach to version control. Version control is a process that allows you to keep labeled checkpoints in your code so you can always refer back to them (or even revert back to them) if it becomes necessary. In addition to that, version control is an essential tool for collaborating with other developers. We won’t emphasize that as often in this book, but it’s a good idea to keep it in mind.
Many professional version control tools are available and they all have their own set of features and nuances. Some common examples include Subversion, Mercurial, Perforce, and CVS. In the web development community, however, the most popular version con‐ trol system is called Git.
Installing Git
Git has straightforward installers in both Mac OS and Windows. For Windows, we’ll use the msysgit project, which is available on GitHub as shown in Figure 1-6. The in‐ stallers are still available on Google Code and are linked from the GitHub page. Once you download the installer, double-click it and follow the instructions to get Git on your system.
Figure 1-6. The msysgit home page
For Mac OS, I prefer using the Git OS X installer shown in Figure 1-7. You simply download the prepackaged disk image, mount it, and then double-click the installer. At the time of this writing, the installer says that it is for Mac OS Snow Leopard (10.5), but it worked fine for me on my Mountain Lion (10.8) system.
Figure 1-7. The Git for OS X home page
If you’re using Linux, you can install Git through your package management system.
Unix Command-Line Basics
There are graphical user interfaces to Git, but it’s much more efficient to learn to use it through the command line. Before you learn to do that, however, you’ll have to learn to navigate your filesystem using some basic Unix commands.
Like I mentioned before, I am assuming you have a background in computing and programming so you’ve most likely interacted with a desktop GUI environment. This means that you’ve had to use the desktop environment to explore the files and folders stored on your machine. You typically do this through a filesystem navigator such as Finder for Mac OS or Windows Explorer in Windows.
simulates a Unix terminal in Windows and gives you access to Git commands. To fire up the Git Bash prompt, you’ll navigate there via your Start menu. If you’re running Mac OS, you’ll use the Terminal program, which you can find in the Utilities directory of your Applications folder. If you’re using Linux, it depends a bit on the particular flavor you’re using, but there is usually an easily available Terminal program in your applica‐ tions. The default Mac OS terminal window is shown in Figure 1-8.
Figure 1-8. A default terminal window in Mac OS
Once you open the terminal, you’ll be greeted with a command prompt. It may look different depending on whether you’re using Windows or Mac OS, but it usually con‐ tains some information about your working environment. For instance, it may include your current directory, or maybe your username. In Mac OS, mine looks like this:
Last login: Tue May 14 15:23:59 on ttys002 hostname $ _
Where am I?
An important thing to keep in mind is that whenever you are at a terminal prompt, you are always in a directory. The first question you should ask yourself when presented with a command-line interface is “Which directory am I in?” There are two ways to answer this question from the command line. The first way is to use the pwd command, which stands for print working directory. The output will look something like this:
hostname $ pwd /Users/semmy
Although I do use pwd on occasion, I definitely prefer to use the command ls, which roughly translates to list the contents of the current directory. This gives me more visual cues about where I am. In Mac OS, the output of ls looks something like this:
hostname $ ls
Desktop Downloads Movies Pictures Documents Library Music
So ls is similar to opening a Finder or Explorer window in your home folder. The result of this command clues me in that I’m in my home directory because I see all of its subdirectories printed to the screen. If I don’t recognize the subdirectories contained in the directory, I’ll use pwd to get more information.
Changing directories
The next thing that you’ll want to do is navigate to a different directory than the one you’re currently in. If you’re in a GUI file browser, you can do this by simply double-clicking the current directory.
It’s not any harder from the command line; you just have to remember the name of the command. It’s cd, which stands for change directory. So if you want to go into your Documents folder, you simply type:
hostname $ cd Documents
And now if you want to get some visual feedback on where you are, you can use ls: hostname $ ls
Projects
This tells you that there’s one subdirectory in your Documents directory, and that sub‐ directory is called Projects. Note that you may not have a Projects directory in your Documents directory unless you’ve previously created one. You may also see other files or directories listed if you’ve used your Documents directory to store other things in the past. Now that you’ve changed directories, running pwd will tell you your new location:
hostname $ pwd
/Users/semmy/Documents
What happens if you want to go back to your home directory? In the GUI file browser, there is typically a back button that allows you to move to a new directory. In the terminal there is no such button. But you can still use the cd command with a minor change: use two periods (..) instead of a directory name to move back one directory:
Desktop Downloads Movies Pictures Documents Library Music
Creating directories
Finally, you’ll want to make a directory to store all of your projects for this book. To do this, you’ll use the mkdir command, which stands for make directory:
hostname $ ls
Desktop Downloads Movies Pictures Documents Library Music
hostname $ mkdir Projects hostname $ ls
Desktop Downloads Movies Pictures Documents Library Music Projects hostname $ cd Projects
hostname $ ls hostname $ pwd /Users/semmy/Projects
In this interaction with the terminal, you first look at the contents of your home directory to make sure you know where you are with the ls command. After that, you use mkdir
to create the Projects directory. Then you use ls to confirm that the directory has been created. Next, you use cd to enter the Projects directory, and then ls to list the contents. Note that the directory is currently empty, so ls has no output. Last, but not least, you use pwd to confirm that you are actually in the Projects directory.
These four basic Unix commands are enough to get you started, but you’ll learn more as we move forward. I’ve included a handy table at the end of this chapter that describes and summarizes them. It’s a good idea to try to memorize them.
Filesystems and trees
Web development (and programming in general) is a very abstract art form. This roughly means that to do it effectively and efficiently, you’ll need to improve your ab‐ stract thinking skills. A big part of thinking abstractly is being able to quickly attach mental models to new ideas and structures. And one of the best mental models that can be applied in a wide variety of situations is a tree diagram.
A tree diagram is simply a way of visualizing any kind of hierarchical structure. And because the Unix filesystem is a hierarchical structure, it’s a good idea to start practicing our mental visualizations on it. For example, consider a directory called Home that contains three other directories: Documents, Pictures, and Music. Inside the Pictures directory are five images. Inside the Documents directory is another directory called Projects.
A tree diagram for this structure might look something like Figure 1-9.
Figure 1-9. A tree diagram representing a file hierarchy
It’s a good idea to keep this mental model in your head while you’re navigating the filesystem. In fact, I would recommend adding an asterisk (or something similar) that denotes your current directory and have that move as you’re moving through the filesystem.
More generally speaking, if you try to attach a tree diagram to any hierarchical structure you’ll most likely find that it’s easier to understand and analyze. Because a large part of being an effective programmer comes from the programmer’s ability to quickly build mental models, it’s a good idea to practice attaching these tree diagrams to real-world hierarchical systems whenever they make sense. We’ll do that in a few instances throughout the rest of the book.
Git Basics
Now that we can navigate the command line, we’re ready to learn how to keep our project under version control with Git.
Configuring Git for the first time
Like I mentioned before, Git is actually designed for large-scale collaboration among many programmers. Even though we’re going to use it for our personal projects, it will need to be configured so that it can track our changes with some identifying information, specifically our name and email address. Open your terminal and type the following commands (changing my name and email address to yours, of course):
hostname $ git config --global user.name "Semmy Purewal" hostname $ git config --global user.email "semmy@semmy.me"
Now we’re ready to start tracking a project with Git. We’ll begin by navigating to our Projects folder if we’re not already there:
hostname $ pwd /Users/semmy
hostname $ cd Projects hostname $ pwd
/Users/semmy/Projects
Next we’ll create a directory called Chapter1, and we’ll list the contents of the directory to confirm that it’s there. Then we’ll enter the directory:
hostname $ mkdir Chapter1
Now we can put the Chapter1 directory under version control by initializing a Git repository with the git init command. Git will respond by telling us that it created an empty repository:
hostname $ pwd
/Users/semmy/Projects/Chapter1 hostname $ git init
Initialized empty Git repository in /Users/semmy/Projects/Chapter1/.git/
Now try typing the ls command again to see the files that Git has created in the directory, and you’ll find there’s still nothing there! That’s not completely true—the .git directory is there, but we can’t see it because files prepended by a dot ( . ) are considered hidden files. To solve this, we can use ls with the -a (all) flag turned on by typing the following:
hostname $ ls -a . .. .git
This lists all of the directory contents, including the files prepended with a dot. You’ll even see the current directory listed (which is a single dot) and the parent directory (which is the two dots).
If you’re interested, you can list the contents of the .git directory and you’ll see the filesystem that Git prepares for you:
hostname $ ls .git
HEAD config hooks objects branches description info refs
We won’t have the occasion to do anything in this directory, so we can safely ignore it for now. But we will have the opportunity to interact with hidden files again, so it’s helpful to remember the -a flag on the ls command.
Determining the status of our repository
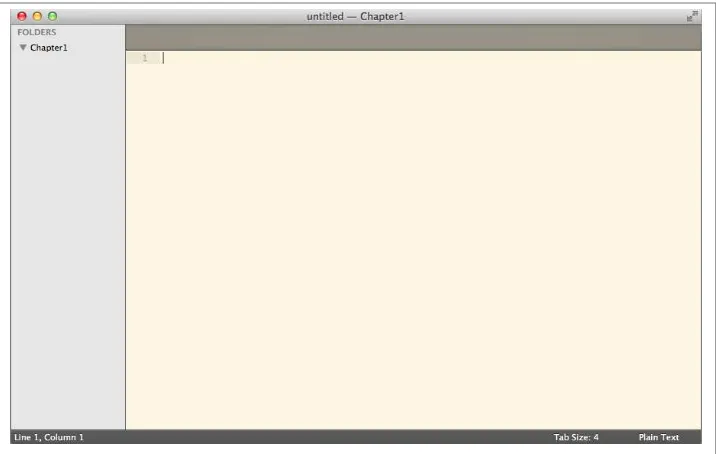
Let’s open Sublime Text (if it’s still open from the previous section, close it and reopen it). Next, open the directory that we’ve put under version control. To do this, we simply select the directory in Sublime’s Open dialog box instead of a specific file. When you open an entire directory, a file navigation pane will open on the left side of the editor window—it should look similar to Figure 1-10.
Figure 1-10. Sublime with the Chapter1 directory opened
To create a new file in the Chapter1 directory, right-click (or Command-click on Mac OS) Chapter1 in the file navigation pane and select New File from the context menu. This will open a new file as before, but when you save it, by default it will use the Chapter1 directory. Let’s save it as index.html.
Figure 1-11. Sublime after the index.html file is added, edited, and saved
Let’s see what has happened with our Git repo. Return to your terminal window and confirm you’re in the correct directory:
hostname $ pwd
/Users/semmy/Projects/Chapter1 hostname $ ls
index.html
Now type git status and you’ll see a response that looks something like this: hostname $ git status
# On branch master #
# Initial commit #
# Untracked files:
# (use "git add <file>..." to include in what will be committed) #
# index.html
There’s a lot of information here. We’re most interested in the section labeled Untracked files. Those are the files that are in our working directory, but are not currently under version control.
Notice that our index.html file is there, ready to be committed to our Git repository.
Our first commits!
We’re interested in tracking changes in our index.html file. To do that, we follow the instructions Git gave us and add it to the repo with the git add command:
hostname $ git add index.html
Notice that Git doesn’t respond at all. That’s okay. We can double-check that everything worked by typing git status again:
hostname $ git status # On branch master #
# Initial commit #
# Changes to be committed:
# (use "git rm --cached <file>..." to unstage) #
# new file: index.html #
This gives us the feedback we were looking for. Notice that index.html is now listed under the Changes to be committed heading.
Once we’ve added the new files to the repository, we would like to commit the initial state of the repository. To do this, we use the git commit command along with the -m
flag and a meaningful message about what has changed since the last commit. Our initial commit often looks something like this:
hostname $ git commit -m "Initial commit" [master (root-commit) 147deb5] Initial commit 1 file changed, 1 insertion(+)
create mode 100644 index.html
This creates a snapshot of our project in time. We can always revert back to it later if something goes wrong down the road. If we now type git status, we’ll see that in‐ dex.html no longer appears because it is being tracked and no changes have been made. When we have no changes since our last commit, we say we have a “clean working directory”:
hostname $ git status # On branch master
nothing to commit (working directory clean)
Next, let’s modify index.html with a minor change. We’ll add a second line that says “Goodbye World!” Go ahead and do that and save the file using the appropriate keyboard shortcut. Now let’s see how git status responds to this change:
hostname $ git status # On branch master
# Changes not staged for commit:
# (use "git add <file>..." to update what will be committed)
# (use "git checkout -- <file>..." to discard changes in working directory) #
# modified: index.html #
no changes added to commit (use "git add" and/or "git commit -a")
Notice that Git tells us that index.html has been modified, but that it’s not staged for the next commit. To add our modifications to the repository, we have to first git add the modified file and then we have to git commit our changes. We may want to verify the add has correctly happened by typing git status before the commit. This interaction might look something like this:
hostname $ git add index.html hostname $ git status
# On branch master
# Changes to be committed:
# (use "git reset HEAD <file>..." to unstage) #
# modified: index.html #
hostname $ git commit -m "Add second line to index.html" [master 1c808e2] Add second line to index.html
1 file changed, 1 insertion(+)
Viewing the history of our repo
Initial commit
Like the four Unix commands that we learned in the previous section, it’s really impor‐ tant to memorize these four Git commands. A handy chart in “Summary” on page 21 covers these commands.
Saving versus committing
In case it’s confusing, I want to take a moment to clearly differentiate between saving a file (through your text editor) and actually committing a change. When you save a file, you actually overwrite the file on your computer’s disk. That means that unless your text editor offers you some sort of built-in revision history, you can no longer access the old version of the file.
Committing to a Git repository allows you to keep track of all the changes you made since the last time you committed the file. This means that you can always go back to a previous version of the file if you find that you’ve made an unrecoverable mistake in your file’s current state.
At this point, it probably looks as though Git stores your code as a linear sequence of commits. That makes sense right now because you’ve learned a subset of Git that allows you to create a repository of where every commit follows exactly one other commit. We refer to the first commit as a parent commit and the second commit as a child commit. A Git repository with four commits looks similar to Figure 1-12.
Figure 1-12. A Git repository with four commits
Figure 1-13. A more complex Git repository
Right now, we don’t know any Git commands that will allow us to create a structure like this, but if you continue on in your web app development journey, you’ll have to learn
them eventually. The point is that this should motivate you to start picturing your Git repo in a more visual way so that when things do get complex, you don’t get overwhelmed.
Browsers
The last tool that we’ll interact with regularly is the web browser. Because we’re learning to build applications that run in the web browser, it’s essential that we learn how to effectively use our browser as a developer tool, and not just as a window into the Internet. There are several excellent web browsers including Firefox, Safari, and Chrome. I would recommend becoming proficient in using the developer tools available in all of these browsers. But to keep everyone on the same page and to keep things simple, we’ll use Google Chrome as our browser of choice.
Installing Chrome
Whether you’re on Windows, Mac OS, or Linux, you can install Google Chrome easily by going to the Google Chrome web page. The installation process will, of course, vary, but the instructions are very clear. Once you install Chrome and run it for the first time, it should look something like Figure 1-14.
Summary
One of the most important aspects of web application development is getting used to an efficient and effective workflow. A modern workflow involves three important tools: a text editor, a version control system, and a web browser. Sublime Text is a popular, cross-platform text editor that is useful for editing source code. Git is a commonly used version control system that has a command-line interface. Chrome is an excellent web browser for web development.
Before moving on, you should have all of the previously described tools installed on your computer. You should also memorize the commands in Table 1-1 and Table 1-2, which allow you to navigate your filesystem and interact with Git from the command line.
Table 1-1. Unix commands
Command Description
pwd Print your current directory
ls List the contents of your current directory
ls -a List including all hidden files
cd [dir] Change to the directory called [dir]
mkdir [dir] Create a new directory called [dir]
Table 1-2. Git commands
Command Description
git init Initialize your repository
git status Display the status of your repository
git add [file(s)] Stage [files] for the next commit
git commit -m [msg] Commit your staged files with message [msg]
git log Show the commit history
More Practice and Further Reading
Memorization
In teaching and learning, memorization often has a negative connotation. In my mind, this view is mostly misguided, particularly when it relates to computer programming. If you follow the mindset that “well, I can just look that up when I need it,” you’ll spend more time looking up basic stuff than focusing on the more challenging things that arise. Imagine, for instance, how much more difficult long division would be if you didn’t have your multiplication tables memorized!
With that in mind, I’m going to include a “Memorization” section at the end of the first few chapters that will cover the basic things that you should memorize before moving on to the next chapter. For this chapter, those things are all related to Git and the Unix command line. You should repeatedly do the following things until you can do them without looking at any documentation:
1. Create a new folder using the command line. 2. Enter that folder on the command line.
3. Create a text file in your text editor and save it as index.html in the new directory. 4. Initialize a Git repository from the command line.
5. Add and commit that file to the repository from the command line.
What’s the best way to memorize this sequence of tasks? Simple: do it over and over again. I’ll pile more onto this task throughout the next few chapters, so it’s important to master these steps now.
Sublime Text
As I mentioned before, you’ll be spending a lot of time in your text editor, so it’s probably a good idea to move a little beyond the basics. The Sublime website has a great support page that has links to documentation and videos that demonstrate advanced features of the editor. I suggest that you explore the page and see if you can level up your Sublime skills.
Emacs and Vim
Nearly every web developer will eventually have to edit a file on a remote server. This means that you won’t be able to use a text editor that requires a GUI. Emacs and Vim are incredibly powerful editors that make doing so a breeze, but the learning curve on both is relatively steep. If you can find the time, it is really worthwhile to learn the basics of both editors, but it seems to me that Vim has become more common among web developers in recent years (full disclosure: I’m an Emacs user).
The GNU home page has an excellent overview of Emacs, including a tutorial for be‐ ginners. O’Reilly also has several books on Emacs and Vim including Learning the vi and Vim Editors by Arnold Robbins, Elbert Hannah, and Linda Lamb and Learning GNU Emacs by Debra Cameron, James Elliott, Marc Loy, Eric S. Raymond, and Bill Rosenblatt.
It would be to your benefit to learn how to do the following things in both editors:
1. Open and exit the editor.
3. Open multiple files simultaneously.
4. Create a new file from within the editor and save it. 5. Search a file for a given word or phrase.
6. Cut and paste portions of text between two files.
If you take the time to do that, you’ll get a pretty good sense of which editor you would prefer to spend more time with.
Unix Command Line
The Unix command line takes ages to master, but you’ve learned enough to get started. In my experience, it’s far better to learn things in the context of solving specific problems, but there are a few other basic commands that I use regularly. Using a Google search, learn about some of these common commands: cp, mv, rm, rmdir, cat, and less. These will all come in handy at various times.
More About Git
Git is an extraordinarily powerful tool—we’ve only barely scratched the surface of its capabilities. Fortunately, Scott Chacon has written Pro Git (Apress, 2009), a great book that covers many aspects of Git in a lot of detail. The first two chapters cover several features that will help you move through this book more efficiently, including reverting to previously committed versions of your repository.
The third chapter of Chacon’s book covers the concept of branching in detail. Branching is a bit beyond the scope of this book, but I hinted at it earlier. I encourage you to explore this topic because the ability to easily and quickly branch your repository is really one of the best features of Git.
GitHub
GitHub is an online service that will host your Git repositories. If you keep your code open source, it’s free. If you want to create private Git repositories, GitHub’s cheapest plan is about $7 per month. I encourage you to sign up for the free plan and explore storing Git repositories on GitHub.
GitHub’s help page walks you through setting up a GitHub account and connecting it to your Git repository. It also has a ton of useful information on both Git and GitHub in general. Use it to get started.
CHAPTER 2
The Structure
Over the course of the next two chapters, we’re going to get an overview of two relatively important client-side topics: HTML and CSS. Because there’s no way that we can cover both of these in detail, these two chapters will be written primarily as a series of hands-on tutorials that will help you learn enough HTML and CSS to support the code ex‐ amples in the remainder of the book. “More Practice and Further Reading” on page 49 will encourage you to explore other resources.
If you’re already familiar with HTML and CSS, it’s likely that you can comfortably move on to Chapter 4, which starts with client-side JavaScript. You may want to scan the chapters and read the summary at the end before doing so.
Hello, HTML!
HTML, which stands for HyperText Markup Language, is a technology that allows us to specify the structure of the visual elements (sometimes referred to as the user inter‐ face) of a web application. What do I mean when I say structure? Let’s take a look at a simple example.
To get started, we’ll use the command line to create a directory called Chapter2 in our
Projects directory. Recall that we’ll use the mkdir command for that. Next, let’s open that
directory in Sublime Text using either the File menu or the shortcut keys. Create a new file called hello.html inside that directory. Type in the contents exactly as you see here:
<!doctype html> <html>
<head>
<title>My First Web App</title> </head>
<body>
<h1>Hello, World!</h1>
</body> </html>
Tags Versus Content
As you’re typing, one of the things you may notice is that the document consists of two types of content. One type of content is normal text content like “My First Web App” and “Hello, World!” The other type of content, like <html> and <head>, is surrounded by angle brackets, and we refer to these elements as tags. Tags are a form of metadata, and this metadata is used to apply structure to the content of the page.
Fire up Chrome and open the file in your web browser using the Open File option in the File menu. You’ll see something that looks similar to Figure 2-1.
It’s a good idea to get the hang of keyboard shortcuts because it will make your workflow more efficient. The keyboard shortcut for open‐ ing a file in Chrome is Command-O if you’re in Mac OS. In Linux or Windows, it’s Ctrl-O.
Figure 2-1. hello.html opened in Chrome
<p> Is for Paragraph
Now, we’ll make a minor modification by adding a paragraph with some lorem ipsum text, which is simply filler text that we can replace with actual copy later. You can cut and paste the text from the Wikipedia page for lorem ipsum:
<!doctype html> <html>
<head>
<title>My First Web App</title> </head>
<body>
<h1>Hello, World!</h1>
<p>Lorem ipsum dolor sit amet, consectetur adipisicing elit, sed do eiusmod tempor incididunt ut labore et dolore magna aliqua. Ut enim ad minim veniam, quis nostrud exercitation ullamco laboris nisi ut aliquip ex ea commodo consequat. Duis aute irure dolor in reprehenderit in voluptate velit esse cillum dolore eu fugiat nulla pariatur. Excepteur sint occaecat cupidatat non proident, sunt in culpa qui officia deserunt mollit anim id est laborum.</p>
</body> </html>
Once we make the changes, we can save the changes to the document. Now we can go back to our browser and reload the page by clicking the circular arrow next to the address bar in Chrome. You should see the body of the browser update with the content, as illustrated in Figure 2-2.
You can refresh this page with Ctrl-R in Windows and Command-R in Mac OS.
This will be our typical workflow when editing web pages. We’ll open the file in our text editor, make some minor changes, and reload the web browser to see the changes.
Figure 2-2. Modified example1.html opened in Chrome
Comments
Comments are a convenient way to annotate our HTML. We start an HTML comment with <!-- and end a comment with -->. Here’s a simple example that’s built on the one in the previous section:
<!doctype html> <html>
<head>
<title>Comment Example</title> </head>
<body>
<!-- This is the main heading --> <h1>Hello World!</h1>
<!-- This is the main paragraph -->
<p>I'm a main paragraph, most likely associated with the h1 tag since I'm so close to it!</p>
</body> </html>
Headings and Anchors and Lists, Oh My!
Now that we’ve seen some examples of basic tags and comments, what other kinds of tags can we include in our markup?
First, we can generalize the <h1> tag by creating <h2>, <h3>, <h4>, <h5>, and <h6> tags. They represent different heading levels, and are usually reserved for important content on the page. The most important heading content should be contained in an <h1> tag, whereas heading content of lesser importance should appear in the others:
<!doctype html> <html>
<head>
<title>Heading Tag Examples</title> </head>
<body>
<!-- This is the main header --> <h1>This is very important!</h1>
This is some content that might be associated with the important stuff
-->
<p>Important paragraph</p>
<h2>This is a less important header</h2> <p>And here is some less important content</p> </body>
</html>
Another important tag in an HTML document is the <a> tag, which stands for anchor and is used to create links. The anchor tags are a unique characteristic of hypertext because they can link to other information, either on the current page or another web page altogether. To use anchor tags, we have to also include an HTML href attribute, which tells the browser where to go when a link is clicked. The href attribute goes inside the opening tag:
the href attribute tells us where to go when the anchor element is clicked
-->
<p>Here is a <a href="http://www.google.com">link</a> to Google!</p>
<p>
<a href="http://www.example.com">
And this is a link that is a little longer </a>
</p> <p>
And here is a link to
<a href="http://www.facebook.com">www.facebook.com</a> </p>
</body> </html>
When we open this page in the web browser, we’ll get something that looks like Figure 2-3.
Figure 2-3. A page with links using anchor tags
All of the blue underlined text on the page is clickable, and when clicked it will take you to the page specified in the href attribute.
One problem with this example is that it’s using paragraph elements to list content. Wouldn’t it be better if we had a specific tag that represented a list? It turns out that we have two of them! The <ol> tag and the <ul> tag represent ordered lists and unordered
lists, respectively. Inside these lists, we have <li> tags that represent list items. In the
<!doctype html> <html>
<head>
<title>List Examples</title> </head>
<body>
<h1>List Examples!</h1>
<!-- We'll wrap the links in an ul tag --> <ul>
<li>
Here is a <a href="http://www.google.com">link</a> to Google! </li>
<li>
<a href="http://www.example.com">
And this is a link that is a little longer </a>
</li> <li>
And here is a link to
<a href="http://www.facebook.com"> www.facebook.com
</a> </li> </ul>
<!-- We can also create an ordered list tag --> <h3>How to make an ordered list</h3>
<ol>
<li>Start by opening your ol tag</li>
<li>Then add several list items in li tags</li> <li>Close your ol tag</li>
</ol> </body> </html>
When we refresh our browser, it should look similar to Figure 2-4.
Figure 2-4. A page with an unordered and ordered list
Notice how both lists have bullets at the front of each list item, but the bullets for the ordered list are numeric.
Generalizations
We can generalize a few things from the first few examples that we’ve seen. The first is that all normal text content is wrapped in HTML tags.
Second, you’ll probably notice that we’ve indented HTML tags that are contained in other HTML tags. The reason is that HTML is a hierarchical method of structuring documents. We use indentation as a visual cue to remind us where we are in the hier‐ archy. That’s why the <head> tag and the <body> tag are indented within the <html> tag, and the <h1> tag and the <p> tags are also indented relative to the <body> tag. We’ve occasionally kept the links on the same line as the content, while other times we’ve broken the line. In HTML, white space doesn’t matter in most cases.
Because you do it so often, it’s helpful to learn the keyboard short‐ cuts to reload the page and switch between active windows in your environment. In Windows and most Linux environments, you can use Ctrl-Tab to switch between active windows and Ctrl-R to reload the page. In Mac OS, you use Command-Tab and Command-R.
The Document Object Model and Trees
HTML tags define a hierarchical structure called the Document Object Model, or DOM for short. The DOM is a way of representing objects that can be defined via HTML and then later interacted with via a scripting language like JavaScript. HTML tags define DOM elements, which are entities that live in the DOM.
We’ve already been writing our HTML in a way that helps us visualize the DOM. That’s why we’ve been indenting our tags that are contained in other tags, because it gives us a sense of the hierarchy. Although that’s helpful for our code, it doesn’t always work as clearly as we might hope. For instance, consider the following HTML:
<!doctype html> <html>
<head>
<title>Hello World!</title> </head>
<body>
<h1>Hello World!</h1> <div>
<ol>
<li>List Item</li> <li>List Item</li> <li>List Item</li> </ol>
<p>This is a paragraph.</p>
<p>This is a <span>second</span> paragraph.</p> </div>
<ul>
<li>List Item <span>1</span></li> <li>List Item <span>2</span></li> <li>List Item <span>3</span></li> </ul>
</body> </html>
This code includes several tags that we haven’t seen, but it’s not essential that you un‐ derstand their function yet. What is important is that you notice that even though this
code is clearly indented, there are a few tags that are still not separated out on a different line. For example, the span elements are contained on the same line as the li elements. This is actually fine because the <span> tag contains a single character, but it doesn’t illustrate the relationship as clearly as the indented structure does. So we need another way to think about this example.
In the previous chapter, we discussed using tree diagrams to create mental models of our computer’s filesystem. It turns out that we can also use tree diagrams to create mental models of the DOM. This mental model will come in handy later when we’re interacting with the DOM via JavaScript. As an example, we can use a tree diagram to represent the preceding code, as shown in Figure 2-5.
Figure 2-5. A tree representation of the preceding DOM
Note that this diagram creates a clear representation of the contents of the DOM. It also clarifies some of the relationships: we refer to DOM elements that are lower in the tree as descendants of DOM elements that are higher in the tree if there is a path that connects them. Immediate descendants are called child elements, and the element above a child element is referred to as its parent element.
In this example, all elements are descendants of the html element and the ul element is a descendant of the body element. The ul element is not a descendant of the the head
element without moving up in the hierarchy. The ul element has three children (each of the li elements) and each li element has a span element as a child.
We’ll learn more about these relationships as we move forward, but for now it’s good to get some practice thinking about the DOM in this way.
Using HTML Validation to Identify Problems
Like I said in the previous section, text content in our HTML document is typically enclosed by a pair of tags. An opening tag looks like <html> and a closing tag looks like
</html>. The actual name of the tag is what specifies the type of the DOM element that it represents.
This can cause problems once our document gets very long. For instance, consider the following HTML document, which is a slight generalization of our previous example with some new tags:
<!doctype html> <html>
<head>
<title>My First Web App</title> </head>
<body>
<h1>Hello, World!</h1> <nav>
<div>Login</div> <div>FAQ</div> <div>About Us</div> </nav>
<p>Lorem ipsum dolor sit amet, consectetur adipisicing elit, sed do eiusmod tempor incididunt ut labore et dolore magna aliqua. Ut enim ad minim veniam, <span>quis nostrud exercitation</span> ullamco laboris nisi ut aliquip ex ea commodo consequat.</p>
<p>Lorem ipsum dolor sit amet, consectetur adipisicing elit, sed do eiusmod tempor incididunt ut labore et dolore magna aliqua. Ut enim <span>ad minim veniam, quis nostrud exercitation ullamco laboris nisi ut aliquip ex ea commodo consequat. Duis aute irure dolor in reprehenderit in voluptate <span>velit esse cillum dolore eu fugiat</span> nulla pariatur.</p>
<p>Lorem ipsum dolor sit amet, consectetur adipisicing elit, sed do eiusmod tempor incididunt ut labore et dolore magna aliqua.</p>
</body> </html>
This HTML document has an error, but if you open it in your browser you won’t notice it. Spend a few moments looking and see if you can find it.
If you found it, congratulations—you have a great eye! If you didn’t find it, don’t feel bad. It’s in the second paragraph. There’s an opening <span> tag inside the second sen‐ tence, but it’s never closed. Most people have a hard time finding such errors when they are first starting out. Fortunately, it turns out that there’s a very nice automated way to find errors in HTML documents.
A validation program is a program that automatically checks to see if your code con‐ forms to certain basic standards. If you’ve used a programming language like Java or C++ in the past, you may have worked with a compiler. If your code has an error, the compiler will tell you about it when you run your code through it. Languages like HTML are a bit looser in the sense that a browser will let you get away with a small number of errors. A validation program will catch these errors even when a browser won’t. But if the browser displays the page in exactly the same way with or without a closing
<span> tag, why do we care? It turns out that the only way we can guarantee that it will always look the same in every browser is if our HTML is correct. That’s why an HTML validator is a very handy tool.
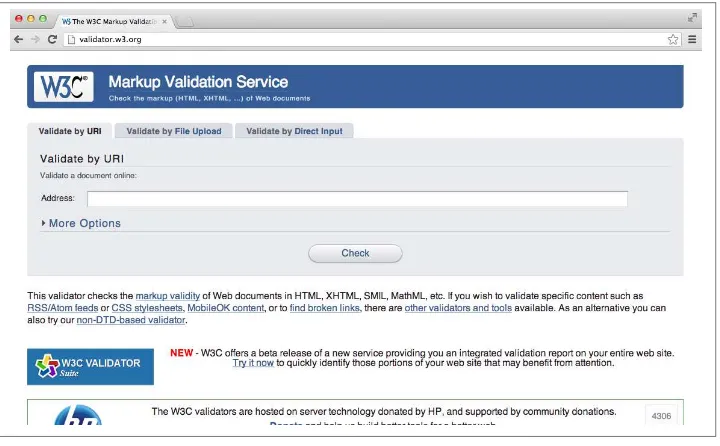
We don’t have to install any software to use an HTML validator. For now, we’ll get started by visiting the W3C’s Markup Validation Service home page. At the time of this writing it looks something like Figure 2-6.
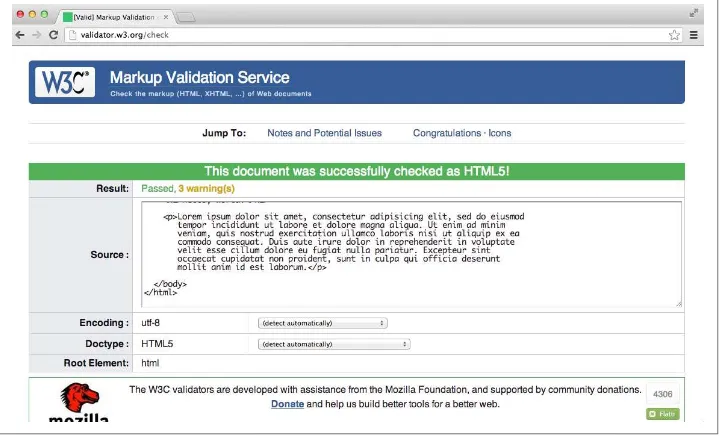
Notice that there’s a tab that says “Validate by Direct Input.” When we click it, we can cut and paste some of our HTML code into the text field that appears. Once we have some code pasted, we click the big Check button. We’ll start by running our lorem ipsum example from earlier. If our HTML doesn’t have any errors, we’ll see something similar to Figure 2-7.
Figure 2-7. The W3C’s HTML validator after being run on our lorem ipsum example
When validating your HTML, you’ll most likely get three warnings even when you have no errors. The first of those warnings tells you that the validator is using the HTML5 conformance checker. Even though the HTML5 standard is relatively stable, there could be changes and this warning is just letting you know that.
The other two relate to character encoding, and can be ignored for now. If you’re interested, one of the warnings links to a brief tutori‐ al on character encoding that will show you how to specify a char‐ acter encoding in your HTML document.
If the code does not pass validation, we’ll see specific errors listed. For example, if we run the code that is missing a closing tag for the span element in the second paragraph, we’ll see something similar to Figure 2-8.