ISBN: 978-1-449-33499-4
[LSI]
HTML5 Hacks
by Jesse Cravens and Jeff Burtoft
Copyright © 2013 Jesse Cravens, Jeff Burtoft. All rights reserved.
Printed in the United States of America.
Published by O’Reilly Media, Inc., 1005 Gravenstein Highway North, Sebastopol, CA 95472.
O’Reilly books may be purchased for educational, business, or sales promotional use. Online editions are also available for most titles (http://my.safaribooksonline.com). For more informa-tion, contact our corporate/institutional sales department: 800-998-9938 or corporate@oreil ly.com.
Editors: Simon St. Laurent and Meghan Blanchette
Revision History for the First Edition:
2012-11-09 First release
See http://oreilly.com/catalog/errata.csp?isbn=9781449334994 for release details.
Nutshell Handbook, the Nutshell Handbook logo, and the O’Reilly logo are registered trademarks of O’Reilly Media, Inc. HTML5 Hacks and related trade dress are trademarks of O’Reilly Media, Inc.
Many of the designations used by manufacturers and sellers to distinguish their products are claimed as trademarks. Where those designations appear in this book, and O’Reilly Media, Inc., was aware of a trademark claim, the designations have been printed in caps or initial caps.
Table of Contents
Preface
. . . vii
1. Hacking the Semantic Way
. . . 1
Hack 01. Simplify Your Doc with the Right <doctype>
1
Hack 02. Adopt Common Structures
2
Hack 03. Make Your New HTML5 Tags Render Properly in Older Browsers
5
Hack 04. Bring Back the <input> Tag
11
Hack 05. Easily Implement Form Validation Without JavaScript
16
Hack 06. Improve the Usability of Your Forms with New Controls
24
Hack 07. Know What’s Going On in Your App with New DOM Events
37
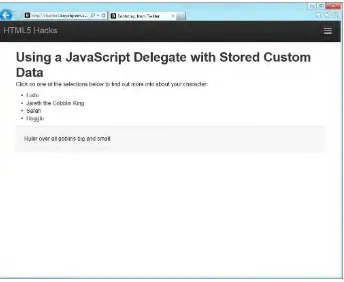
Hack 08. Add Rich Context to Your Markup with Custom Data
40
Hack 09. Track User Events with Custom Data
44
Hack 10. Make Your Page Consumable by Robots and Humans Alike with Microdata
47
2. Hacking with Style
. . . 53
Hack 11. Use Experimental CSS Features with Browser Prefixes
54
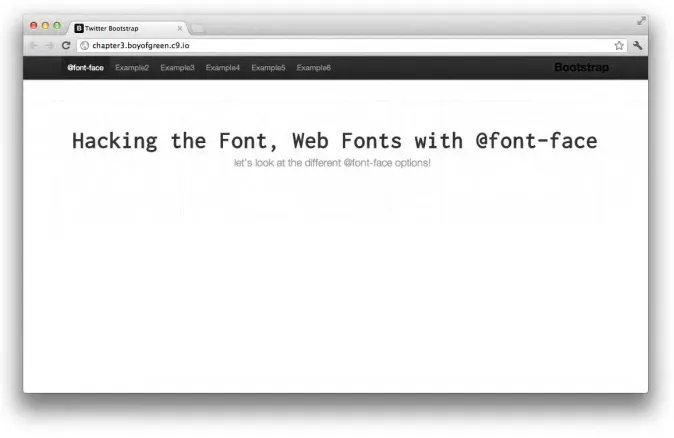
Hack 12. Design with Custom Fonts Using Web Fonts
56
Hack 13. Use Google Web Fonts for Simple @font-face Implementation
61
Hack 14. Use CSS3 Text Effects to Make Your Text Not Suck
70
Hack 15. Make Elements Appear Transparent Without Altering the Opacity
73
Hack 16. Use Media Queries to Build Responsive Design
77
Hack 17. Make Your Web App Respond to Device Orientation Changes
81
Hack 18. Take Full Control of Your DOM with Pseudoclasses
85
Hack 19. Hack Up Your Sprite and Put Your Images Inline with Image Data URIs
87
Hack 20. Build Gradients the Easy Way
92
Hack 21. Make Borders Interesting Again, with Border Treatments
98
Hack 22. Set Multiple Background Images to the Same Element
103
Hack 24. Turn Transforms into Animations with CSS3 Transitions
110
Hack 25. Make iOS-Style Card Flips with CSS Transforms and Transitions
113
Hack 26. Use Respond.js to Polyfill CSS3 Media Queries in IE
117
Hack 31. Replace the Background of Your HTML5 Video with the <canvas> Tag
135
Hack 40. Use the HTML5 <canvas> Tag to Create High-Res, Retina-Display-Ready Media
177
Hack 49. Make Any Element on Your Page User-Customizable with Editable Content
226
Hack 50. Turn Your Web Page into a WYSIWYG Editor
229
Hack 51. Take Control of the Browser History Buttons with HTML5 Session History
232
6. Client-Side Data Storage Hacks
. . . 239
Hack 52. Embed Binary Data in an Inline URL
239
Hack 53. Convert a Data URI to a Blob and Append It to Form Data with XHR2
244
Hack 54. Use the WebStorage API to Persist User Data
246
Hack 56. Cache Media Resources Locally with the FileSystem API
255
Hack 57. Build a Milestone Calendar with IndexedDB and FullCalendar.js
264
7. Geolocation Hacks
. . . 273
Hack 58. Use the Geolocation APIs to Display Longitude and Latitude in a Mobile Web Application
274
Hack 59. Use Google’s Geocoding API to Reverse-Geocode a User’s Location
280
Hack 60. Update a User’s Current Location in a Google Map
286
Hack 61. Use the Geoloqi Service to Build a Geofence
291
Hack 62. Use the Geoloqi Real-Time Streaming Service to Broadcast a Remote User’s Movement
298
Hack 63. Polyfill Geolocation APIs with Webshims
302
8. WebWorker API
. . . 307
How Browsers Handle JavaScript
307
Hack 64. Use the BlobBuilder Interface to Create an Inline Worker
309
Hack 65. Perform Heavy Array Computations in a Dedicated Web Worker
315
Hack 66. Use a Timer to Send Application State to Workers
325
Hack 67. Process Image Data with Pixel Manipulation in a Dedicated Worker
338
Hack 68. Use Import Scripts to Make Twitter JSONP Requests
343
Hack 69. Connect to Shared Workers Simultaneously from Multiple Browser Windows
347
9. Hacking HTML5 Connectivity
. . . 351
Hack 70. Use Kaazing’s Remote WebSocket Server to Echo Simple Messages from a Browser
352
Hack 71. Build a Blazing-Fast WebSocket Server with Node.js and the ws Module
360
Hack 72. Build a Donation Thermometer with Web Sockets, the Pusher API, and PHP
367
Hack 73. Build Plug-Ins for jWebSocket
383
Hack 74. Push Notifications to the Browser with Server-Sent Events
394
Hack 75. Configure Amazon S3 for Cross-Origin Resource Sharing to Host a Web Font
404
Hack 76. Control an HTML5 Slide Deck with Robodeck
414
Hack 81. Use Node.js’s Response Object to Respond to the Client with
Device-Specific Data
450
Hack 82. Use the Node Package Manager to Add a Web Application Framework As a Third-Party Module
452
Hack 83. Use the Express Application Generator to Bootstrap Your App
453
Hack 84. Build a Custom Module to Handle Routing
455
Hack 85. Configure Express to Use a View Engine
457
Hack 86. Use Jade Layouts to DRY Up Your Application’s Views
458
Hack 87. Use a Jade Partial to Create a Common Navigation Bar in Your Views
461
Hack 88. Use Jade Mixins to Populate Your Views with Data
463
Hack 89. Set Up Expressive, Dynamic, Robust CSS with Stylus
466
Hack 90. Include HTML5 Boilerplate As Your Default Starter Template
469
Become an HTML5 Hacker
475
Preface
HTML5 is the new catchall term for “the Web.” Like Ajax and Web 2.0 before, the term can cause confusion when used in different contexts. HTML5 is technically the fifth revision of the HTML markup language, but you will find the term being used to de-scribe an umbrella of next-generation web technology specifications that include CSS3, SVG, and JavaScript APIs.
In order to understand HTML5 in this context, first it is important to understand that HTML5 is not one technology that is applied or added to a web application. There are more than 30 specifications within the HTML5 umbrella, and each is at a different stage of maturity. Furthermore, each specification is also at a different state of adop-tion and, potentially, implementaadop-tion, by the major browser manufacturers.
Depending on an application’s business requirements, the app’s developer will pick and choose the HTML5 features to take advantage of. It is entirely possible that only a handful of the available specifications will be used for the final implementation of a modern web application.
Critics often proclaim it is necessary to wait until HTML5 is 100% supported before you use it in your application. This is simply not true. Many specifications have already reached maturity and are fully implemented by modern browsers. Other specifica-tions are at an early stage of development, or are poorly supported by some of the major browser manufacturers. It’s important to know which specification type you are using. Research is helpful, but the only true way to tell is to thoroughly test your apps in all browsers.
For the specifications that are newer or that aren’t as strongly supported, some clever developers have produced free and open source code that can be utilized to shim, or
expect the browser to provide natively. Flattening the API landscape, if you will.” In our opinion, the best polyfill is one that lets you write your code just as you would if the feature were natively supported, and that does the work in the background when nec-essary, being transparent to both the user and the developer. In most circumstances, each HTML5 specification has a polyfill, or multiple competing polyfills, and is ready to be used today. You will find references to some of the Web’s most effective polyfills within this book.
Why HTML5?
A beginning developer might ask, “Why should I care about HTML5?” Unfortunately, there is not a simple answer to this question. Even the most advanced web developers will answer this question differently depending on the features they are most familiar with.
But overall, there are some common trends that span the feature set and on which most developers would agree. Before HTML5, the Web was not considered to be a rival to native desktop and mobile applications. Nearly since its inception, the Web has been considered to be an easily deployable, cross-platform solution. However, it has been hampered due to its lack of highly important business requirements: namely, performance, security, and graphics. The theory has been that if the modern web browser could mature as an application platform, developers would be able to stop creating platform-specific native applications.
The Ajax revolution took the web application world in the right direction by providing asynchronous, background updates to the server via the
XMLHttpRequest
object, JSON transfer format, and an explosion of JavaScript libraries that stretched the boundaries of application development in the browser, many of which continue to make up the basis for polyfill support. However, HTML5 is about the modern browser providing the necessary support to enable sophisticated application development natively. In order to accomplish this, features such as the ability to maintain browser history and bookmarking during asynchronous interactions, cross-domain commu-nication, local storage, offline support, rich graphics, and even new protocols to im-prove the speed and efficiency of the connectivity layer still needed to be created and improved.HTML5 Implementations
As an eager developer ready to move forward with implementing some of the new features available in this text, it will be important to understand that many of the HTML5 specifications are in experimental stages of development. One major chal-lenge in writing a book about evolving specifications is keeping the information fresh and up to date.
The following topics are important considerations when learning experimental web browser specifications.
Browser-specific prefixes
In order for browser makers to be able to implement experimental features (usually implementing specifications before they were completed), browser makers “prefix” that feature with a shorthand that limits its use to each particular browser. A great example of this is the implementation of
requestAnimationFrame
, which is a Java-Script method in the page that aids in animation within the browser. Each browser originally implemented this feature with browser prefixes as follows:•
requestAnimationFrame
•
webkitRequestAnimationFrame
•
mozRequestAnimationFrame
•
oRequestAnimationFrame
•
msRequestAnimationFrame
Browser prefixes are most common in CSS. We urge you to read the introduction to Chapter 2 to get a full explanation of how browser prefixes are implemented in CSS.
Validation with HTML5 Conformance Checker
An HTML validator is a piece of software that parses your web pages against a set of web standards as defined by a particular Document Type Definition (DTD). If you are unfamiliar with a DTD, think of it as metadata that precedes your HTML markup in order to instruct the browser as to what “flavor” of HTML you will be using.
The HTML validator returns a list of errors found, according to the chosen standard. For our purposes, we will assume that we are using the HTML5 Document Type Definition.
1http://en.wikipedia.org/wiki/Hacker
HTML5 Lint
This means that developers should also be ready to use a lint tool in order to expose stylistic issues within their code. Some of the more common issues to check for are consistent indentation, lowercase tags, and omission of closing tags.
At the time of this writing, we recommend the HTML5 Lint tool.
References for HTML5 implementation statuses and feature support
We will continue to provide updates as often as possible to the examples provided within this text on our blog.There are also many great resources around the web to reference HTML5 implemen-tation statuses and feature support of specific browsers.
For all modern browsers:
http://caniuse.com/ http://html5test.com/
For Chrome:
http://www.chromium.org/developers/web-platform-status
For Internet Explorer:
http://msdn.microsoft.com/en-US/ie/ff468705.aspx
For Mozilla Firefox:
https://wiki.mozilla.org/Features
For Apple Safari:
https://developer.apple.com/technologies/safari/html5.html
Why HTML5 Hacks?
1. Hacker (computer security), someone who accesses a computer sys-tem by circumventing its security syssys-tem
2. Hacker (hobbyist), who makes innovative customizations or combina-tions of retail electronic and computer equipment
3. Hacker (programmer subculture), who shares an anti-authoritarian ap-proach to software development now associated with the free software movement
It is in the context of definition 2 that we are using the term hack. Among these types of hacks, the term refers to a self-contained proof of concept, similar to agile spikes, or recipes. These quick solutions exercise or validate an API, feature, or technology, and can also serve a very important role, not only in educating the software team, but also in driving the direction of development within a project’s life cycle.
Who This Book Is For
HTML5 Hacks introduces readers to the umbrella of HTML5 specifications through 90 hacks. For beginners it can serve as a starting point for building browser-based applications. For intermediate to advanced developers it can serve to quickly fill in the gaps for specifications they have yet to be exposed to.
Nevertheless, this book will be what you make of it.
Contents of This Book
This book consists of 10 chapters, organized as follows:
Chapter 1, Hacking the Semantic Way
Introduces new key HTML5 markup elements and attributes
Chapter 2, Hacking with Style
Covers visual expression and behaviors with CSS3
Chapter 3, Multimedia Hacking
Discusses HTML5 audio and video tags
Chapter 4, Hacking Your Graphics with Canvas and SVG
Covers working with Canvas and SVGChapter 5, User Interactions
Chapter 6, Client-Side Data Storage Hacks
Discusses storage and HTML5 application cacheChapter 7, Geolocation Hacks
Teaches how to work with geolocations
Chapter 8, WebWorker API
Covers taking advantage of the WebWorker API
Chapter 9, Hacking HTML5 Connectivity
Discusses web sockets, cross-document messaging, server-side events, and more
Chapter 10, Pro HTML5 Application Hacks with Node.js
Teaches how to build professional HTML5 applications with Node.js
Conventions Used in This Book
The following typographical conventions are used in this book:
Italic
Indicates new terms, URLs, email addresses, filenames, file extensions, path-names, directories, and Unix utilities
Constant width
Indicates commands, options, switches, variables, attributes, keys, functions, types, classes, namespaces, methods, modules, properties, parameters, values, objects, events, event handlers, XML tags, HTML tags, macros, the contents of files, or the output from commands
Constant width bold
Shows commands or other text that should be typed literally by the user
Constant width italic
Shows text that should be replaced with user-supplied values
This formatting signifies a tip, suggestion, general note, warning, or caution.
Using Code Examples
writing a program that uses several chunks of code from this book does not require permission. Selling or distributing a CD-ROM of examples from O’Reilly books does require permission. Answering a question by citing this book and quoting example code does not require permission. Incorporating a significant amount of example code from this book into your product’s documentation does require permission.
We appreciate, but do not require, attribution. An attribution usually includes the title, author, publisher, and ISBN. For example: “HTML5 Hacks by Jesse Cravens and Jeff Burtoft (O’Reilly). Copyright 2013 Jesse Cravens and Jeff Burtoft, 978-1-449-33499-4.”
All of the code examples are located at https://github.com/html5hacks.
You can also keep up with the authors and any updates at http://html5hacks.com.
We’d Like to Hear from You
Please address comments and questions concerning this book to the publisher:
O’Reilly Media, Inc.
1005 Gravenstein Highway North Sebastopol, CA 95472
(800) 998-9938 (in the United States or Canada) (707) 829-0515 (international or local)
(707) 829-0104 (fax)
We have a web page for this book, where we list errata, examples, and any additional information. You can access this page at:
oreil.ly/HTML5_Hacks
To comment or ask technical questions about this book, send email to:
For more information about our books, courses, conferences, and news, see our web-site at http://www.oreilly.com.
Find us on Facebook: http://facebook.com/oreilly
Follow us on Twitter: http://twitter.com/oreillymedia
Safari® Books Online
Safari Books Online is an on-demand digital library that delivers expert content in both book and video form from the world’s lead-ing authors in technology and business.
Technology professionals, software developers, web designers, and business and cre-ative professionals use Safari Books Online as their primary resource for research, problem solving, learning, and certification training.
Safari Books Online offers a range of product mixes and pricing programs for organ-izations, government agencies, and individuals. Subscribers have access to thou-sands of books, training videos, and prepublication manuscripts in one fully search-able database from publishers like O’Reilly Media, Prentice Hall Professional, Addison-Wesley Professional, Microsoft Press, Sams, Que, Peachpit Press, Focal Press, Cisco Press, John Wiley & Sons, Syngress, Morgan Kaufmann, IBM Redbooks, Packt, Adobe Press, FT Press, Apress, Manning, New Riders, McGraw-Hill, Jones & Bartlett, Course Technology, and dozens more. For more information about Safari Books Online, please visit us online.
Acknowledgments
We would like to extend a special thank you to both of our families. This book required a lot of evening and weekend hours to complete, and our wives and children are the ones who sacrificed the most.
Jeff would like to thank his wife Carla who encouraged him to step out and write a book, and for allowing their lives to be turned upside down while he worked to com-plete it. He would also like to thank his children, Chloe, Maddy, and Jude, for being his inspiration for creativity, and for being proud of him in everything he does. Jeff would also like to thank Jesse, his partner and coauthor, for dreaming up ideas like this book, and making them a reality.
Guest Hackers
John Dyer is the executive director of Communications and Educational Technology at Dallas Theological Seminary. He has been a web developer and technology writer for more than 10 years, and he loves creating tools that make complex tasks easier for other developers. He lives in the Dallas area with his two amazing kids and his lovely wife, Amber.
Alex Sirota cofounded and was the CTO and Head of Product at FoxyTunes, an Internet startup acquired by Yahoo!, where he spent more than four years building media and entertainment web products. Previously, he cofounded Elbrus Ltd., a com-pany that provided software solutions to Philips Medical Systems, IBM, and others. Prior to Elbrus, he was the head of a computer facility in the Israel Defense Forces, and he coauthored a book (published by Wiley) on Mozilla and web technologies. He holds a bachelor’s degree in computer science from Technion–Israel Institute of Tech-nology.
Raymond Camden is a senior developer evangelist for Adobe. His work focuses on web standards, mobile development, and ColdFusion. He’s a published author and presents at conferences and user groups on a variety of topics. He can be reached through his blog, via Twitter (@cfjedimaster), or via email (raymondcam [email protected]).
Phil Leggetter is a Real-Time Web Software and Technology Evangelist. He has been developing and using real-time web technologies for more than 10 years, and his focus is to help people use these technologies to build the next generation of interactive and engaging real-time web applications.
HACK 01
1
Hacking the Semantic Way
The spirit of HTML5 is simplicity. HTML5 has made it easy to implement web stand-ards that in the past have been difficult to implement. Instead of trying to reinvent the Web, visionary consortiums such as the WHATWG (Web Hypertext Application Tech-nology Working Group) and the W3C (World Wide Web Consortium) looked at the web standards that had evolved and built upon them.
In essence, HTML5 is primarily an update to the HyperText Markup Language (HTML). In this chapter we will start with the basic building blocks of HTML, the semantic elements, to provide a foundation for the simple yet powerful new web browser tech-nologies exposed within this book.
So, open up your favorite code editor, brew a pot of coffee, and get ready to code in the most powerful language the Web has ever seen: HTML5!
Simplify Your Doc with the Right
<doctype>
If there’s an emblem representing the simplicity HTML5 brings to the markup world, it’s the
<DOCTYPE>
tag. The HTML5<doctype>
tag is easy to use.When you open an XHTML document the first thing you see, the first line of the docu-ment, is a mess:
<!DOCTYPE html PUBLIC "-//W3C//DTD XHTML 1.0 Transitional//EN" "http:// www.w3.org/TR/xhtml1/DTD/xhtml1-transitional.dtd">
HACK 02
HTML5 says farewell to all that, and keeps it simple:
<!doctype html>
The browser uses the
<doctype>
to know how to render the web page. Most browsers didn’t download the DTD from the URL, but they did change their behavior based on the<DOCTYPE>
. If a browser encountered the preceding code, it would switch to standards mode (as opposed to quirks mode) and apply XHTML transitional formatting.Given all that, how can HTML5 get away with a basic
<doctype>
such ashtml
? The simple answer is that the new<doctype>
is a “simple answer.” The new<doctype>
was made to trigger a simplified approach to document rendering, not to meet old expectations. Browser makers reached a consensus on how browser-specific func-tionality should be handled, so there is no need for “quirks mode” page rendering. If all browsers render in a standard manner, the DTD is unnecessary; thus a simple dec-laration of
html
states that the browser should set aside any DTD and simply render the page.HTML5 is a simplified version of HTML. The tags are less complex, the features are less complex, and most importantly, the rules are less complex.
However, in most applications you write, you will not yet be servicing a user base that consistently supports HTML5. So how can you switch between
<doctype>
s when the<doctype>
is supposed to be the first line of the document? This doesn’t leave much room for JavaScript trickery or fancy hacks. Well, good news; there is a backward-compatible HTML5<doctype>
as well:<!DOCTYPE html>
“But wait,” you say. “Isn’t that the same simple
<doctype>
presented earlier?” Yes, it is! The only key difference is that “doctype” is now in all caps. The HTML5 specification states that the<doctype>
is case-insensitive; however, previous versions of HTML require an all-caps version of the<doctype>
. You will find that much of HTML5 is backward-compatible with earlier versions. The vast majority of browsers on the mar-ket today will see the new<doctype>
and recognize it as simply being “standards mode” for page rendering.Using the backward-compatible version of the
<doctype>
will allow you to start using HTML5 today, while continuing to support browsers of the past!Adopt Common Structures
Web designers and developers have long conformed to structural components on a page. A common high-level page structure may look something like the following:
<!DOCTYPE html PUBLIC "-//W3C//DTD XHTML 1.0 Transitional//EN" "http://www.w3.org/TR/xhtml1/DTD/xhtml1-transitional.dtd">
<html>
<head>
<meta http-equiv="content-type" content="text/html;charset=UTF-8" />
<title>...</title>
Take note of the “structural”
id
s in the page. This reflects well-organized content and a clean structure for the page. The problem with the preceding code is that almost every element in the markup is adiv
.Div
s are great, but they are of little use in page definition without associating them with anid
. The problem with usingid
s for role association is that when you want to use them for another purpose—say, to identify a doc tree—you run into problems: as soon as you add a tool such as YUI Grids or WordPress to a page that actually uses theid
of adiv
, it conflicts with yourdiv
“roles,” and the next thing you know you are adding layers ofdiv
s just to satisfy your structural needs. As a result, the clean page shown earlier may now look something like this:<!DOCTYPE html PUBLIC "-//W3C//DTD XHTML 1.0 Transitional//EN" "http://www.w3.org/TR/xhtml1/DTD/xhtml1-transitional.dtd">
<html>
<head>
<meta http-equiv="content-type" content="text/html;charset=UTF-8" />
<div id="wordpress-org-887478">...</div>
</div>
</div>
<div id="footer">...</div>
</body>
You can see pretty quickly where this gets messy, yet we don’t want to abandon the idea of structural elements that declare page segments—many code readers, such as screen readers and search bots, have come to rely on structural conventions. As with many parts of HTML5, the new structural tags have provided a simple solution to the problem of added complexity. Let’s build our page with structural elements:
<!DOCTYPE html>
Once again we have a simple, clean HTML5 solution that keeps our page easy to work with, and easy to consume by screen readers and search bots. This same code can meet the needs of our third-party products as well, as shown in the following solution:
<!DOCTYPE html>
<header data-yuigrid="doc2" data-wordpress="2833893">...</header>
<nav>...</nav>
<article data-yuigrid="doc2" data-wordpress="887478">...</article>
<footer>...</footer>
</body>
HACK 03
We’ll get into the
data-
attributes later in this chapter, but for now you just need to understand that this solution allows you to keep the structural elements of the page and let third-party components apply identifiers to the nodes, while freeing up theid
attributes for the page author to control. Take note, third-party developers: never as-sume that the
id
of an element is yours to consume!All That and More
HTML5 didn’t stop at the new tags discussed in the preceding section. Here’s a partial list of some of the new HTML5 markup tags to take note of:
<article> <aside> <figcaption> <figure> <footer> <header> <hgroup>
<mark> <nav> <section> <time> <keygen> <meter> <summary>
A lot of these tags grew out of common use by web developers. The W3C smartly decided to “pave the cow paths” instead of trying to change the behavior of web de-velopers. This way, the tags are generally useful for immediate adoption.
In most cases each tag’s intent is pretty obvious. The
<header>
and<footer>
tags do exactly what they say: they outline the header and footer of the page (or app). You use<nav>
to wrap your navigation. The<section>
and<article>
tags give you options to the overused<div>
tag; use these to break up your page according to the content (e.g., wrap your articles in the<article>
tag). The<aside>
tag acts in a similar way to the<article>
tag, but groups the content aside the main page content. The<figure>
tag refers to a self-contained piece of content, and so on and so on. Note that this list is not conclusive and is always changing. Visit the w3schools website for the most complete list I could find.Make Your New HTML5 Tags Render
Properly in Older Browsers
Don’t wait for full HTML5 adoption across the Web. Make HTML5 structural tags ren-der properly in all browsers.
So, now you have this whole new world of HTML5 elements that will let you be both expressive and semantic with your markup. You’ve been freed from the shackles of
div
s and can show your face at parties again!You’re feeling pretty good about yourself until you remember that some of your visitors are not using HTML5 browsers, and being the web standards elitist that you are, your page has to be backward-compatible. Don’t throw those HTML5 tags out the window just yet. This hack will teach you how to write your code once, and use it on all the browsers out there.
Any browser made in the past 10 years will see your HTML5 tags in one of 3 ways:
1. See the HTML5 tag and render it appropriately (congratulations, you support HTML5!).
2. See the HTML5 tag, not recognize it, and consider it an unstyled (which defaults to inline) DOM (Document Object Model) element.
3. See the HTML5 tag, not recognize it, and ignore it completely, building the DOM without it.
Option 1 is a no-brainer: you’re in an HTML5 browser. Option 2 is likewise pretty easy to address, as you simply have to set your default display parameters in your CSS. Keep in mind that with option 2, you have no functional DOM APIs for these new tags, so this is not true support for the tags. In other words, using this method to create a
meter
element does not create a functional meter. For our use case of semantic markup elements, however, this should not be an issue.So, focusing on option 3, you’re using IE 6, 7, or 8 and you’re loading a page that contains new HTML5 semantic tags. The code will look something like this:
<!DOCTYPE html>
The Fallback div
In the preceding code sample, the
nav
element is not recognized and is passed over at render time. Since the DOM does not recognize these elements, option 1 uses a fallback element that the browser does recognize, and wraps each unrecognized element in it. The following code should make this easier to understand:<!DOCTYPE html>
Voilà! We can now style the element with the
nav-div
class instead of the element with thenav
class, and our DOM will be complete in all common browsers. Our page will style correctly, and we will have our new HTML5 tags in place for screen readers and search engines that will benefit from the semantic tags.This method will work, but there are some downsides to this solution. For starters, having duplicate tags negates the benefit in many ways, as we are still using
div
s for every structural element of the page. The biggest problem with this solution, though, is how it corrupts the DOM tree. We no longer have a consistent parent–child rela-tionship from browser to browser. The browsers that do recognize the HTML5 element will have an extra “parent” to the contents of the element, so the trees will differ from one browser to the next. You may think you don’t need to care about this, but as soon as you start accessing the DOM with JavaScript (especially if you’re using a JavaScript library such as YUI or jQuery) you will run into cross-browser issues.The Real DOM Hack: The HTML5 Shim (or Shiv)
switched from
createElement
toinnerHTML
and realized he lost the ability to style unrecognized elements. Fast-forward to 2008, when John Resic realized he could ex-ploit the same bug to make HTML5 elements recognizable in IE; he named the capa-bility the “HTML5 shiv,” although it is technically a shim. Here are the details.Old versions of IE don’t recognize HTML5 elements naturally, but as soon as you use
document.createElement()
in the head of the document passing in an unrecog-nized element, IE will add the element to its tag library and it can be styled with CSS. Let’s go back to the markup:<!DOCTYPE html> <html>
<head>
<meta charset="UTF-8">
<title>My New Page with Nav</title>
<style>
.nav { color: red }
nav { display: block; background-color: blue }
</style> </head> <body> <div>
<nav class="nav">
<p>this is nav text</p>
</nav> </div> </body> </html>
Figure 1-1.
Styled nav element in a browser that doesn’t support the tag
Notice that the element didn’t pick up the color from the tag name or the CSS class assigned to the tag; it simply ignored it. Now let’s throw in our JavaScript and try it again:
<!DOCTYPE html> <html>
<head>
<meta charset="UTF-8">
<title>My New Page with Nav</title>
<style>
.nav { color: red }
nav { display: block; background-color: blue }
<script>
document.createElement('nav');
</script> </head> <body> <div>
<navclass="nav">
<p>this is nav text</p>
</nav> </div> </body> </html>
Now our markup will pick up the blue background from the tag styles and the red text from the class name; the result will look something like Figure 1-2.
Figure 1-2.
HACK 04
Bring Back the <input> Tag
HTML5 has breathed new life into the
<input>
tag. It’s time to get excited once again about this “age-old” tag.I have to admit that I was getting a little bored with the
<input>
tag. Before HTML5, any real interaction had to be done outside the tag: whether the interaction involved validation, formatting, or graphical presentation, JavaScript was a necessary polyfill. Well, HTML5 has given us a reason to be excited about the<input>
tag again.The
<input>
tag is not truly an HTML5 tag, per se. It’s the same<input>
tag we have had in every previous version of HTML, but HTML5 has added a slew of new features. The good thing about updating an existing tag is that it’s naturally backward-compatible. You may code your tag like this:<input type="date" />
and non-HTML5 browsers will simply see this:
<input />
In this hack we’ll look at a few new, common features of this wonder of a tag.
Some of the Basics
There are a few basic (but powerful) new features in the HTML5
<input>
tag that are accessible on almost any input type. We’ll start by looking at some of the simple at-tributes and then move on to some of the more complex ones.First on the list is the placeholder text, which is a string assigned to the
placehold
er
attribute that provides a hint for the input box. Placeholder text is quite useful and quickly becoming commonplace. The text appears when the input value is empty and disappears once the input receives focus. Then it reappears when it loses focus (pro-viding the input box is still empty).Another common attribute is
autofocus
, which, as you can guess by the name, brings focus to an element once the document is loaded. Simply setautofocus="au
tofocus"
(or just addautofocus
as an attribute) and this will be the default focus element once the page is loaded (as opposed to focusing on the first element of the page).<!DOCTYPE html>
<html> <body>
<form>
Add your telephone: <input type="tel" name="phone" required /><br />
<input type="submit" /> </form>
</body> </html>
If you try hitting the Submit button without putting a value in the field, your browser will throw up a default message along the lines of “Please fill out this field.” It’s not perfect, but it’s a start.
The
form
attribute is a feature that has been a long time coming. Have you ever wanted to have a form on your page, but without constraining the form elements to one section of your DOM? Maybe you are on a mobile device and you would like your Submit button to pop up from the bottom of the screen instead of residing in your form area. Theform
attribute lets you create aform
element for a form, even when it is not a child node of the form. Simply set theform
attribute to theid
of the form (it can’t be the form name or another attribute, something the W3C needs to address). With this attribute, the preceding example would look something like this:<!DOCTYPE html>
<html> <body>
<form id="myForm">
Add your telephone: <input type="tel" name="phone" required /><br />
</form>
<input type="submit" form="myForm" /> </body>
</html>
1 http://www.w3.org/TR/html5/common-input-element-attributes.html#the-autocomplete-attribute
The autocomplete Attribute
The Web definitely has a fascination with autocomplete. Since we all hate to type, we love it when the
form
element knows what we want to type and just does it for us. So HTML5 comes along and introduces autocomplete as a simple attribute. You setautocomplete
toon
oroff
(it’son
by default) and your work is done! The code wouldAdd your telephone: <input type="tel" name="phone" autocomplete="on" /><br />
</form>
<input type="submit" form="myForm" /> </body>
</html>
Now, what sucks about
autocomplete
is where it gets its data. To explain this I’ll cite the boring old spec from the W3C:The user agent may store the value entered by the user so that if the user returns to the page, the UA can prefill the form.1
So, the
autocomplete
value comes from the user agent. But who is the user agent? It’s not the page developer, or JavaScript, or HTML: it’s the browser. If I fill out a few forms and always enter the string [email protected] into the input field designated for an email address, the browser remembers that and prefills it for me. So it’s great for form elements such as email address and telephone number, but it’s not incredibly useful for a developer. The key thing to take away from this discussion is that you can turn off the autocomplete feature when you need to.The list Attribute
Think of the
list
attribute as being a version ofautocomplete
for developers. Thelist
attribute is tied to anid
of adatalist
(yes, once again this is not a name or any other type of identifier, it has to be anid
). It will look something like this:<!DOCTYPE html>
<html> <body>
<form action="demo_form.asp" autocomplete="on">
First name:<input type="text" name="fname" /><br />
Last name: <input type="text" name="lname" /><br />
E-mail: <input type="email" name="email" /><br />
Favorite Animal: <input type="text" name="animal" list="animals" /><br />
<datalist id="animals">
<option value="Dog">
<option value="Dolphin">
<option value="Duck">
<option value="Cat">
<option value="Bird">
<option value="mouse">
</datalist>
<input type="submit" />
</form>
</body> </html>
Figure 1-3.
Datalist displaying predefined options
One of the bad things about both
list
andautocomplete
is that you can’t style them. I’ll rant about that some more as we get into a few of the more functional input types, such asdate
, but I would expect to be able to style the results with CSS, just as I do any form element.The pattern Attribute
How many times have you run a regex (or regular expression) against the value of
input
to see if it meets certain criteria? If you’re like me, you’ve done this more times than you can count. This was the inspiration for thepattern
attribute in HTML5. According to the W3C spec, the pattern should “control” the input value. As you would expect, you utilize this value with thepattern
attribute set to a JavaScript format regular expression. Let’s take a look:<!DOCTYPE html>
HACK 05
<form action="demo_form.asp" autocomplete="on">
First name:<input type="text" name="fname" /><br />
Last name: <input type="text" name="lname" /><br />
E-mail: <input type="email" name="email" /><br />
ID Number:
<input placeholder="enter your 5 digit id number" type="text" name="idNumber" pattern="[0-9]{5}" />
<br />
<input type="submit" />
</form>
</body> </html>
If you don’t meet the pattern criteria the form cannot be submitted, and instead you get a user agent message that says something like “Please match the requested for-mat.” One of the big problems with this implementation is its lack of adherence to modern web patterns.
Back in the day (2005 or so) we used to wait until a form was submitted to validate each input field, and if one or more of the fields didn’t pass we would return an error message to the user. The W3C’s implementation is so HTML 4.01. In HTML5 I would have expected the validation to be on a specified keystroke or on a blur of the field.
Luckily HTML5 has a backup plan for some of these validation shortcomings. The next hack discusses form validation to see how to make it all work for you!
Easily Implement Form Validation Without
JavaScript
HTML5 includes powerful form validation that works seamlessly with the slew of new input types.
you would run some JavaScript before the form was submitted to make sure all your conditions were met. For the record, the best kind of validation is when you do both. You should start with validation on the client to give the user an immediate response, and then revalidate on the server to make sure your response wasn’t being hacked.
HTML5 isn’t going to help you with server-side validation, but it sure will make it easier on the client. HTML5 once again takes a tried-and-true web standard and reinvents it as native browser functionality. Let’s dive in!
What Does It Mean to Validate?
In HTML5 every input has the ability to have validation engaged, and a form cannot be submitted if it doesn’t validate. In order for the form to validate, every input needs to have its validation criteria met. It’s pretty simple: every input has a method you can call to see if it will meet a validation test. Let’s look at a form containing an
input
of typenumber
:<input type="number" name="quantity" min="1" max="5" value="11" />
<input type="submit" /> </form>
</body> </html>
Now let’s check it with JavaScript:
<script>
if(document.myForm.quantity.checkValidity() === false){
alert('fail'); }
</script>
When the value of
quantity
is greater than5
the alert will be fired. Now let’s try something a little different. Instead of checking the input itself, let’s just check the form. Here is the new JavaScript:<script>
if(document.myForm.checkValidity() === false){
alert('fail'); }
</script>
Notice that the validity state rolled up to the form. If any one of the inputs within the form doesn’t meet the criteria for validation, the form rule will return
false
as well. This is a key feature when you have long forms. For instance, if I have a form with 25 input fields that need to be validated, I don’t want to have to go through the form with JavaScript and check each input field—this would require 25 different DOM hits. In-stead, I’d rather check the form and have it determine whether all the necessary input criteria are met on each of the 25 inputs.Validation Criteria
So, we know how we can check to see if a form is valid or not, but how do we set the criteria we want to validate against? Well, there are really three ways to do this in HTML5.
The required attribute
First, we can simply add the
required
attribute to aninput
, and theinput
will return atrue
state for itsvalidity
value only if the element has a value and the value matches the required input criteria. In the following example, theinput
has to be a number between one and five:<input type="number" name="quantity" min="1" max="5" />
The pattern attribute
The new
pattern
attribute is pretty slick, especially for people who like to write regular expressions. In this case you set a regular expression to thepattern
attribute, and your input will validate against that pattern in order to have thevalidity
value returntrue
:<input type="text" name="quantity" pattern="[0-5]{1}" />
Measurable attributes
Some
input
types have comparative criteria such asinput
types have attributes such asmin
andmax
that must be satisfied before the input can be considered valid. Let’s look at our first input example again:<form name="myForm">
Quantity (between 1 and 5): <input type="number" name="quantity" min="1" max="5" />
<input type="submit" /> </form>
In this case the number that is input must meet the
min
andmax
criteria in order to be considered valid. For example, the number 11 would not validate but the number 4 would validate. In a similar manner we have the<form name="myForm">
Enter Your Email: <input type="email" name="myEmail" />
<input type="submit" /> </form>
The
var emailTest = /^[a-zA-Z0-9._-]+@[a-zA-Z0-9.-]+\.[a-zA-Z]{2,4}$/;
If the value of the input doesn’t have a username, an at sign (@), and a domain, it’s considered invalid.
Let’s Call This Validation Thing Off
Sometimes you may want to skip validation. A few HTML5 validations allow you to do this. The first is the
formnovalidate
attribute. As you can guess, if you apply this attribute to a button or an input whosetype
issubmit
, the validation does not stop the form from submitting. This attribute can be placed as follows:<form name="myForm">
Quantity (between 1 and 5): <input type="number" name="quantity" min="1" max="5" />
Enter Your Email: <input type="email" name="myEmail" />
<input type="submit" />
<button type="submit" formnovalidate>save</button
Note that the form is still invalid. If you call the
checkValidity()
method on this form, it will still returnfalse
. In the case of theformnovalidate
attribute, you simply ignore whether the form is valid or not when you submit.The second way to escape validation is with the
novalidate
attribute. In a similar manner, thenovalidate
attribute is added to theform
element itself, and every but-ton and input whosetype
issubmit
will skip the validation stem and submit the form directly:<form name="myForm" novalidate>
Quantity (between 1 and 5): <input type="number" name="quantity" min="1" max="5" />
Enter Your Email: <input type="email" name="myEmail" />
<input type="submit" />
<button type="submit" >save</button> </form>
The Constraint Validation API
The HTML5 spec makes allowances for us to be more specific with our validation errors. In the previous example form, the user must enter a number between one and five to not receive an error. If we wanted to update the error message to be a little more suitable, we would add a custom message with the
setCustomValidity()
method:<form name="myForm">
Quantity (between 1 and 5):
<input type="number" name="quantity" min="1" max="5" oninput= "updateMessage(this)"/>
Enter Your Email: <input type="email" name="myEmail" formnovalidate />
<input type="submit" /> </form>
<script>
myForm.quantity. setCustomValidity('looks like your numbers ... between one and five')
function updateMessage(input){
}
</script>
Our form will now give us an option for a friendlier, more helpful user error. Notice that we had another method in the
<script>
tag and set it to theoninput
of theinput
. When you usesetCustomValidity()
you automatically trigger the other portion of your Constraint Validation API to returnfalse
when you call thecheckValidity()
method. In order to use a custom method and still have the form be considered valid when the criteria are met, you need to throw in some JavaScript to clear out the
setCustomValidity()
method once the validation criteria are met (in this case, once the form is not blank). I still think the W3C has some room to make this even easier for web developers in upcoming versions of the spec. This is functionality you should be able to access without JavaScript.Developers aren’t the only ones using the Constraint Validation API. The user agent uses the same API when it sets up the pseudoclasses for its CSS. With CSS3 we can change visual cues based on the “state” of a validation field. We have access to two pseudoclasses (more on this later) to use for visualizing cues:
:required
, for ele-ments that are marked as required; and:invalid
, for elements that are marked as invalid. Unlike the form-level validation that occurs when the page submits, the pseu-doclasses are based on the current state. This will give users strong visual cues. Let’s look at an example with a contact form where the name is required, and the phone number and email address are not required:}
</style>
//our form
<form name="myForm" >
Enter Your Name: <input type="text" name="myName" required > Enter Your Phone Number:
<input type="tel" name="myPhone" pattern="\d\d\d-\d\d\d-\d\d\d\d" /> Enter Your Email: <input type="email" name="myEmail" />
<input type="submit" />
</form>
Figure 1-4 shows our rendered view.
Figure 1-4.
Form with validation for required field
We had to do this in two different ways due to browser support. The easy way was the method we used for the email address. The
input
knows what a valid input address looks like (i.e., the pattern of the address, not whether it works). So once a valid string is set to the proper value, the field will no longer appear with a red border.The method we used for the telephone number was a little more difficult. Most modern browsers “partially” support the
tel
input type for HTML5. One thing that isn’t sup-ported is whether what is entered is indeed a valid telephone number. I could easily type my name into that field and it would validate. Here, we needed to go back to thepattern
attribute and use a regex to determine whether it was a phone number. This particular regex isn’t very useful, as it only checks to see if there is a digit string that matches this pattern: xxx-xxx-xxxx. It doesn’t satisfy the use of brackets around an area code, nor does it support any numbers in a format other than that used in the United States. We’d need a more robust regular expression for that.It would appear that our form is complete and ready to throw onto our website, but there are a few final details to point out. We assigned a
required
state to thename
, as we desired, but note that a partially filledinput
will stop the form from submitting as well (the form field is invalid but not required, but this form must validate before it can be submitted). Addingnovalidate
to the form allows not only the invalid inputs to submit, but also the required ones as well. There is no clear solution for avoiding this, so let’s move forward and address the issue with the user if it becomes a problem.Before we try this form again, let’s go back and update the Enter Your Name field to display a more user-friendly error message:
HACK 06
Enter Your Name:
<input type="text" name="myName" placeholder="Enter Your Name" oninput="updateMessage(this)" required>
Enter Your Phone Number:
<input type="tel" name="myPhone" pattern="\d\d\d-\d\d\d-\d\d\d\d" /> Enter Your Email: <input type="email" name="myEmail" />
<input type="submit" />
</form>
<script>
document.myForm.myName.setCustomValidity("To join our list..., please enter it here")
function updateMessage(input){
if(input.value ==""){}
input.setCustomValidity('');
}
</script>
There we have it. In the past, such validation would have required a good amount of custom JavaScript. Now it can be done with the simplicity of HTML5!
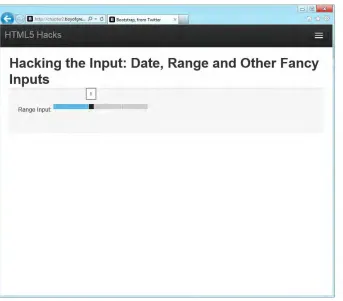
Improve the Usability of Your Forms with
New Controls
Your forms just got easier to use. HTML5 browsers include new controls such as the
date
input type, the<range>
tag, and others.We’ve been talking about form elements for the past few hacks now, and they all have a common thread when it comes to reasoning. Many of these simple, easy-to-implement specifications actually replace standards that web developers have been coding to for years. This has made life easier for developers, made pages perform more quickly (browser code instead of JavaScript), and brought uniformity across web applications.
Figure 1-5.
The YUI date picker, which provides a clean interface for date selection
This is a huge improvement over having the user enter the date into an input field and hoping that it meets the required format. With the YUI date picker, we can stylize the component with CSS and make it look like it blends right in with our app. This has served our purposes for years. Whether we are using the Internet Explorer browser or the Firefox browser, our date picker will look the same and the user will always know what to expect.
markup, and more CSS equals page bloat and additional memory usage. Let’s use that extra code and memory for something spectacular and leave the basic input functionality to the browser. Each of the following form features takes something that used to be hard to do in JavaScript and makes it easy, light, and context-aware.
The date Input Type
The
date
input type is one of my favorites. As in the previous date picker example, a lot of work has gone into creating a successful date selection tool. I can’t tell you how many times I’ve been frustrated with parts of the Web that use date selection tools that are slow and buggy (yes, I mean you, airline and car rental sites).The HTML5
date
input type is fairly simple to implement. Out of the box it looks something like this:<form name="dateSelection">
Enter Departing Date: <input type="date" name="departingDate" /> </form>
The preceding code results in the simple pull-down box shown in Figure 1-6.
Figure 1-6.
In terms of context, here’s the great thing about the preceding example. As it stands, the date selector will be pretty tough to use on my iPhone; not only is it hard to see, but also my fingers are pretty fat and those tap zones are pretty small. So in iOS 5 and later, Apple has kindly implemented the date input field shown in Figure 1-7.
Figure 1-7.
The date input field in the iOS 5 Safari browser on an iPhone
Nice job, Apple! Now let’s look at some of the other attributes we can add to give this application a functionality similar to those great little polyfill date pickers. Here’s the code:
<form name="dateSelection">
Enter Departing Date: <input type="date" min="2012-03-12" step="1" max="2012-05-12" name="departingDate" />
<input type="submit" /> </form>
step
Increment at which a date can be selected. The spec doesn’t clarify all the incre-ment types that a user agent must adhere to, but day, week, month, and year are obvious implementations.
min
A date value that represents the minimum date the input will consider valid. It’s not clear whether the controller will allow you to choose dates below the
min
date, or whether it limits selection to the valid date range. Implementations differ among browser makers at this point.max
A date value that represents the maximum date the input will consider valid.
As is the case with all changes that are powerful, a new set of DOM methods has been added as well:
stepUp()
/
stepDown()
Can be called to increment the date that is input to either the next date or the preceding date in the series.
stepUp()
calls the next day;stepDown()
calls the preceding day.valueAsDate()
Returns a JavaScript date object, not just a date string.
This might not sound exciting, but you can replace this polyfill:
<form name="myForm">
Birthday: <input type="text" name="bday" value="03/12/2012" />
<input type="submit" /> </form>
<script>
var myInput = document.myForm.bday.value; var myDate = new Date(myInput);
</script>
with this:
<form name="myForm">
Birthday: <input type="date" name="bday" value="2012-03-12" />
<input type="submit" /> </form>
<script>
var myInput = document.myForm.bday.valueAsDate();
It’s also interesting to note that there are a few variations on the input type of
date
, and each provides noteworthy interface challenges, especially on mobile and touch devices. Here are some similar types to keep your eye on:•
datetime
•
month
•
week
•
time
•
datetime-local
The range Input Type
Once again, let’s look at one of our great polyfill libraries to get an idea of what the problem is. Figure 1-8 shows a screen capture of the YUI slider utility.
Figure 1-8.
When you’re selecting ranges, nothing is worse than typing in values, especially when you’re “exploring” what will happen when those ranges change. The slider has become a standard tool on both web and desktop devices. You generally have a bar represent-ing somethrepresent-ing like numeric values or colors, and a handle that you drag from one end of the bar to the other. Again, let’s consider how difficult it may be to make selections on the YUI slider if you’re on a mobile device. The handle is small, and what feels like a short amount of movement on a mobile device could be a sizable amount to the slider.
The HTML5 type of
range
allows browser makers to provide a range selection tool with an experience that best fits the context of the device. The pattern for desktop browsers appears to be a slider. Let’s jump into the implementation:<form name="myForm">
Shoe size: <input type="range" name="shoeSize" min="0" max="15" step=".5" value="3" />
<input type="submit" /> </form>
All that, with no JavaScript—this polyfill would be hundreds of kilobytes’ worth of code. Now let’s look at some of the attributes we added to the input:
min
/
max
Once again we see the ability to set a
min
and amax
for the range. These are a bit more profound in therange
input type because they define the first step (the bottom of the slider) and the top (the top of the slider). If nomin
andmax
are set, the user agent (again, the browser) will assume the range is 0 to 100.step
In the preceding example we are selecting shoe sizes that come in half or whole sizes. Therefore, we set the
step
to.5
so that whole or half sizes can be chosen. This can come in handy in very large ranges as well. Say you are applying for a loan and you’re using a range tool to choose your loan amount. For an improved user experience, you may want to round up to the nearest $10,000. Setting thestep
to10,000
will allow you to do just that.value
value
to be3
since the most popular shoe size in our little store is size 3. (Yes, we do cater to elves, leprechauns, and small children.) Thevalue
allows you to choose the “default” value that makes the most sense, not just what’s in the middle.The HTML5 version of the sliders also has the added benefit of being able to match the other browser controls, as shown in Figure 1-9.
Figure 1-9.
HTML5 range input type from Internet Explorer 10 that matches other form elements on the page
The color Input Type
You may not have thought of a color picker as being essential to a user’s web experi-ence, but as the Web becomes more of an application environment, complex activities such as picking colors need to be responsive and adaptive. The
color
input type allows you to select a color value from within the input.Support for this input type is still nascent, and at the time of this writing no user agent supports it. As with all of the other unsupported input types, browsers that do not (or do not yet) support the
color
input type will simply see an input tag as it would appear for an input with thetype
equal totext
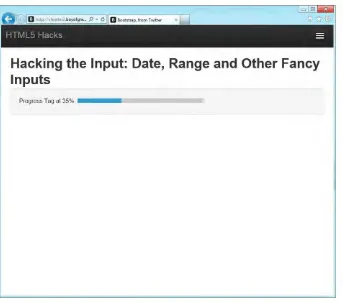
.The <meter> and <progress> Tags
Moving slightly out of the input space but staying within the HTML5 form, we see two new form components that will quickly become basic building blocks for web appli-cations. The first of the two is the
<meter>
tag. For a clear definition, let’s go right to the spec:The meter element represents a scalar measurement within a known range, or a fractional value; for example disk usage, the relevance of a query result, or the fraction of a voting population to have selected a particular candidate.
Think of a meter as a bar from a bar chart. It’s a graphical representation of one num-ber as part of a greater numnum-ber. Let’s look at a code example:
<form name="myForm">
30%: <meter value="3" min="0" max="10"></meter><br />
30%: <meter value="0.3" low="0.4">30%</meter>
</form>
Figure 1-10.
The <meter> tag as it appears in Chrome for Windows
This particular form element has some interesting UI controls. You can see from the preceding example that the meter needs to have a value set, as well as a range, to be effective. The
min
andmax
attributes will set the range (the meter is completely empty and the meter is completely full, respectively), and thevalue
will specify the current fill level. If either of the attributes is missing, the form will assume the value—for ex-ample, an undefined value will probably be considered zero by most user agents.Additionally, three other attributes can be added to the meter to control the interface. The