• Table of Contents Pub Date : April 2004
ISBN : 0-596-00641-1 Pages : 334
Slots : 1.0
O'Reilly's new guide to the technology,
Eclipse, provides exactly what you're looking
for: a fast-track approach to mastery of
Eclipse. This insightful, hands-on book
delivers clear and concise coverage, with no
fluff, that gets down to business immediately.
The book is tightly focused, covering all
debugging techniques, and how they're used
every day by thousands of developers.
Development of practical skills is emphasized
with dozens of examples presented
• Table of Contents Pub Date : April 2004
ISBN : 0-596-00641-1
Section 1.3. Understanding Eclipse
Section 1.4. Views and Perspectives
Section 1.5. Working with Eclipse
Section 1.7. A Word About Project Management
Section 2.6. Customizing the Development Environment
Chapter 3. Testing and Debugging
Section 6.1. Creating AWT Applications
Section 6.2. Creating Swing Applications
Section 6.3. Using Eclipse Plug-ins
Section 7.4. Working with Composites and Layouts
Section 8.6. Opening Internet Explorer in anSWT Window
Chapter 9. Web Development
Section 9.1. Installing and Testing Tomcat
Section 9.2. Creating a JSP
Section 9.3. Creating a Servlet
Section 9.4. Creating a Servlet in Place
Section 9.5. Connecting to a JavaBean
Section 9.6. Using the Sysdeo Tomcat Plug-in
Section 9.7. Deploying Web Applications
Chapter 10. Developing Struts Applicationswith Eclipse
Section 10.1. Struts and Eclipse
Section 10.2. Creating the View
Section 10.3. Creating the Controller
Section 10.4. Creating the Model
Section 10.5. Using the Easy Struts Plug-in
Manifests, and Extension PointsChapter 11. Developing a Plug-in: The Plug-in Development Environment, Section 11.1. All You Really Need Is plugin.xml
Section 11.2. Using the Plug-in Development Environment
Section 11.3. Using the Run-time Workbench
Section 11.4. Creating a Standard Plug-in
Chapter 12. Developing a Plug-in: Creating Editors and Views
Section 12.1. Creating a Multi-Page Editor
Section 12.2. Creating a View
Section 12.3. Deploying a Plug-in
Chapter 13. Eclipse 3.0
Section 13.1. A Look at Eclipse 3.0
Section 13.2. Creating a Java Project
Section 13.3. Changes to the Eclipse Platform
Section 13.4. Changes to the Java Development Tools
Section 13.5. Other Changes
Colophon
Copyright © 2004 O'Reilly Media, Inc. Printed in the United States of America.
Published by O'Reilly Media, Inc., 1005 Gravenstein Highway North, Sebastopol, CA 95472.
O'Reilly & Associates books may be purchased for educational, business, or sales promotional use. Online editions are also available for most titles (http://safari.oreilly.com). For more information, contact our corporate/institutional sales
department: (800) 998-9938 or [email protected]. Nutshell Handbook, the Nutshell Handbook logo, and the
O'Reilly logo are registered trademarks of O'Reilly Media, Inc. The title of Eclipse, the images of ornate butterflyfish, and related trade dress are trademarks of O'Reilly Media, Inc.
Java and all Java-based trademarks and logos are trademarks or registered trademarks of Sun Microsystems, Inc., in the United States and other countries. O'Reilly Media, Inc. is independent of Sun Microsystems, Inc.
Many of the designations used by manufacturers and sellers to distinguish their products are claimed as trademarks. Where those designations appear in this book, and O'Reilly Media, Inc. was aware of a trademark claim, the designations have been printed in caps or initial caps.
While every precaution has been taken in the preparation of this book, the publisher and author assume no responsibility for
Preface
Welcome to Eclipse, today's premiere Java™ Integrated development environment (IDE). Eclipse is an extraordinary tool, and it fills a long-standing need among Java developersno longer do you have to suffer through pages of errors scrolling off the screen while using command-line Java compilers. Now you've got an IDE that will handle the details for you, letting you get on with writing code. If you've never used Eclipse before, your productivity is about to take a giant jump.
We're going to push the Eclipse envelope in this book, working from the basics up through the advanced. This book has been designed to open up Eclipse and to be more accessible than any other. It's a programmer-to-programmer book, written to bring you up to speed in Eclipse without wasting time.
What's Inside
From cover to cover, this book is pure Eclipse, covering
hundreds of skills and techniques. We start from the most basic Java development and work up to creating your own plug-in editors for the Eclipse environment. Here are a few of the topics in this book:
Using Eclipse to develop Java code Working with JAR files
Setting launch configurations Selecting Java runtimes
Creating Javadoc Refactoring
Extracting Interfaces Viewing type hierarchies Customizing Eclipse Testing code with JUnit Debugging
Using hot code replacement Sharing projects with CVS
Comparing code with local history Using Ant to build Eclipse projects
GUI programming from applets to Swing Using the Standard Widget Toolkit (SWT)
SWT buttons, text, labels, lists, layouts, and events SWT menus, toolbars, sliders, trees, and dialogs Developing web applications
Writing servlet code in place Using the Sysdeo Tomcat plug-in
Debugging and deploying web projects Developing Struts applications with Eclipse Using the Easy Struts plug-in
Developing Eclipse plug-ins
Extension points
Using the Run-time Workbench Creating a standard plug-in Creating an action set
Creating plug-in menus
Creating a multipage editor plug-in Creating a plug-in wizard
Creating an Eclipse view supported with a plug-in We're going to see all these topics and many more in the upcoming pages. Here's an overview of each chapter:
Chapter 1
This chapter is all about the basics, including all the details on the Eclipse Workbench and an introduction to the Java Development Tools (JDT).
Chapter 2
Chapter 3
An IDE wouldn't be much use without a debugger. Eclipse and the JDT give you all the power of a true debugger, including breakpoints, expression evaluators, being able to change values on the fly, and more.
Chapter 4
One of the valuable aspects of Eclipse is that it lets you
develop in teams, something that any commercial developer can appreciate, since significant development is usually
done in teams. Using Concurrent Versions System (CVS), team members do all of their work in their own
workbenches, but they can share and register their work using a CVS repository.
Chapter 5
Ant is a powerful Java build tool, and we'll see in this chapter that you can do things with Ant in Eclipse that Eclipse can't do alone, such as copy and move files.
Chapter 6
This chapter starts our work using Eclipse to handle GUI development with Swing. We'll also take a look at a Swing plug-in for Eclipse hereusing this plug-in, for example, you can drag and drop Swing controls.
In this chapter and the next, we'll be covering the Standard Widget Toolkit (SWT)the GUI toolkit for Java developers that provides a portable API and tight integration with the underlying native GUI platform. SWTa 100% Java
alternative to the AWT and Swingis another reason Eclipse has become so popular, and we're going to spend two
chapters on it.
Chapter 8
This chapter completes our coverage of the SWT, including dialogs, toolbars, sliders, trees, menus, and more.
Chapter 9
This chapter gets us started with web development,
creating both servlets and JSP using Eclipse and the Tomcat server. We'll also take a look at a Tomcat Eclipse plug-in.
Chapter 10
We continue our web work in this chapter with applications constructed using the Struts framework. We'll also see how to use a Struts plug-in.
Chapter 11
In this chapter, we're going to start creating Eclipse plug-ins to extend Eclipse. We'll use the Plug-in Development
Chapter 12
Here, we're going to get the details on some more advanced aspects of plug-in creationeditors, creating wizards, and how to support Eclipse views.
Chapter 13
Conventions Used in This Book
There are some conventions we'll use that you should know about. When we've added a new piece of code and are
discussing it, it'll appear in bold face, and when there's more code to come, you'll see three dots. Here's what that looks like:
Listener listener = new Listener( ) {
public void handleEvent(Event event) {
ToolItem item = (ToolItem)event.widget;
String string = item.getText( );
.
.
.
}
};
We'll also use the standard convention for selecting menu items in this book; for example, to create a new project in Eclipse, you use the File New Project menu item.
The following typographical conventions are used in this book:
Plain text
keyboard accelerators.
Italic
Indicates new terms, example URLs, example email addresses, filenames, file extensions, pathnames, directories, and Unix utilities.
Constant width
Indicates commands, options, switches, variables, types, classes, namespaces, methods, modules, properties, parameters, values, objects, events, event handlers, and XML tags.
Constant width italic
Indicates text that should be replaced with user-supplied values.
This icon signifies a tip, suggestion, or general note.
What You'll Need
All the software you'll need in this book can be downloaded from the Internet for free. You'll need Eclipsethis book was
written using Eclipse 2.1.1and we'll discuss where to get Eclipse in Chapter 1. Other software packages that we'll be
downloading throughout the book include the Tomcat web server and various CVS servers (which will allow you to share Eclipse projects with others).
Eclipse is built to be extendible, and hundreds of Eclipse plug-ins are available for free downloading. Plug-ins let you add functionality to Eclipsenew built-in editors, code generators, software launchers, and moreand we'll take a look at a number of the most popular plug-ins in this book. And in Chapter 11
Using Code Examples
All the code in this book is available for download from
http://www.oreilly.com/catalog/eclipse. See the file readme.txt
in the download for installation instructions.
This book is here to help you get your job done. In general, you may use the code in this book in your programs and
documentation. You do not need to contact us for permission unless you're reproducing a significant portion of the code. For example, writing a program that uses several chunks of code from this book does not require permission. Selling or
distributing a CD-ROM of examples from O'Reilly books does
require permission. Answering a question by citing this book and quoting example code does not require permission.
Incorporating a significant amount of example code from this book into your product's documentation does require
permission.
We appreciate, but do not require, attribution. An attribution usually includes the title, author, publisher, and ISBN. For example: "Eclipse, by Steve Holzner. Copyright 2004 O'Reilly Media, Inc., 0-596-00641-1."
If you feel your use of code examples falls outside fair use or the permission given above, feel free to contact us at
We'd Like to Hear from You
Please address comments and questions concerning this book to the publisher:
O'Reilly & Associates, Inc.
1005 Gravenstein Highway North Sebastopol, CA 95472
(800) 998-9938 (in the United States or Canada) (707) 829-0515 (international or local)
(707) 829-0104 (fax)
We have a web page for this book, where we list errata,
examples, and any additional information. You can access this page at:
http://www.oreilly.com/catalog/eclipse
To comment or ask technical questions about this book, send email to:
For more information about our books, conferences, Resource Centers, and the O'Reilly Network, see our web site at:
Chapter 1. Essential Eclipse
If you're reading this book, you're most likely a Java
programmer, and you know how finicky Java can be at times. Missed import statements, forgotten variable declarations, omitted semicolons, garbled syntax, typosall these problems will cause the Java command-line compiler, javac, to cough in your face and display pages of annoying error messages. The error messages tell you that javac knows what the error is, so why doesn't it just fix the problem and let you get on
developing?
Because javac can't fix the problem; it isn't an editor. That makes long streams of errors scrolling off the page an all-too-common experience for Java developers, and leaves them with the feeling that Java is too prickly about what can go wrong. To change all that, you can use an integrated development
environment (IDE), which will not only catch errors before you try to compile, but also suggest solutions. Java is badly in need of a good IDE, and a number of candidates are available, but the premiere Java IDE these days is the one this book is all about: Eclipse. You can see Eclipse in action in Figure 1-1.
1.1 Eclipse and Java
Although Eclipse can act as an IDE for many different
languagesIDEs are available from C/C++ to Cobolits great popularity is as a Java IDE, and it comes with Java support built-in. Eclipse refers to itself as a universal tool platform, capable of handling IDEs for many different languages, but the Java IDE that comes with Eclipse is going to be our main focus, as it is for the great majority of Eclipse users.
The whole Eclipse magic is that it will take the rough edges off Java development in the way you've always imagined. The errors that would cause javac to stumble are usually handled before you even try to compile, and if there is an issue, Eclipse will suggest solutions. All you have to do is point and clickno need for serious head-scratching. If you're like most Java
developers, you're going to find yourself thinking, This is great!
1.1.1 Some Background
Eclipse is free for the downloading, like a number of other Java IDEs, but Eclipse has a serious advantage behind it: the power of IBM, which reportedly spent $40 million in the development of the IDE. The first version, Version 1.0, appeared in
November 2001 and gradually became popular (althoughas with any developer toolthere was a great deal of discussion of its faults).
In time, Eclipse has changed and improved, and the current version, 2.1.1, is getting much praise. In fact, it's become so popular that when Version 2.1 first appeared, the servers at
Eclipse was created by IBM in a massive effort that has left Java programmers the winners. It's now an open source project, still largely under IBM's development, but part of a software
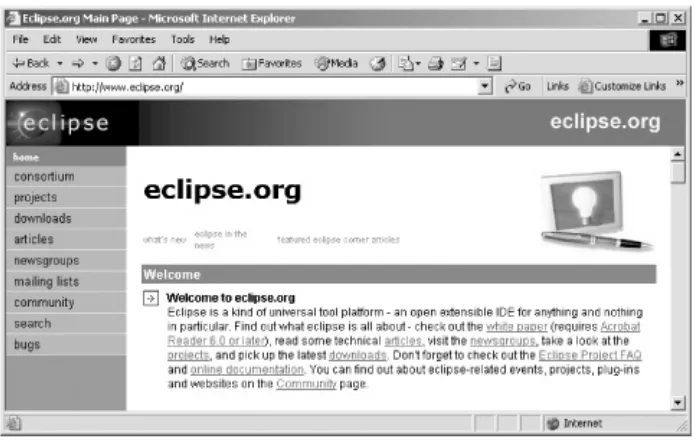
consortium named eclipse.org. You can see the consortium's page, http://www.eclipse.org, in Figure 1-2.
Figure 1-2. The Eclipse consortium's web page
The Eclipse consortium originally consisted of IBM's subsidiary, Object Technologies International (OTI)who developed Eclipse in the first placealong with Borland, IBM, MERANT, QNX Software Systems, Rational Software3, Red Hat, SuSE, TogetherSoft3, and Webgain2 in November 2001. Since then, the consortium has grown to more than 45 members, including Sybase, Hitachi, Oracle, Hewlett-Packard, Intel, and others.
OTI is not a new player either; it's been around for quite some time, and it was responsible for the foundations behind IBM's Visual Age line of products (IBM acquired OTI in 1996). Long ago, OTI created a Java tool written in the Smalltalk language, Visual Age for Javaalso called VA4Jthat was well received.
removed in favor of more standard ones, and a great deal of development power has been added. In other words, although Eclipse itself is relatively new, it already has considerable
history.
The Eclipse project as a whole is divided into three subprojects: The Eclipse platform itself, which forms the backbone of the whole application
The Java Development Toolkit (JDT)
The plug-in development environment (PDE), which lets you develop your own tools for Eclipse, called plug-ins
These various subprojects are themselves divided into other subprojectsthe JDT subproject, for example, is made up of the user interface (UI), core, and debug subprojects. You can learn more about these three subprojects at
http://www.eclipse.org/eclipse/, and of course you'll learn a lot more about them in this book.
1.1.2 A Word About the Common Public License
(CPL)
Eclipse is open source software, which leaves some people uncertain about legal rights when using it. Open source
software gives users open access to the software's source code and the right to modify and distribute the software themselves. If you want to modify that software, on the other hand, it's often true that open source licenses don't allow distribution of the modified software unless the end user is also given these rights (as opposed to a copyright, this is sometimes called a
Some open source licenses insist that any software bundled with other open source software also be open source. However, the open source license that Eclipse uses, the Common Public License (CPL), is also designed to allow commercial interests. The CPL allows software bundled with open source software to be distributed under more restrictive licenses for commercial purposes.
If you ever plan to modify and distribute new versions of Eclipse, you can read about the CPL at
http://www.opensource.org (in particular, at
http://www.opensource.org/licenses/cpl.php). Among other things, the CPL says, "this license is intended to facilitate the commercial use of the Program."
1.2 Getting Eclipse
How do you get and install Eclipse? Eclipse is free for the downloadingall you have to do is navigate to
http://www.eclipse.org/downloads and select one of the
download mirrors available on that page. When you do, you'll be presented with a list of the available downloads, which are of these types:
Release builds
The Eclipse team releases these versions for general use. Usually when you download Eclipse, you'll use one of the release versions. These builds have been thoroughly tested, and the chance of coming across serious bugs is minimal. This is a version of Eclipse comparable to the version that other companies would sellif Eclipse were for sale.
Stable builds
These are comparable to beta versions. A stable build is a step along the way toward a release version. The Eclipse team considers this build to be relatively stable, but there may be problems. This is where you'll find the new features that are upcoming in Eclipse.
Integration builds
integration build proves itself, it may be elevated to a stable version.
Nightly builds
These are the most experimental of all publicly available Eclipse builds. They're created nightly by the Eclipse team, and there's really no guarantee that things will work well. Some experience with these builds indicates that they can actually have substantial problems.
Normally, you'll use the most recent release version of Eclipse. To get Eclipse, select the most recent release download for your operating system and click the appropriate link to download it.
Want to learn more about the current and upcoming versions of Eclipse? See http://www.eclipse.org/eclipse/development/main.html.
Installing Eclipse is not difficultall you've got to do is unzip or untar it, depending on your operating system. Since you've downloaded the version of Eclipse targeted to your operating system, you'll find the executable file ready to run as soon as you uncompress Eclipse.
Windows users will be pleased to learn that Eclipse doesn't use the Windows registry, so (re)installation is easy and trouble free.
eclipse.exe. When you start the program the first time, it may ask you to wait while it completes the installation, which does not take long (Eclipse is creating the workspace directories it'll be using). When you first run Eclipse, you should see something like Figure 1-1, shown earlier in this chapter.
You must have Java installed on your machine when you try to start Eclipse. If you start Eclipse for the first time and see a dialog box with the message that begins "A Java Runtime Environment (JRE) or Java Development Kit (JDK) must be available in order to run Eclipse," you've got to download and install Java first. You can get Java for free at http://java.sun.com/j2se/.
In the next chapter, we'll see how to switch the local installation of Java that Eclipse will use if you have multiple installations of Java (for
example, you might want to use a newly downloaded JDK instead of the default JRE that comes with many browsers).
To make starting Eclipse easier, you can also connect various shortcuts to the Eclipse executable. In Windows, right-click the executable file in the Windows Explorer and select "Create
Shortcut" from the context menu that opens, then drag the new shortcut where you want it. In Linux or Unix, just add the
1.3 Understanding Eclipse
So what is Eclipse itself? Most people think of Eclipse as a Java IDE, and when you download Eclipse, you get the Java IDE (this is the Java Development Toolkit, the JDT) and the Plug-in
Development Environment (the PDE) with it. If you only want to develop Java, it's easy to think of Eclipse as a Java IDE because that's the main tool you'll be using.
Eclipse itself, however, is a universal tool platform. The JDT is really an addition to Eclipseit's a plug-in, in fact. Eclipse itself is really the Eclipse platform, which provides support for tools beyond just the Java set you get on download. These tools are implemented as plug-ins, so the platform itself only needs to be a relatively small software package.
The platform provides the support the plug-ins need to run; if you want to develop Java, you use the JDT plug-in that comes with Eclipse; if you want to develop in other languages, you'll need to get other plug-ins, such as the CDT, which lets you
develop C/C++ code. Installing a plug-in is easy, as we're going to seeall you have to do is drop it into the Eclipse plugins
directory and restart Eclipse. Eclipse does some checking on each plug-in when it starts, but the plug-ins are not loaded until they're needed in order to save processing time and memory space.
It's also important to realize that although Eclipse is written in Java, it's intended to be language-neutral. To develop in any programming
language, all you need is the corresponding plug-in. In fact, Eclipse is also intended to be spoken-language neutral, tooyou can easily change the language that Eclipse uses. To change languages, you can use the same plug-in mechanism that supports plug-ins, except that languages are supported with what are called plug-in fragments. OTI has a
1.3.1 The Eclipse Platform
The Eclipse platform is made up of several components: the platform kernel, the workbench, the workspace, the team
component, and the help component. You can see an overview of the platform in Figure 1-3.
Figure 1-3. The Eclipse architecture
1.3.2 The Platform Kernel
The kernel's task is to get everything started and to load
needed plug-ins. When you start Eclipse, this is the component that runs first, and it loads the other plug-ins that you normally think of as Eclipse itself, such as the workbench.
1.3.3 The Eclipse Workbench
The Eclipse workbench is what you saw back in Figure 1-1it's the basic graphical interface you work with when you use
and its job is to present those items and the internal windows you saw in Figure 1-1.
Next to the platform kernel, the workbench is Eclipse at its most basic. When you start Eclipse, before working with any specific IDE like the JDT, the workbench displays a Welcome message. When you open another tool like the JDT, that tool takes over.
The workbench looks like a native application, targeted to the operating system you run it on, which is both a feature and a controversial point of Eclipse. The workbench itselfthat is to say, Eclipse's graphical user interfaceis built using Eclipse's own
Standard Widget Toolkit (SWT) and JFace (which is built on top of SWT). The SWT uses the operating system's native graphics support to give the look-and-feel of a native application for the operating system. This is quite different from how most Java applications have worked historically, even those that use Swing.
SWT has to be ported to each operating system that supports Eclipse, and that's been the source of some contention in the Eclipse community, with many people saying that Eclipse, like Java, should be completely operating system-independent. However, that's the way that Eclipse has decided to go, and it's already been ported to most major operating systems, including Windows, Solaris, Mac OS X, Linux/Motif, Linux/GTK2, HP-UX, and a number of others.
In fact, we're going to see how to use SWT and JFace in this book to create Java applications with a totally native look-and-feel. SWT provides some basic graphics and control support, which JFace extends considerably. Eclipse is not only built using SWT and JFace, but it lets you use them as well.
The workspace manages all your resources for youthat is, everything you store on disk or connect to on other machines. When you write code in Eclipse, you work with Eclipse projects. Each project is given its own folder in Eclipse's workspace
directory, which makes it easy to keep track of them. Each project itself can contain many subfolders. Usually, all of a project's folders are subfolders of the main project folder, but they don't have to beyou can include folders anywhere in your machine in a project, and you can include networked folders in a project as well.
When working with code, the workspace component is responsible for managing all the resources connected to a project, which includes all the files in the project. It saves the low-level changes to those resources as well, storing the history of each resource's changes and letting you undo those changes as needed. The workspace informs the plug-ins of those
changes.
The fact that all your Eclipse projects are stored in the same directory has its advantages. For example, if you install a new version of Eclipse, you can often simply copy the workspace directory from the old version directly to the new workspace directory. (Check the new version's release notes to make sure there is no specific problem doing things this wayfor example, you can't import Eclipse 1.0 projects into Eclipse 2.0 or later workspaces. If there is a problem, you can always simply delete the new installation and reinstall Eclipse by unzipping or untarring it.)
1.3.5 The Team Component
The team component is the plug-in that supports version
that software can be tracked. This is also done so team
members don't overlap or obliterate changes made by other team members as they work on different versions of the code at the same time.
This component acts like a Concurrent Versions System (CVS) client that interacts with a CVS server. If you're not familiar with CVS, don't worry; we'll take a look at using CVS to support
version control in Chapter 4. Using the team component, you'll be able to maintain version control over your software, which is a very useful feature when working in teams.
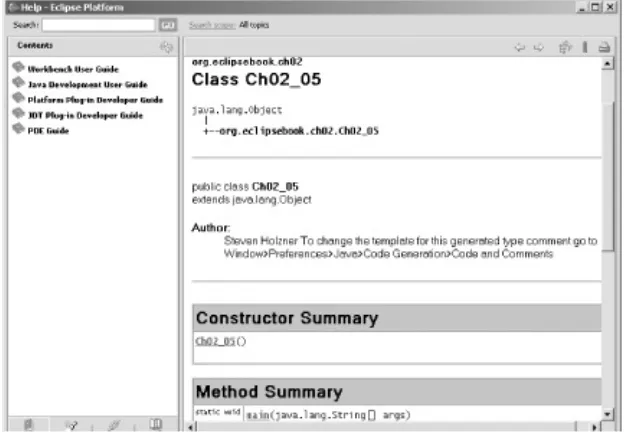
1.3.6 The Help Component
The help component, as you can gather from its name, provides help to the user. It's actually an extensible documentation
system for providing Help; plug-ins can provide HTML
documentation with XML-formatted data to indicate how that help documentation should be navigated.
1.4 Views and Perspectives
When you're working with the workbench, you'll see a number of different internal windows, called views, and the idea is that they give you different "views" into your projects. For example, one view may give you an overview of the Java classes in your project, while another may let you navigate between projects. For example, back in Figure 1-1, you can see the Navigator view at the upper left in Eclipsethis is the view that will display all your projects and let you move from one to another.
Because screen space is always at a premium in GUIs, views are often stacked, one on top of another, and you select the one you want to see using tabs that appear on the edge of the
stacked views.
If you ever want to reopen a view you've closed by mistake, select Window Show View, and select the view you want from the menu that appears.
The editor is one special type of window that usually appears in the center of the workbench. When you open up documents, code, or resources, they'll appear in an editor. Eclipse
The editor window is where you do most of the work when developing your code; for example, it's where you enter and edit your code. As we're going to see, the JDT has an editor that is lavish with built-in details, such as syntax checking, code highlighting, and much more. You might have several editors open at once, in which case they'll be stacked with tabs
showing at the top of the stack, and you can pick out the one you want by clicking the corresponding tab (or with the Window
Switch to Editor menu item, which displays a list of editors you can switch to). You can close an editor simply by clicking the X in its associated tab (or with the Window Hide Editors menu item, which toggles to Window Show Editors after
hiding an editor). To sum up: views give you overviews of your projects, and editors let you develop code and resources.
There's one more concept to master here as well: perspectives. You don't normally decide what views and editors to display yourself; instead, they're organized into groups called
perspectives (although it is easy to customize perspectives yourself). For example, when you create a Java application, you'll use the Java perspective; when you want to debug a Java program, you'll use the Debug perspective.
Perspectives have a predefined set of views and editors built-in; when you select a perspective, that set of views and editors appears automatically. For example, we'll take a look at the Java perspective here: to select a perspective, you use the Window Open Perspective menu item, which displays a
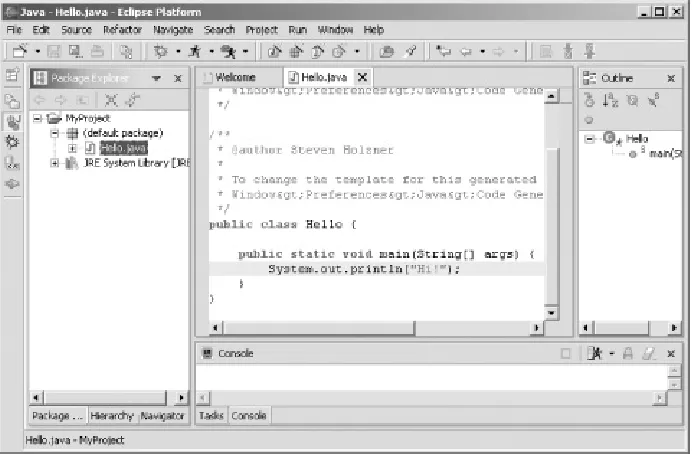
submenu of the installed perspectives. In this case, we'll choose the Window Open Perspective Java menu item to open the Java perspective, shown in Figure 1-4.
This perspective presents an editor, which appears in the center pane, that lets you write Java code, as well as show several views. For example, the Package Explorer view you see at left gives you an overview of the Java packages and classes in a project, and it lets you move between them. When you debug a Java application, the workbench makes the Debug perspective appear, which you see in Figure 1-5. This perspective displays the code you're debugging, where you are in the program, the values of variables and expressions you want to watch, and so on, in various views.
Much of the time, the idea of views, editors, and perspectives is transparent to the user, and that's certainly the case when you master Eclipse and use it on a daily basis. But they're important concepts for us and ones we'll be referring to by name
throughout the book.
Now that we're fortified with the concepts and overview that we need, it's time to start actually working with Eclipse. Although Eclipse is a universal tool platform, its great popularity comes from developing Java code, and we're going to put it to work doing that here. When you first start Eclipse, you'll see the Resource perspective, which is the default perspective for
1.5 Working with Eclipse
You use the Eclipse Java Development Tools (JDT), a series of six seamlessly integrated plug-ins, for Java development in Eclipse. Even if you've written Java for years, you're about to have a whole new experience, one that makes Java
development so smooth that when you understand how to use the JDT, you'll wonder what took people so long to make this a reality.
Eclipse is all about code development, and the only way to really understand what's going on is by creating code, so we're going to start by using the JDT to create and run the amazingly useful application you see in Example 1-1. This Java application just displays the message "No worries." on the console.
Example 1-1. The Ch01_01.java example
public class Ch01_01
{
public static void main(String[] args)
{
System.out.println("No worries.");
}
}
up right now. In Eclipse, all Java code must be inside a Java project, so the first step is to create a Java project.
1.5.1 Creating a Java Project
To invoke the Java perspective, and enter the code for our first example, Ch01_01.java, start Eclipse and select the Window Open Perspective Java menu item to open the Java
perspective using the JDT, as you see in Figure 1-6. This is the perspective you'll use over and over as you start relying on Eclipse for Java development.
Figure 1-6. The Eclipse Java perspective
It's worth getting to know the Java perspective before we start using it. At the top are the standard menu bars and toolbars, populated with new items for the Java perspective, which we'll become familiar with in the coming pages.
of the package you're working on and lets you navigate through Java projects, selecting what files you want to open in the
editor. The Hierarchy view lets you examine type hierarchiesyou select an item in a code editor, right-click it, and select the
Open Type Hierarchy context menu item. When you do, the
hierarchy view will display the hierarchy of that item, giving you a clickable inheritance tree for the item, including all members. That can be a big help if you're trying to figure out the syntax of methods you want to override or which methods are
available.
The Outline view in the pane at right presents a structured, hierarchical view of the contents of the file open in the main editor pane and lets you jump to elements in it. This is great for developers who are accustomed to using a simple text editor to develop long Java files, because this view organizes the main sections of long code files, letting you move around at will (more on this view in the next chapter).
At the bottom of the Java perspective are the Tasks and Console views, which you can select between using tabs. The Tasks view displays pending tasks, such as errors that the compiler has noticed and which need to be fixed, and the Console view shows you what's going on in the output consoleour sample application will write to the Console view, for example.
Editors are stacked in the middle pane and are accessible with the tabs at upper left in that pane. The JDT code editors give you an immense amount of power, far beyond simply entering text. There are all kinds of hidden assets built-in here, most of which are utterly unobtrusive until you decide you want to use them.
Figure 1-7. The New Project dialog box, first pane
Select the Java and Java Project items and click Next to bring up the next pane of this dialog box. Enter the name of this new project, Ch01_01, in the Project Name box, and click Next,
bringing up the next pane of the dialog, which you see in Figure 1-8. As you can see in this pane, we're about to create a new project named Ch01_01 in its own folder. You can use the Projects tab here to include other projects in the build path, something we'll do as our projects become more involved. The Libraries tab lets you browse to libraries and JAR files you want included in the build path; by default, only the JRE System Library is included. The Order and Export tab lets you specify the order of classes in your build path, and gives you the option of whether you want to export the current projects so its code will be available to other projects. In this case, just click Finish to create our new project, Ch01_01.
This adds the new Ch01_01 project to the Package Explorer, as you see in Figure 1-9. The project is represented as a folder in your workspace, and, at this point, the folder only contains the libraries we've included on the build path, the JRE System
Library.
Figure 1-9. A new project in the Package Explorer
next step is to add a new public Java class to the project.
1.5.2 Creating a Java Class
In our example, the public class is Ch01_01, and Eclipse stores public classes like this one in their own files. There are several techniques for creating new classes in Eclipse: you can use the toolbar item with the circled C icon, you can use the File New
Class menu item, or you can right-click a project in the
Package Explorer and select the New Class item in the context menu. Any one of these methods opens the New Java Class
dialog box you see in Figure 1-10.
Figure 1-10. Creating a new Java class
specify which, if any, interfaces it implements. We're going to put our examples into Java packages to avoid any conflict with other code; here, we'll use packages named after the example's chapter, like org.eclipsebook.ch01. In this case, just enter the name of this new class, Ch01_01, in the Name box, and enter the name of a new package we'll create for this class,
org.eclipsebook.ch01, in the Package box, and click Finish to accept the other defaults. Note, in particular, that under the question "Which method stubs would you like to create?" we're leaving the checkbox marked "public static void main(String[] args)" checked. Doing so means that Eclipse will automatically create an empty main method for us.
Clicking the Finish button creates and opens our new public class, Ch01_01, as you see in Figure 1-11; note the package
statement that creates the org.eclipsebook.ch01 package. This new class will be stored in its own file, Ch01_01.java, in the Eclipse folder workspace\Ch01_01.
Figure 1-11. A new Java class in Eclipse
added to our class already. Now let's enter some code of our own.
1.5.3 Using Code Assist
You can type in code using the JDT's editor as with any editor, as you'd expect, but there's a lot more utility here than in a standard text editor. For example, the JDT also supports a facility named code assist that helps you by completing code you've already started to type, and it's a handy tool you'll find yourself using over and over.
For example, say that you want to enter the code
System.out.println("No worries."); in the main method. To see code assist do its thing, move the mouse cursor inside the
main method's body and type System., and then pause. Code assist will automatically display the various classes in the
System namespace, as you see in Figure 1-12.
When you highlight out in the list of possible classes with the mouse, code assist will give you a rundown of what this class does, as you see at left in the figure. Double-click out in the code assist list so that code assist will insert it into your code, and type a period to give you System.out., and pause again. Code assist will display the methods of the out class. Double-click the code assist suggestion println(String arg0), and code assist will insert this code into the main method:
public class Ch01_01
{
public static void main(String[] args)
{
System.out.println( )
}
Edit this now to display our "No worries." text (you'll see that code assist adds the closing quotation mark automatically as you type):
public class Ch01_01
{
public static void main(String[] args)
{
System.out.println("No worries.")
}
}
However, Eclipse displays this new code with a wavy red line under it, which indicates there's a problem. To see what's going on, rest the mouse cursor over the new code, and a tool tip will appear, as you can see in Figure 1-13, indicating that there's a missing semicolon at the end of the line.
Add that semicolon now to give you the complete code and make the wavy red line disappear:
public class Ch01_01
{
public static void main(String[] args)
{
System.out.println("No worries.");
}
}
Another handy way to find all the members of a class or object is to highlight an item's name in a code editor, right-click the highlighted name, and select the Open Type Hierarchy item from the context menu. Doing so will open the item's complete type hierarchy in the Hierarchy view, and you'll see all its members, the data types of fields, the
arguments you pass to methods, and more. In fact, the code where the selected item is defined will also appear in a code editor (unless that code is inaccessible, as when it's in a JAR filefor example, the
System.out class is defined in rt.jar, so no source code is
availablealthough there are now ways to attach source directories to JAR files).
As you can see in this example, the coding was made a little easier because code assist knew all the members of the
System.out class and let you select from among them. Code assist will automatically appear when you type a dot (.). You can also make code assist appear at any time while you're typing codejust type Ctrl+Space.
You can also turn code assist off. To configure code assist as you like, select Window Preferences, then Editor in the left pane of the Preferences dialog, and then the Code Assist tab.
Each time you edit the code in a file, as we're doing here in
Ch01_01.java, an asterisk appears in front of the filename file in its code editor tab, as you see in Figure 1-13. This asterisk indicates that changes to the file have not yet been saved.
There are many ways to save your work: click the diskette icon (for Save) in the toolbar; click the diskette followed by an
Alright, we've got our first code written and stored to disk. How about running it?
1.5.4 Running Your Code
If you look closely at the Package Explorer view in Figure 1-13, you'll see that the circled C icon for our Ch01_01 class also has a small running figure in it. That is Eclipse's way of indicating this class is runnable because it has a main method. To run this code and see the output, select the Run Run As Java
Application menu item, or open the pull-down menu for the running figure icon in the toolbar and select the Run As Java Application menu item. This runs our code (Eclipse will ask you to save it first if the code has not been saved yet), and the
System.out.println method will write our message to the
console. The text of that message, "No worries.", appears in the Console view at the bottom of the Java Perspective, as you see in Figure 1-14.
Congratulationsnow you're an Eclipse developer.
1.5.5 Using the Scrapbook
There's another way to run code in a Java Project, and you don't need a main method to do it: you can use a scrapbook page instead. Scrapbook pages give you a way of executing code, even partial code, on the flya big help in the development process. This is not an essential skill, but it's a useful one.
To create a scrapbook page, select the File New Scrapbook Page menu item to open the New Scrapbook Page dialog box, enter the name Ch01_01Scrapbook in the File name box, and click Finish to create the new scrapbook page, which will be saved as Ch01_01Scrapbook.jpage. The new page appears in the Package Explorer and is automatically opened in the editor view, as you see in Figure 1-15. You can enter code or code snippets to run in this page, which helps when your code is
getting long and you just want to test part of it. For example, to run our example, enter this code in the scrapbook page (as you see in Figure 1-15)note that you must include the package
name here when referencing the main method in your code:
String[] args = {};
org.eclipsebook.ch01.Ch01_01.main(args);
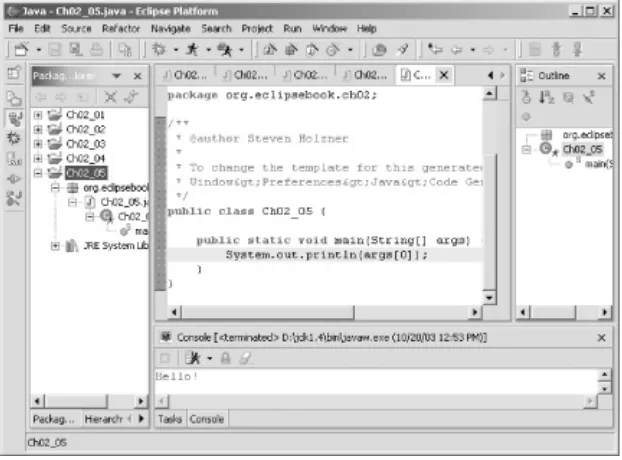
To tell the scrapbook page what code to run, select all the code you've entered, as you see in Figure 1-15, right-click it, and select the Execute context menu item (you can also select the Run Execute menu item). The results appear in the Console view as before, as you can see in Figure 1-15. In this way, you can execute Java code using a scrapbook page, even snippets of code, and see the results as they'd appear in the console. To close the scrapbook page, click the X button in the tab
corresponding to its editor in the workbench's central pane.
If you select the Display item instead of the Execute item, you'll see the net return value of the code you've highlighted in the scrapbook, which is useful for testing methods on the fly. Also, note that you can set imports for the scrapbook page, importing other packages as needed, by right-clicking the scrapbook's code in the editor view and selecting the context menu's Set Imports menu item.
1.6 Using Quick Fix
Quick Fix lets the JDT suggest ways of fixing simple errors, and that's one of the things that Java should have had a long, long time ago. For example, say you change the Ch01_01 code to display the "No worries." message along with today's date:
public class Ch01_01 {
public static void main(String[] args) {
outString = "No Worries on ";
Calendar rightNow = Calendar.getInstance( );
System.out.println(outString + rightNow.getTime( ));
}
}
You can probably spot a few errors here. The variable
outString is not declared, which makes the first and last lines of code in main invalid, and the Calendar class has not been imported, making the middle line of code invalid. If you were using javac, you'd have to quit editing and run javac to catch those errors. But the second you enter these lines into Eclipse, they'll be flagged as errors with wavy red underlines, as you see in Figure 1-16.
Eclipse doesn't let you down by just showing you the errorsit also suggests solutions. Note the yellow light bulb and red X icons in the bar to the left of the code editor, which is called the
marker bar. These icons tell you that Quick Fix is available for all the errors. Note also the hollow red rectangles in the bar on the right of the code editor view, called the overview ruler. These hollow red rectangles indicate statements that Quick Fix can fixsolid red rectangles flag compiler errorsand you can use these icons to navigate to problems to fix.
If you let the mouse cursor hover over the first light bulb icon in the marker bar, you'll see a tool tip appear with the description of the error ("outString cannot be resolved"), as in Figure 1-17.
To activate Quick Fix and see what the JDT suggests to fix the problem, click the light bulb icon on the affected line. Doing that displays a number of options, the first of which is "Create local variable `outString'", as you see in Figure 1-17. Quick Fix also indicates what its suggested solution will look like in the context of your code, as you see at the bottom of the figure. To fix the code, select the Create local variable option by double-clicking it, which changes our code to this, declaring outString as a variable of type String:
public class Ch01_01 {
public static void main(String[] args) {
String outString = "No Worries on ";
Calendar rightNow = Calendar.getInstance( );
System.out.println(outString + rightNow.getTime( ));
}
Declaring outString also fixes the last line in the main method, which references that variable, so the light bulb icon disappears from that line as well.
We've still got to fix the problem with the middle line of code in the main method, which uses the Calendar class. You can see what Quick Fix suggests for this problem in Figure
1-18importing the java.util.Calendar class. (This aspect of Quick Fix alone is worth the price of admission: you no longer have to hunt through entire package hierarchies to find what package to import when you want to use a class whose
namebut not packageyou remember.)
Figure 1-18. Using Quick Fix to import a package
To use this suggested Quick Fix, double-click the "Import
`java.util.Calendar'" line, which imports java.util.Calendar
and changes your code to this:
import java.util.Calendar;
.
.
public class Ch01_01 {
public static void main(String[] args) {
String outString = "No Worries on ";
Calendar rightNow = Calendar.getInstance( );
System.out.println(outString + rightNow.getTime( ));
}
}
After resolving these problems with Quick Fix, you can run the code as you see in Figure 1-19. Now you'll see that there are no worries, as the text message in the Console view indicates.
1.7 A Word About Project Management
As you create more projects like Ch01_01, you'll find Eclipse getting more and more crowded, since all your projects are displayed in the Java perspective's Package Explorer view, as well as the Navigator view (recall that the Navigator view is there to let you navigate between projects). If you have 30 projects, there will be 30 entries there. There are various ways to deal with this clutter (such as creating working sets, as we'll see in Chapter 2), but we'll take a look at the simplest one here.
To remove a project from the Package Explorer and Navigator views, you can simply delete it. This does not necessarily delete the actual files used for the project, and, whenever you want, you can add the project back to these views. For example, to remove the Ch01_01 project, just right-click its icon and select the Delete item. Eclipse will display the Confirm Project Delete dialog box, as you see in Figure 1-20.
In this case, make sure that the "Do not delete contents" radio button is selected and click Yes to remove the project from Eclipse. The project will disappear from the Package Explorer and Navigator views. Clicking the other radio button will make Eclipse delete all the files and their contents in the project, so don't do that if you want to use the project again later.
When you want to work with the project again, you just import it. To do that, right-click the Package Explorer or Navigator and select the Import context menu item, or select the File Import menu item. This opens the Import dialog; select the "Existing Project into Workspace" item and click Next. In the next pane, click the Browse button, select the Ch01_01 folder, and click OK, giving you results like those shown in Figure 1-21.
Click Finish to import the Ch01_01 project again. Now the
project is back and ready for use. To run it, select the project in the Package Explorer and select the Run Run As Java
Application menu item. That's all you need; this is a crude but effective way of doing project management, and we'll see others as we progress.
You can also close projects if you right-click them and select the Close Project menu item. However, that doesn't remove them from the Package Explorer and Navigator viewsit just closes the project folder and changes its icon. The only real benefit of closing projects is that it will allow Eclipse to start up a little faster later because it doesn't have to initialize closed projects.
Chapter 2. Java Development
This chapter is where we get down to the business of
developing Java using Eclipse. We're going to take a look at using Eclipse for Java development as well as project
2.1 Developing Java Code
If there's anything that takes more time than it seems to be worth in Java, it's creating code from scratch. While the logic inside a method, interface, or class is unique, the modifiers of a method, the imports for a class, and the syntax involved with new packages is the same over and over again. This often results in a lot of repetitive typing, wasted time, and in many cases, annoying little typo-related bugs. Eclipse can help with all this and more.
2.1.1 Creating New Methods
Eclipsethrough code assistmakes it easy to create new
methods. As an example, we're going to create and call a new method named printer, which displays the message "No
worries.", as you can see in Example 2-1.
Example 2-1. The Ch02_01.java example
public class Ch02_01
{
public static void main(String[] args)
{
printer( );
private static void printer( )
{
System.out.println("No worries.");
}
}
How do you create new methods? Start Eclipse now and create a new project named Ch02_01. Then create a new Java class named Ch02_01, making it part of the org.eclipsebook.ch02
package. Leave the checkbox for the creation of a stub for the
main method checked when you create this new class. This gives you the code:
public class Ch02_01 {
public static void main(String[] args) {
}
}
You could simply type in the printer method, of course, but Eclipse can also be of assistance here. Move the cursor below the body of the main method and type private to make this new method a private method, and then type Ctrl+Space to open code assist, as you see in Figure 2-1.
Code assist lets you select the type of private method you want to createprivate, private static, and so on. Here, select the
private static method, creating the new method template you see in Figure 2-2. The placeholder return_type is
highlighted, ready for you to enter in a type; use void. Next, replace the name placeholder with the name printer and delete the arguments placeholder.
This creates the new method in outline; all that's left is to add the code that will display the message (as before, you can take advantage of code assist to pause after you type each dot for suggestions):
public static void main(String[] args) {
}
private static void printer( )
{
System.out.println("No worries.");
}
Then just add the call to printer from main:
printer( );
}
private static void printer( )
{
System.out.println("No worries.");
}
That's all you need; now you can run the example with the Run As Java Application menu item. You should see "No worries." appear in the Console viewjust as before. But this time, we're using a new custom method.
2.1.2 Creating New Classes
We've created a new method and given it a name, but what if you want that new method to be in a different class? For
example, say that your main method is in a class named
Ch02_02, but the printer method is in a class named
Ch02_02Helper:
Ch02_02
|
+---main
|
+---printer
In this case, you could create a new object of the
Ch02_02Helper class in the main method, and then you could call that object's printer method, as you see in Example 2-2.
Example 2-2. The Ch02_02.java example
public class Ch02_02 {
public static void main(String[] args) {
Ch02_02Helper helper = new Ch02_02Helper( );
helper.printer( );
}
The Ch02_02Helper class, with the printer method in it, appears in Example 2-3.
Example 2-3. The Ch02_02Helper.java example
public class Ch02_02Helper {
public void printer( ) {
System.out.println("No worries.");
}
To implement this example with its two classes in Eclipse, create a new project named Ch02_02 and add the new class
Ch02_02Helper to the project. Make this class public and put it into the org.eclipsebook.ch02 package (and make sure that you don't create a main method stub in this class). Next, add the printer method to this class, as in Example 2-2.
Then save the file. This is an important step because if you don't save the file, the printer method won't be available to the rest of your project's code. This is essential to
knowwhenever you want to work with items from file A in file B, you have to save file A first because Eclipse compiles from the files, not what's in its editors.
Having created the new Ch02_02Helper class, the next step is to create the class containing code that will make use of it, the
Ch02_02 class. Create that new class in the project and add a stub for the main method to it. Now all you need to do in the
main method is add the code to create an object of the
Ch02_02Helper class and call that object's printer method:
public class Ch02_02 {
public static void main(String[] args) {
Ch02_02Helper helper = new Ch02_02Helper( );
helper.printer( );
}
Then save all your work and run the application; Eclipse's
compiler handles locating both classes in the same package for you. You should see the "No worries." message as shown in
Figure 2-3. Using multiple classes
And there's more you can do with multiple classes here as well. Say you want to override the printer method and change the text it displays. You can do that by deriving a new class based on the Ch02_02Helper class and overriding printer in this new class. To do this, right-click the org.eclipsebook.ch02
package inside the Ch02_02 project and select the New Class item, opening the New Java Class dialog you see in Figure 2-4.
Name the new class Ch02_02HelperHelper, enter the package name, and deselect the main stub checkbox. To derive this class from Ch02_02Helper, type Ch02_02Helper in the Superclass box (you can also implement interfaces by entering them into the Interfaces box), and click Finish to create the new class. Here's what you getthis new class automatically extends the
Ch02_02Helper class:
public class Ch02_02HelperHelper extends Ch02_02Helper {
}
We want to override the printer method from the base class's version here, so open the new class, Ch02_02HelperHelper, and select the Source Override/Implement Methods menu item, opening the Override/Implement Methods dialog box you see in Figure 2-5 (if you're implementing an interface, you can also find the methods you have to implement here).
Figure 2-5. Overriding a method
This dialog shows a list of possible overrides; all you have to do is pick one. In this case, select the printer method and click OK. When you do, you'll see a stub for the new version of the
printer method in the Ch02_02HelperHelper class:
public class Ch02_02HelperHelper extends Ch02_02Helper {
* @see org.eclipsebook.ch02.Ch02_02Helper#printer( )
*/
public void printer( ) {
// TODO Auto-generated method stub
super.printer( );
}
}
In this overriding version, use this code to display a new message, "No problems.":
public void printer( ) {
System.out.println("No problems.");
}
And that's ityou've overridden a method in a derived class. As the final step here, change the code in the main method to use your new class:
public class Ch02_02 {
public static void main(String[] args) {
Ch02_02HelperHelper helper = new Ch02_02HelperHelper( );
}
}
When you run this example, you should see the new message, "No problems.", as in Figure 2-6.
Figure 2-6. Using our derived class
As you can see, automatic code generation can be a timesaver. In this case, you used it to override a method, but there are other options available in the Source menu:
Source Generate Getter and Setter lets you generate standard Java getter and setter methods for a field in a class. For example, if the field is named temperature, the suggested getter and setter methods will be
getTemperature and setTemperature.
Source Generate Delegate Methods lets you create delegate methods for other methods automatically.
Source Add Constructor from Superclass lets you create a constructor that will include code to call the superclass's constructor. (You can also create this constructor
automatically when you create a class.)
Source Surround with try/catch Block is a great one, and it will surround selected text with a try/catch block for you. This option checks for any uncaught exceptions
automatically and adds code to catch them.
For example, say you've stored the message that the printer
method displays in a class field named message:
public class Ch02_02HelperHelper extends Ch02_02Helper {
/* (non-Javadoc)
* @see org.eclipsebook.ch02.Ch02_02Helper#printer( )
*/
public void printer( ) {
System.out.println(message);
}
Instead of simply storing this data in a class field, you can use getter and setter methods to access it (these methods are of the standard form used in JavaBeans™ to support properties). In this case, you can create getter and setter methods for the value in message by selecting the Source Generate Getter and Setter menu item, which opens the Generate Getter and Setter dialog box you see in Figure 2-7. Just select the checkbox next to message and click OK.
Figure 2-7. Creating Getter and Setter methods
Eclipse will create the new getter and setter methods
public class Ch02_02HelperHelper extends Ch02_02Helper {
/* (non-Javadoc)
* @see org.eclipsebook.ch02.Ch02_02Helper#printer( )
*/
String message = "No problems.";
public void printer( ) {
System.out.println(getMessage( ));
}
/**
* @return
*/
public String getMessage( ) {
return message;
/**
* @param string
*/
public void setMessage(String string) {
message = string;
}
Another good timesaver is the Source Surround with try/catch Block menu item. This one checks the code you've selected for uncaught exceptions and writes a try/catch block for any that it findsanother great Eclipse feature worth the price of
admission.
2.1.3 Creating New Packages
Besides using multiple classes in the same project, it's also easy to distribute your code over multiple packages in the same
project. For example, you can break up your code into two
packages, org.eclipse.ch02 and org.eclipse.ch02_2, as you can see in the Package Explorer at left in Figure 2-8. Here,
we're putting the Ch02_03Helper class, which contains the
printer method, into an entirely new package,
org.eclipse.ch02_2.
If you want to access a class in another package, just
remember to import itin this case, that means using the fully qualified name of the class you want access to, which is
org.eclipsebook.ch02_2.Ch02_03Helper. After you've imported the class, you can create objects using it, like this:
import org.eclipsebook.ch02_2.Ch02_03Helper;
/**
* @author Steven Holzner
*
* To change the template for this generated type comment go to
* Window>Preferences>Java>Code Generation>Code and Comments
*/
public static void main(String[] args){
Ch02_03Helper helper = new Ch02_03Helper( );
helper.printer( );
}
}
And that's all it takes; as you can see, multiple packages in the same project are no problem at all.
What if the code you want to use is not only in a different package, it's also in another project? When you create a project, you have the option of adding other projects to the build path. For example, if you want to create a new project that works with the code in the org.eclipsebook.ch02_2
package from a new project, Ch02_03, just click the Projects tab in the second pane of the New Java Project dialog and add the
Ch02_03 project to the build path, as you see in Figure 2-9.
Now the code in Ch02_03, including the
2.2 Building and Running Code
How do you create the Java .class files that are the end result of developing a project? You use the items in the Project menu. The main menu item here is the Project Build Project menu item. This item will compile the source code files in your project and leave the resulting .class files in the same folder as the source code files by default. For example, if you are working with the Ch02_03 project and select Project Build Project, the
.class files for this project will appear in the directory
workspace/Ch02_03/org/eclipsebook/Ch02 (recall that the classes in this project are in the org.eclipsebook.Ch02
package, which the directory structure reflects). Once created, these .class files are ready for use and distribution.
It often makes sense to store all your project's source code in a folder named src and the binary output in a folder named bin. If you want to set things up this way when you create a new
project, open the New Java Project dialog as usual, and, in the second pane, click the Source tab followed by the Add Folder button. Doing so opens the Source Folder Selection dialog; click the Create New Folder button and give the new folder the name
src. Then click OK twice. Eclipse will recognize that you're
creating a source code folder and automatically ask if you want to create a bin folder for the binary output, as you see in Figure 2-10.
Configuring a project this way automatically stores your source code in the folder named src and the binary output in a folder named bin (bin will not appear in the Package Explorer because it doesn't contain any source code).
2.2.1 Using JAR and .class Files
Say that you're writing a Java servlet (for more details on servlets, see Chapter 9), shown in Example 2-4.
Example 2-4. The Ch02_04.java example
package org.eclipse.ch02;
import java.io.*;
import javax.servlet.*;
/**
* @author Steven Holzner
*
* To change the template for this generated type comment go to
* Window>Preferences>Java>Code Generation>Code and Comments
*/
public class Ch02_04 extends HttpServlet {
public void doGet(HttpServletRequest request,
HttpServletResponse response)
throws IOException, ServletException
{
response.setContentType("text/html");
PrintWriter out = response.getWriter( );