by Clayton Walnum
Construction Kit
FOR
Construction Kit
FOR
by Clayton Walnum
Construction Kit
FOR
Hoboken, NJ 07030-5774 www.wiley.com
Copyright © 2005 by Wiley Publishing, Inc., Indianapolis, Indiana Published by Wiley Publishing, Inc., Indianapolis, Indiana Published simultaneously in Canada
No part of this publication may be reproduced, stored in a retrieval system or transmitted in any form or by any means, electronic, mechanical, photocopying, recording, scanning or otherwise, except as permit-ted under Sections 107 or 108 of the 1976 Unipermit-ted States Copyright Act, without either the prior written permission of the Publisher, or authorization through payment of the appropriate per-copy fee to the Copyright Clearance Center, 222 Rosewood Drive, Danvers, MA 01923, (978) 750-8400, fax (978) 646-8600. Requests to the Publisher for permission should be addressed to the Legal Department, Wiley Publishing, Inc., 10475 Crosspoint Blvd., Indianapolis, IN 46256, (317) 572-3447, fax (317) 572-4355, e-mail: brandreview@ wiley.com.
Trademarks:Wiley, the Wiley Publishing logo, For Dummies, the Dummies Man logo, A Reference for the Rest of Us!, The Dummies Way, Dummies Daily, The Fun and Easy Way, Dummies.com, and related trade dress are trademarks or registered trademarks of John Wiley & Sons, Inc. and/or its affiliates in the United States and other countries, and may not be used without written permission. All other trademarks are the property of their respective owners. Wiley Publishing, Inc., is not associated with any product or vendor mentioned in this book.
LIMIT OF LIABILITY/DISCLAIMER OF WARRANTY: THE PUBLISHER AND THE AUTHOR MAKE NO REP-RESENTATIONS OR WARRANTIES WITH RESPECT TO THE ACCURACY OR COMPLETENESS OF THE CON-TENTS OF THIS WORK AND SPECIFICALLY DISCLAIM ALL WARRANTIES, INCLUDING WITHOUT LIMITATION WARRANTIES OF FITNESS FOR A PARTICULAR PURPOSE. NO WARRANTY MAY BE CRE-ATED OR EXTENDED BY SALES OR PROMOTIONAL MATERIALS. THE ADVICE AND STRATEGIES CON-TAINED HEREIN MAY NOT BE SUITABLE FOR EVERY SITUATION. THIS WORK IS SOLD WITH THE UNDERSTANDING THAT THE PUBLISHER IS NOT ENGAGED IN RENDERING LEGAL, ACCOUNTING, OR OTHER PROFESSIONAL SERVICES. IF PROFESSIONAL ASSISTANCE IS REQUIRED, THE SERVICES OF A COMPETENT PROFESSIONAL PERSON SHOULD BE SOUGHT. NEITHER THE PUBLISHER NOR THE AUTHOR SHALL BE LIABLE FOR DAMAGES ARISING HEREFROM. THE FACT THAT AN ORGANIZATION OR WEBSITE IS REFERRED TO IN THIS WORK AS A CITATION AND/OR A POTENTIAL SOURCE OF FUR-THER INFORMATION DOES NOT MEAN THAT THE AUTHOR OR THE PUBLISHER ENDORSES THE INFOR-MATION THE ORGANIZATION OR WEBSITE MAY PROVIDE OR RECOMMENDATIONS IT MAY MAKE. FURTHER, READERS SHOULD BE AWARE THAT INTERNET WEBSITES LISTED IN THIS WORK MAY HAVE CHANGED OR DISAPPEARED BETWEEN WHEN THIS WORK WAS WRITTEN AND WHEN IT IS READ.
For general information on our other products and services, please contact our Customer Care Department within the U.S. at 800-762-2974, outside the U.S. at 317-572-3993, or fax 317-572-4002. For technical support, please visit www.wiley.com/techsupport.
Wiley also publishes its books in a variety of electronic formats. Some content that appears in print may not be available in electronic books.
Library of Congress Control Number: 2004107916 ISBN: 0-7645-7491-4
Manufactured in the United States of America 10 9 8 7 6 5 4 3 2 1
To Lynn.
Author’s Acknowledgments
Some of the people who helped bring this book to market include the following:
Acquisitions, Editorial, and Media Development
Project Editor:Kelly Ewing
Acquisitions Editor:Greg Croy
Technical Editor:Lee Musick
Editorial Manager:Carol Sheehan
Permissions Editor:Laura Moss
Media Development Specialist:Travis Silvers
Media Development Manager: Laura VanWinkle
Media Development Supervisor: Richard Graves
Editorial Assistant:Amanda Foxworth
Cartoons:Rich Tennant (www.the5thwave.com)
Composition
Project Coordinator: Nancee Reeves Layout and Graphics: Andrea Dahl,
Lauren Goddard, Denny Hager, Joyce Haughey, Melanee Prendergast, Heather Ryan
Proofreaders: David Faust, John Greenough, TECHBOOKS Production Services Indexer: TECHBOOKS Production Services
Publishing and Editorial for Technology Dummies
Richard Swadley,Vice President and Executive Group Publisher
Andy Cummings,Vice President and Publisher
Mary Bednarek,Executive Acquisitions Director
Mary C. Corder,Editorial Director
Publishing for Consumer Dummies
Diane Graves Steele,Vice President and Publisher
Joyce Pepple,Acquisitions Director
Composition Services
Gerry Fahey,Vice President of Production Services
Introduction...1
Part I: Making Your Own Internet Explorer ...5
Chapter 1: Exploring the Benefits of Browser Customization ...7
Chapter 2: Figuring Out What’s Customizable ...17
Chapter 3: Meeting the Browser Construction Kit ...27
Part II: Customizing the Look of the Browser ...37
Chapter 4: Designing the Browser Window ...39
Chapter 5: Adding the Browser Pane ...53
Chapter 6: Assembling the Toolbar ...61
Chapter 7: Designing the Menu Bar ...69
Chapter 8: Pulling Together the Status Bar ...73
Chapter 9: Customizing the Address Bar ...81
Part III: Creating Browser Graphics ...87
Chapter 10: Introducing Paint Shop Pro ...89
Chapter 11: Jazzing Up Your Browser with Borders ...99
Chapter 12: Painting Skins ...113
Chapter 13: Creating Toolbars ...125
Chapter 14: Painting Status Bars ...139
Chapter 15: Manufacturing Buttons ...147
Chapter 16: Producing Icons ...157
Part IV: Controlling the Behavior of the Browser ...165
Chapter 17: Controlling Access to Internet Sites ...167
Chapter 18: Incorporating Passwords and Tracking Time Online ...173
Chapter 19: Keeping Track of Visited Sites ...181
Chapter 20: Exploring a Browser Script File ...187
Part V: Designing Customized Web Browser Projects ...207
Chapter 21: Developing a General-Use Web Browser ...209
Chapter 26: Designing a Library Browser ...281
Chapter 27: Getting a Laugh with an April Fool’s Browser ...295
Chapter 28: Constructing a Sheet-Metal Browser ...309
Part VI: The Part of Tens ...319
Chapter 29: Ten More Browser Ideas ...321
Chapter 30: Ten Tools and Resources for Web Browser Builders ...339
Appendix: What’s on the CD-ROM ...345
Introduction ...1
About This Book ...1
Conventions Used in This Book ...1
What You’re Not to Read ...2
Foolish Assumptions ...2
How This Book Is Organized ...2
Part I: Making Your Own Internet Explorer ...2
Part II: Customizing the Look of the Browser ...3
Part III: Creating Browser Graphics ...3
Part IV: Controlling the Behavior of the Browser ...3
Part V: Designing Customized Web Browser Projects ...3
Part VI: The Part of Tens ...3
Icons Used in This Book ...4
Where to Go from Here ...4
Part I: Making Your Own Internet Explorer ...5
Chapter 1: Exploring the Benefits of Browser Customization . . . .7
Application Simplification ...7
Special-Purpose Browsers ...8
Specific-Audience Browsers ...9
The Joy of Do-It-Yourself ...10
Browser Construction Kit Installation ...11
Browser Construction Kit Removal ...15
Chapter 2: Figuring Out What’s Customizable . . . .17
The Kit Versus the Full Internet Explorer ...17
Window Elements ...19
The title bar and icon ...20
The window style and color ...21
The buttons and client area ...22
The Browser Pane ...23
Toolbars, Status Bars, and Menus ...24
The toolbar ...24
The status bar ...24
The menu bar ...25
Chapter 3: Meeting the Browser Construction Kit . . . .27
Microsoft Licensing ...27
The Browser Editor ...28
Starting the editor ...28
Introducing the toolbox ...29
Exploring the browser display pane ...30
Exploring the custom function pane ...30
Including Standard Browser Features ...32
Menu bar ...32
Toolbar ...33
Status bar ...33
Address bar ...33
Understanding Custom Browser Features ...34
Passwords and the locking mechanism ...34
Timers ...34
Clock ...34
Alarms ...35
Site-approval list ...35
Web browsing log ...35
Screen-capture “spy” ...35
Custom Web browser graphics ...36
Part II: Customizing the Look of the Browser ...37
Chapter 4: Designing the Browser Window . . . .39
The Window Command Category ...39
The Window Color ...40
The Application Icon ...42
The Window Style ...43
The Normal style ...44
The Normal Unsizable style ...44
The Toolbox style ...46
The Toolbox Unsizable style ...46
The No Controls style ...47
Minimize, Maximize, and Close Buttons ...48
The Window Borders ...49
The Window Skin ...51
The Window Title ...52
Chapter 5: Adding the Browser Pane . . . .53
The Browser Command Category ...53
Pane Position ...57
Pane Size ...58
Starting a Web Page ...59
Chapter 6: Assembling the Toolbar . . . .61
The Toolbar Command Category ...61
Toolbar Position ...64
Toolbar Image ...64
Button Types ...65
Back, Forward, Stop, Refresh, and Home buttons ...65
The Search button ...67
The Favorites button ...67
Chapter 7: Designing the Menu Bar . . . .69
The Menu Bar Command Category ...69
The Menus ...71
Chapter 8: Pulling Together the Status Bar . . . .73
The Status Bar Command Category ...73
Status Bar Position ...75
Status Bar Image ...76
The Status Bar Icon ...77
The Status Bar Clock ...78
The Status Bar Timer ...78
The Status Bar Date ...79
The Current URL ...80
Chapter 9: Customizing the Address Bar . . . .81
The Address Bar Command Category ...81
Address Bar Position ...83
Address Bar Image ...84
The Go Button ...85
The Favorites Buttons ...86
Part III: Creating Browser Graphics ...87
Chapter 10: Introducing Paint Shop Pro . . . .89
Installing Paint Shop Pro ...89
Chapter 11: Jazzing Up Your Browser with Borders . . . .99
Understanding Border Requirements ...99
Starting a New Border ...100
Filling the Background ...102
Changing the Rectangle to 3-D ...104
Painting a 3-D Rivet ...105
Adding the Rivet to the Border ...109
Saving the Border ...110
Chapter 12: Painting Skins . . . .113
Understanding Skin Requirements ...113
Starting a Skin ...114
Filling a Background with a Texture ...115
Filling a Background with a Pattern ...118
Filling a Background with a Gradient ...121
Chapter 13: Creating Toolbars . . . .125
Understanding Toolbar Requirements ...125
Starting a New Toolbar ...126
Filling the Toolbar’s Background ...128
Adding a Sunburst Effect ...130
Adding a Graphic to the Toolbar ...132
Adding a 3-D Effect ...136
Chapter 14: Painting Status Bars . . . .139
Understanding Status Bar Requirements ...139
Starting a New Status Bar ...140
Filling the Status Bar’s Background ...142
Adding the 3-D Effect ...144
Chapter 15: Manufacturing Buttons . . . .147
Understanding Button Requirements ...147
Starting a New Button ...148
Zooming In on the Button ...149
Filling the Button’s Background ...150
Adding a 3-D Effect ...152
Adding an Image to Your Button ...153
Chapter 16: Producing Icons . . . .157
Getting an Icon Editor ...157
Understanding Icon Requirements ...158
Starting a New Icon ...158
Making an Icon from Scratch ...159
Part IV: Controlling the Behavior of the Browser ...165
Chapter 17: Controlling Access to Internet Sites . . . .167
Using the Internet Alarm ...167
Setting Up an Approved-Sites List ...170
Chapter 18: Incorporating Passwords and Tracking
Time Online . . . .173
Using the Password System ...173
Recovering Your Password ...174
Using Timers ...178
Setting the timer options ...178
Associating an alarm with the countdown timer ...179
Chapter 19: Keeping Track of Visited Sites . . . .181
Generating Web Site Log Files ...181
Starting a log file ...182
Viewing and deleting a log file ...182
Generating Automatic Screen Captures ...182
Starting screen captures ...183
Viewing and deleting screen captures ...183
Chapter 20: Exploring a Browser Script File . . . .187
What the Editor Does ...187
The Seven Attribute Groups ...188
Attribute Settings ...189
The Simplest Script File ...190
A Complete Script File ...191
The Window Attributes Section ...194
The Browser Attributes Section ...196
The Toolbar Attributes Section ...197
The Status Bar Attributes Section ...199
The Menu Bar Attributes Section ...200
The Function Attributes Section ...204
The Address Bar Attributes Section ...204
Part V: Designing Customized Web Browser Projects ...207
Chapter 21: Developing a General-Use Web Browser . . . .209
Creating the Window ...209
Adding the Menu Bar ...212
Adding the Toolbar ...214
Adding the Address Bar ...218
Adding the Browser Pane ...220
Compiling the Custom Browser ...222
Chapter 22 Coming Up with a Child’s Web Browser . . . .223
Creating the Window ...223
Adding the Menu Bar ...227
Adding the Toolbar ...228
Adding the Address Bar ...230
Adding the Browser Pane ...232
Adding Child Safety Features ...234
Compiling the Custom Browser ...235
Chapter 23: Designing a Special-Topic Browser . . . .237
Creating the Window ...237
Adding the Menu Bar ...241
Adding the Toolbar ...243
Adding the Status Bar ...245
Adding the Address Bar ...248
Adding the Browser Pane ...250
Compiling the Custom Browser ...251
Chapter 24: Developing a Dedicated-Site Browser . . . .253
Creating the Window ...253
Adding the Menu Bar ...256
Adding the Toolbar ...257
Adding the Status Bar ...259
Adding the Browser Pane ...261
Compiling the Custom Browser ...263
Chapter 25: Creating a Spy Browser . . . .265
Creating the Window ...265
Adding the Menu Bar ...268
Adding the Toolbar ...270
Adding the Status Bar ...272
Adding the Browser Pane ...274
Adding the Address Bar ...276
Adding the Spy Features ...278
Compiling the Spy Browser ...279
Chapter 26: Designing a Library Browser . . . .281
Creating the Window ...281
Adding the Menu Bar ...284
Adding the Status Bar ...288
Adding the Address Bar ...290
Adding the Browser Pane ...292
Compiling the Custom Browser ...293
Chapter 27: Getting a Laugh with an April Fool’s Browser . . . .295
Creating the Window ...295
Adding the Menu Bar ...298
Adding the Toolbar ...299
Adding the Status Bar ...301
Adding the Address Bar ...303
Adding the Browser Pane ...305
Compiling the Custom Browser ...307
Chapter 28: Constructing a Sheet-Metal Browser . . . .309
Creating the Window ...309
Adding the Menu Bar ...312
Adding the Toolbar ...313
Adding the Status Bar ...314
Adding the Address Bar ...315
Adding the Browser Pane ...317
Compiling the Custom Browser ...318
Part VI: The Part of Tens ...319
Chapter 29: Ten More Browser Ideas . . . .321
The Animal Theme ...321
The Art Theme ...323
The Music Theme ...325
The Sea Theme ...326
The Sports Theme ...328
The Stamps Theme ...330
The Browse-Only Browser ...332
The Traditional Theme ...333
The Minimal Browser ...335
The Dream Browser ...337
Chapter 30: Ten Tools and Resources for Web Browser Builders . . .339
Microsoft Paint ...339
ImageForge ...340
Adobe Photoshop ...340
Microsoft Visual Basic .NET ...340
MSDN ...341
Internet Explorer Programming Support Center ...341
IEAK ...342
Your Favorite Internet Search Engine ...342
Microsoft Windows Update ...342
Appendix What’s on the CD-ROM ...345
System Requirements ...345
Using the CD ...346
What You’ll Find on the CD ...346
Author-created material ...346
Paint Shop Pro ...346
Troubleshooting ...347
I
think it’s safe to say that practically every personal computer on the planet has some sort of Internet browser installed on it. The Internet has become — in a very real sense — an extension of our own machines, often so perfectly integrated with our computer’s operating system that we sometimes can’t tell the difference.With Internet browsers taking such a huge place in the computing world, it seemed to me that it’d be cool to have a little fun with them, to come up with a way to put together a browser in the same way that you might glue together a model. The idea was to provide a set of components and settings and then let the user decide what he wanted to use.
And so was born the Browser Construction Kit, the software that accompanies this book.
About This Book
Using the Browser Construction Kit, you can create dozens (hundreds?) of different browser configurations, from browsers that look much like any other Windows application to some way out designs, with custom graphics, buttons, menus, and so on.
Some of this book is the software manual for the Browser Construction Kit, whereas other parts of the book provide hands-on projects for building many types of Web browsers. Such browser designs include a safe browser for chil-dren, a specialized browser for small businesses, and even an April Fool’s browser that’s sure to drive your April 1 victims batty.
Conventions Used in This Book
What You’re Not to Read
Some elements of this book provide information that you need not bother with. What’s the point of having this stuff clogging up the works? Well, you just might want to read this extra information, especially if you’re interested in learning something over and above the basic instructions for using the software.
Foolish Assumptions
The Browser Construction Kit requires no programming, so don’t get the idea that you need to be a computer scientist to get the thing to work. Designing a new Web browser is easy! It would be nice if you know something about the Internet — from a user’s point of view — and have some experience with Microsoft Internet Explorer. But, regardless of your experience level, within a short while, you’ll be cranking out browser designs like a pro. What do you need to get going? The following list is a good start:
⻬A Windows computer
⻬An Internet connection
⻬A user’s knowledge of Web browsers
⻬The desire to create interesting browser designs of your own Although you have no need of programming skills to use the Browser Construction Kit, the complete Visual Basic .NET source code is included on this book’s CD. If you know how to program with VB .NET, you can look over the source code to see how the program works. You can even load it into your copy of VB .NET and make whatever modifications you like.
How This Book Is Organized
This book has six parts, but you don’t have to read the parts in any special order. If, for example, you want to build a browser or two right away, feel free to jump ahead to Part V, where you’ll find step-by-step instructions for building eight unique browser designs. If you want to know more about the Browser Construction Kit’s many commands, Part II gives you what you need. Get the idea? To help you on your way, here’s a brief roadmap of the book.
Part I: Making Your Own Internet Explorer
also discover good reasons for creating browsers (as if you need any), as well as discover what parts of a browser are easily customizable.
Part II: Customizing the Look of the Browser
This part goes through the Browser Construction Kit in detail, showing you how to use its many controls and commands, as well as how all the parts fit together to create a unique browser design.
Part III: Creating Browser Graphics
Many components of your custom browser can display images that you create yourself with a paint program. These images include backgrounds for the window, border images, button images, and much more. In this part of the book, you discover how to make the images you need for your browser — and all without having to go to art school for four years!
Part IV: Controlling the Behavior
of the Browser
This is the second part of the book that deals in detail with the workings of the Browser Construction Kit. Here, you find out about alarms, locks, passwords, timers, automatic screen captures, log files, and more.
Part V: Designing Customized
Web Browser Projects
The Browser Construction Kit is all about creating browsers, of course, and this part is where you put together browser designs that I’ve created for you, to demonstrate the many ways you can use the Browser Construction Kit. In this part, step-by-step procedures lead you through the construction of eight different browsers.
Part VI: The Part of Tens
Icons Used in This Book
Throughout this book, little pictures, known as icons,appear in the margin. These icons give you a quick visual aid to the following categories:
Whenever you see this icon, you’ll find information on how to do something more efficiently.
This icon marks information that you need to know in order to get the most out of the software.
This icon provides technical background information that you may or may not find interesting. You don’t need to read the material if you don’t want to.
Be careful! When you see this icon, pay special attention because it notes places where you could run into trouble.
This book is accompanied by a CD, and whenever you see this icon, you’re getting a heads up that you should have your CD ready to use.
Where to Go from Here
You can use this book in a couple of ways. Like any book, you can start at the beginning and read your way to the end. That’s probably the best way to learn about the Browser Construction Kit software and the things you can do with the custom browsers you build. You can, however, skip around in the book, if you like, just reading the sections that provide the information you need at any given moment. Because of this nonlinear approach, after you know how to use the software, this book makes a great reference.
Exploring the Benefits of Browser
Customization
In This Chapter
䊳Simplifying a browser application
䊳Targeting a special purpose or user
䊳Installing the Browser Construction Kit
Y
ou’ve probably used your favorite Web browser for a long time. Your browser is a trusted friend that accompanies you on your many treks through the complex world of the World Wide Web. You can’t help but feel warm and fuzzy when you load your browser. (Geez, maybe we all should get out more.) After all, it provides the gateway to many cool adventures, from looking up the latest gossip on your favorite celebrity to more mundane tasks like research. Why on earth change something that works so well? I can come up with plenty of reasons! Of course, not all of these reasons apply to you. Reasons for creating a custom Web browser are as varied as the people using them. You may just want to make the browser easier to use, or you may need a browser customized for a special purpose. Whatever your reasons, this book and its accompanying software are just the ticket. This chapter explains why you may want to build a customized Web browser.Application Simplification
Application simplificationis the process of stripping out parts of a program that you don’t need and may never use. Getting rid of that overhead makes your browser easier to use for a number of reasons:
⻬Fewer commands makes a browser less intimidating.
⻬Fewer commands also means that you work faster because you don’t have dozens of commands to search through.
⻬Fewer controls leaves more screen room for the main display area.
⻬Fewer controls and commands may help the browser load faster. Application simplification is automatic with the Browser Construction Kit. You start with only an empty window, as shown in Figure 1-1, and then add only the program elements you want. In this way, nothing extra clutters the browser’s window or menus.
You may think that the browser customization process is difficult, but the first time you create your own browser, you’ll be amazed at how easy the Browser Construction Kit is to use.
Special-Purpose Browsers
Most Web browsers target the general user. Because so many different types of people use browsers, the browser makers try to please everyone. This attempt yields browsers overloaded with features, most of which the average user never needs. Moreover, such browsers lack special features that a few
Figure 1-1:
people may want. A special-purpose browser— the kind you can create with the Browser Construction Kit — boasts features not found in a conventional browser. A special-purpose browser, for example, can include features that prevent children from accessing unsuitable Web sites.
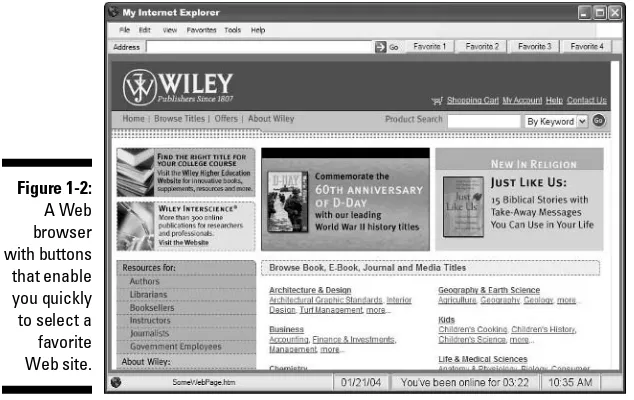
For more information on special browser features, refer to Part IV. In that part, you can read about timers, site-approval lists, locks, and other cool features. Want an example? What if you want a kids’ browser that disables surfing to unsavory Web sites? Or how about a browser that accesses a set of favorite sites with a button click (see Figure 1-2)? Maybe you have a small store, and you want a browser that accesses your catalog, but cannot go elsewhere on the Web. (Hey, you don’t want your customers checking out the competition’s Web site, do you?) Reasons for creating special-purpose Web browsers are more numerous than dust bunnies under my bed — and that’s a lot of reasons!
Specific-Audience Browsers
A fine line divides special-purpose browsers from those targeting a specific audience. For example, a browser designed for children has both a special purpose and a specific audience, right? Yep. In fact, special-purpose and specific-audience browsers often have much in common. The difference is that, when I talk about special-purpose browsers, I’m referring to browser functionality. On the other hand, when I talk about specific-audience browsers,
I’m referring to the way a browser looks. Specifically, I mean the types of graphics you use for buttons and other areas of the browser’s window.
That special-audience browser for your hardware store looks better if it’s designed with images related to hardware. As another example, suppose that you’re crazy about gardening. (Hey, weirder things have happened.) Wouldn’t it be cool to have a Web browser covered with garden-type images (see Figure 1-3)? I’d rather have bikini models, of course, but that’s just me.
The Joy of Do-It-Yourself
Don’t forget the most important thing about customizing a Web browser: It’s fun! You like to build things, right? Who doesn’t? (Okay, my crazy Uncle Satch would rather paint crickets, but that’s another story.) Unlike that jigsaw puzzle of a black cat that’s been sitting in your family room for the past three weeks, a custom Web browser is actually useful. That puzzle . . . well, you’re just going to break it up and throw it back into the box.
To make a Web browser project even more stimulating and exciting, load up your favorite paint program (or use the one on this book’s CD) and create custom images for your browser projects. Such images include borders, back-grounds, status bars, and even buttons, as shown in Figure 1-4. If your browser project was any more fun, it would be illegal!
Figure 1-3:
Don’t go hog wild creating browser graphics just yet. You need to understand the types of images the Browser Construction Kit expects. Each type of image, for example, must be the correct size. Failure to follow the rules can lead to some very weird looking browsers! Check out Part III for more information.
Browser Construction Kit Installation
Before you can design your own Web browsers, you need to install the Browser Construction Kit, located on this book’s CD-ROM. The Browser Construction Kit is a software package comprising a browser editor and a browser compiler. You design your browser using the WYSIWYG (what you see is what you get) editor and then run the browser with the browser com-piler. You don’t need to be a programmer to use the Browser Construction Kit, but if you’re interested in that kind of thing, I wrote the software using Visual Basic .NET. All the software’s source code is also on the CD.
Figure 1-4:
Here’s how to install the Browser Construction Kit:
1. On this book’s CD-ROM, find the Browser Construction Kit folder and open it.
2. Double-click the setup.exe file.
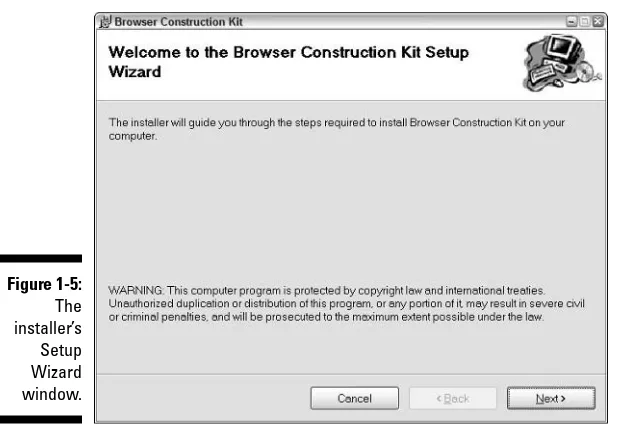
The installer’s Setup Wizard window appears, as shown in Figure 1-5.
3. Click the Next button to continue with the installation.
The Select Installation Folder window appears (see Figure 1-6).
4. Select the folder into which you want the Browser Construction Kit installed.
Normally, you just leave the default folder selected.
5. Select either the Everyone or Just Me button, depending on whether you want to install the program for every user on your system or just for you.
6. Click Next.
The Confirm Installation window appears, as shown in Figure 1-7.
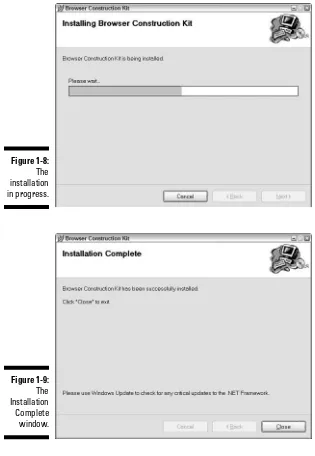
7. Click Next to start the installation.
The installer’s window shows the installation’s progress as it goes, as shown in Figure 1-8.
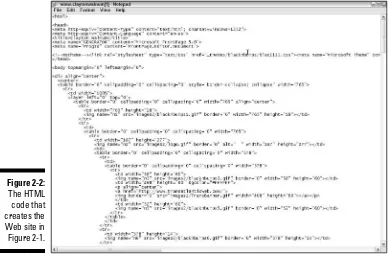
Figure 1-5:
When the installation finishes, the Installation Compete window appears, as shown in Figure 1-9.
8. Click Close to exit.
Figure 1-7:
The Confirm Installation dialog box.
Figure 1-6:
After installation, an icon for the Browser Construction Kit appears on your desktop. The application also appears on your Start menu. You run the pro-gram by double-clicking the icon on your desktop or by single-clicking the application on your Start menu.
Figure 1-9:
The Installation Complete window.
Figure 1-8:
Browser Construction Kit Removal
I just know that you’ll love the Browser Construction Kit so much that you’ll never want to remove it from your system. But, just in case, the application features a handy removal method that you can access from your Control Panel. Here’s how:
1. Go to your Start menu and choose Control Panel from the pop-up menu that appears, as shown in Figure 1-10.
2. In the Control Panel, click Add Or Remove Programs, as shown in Figure 1-11.
3. In the Currently Installed Programs list, click the Browser Construction Kit.
The Change and Remove buttons appear.
4. Click the Remove button (see Figure 1-12) and answer Yes when asked whether you’re sure that you want to remove the program.
Windows removes the Browser Construction Kit from your system.
Figure 1-10:
After Windows has removed the application from your computer, the program files, as well as the program’s entries on your Start menu and your desktop will be gone. However, any files you created with the Browser Construction Kit — that is, files that didn’t exist at the time of the installation — will still be on your computer. You can remove such files manually.
Figure 1-12:
Choosing to remove the application.
Figure 1-11:
Figuring Out What’s Customizable
In This Chapter
䊳Understanding the Windows user interface
䊳Exploring window styles
䊳Customizing toolbars, status bars, and menu bars
T
he full Internet Explorer and the browser you create with the Browser Construction Kit are very different beasts. Although these beasts share the same heart (lub-dub, lub-dub), their external features can be very differ-ent indeed. This is because, like everything else in the universe, building your own Web browser is a give-and-take situation. Specifically, your custom browser cannot have all the features of the full Internet Explorer. But what do you give up, and what do you gain? I’m glad you asked, because the answer is what this chapter is about.The Kit Versus the Full Internet Explorer
Writing an application the size and complexity of Internet Explorer requires dozens of programmers and years of development time — not to mention the gallons of caffeine-laden pop and the bushels of nacho chips consumed. Internet Explorer is up to Version 6, and Microsoft’s programmers are still working on improving it. If you think that one guy (me) sitting behind a laptop computer can compete with that kind of programming muscle . . . well, I’ve got some swampland in Florida you may be interested in.
Anyway, the point is that, when I put together the Browser Construction Kit, I didn’t have to worry about the gory details of rendering HTML files into Web pages or even how to browse from one Web site to another. The Internet Explorer control takes care of everything. I did, however, have to create a user interface for the control that enables the user (that’s you) to send commands to the Internet Explorer control. The cool part is that you decide which user interface elements you want to use.
HTML is the language used to create Web pages. If you’ve ever seen HTML, you have to admit that it’s downright amazing that all that nonsense could ever create something as attractive as a Web page. For example, look at Figure 2-1. There you see a Web browser displaying the home page of my Web site. Figure 2-2, on the other hand, shows what the Web page’s HTML looks like. Yikes!
The browser that the Browser Construction Kit creates lacks some features of the full Internet Explorer. (You never use those features, anyway.) That guy (me again) sitting behind the laptop computer can only do so much. That guy (yep, me again) did, however, include a lot of extra features that the regular Internet Explorer doesn’t have. The point isn’t to reproduce Internet Explorer, but instead to create something new and different. So, although you give up a few features, you get cool new ones like alarms, timers, kid-safety functions, and so on.
Figure 2-1:
To get an overview of the Browser Construction Kit’s many features, refer to Chapter 3.
When you’re browsing the Internet, you may be overcome by the urge to look at some HTML (yeah, right). Here’s how: Go to Internet Explorer’s View menu and choose the Source command. Presto!Notepad runs and loads up the page’s HTML. If you’re ever interested in learning HTML, take a peek at this source code to see what other HTML folks are doing on their Web pages.
Window Elements
Almost every Windows application — Internet Explorer included — shares a set of features. This sharing isn’t one program stealing good ideas from another. Nope, the features I’m talking about are written up by Microsoft in a document for programmers. This document details the way Windows applica-tions’ user interfaces should be programmed.
For example, most Windows applications sport a File menu, right? If you use Windows applications at all, you know that the File menu holds commands like New, Open, Save, Save As, Print, and Exit. Thanks to this menu consis-tency, you don’t learn a new set of basic commands for every new Windows application.
Figure 2-2:
Consistency, however, doesn’t mean that the standard window elements aren’t customizable. Applications can, and do, decide what standard Windows fea-tures they want to offer, as well as how they want those feafea-tures to look and act.
A good example is a toolbar. This handy element of a Windows application often displays buttons that represent commonly used menu commands. The application’s user can issue a command with a single mouse click, rather than digging through the menus. Typically, toolbar commands include load-ing and savload-ing files, editload-ing the current document, choosload-ing style commands, and so on.
The Browser Construction Kit follows (mostly, anyway) the Windows guide-lines for application user interfaces. As the browser customizer, however, you get to decide what features to include and what they look like. The features I’m talking about include the following:
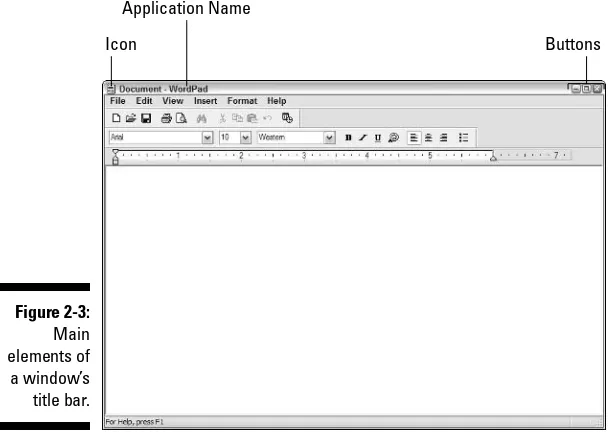
⻬Title bar
The title bar and icon
In a Windows application, the title bar is the horizontal area at the top of the window. The title bar usually displays, among other things, the following items:
⻬Application icon
⻬Application name
⻬Window control buttons
The window style and color
Not every window looks alike. You may have noticed, for example, that an application’s main window looks very different from a dialog box (which is also a type of window). You may even have seen windows that are nothing more than rectangles on the screen (Figure 2-4). In fact, in its simplest form, that’s exactly what a window is: a rectangle in which an application draws its display.
A window’s style determines how the window looks and acts. Microsoft built these window styles into Windows, but the Browser Construction Kit lets you choose the style for your browser. Here are the styles supported by the my kit:
⻬Normal:A standard window.
⻬Normal Unsizable:A standard window that cannot be resized.
⻬Toolbox:A window with a small title bar and only a close button (no minimize or maximize buttons).
⻬Toolbox Unsizable:Same as a toolbox window, except the user cannot resize the window.
⻬No Controls:A simple rectangular window with no controls. To find out more about these window styles, refer to Chapter 4.
Icon
Application Name
Buttons
Figure 2-3:
Besides choosing a window style, you can also set the window’s background color, which is the color that fills the main part of the window, usually called the client area. The client areais where an application displays its data. In the case of a Web browser, the client area displays the current Web page.
The buttons and client area
Most windows have three buttons, one for closing the window and two for controlling the size of the window. These buttons live in the upper-right corner of the window. Not every window has the same buttons, however. In fact, some windows have no buttons at all. Here’s what the three buttons do:
⻬Minimize button:When clicked, this button reduces the window to an icon on the taskbar.
⻬Maximize/Restore button:The first time you click this button, it increases the window to the full size of the screen. The button then changes to a Restore button, which, when clicked, returns the window to its original size.
⻬Close button:This button — the one with the X — closes the window. Clicking this button is the same as choosing the File menu’s Exit command.
The Browser Construction Kit enables you to decide which of these buttons to include in your browser’s window. These choices, though, depend on the window style you choose. A toolbox-style window, for example, can never have Minimize and Maximize buttons.
Figure 2-4:
The Browser Construction Kit enables you to include one, both, or neither of the Minimize and Maximize buttons. In this way, you can control the way the user manipulates your custom browser window.
The Browser Construction Kit places the browser pane in the window’s client area. The client area provides space for two extra items as well: graphical borders and backgrounds. You can use your favorite paint program to create these borders and backgrounds and then add them to your custom browser. The thematic possibilities are endless. Please refer to Part III for more infor-mation on creating browser graphics.
The Browser Pane
The browser paneis the graphical representation of the Internet Explorer con-trol. This component of the browser does most of the work of browsing the Internet. Normally, this pane consumes the entire client area of the window, but the Browser Construction Kit lets you place the browser pane anywhere you want in the client area. You can also set it to any size you want. Figure 2-5 shows the browser editor with a small browser pane in the right side of the window’s client area.
Figure 2-5:
When you’re online with your custom browser, the browser pane displays the current Web page. This fact means that, although you can choose any size and position you want for the browser pane, practical considerations restrict your choices.
Toolbars, Status Bars, and Menus
Most full-featured Windows applications have a toolbar, a status bar, and a menu bar. Your custom browser is no different. Well, maybe it is, depending upon how you design it. Although you can add a toolbar, status bar, and menu bar to your browser, you don’t have to. Congress hasn’t passed that law yet, although I understand that they’re close to requiring all Web browsers to feature a large presidential-campaign donation button.
The toolbar
If you add a toolbar to your browser, you can also add one or more standard browser buttons. You use these buttons all the time. Really, you do. Here’s a list of those buttons:
⻬Home:Returns the browser to the home page.
⻬Back:Returns the browser to the previously viewed page.
⻬Forward:Returns the browser to the page viewed before clicking the Back button.
⻬Stop:Stops loading the current page.
⻬Refresh:Reloads the previous page.
⻬Search:Sends the browser to a Web search engine.
⻬Favorites:Displays links to favorite Web sites.
With the Browser Construction Kit, you can assign your own images to the toolbar buttons. Just load up your paint program, create images of the cor-rect size, and use the browser editor to add the images to the buttons. You can also create an image to use for the toolbar background. Could this be more fun? I mean, you can have a toolbar that looks like a sheet of metal or one the color of spicy mustard, although I don’t recommend the latter.
The status bar
which aren’t available in the regular Internet Explorer. These displays are as follows:
⻬Icon:A small image that appears at the far left of the status bar.
⻬Clock:Displays the current time.
⻬Timer:Displays the amount of time online or a countdown timer.
⻬Date:Displays the current date.
The menu bar
Almost every Windows application has a menu bar, which is where the appli-cation’s commands hang out. Your custom browser can have a menu bar, too. Or not. The choice is yours. If you choose to have a menu bar, you then decide which menus to include, although the content of the menus depends on the features you include in your browser. In any case, the Browser Construction Kit supplies the appropriate command entries for the menus you choose to include. These menus are supported by the Browser Construction Kit:
⻬File
Notes for Visual Basic Programmers
If you’re not a programmer, skip this section. If you are a programmer, you may be interested to know that the Browser Construction Kit is programmed using Visual Basic .NET. You may be even more interested to know that the complete source code is on this book’s CD-ROM. This fact means, of course, that not only can you explore the program to see how it works, but you can also add your own features.
Meeting the Browser
Construction Kit
In This Chapter
䊳Understanding Internet Explorer licensing
䊳Looking over the browser editor
䊳Exploring browser features
䊳Discovering custom browser functions
I
n Chapters 1 and 2, you find out why you’d want to design a custom Web browser, as well as discover the types of browser elements you can fiddle with. In this chapter, you examine the Browser Construction Kit and get a handle on the power it gives you to design the perfect Internet browser — perfect, that is, with respect to the use you have in mind. You don’t actually design a Web browser in this chapter (dang it!), but you can see the many commands that you can use with the Browser Construction Kit.Microsoft Licensing
How do you get your license? No, you don’t have to travel to Redmond, Washington, and meet with Bill. All you need to do is load up your Web browser and go to Microsoft online at www.microsoft.com/windows/ieak/ license/existing/default.asp. When the Web page appears, click the Licensing And Registration link in the text and complete the form that appears.
Of course, if you’re just designing browsers for your own use or to share with family members, you don’t need a license. All you need is the Web Browser Construction Kit and the information in this book.
Don’t distribute a custom Web browser based on Internet Explorer (which is the type of browser the Browser Construction Kit creates) without getting the proper license from Microsoft. Doing so is a violation of Microsoft’s copy-rights. Because the Browser Construction Kit is included on this book’s CD-ROM, this publisher had to acquire the license, too.
The Browser Editor
You can use the Browser Construction Kit to design a custom browser in two ways:
⻬By using the Kit’s included editor (the easy way)
⻬By writing browser script files by hand (the hard way)
Most of the time, you’re going to want to use the editor because it’s a whole lot easier than memorizing the commands that can be in a browser’s script file. If you like monkeying around with technical things, though, you can dig into the script that the editor creates for you or even build your own from scratch. For most of this book, I assume that you’re always going to use the editor. (I talk about scripts in Chapter 20.)
Starting the editor
To start the editor, just double-click the Browser Construction Kit icon on your desktop. (If you haven’t installed the Browser Construction Kit, see Chapter 1.) You can also find the icon on your Start menu (where it requires only a single click). In Windows XP, for example, just open the Start menu and go to All Programs/Browser Construction Kit (or whatever folder you chose when you installed the software from the CD).
Introducing the toolbox
Down the left side of the editor’s window is the toolbox,which contains the components of a Web browser and commands that you need to assemble your custom browser. The editor arranges these components and commands into the following seven categories:
⻬Address bar:Commands and components that build your browser’s address bar.
⻬Browser:Commands and components of a Web browser that affect the pane in which you browse the Internet.
⻬Functions:Custom functions — such as the timer, alarm, and site-approval list — that you can add to your browser.
⻬Menu bar:Commands and components that determine the types of menus you want in your menu bar.
⻬Status bar:Commands and components that build your browser’s status bar.
Figure 3-1:
⻬Toolbar:Commands and components that build your browser’s toolbar.
⻬Window:Commands and components that affect the browser’s main window.
Only one set of commands and components can appear in the toolbox at one time. You choose the set you want from the drop-down list at the bottom of the toolbox. For example, in Figure 3-1, the toolbox contains the commands for the main window, whereas in Figure 3-2, the toolbox is set to show com-mands for the custom browser functions. Notice how, in each case, the drop-down list below the toolbox shows the current command category.
Exploring the browser display pane
As you build your custom Web browser, the changes you make appear in the browser display pane,which is the large area to the right of the toolbox. Before you start building your browser, this pane displays a basic window. As you add and customize browser components, they appear in the window. This way, you can see, even as you work, exactly what your custom browser looks like. Figure 3-3, for example, shows the editor after the user has made the following customizations:
⻬Changed the browser window’s style to an unsizable toolbox
⻬Changed the browser title to My Browser
⻬Added a menu bar
⻬Added border graphics
⻬Added and positioned a browser pane
Exploring the custom function pane
The final part of the editor is the custom function pane,which is where the browser functions you add from the Functions category appear. These spe-cial functions include the following:
⻬A log file
⻬An alarm
⻬A locking mechanism
⻬A site-approval list
⻬A screen-capture “spy”
Figure 3-3:
As you build your browser, the browser display panel displays the results.
Figure 3-2:
When you add one of these special functions to your browser, the function’s icon appears in the custom function pane. Figure 3-4 shows the editor after the user has added all the custom functions.
The custom functions whose icons appear in the custom function pane don’t, for the most part, affect the way your browser window looks. For example, when you add a menu bar to your browser, you can see it at the top of the window. However, the alarm function doesn’t add anything to the browser window, so it appears in the custom function pane instead, just so you know you’ve selected it.
Including Standard Browser Features
Your custom browser shares a set of features with the standard Internet Explorer. These features (assuming that you decide to add them to your browser) include a menu bar, a toolbar, a status bar, and an address bar.
Menu bar
Your custom browser’s menu barcan contain many of the same commands found in the full-featured Internet Explorer, as well as access to commands that control custom features, such as locks, alarms, and log files. As you build your browser, you decide whether you want a menu bar and what menus will be on it. Here are your menu choices:
⻬File:Holds commands such as Open, Close, and Save.
⻬Edit:Contains commands such as Cut, Copy, and Paste.
⻬View:Includes commands to hide or view various browser components, such as the toolbar and status bar.
⻬Favorites:Holds commands to access favorite Web sites.
⻬Tools:Lists commands to access custom tools and functions that you may have added to your browser.
⻬Help:Contains commands to access the Windows Help system, as well as to view the browser’s About dialog box.
Toolbar
The toolbarholds the buttons you need to navigate the Web. Anyone familiar with Web browsers has already used these buttons a zillion times. If the fol-lowing buttons don’t ring a bell, you may be reading the wrong book! Here’s a list of buttons you can add to your toolbar:
⻬Home:Displays the browser’s current home page.
⻬Back:Moves back one page in the browser history.
⻬Forward:Moves forward one page in the browser history.
⻬Stop:Stops the current page from continuing to load.
⻬Refresh:Redisplays the current page from scratch.
⻬Search:Directs the browser to a Web search engine.
⻬Favorites:Displays a list of favorite Web sites.
Status bar
Most Windows applications these days feature status barsin a horizontal area, usually at the bottom of the window, where the application displays status information and other messages the user may need to see. Although the status bar is a standard feature of a Web browser, including Internet Explorer, your custom browser can display information that you don’t see in the full Internet Explorer. This information includes the following:
⻬Icon:Your own custom-designed icon.
⻬Clock:A digital clock showing the current time.
⻬Timer:A display showing the amount of time online or a countdown timer.
⻬Date:The current date.
Address bar
bar. You, however, can choose not to have one, if it suits your needs. You may, for example, want to build a Web browser that never leaves a specific Web site. In that case, you wouldn’t need an address bar.
Although components like menu bars and toolbars are standard features of the full Internet Explorer, your custom components may use these standard features in different ways. For example, you can specify how your custom toolbar looks, which is something that you can’t do with Internet Explorer.
Understanding Custom Browser Features
In this section, I cover the cool stuff that Internet Explorer doesn’t have. These neat features coincide with the custom functions you can add to your browser, as well as a couple of the extra components that you can add to your browser window.
Passwords and the locking mechanism
A password authentication systemprotects many custom functions. If, for example, you’ve created a browser for your kids to use, you don’t want them to accidentally (or deliberately — they are kids, you know) change any of the settings you’ve carefully set up. To change such function settings, the user must enter a password.
Timers
The timer functionsimply tracks how long an online session has been active. You can use the timer to keep an eye on how long you’ve been working on a specific online project, for example. You can also use the timer — as a count-down timer — to lock out the browser after a specific amount of time. If you want your kids (or your parents!) to be online only one hour a day, the timer, once you’ve set it up, can handle this need automatically, shutting off the browser after a given amount of time has elapsed.
Clock
Alarms
Your custom Web browser can use alarms in various ways. The timer uses alarms that tell the user when his Web browsing time is up. This alarm can be just a pop-up window or an actual audible signal. This alarm is the signal for the browser’s user to beg the browser’s administrator (that’s you) for more time.
Site-approval list
The Web overflows with great places to explore. Unfortunately, it also over-flows with nasty places. To complicate matters further, what’s nasty to one person may be perfectly okay to another. Freedom of speech dictates that these nasty places can exist, but it doesn’t force you to allow your custom Web browser to display such places. That’s where the site-approval list comes in.
The site-approval list is nothing more than a list of URLs to which your Web browser is allowed to connect. The list ensures that the user can never go somewhere on the Web that doesn’t meet with your approval. Lots of pro-grams have tried various ways of filtering Web content to keep unwanted sites from being viewed, but the only way to be 99 percent sure is to use a site-approval list. (That missing 1 percent covers me, just in case. . . .)
Web browsing log
The Web browsing logkeeps a list of all the URLs visited by the browser. You may want to use the Web browsing log with older kids who need greater Web browsing freedom than a site-approval list allows, but who must also agree to the types of sites they’ll visit. The browsing log gives you a quick and easy way to check that those who use your custom Web browser follow your rules.
Screen-capture “spy”
The screen-capture function takes a lot of screen shots over the course of a Web browsing session. For that reason, try to review the images at least once a day. Otherwise, you’ll be overwhelmed by the number of screen shots you need to examine.
Custom Web browser graphics
In this chapter’s “Including Standard Browser Features” section, I explain the Web browser’s toolbar, which contains the standard buttons browsers use to navigate the Web. I also explain the status bar and address bar. Your custom browser can go one step beyond the standard Internet Explorer by enabling you to add your own graphics to the toolbar, status bar, and address bar. These graphics include not only the bars themselves, but also the images used with each of the toolbar buttons. Cool!
Customizing the
Look of the
Designing the Browser Window
In This Chapter
䊳Exploring the Window command category
䊳Choosing window styles
䊳Adding or removing window buttons
䊳Placing graphics in your window
E
very custom browser starts with a window. Although Windows dictates to some extent what a window looks like, an application’s programmer can choose to include or exclude certain features. The programmer can also decide what many of the features look like. In the case of the Browser Construction Kit, you get to be the programmer (sort of) and decide the type of window you want to use with your browser. In this chapter, you examine the many ways you can make your browser’s window special.The Window Command Category
The Window toolbox contains every command I discuss in this chapter. You display the Window toolbox by choosing the Window command category from the toolbox’s drop-down list. To get started, run the Browser Construction Kit. When the editor’s main window appears, choose the Window category in the lower-left corner of the window, as shown in Figure 4-1.
When you have the Window category selected, the Window commands appear on the buttons in the toolbox, also shown in Figure 4-1. To select a command, click the appropriate button. The following list describes the commands found in the Window command category:
⻬Color:Specifies the color of the window’s client area.
⻬Icon:Specifies the icon that appears in the window’s upper-left corner.
⻬Style:Specifies the type of window to use, such as a normal window or a toolbar window.
⻬Buttons:Specifies the buttons for the title bar.
⻬Border:Specifies a border image to appear at the top and bottom of the window’s client area.
⻬Skin:Specifies an image to use as a background in the window’s client area.
⻬Title:Specifies the title that appears in the window’s title bar. What you do after clicking the button you want depends on the command you choose. The rest of this chapter shows you how to apply these com-mands to the design of your custom browser’s window.
The Window Color
You can set the background color of the window’s client area to any color you want. To do so, click the Color button in the Window toolbox. When you do, the Color dialog box appears, as shown in Figure 4-2.
Figure 4-1:
In the Color dialog box, click the color you want and then click OK. The window’s background color immediately changes in the editor’s display. If the colors in the Color dialog box don’t suit you, you can define your own. Simply click the Define Custom Colors button to expand the Color dialog box, shown in Figure 4-3. Pick the hue you want from the large color box and then select the shade from the narrow box to the right. When you have your color, click the Add To Custom Colors button, and the color appears in the Custom Colors boxes. Click the color you want and then click OK.
Pick the hue here Pick the shade here
Define Custom Colors button
Add to Custom Colors button
Figure 4-3:
The expanded Color dialog box.
Figure 4-2:
The Application Icon
An application’s icon appears on the left end of the title bar. To add an icon to your window, click the Icon button in the toolbox. When you do, the Select Window Icon dialog box appears (see Figure 4-4). This dialog box is a standard Windows dialog box. Find your icon file as you would in any Windows program and then click the Open button. The Browser Construction Kit adds the icon to your window.
To remove an icon from the browser window, click the Icon button again. The Browser Construction Kit then removes the icon.
Window icons must be a special type of file and must be created by a special editor. If a graphics file has a file extension of .ico, it’s probably the type of file you want. No doubt you can find tons of icons on the Internet. You can probably even do a search of your own hard drive and find plenty of them. If you want to make your own icons, refer to Chapter 16. This book’s CD features a number of browser themes, each of which includes a custom icon. Feel free to use these icons in your own projects as well.
Getting an exact color
If you want a very specific color, you can type color values directly into the Hue, Sat, and Lum boxes, or into the Red, Green, and Blue boxes. Hue stands for . . . well, hue; Sat stands for sat-uration; and Lum stands for luminescence. The Red, Green, and Blue values, on the other hand, are the amount of red, green, and blue to mix to form the final color. These values can range from 0 to 255, with 0 being darkest and 255 being brightest. The value 0,0,0 is black, and the value 255,255,255 is white, with all other colors falling somewhere in between.
For example, the RGB value 255,0,0 is pure red, whereas 0,255,0 is pure green and 0,0,255 is pure blue. Reduce the value of a pure color, and you get a darker shade of the same color. Thus, 128,0,0 is dark red. If all three red, green, and blue color elements have the same value — 128,128,128 or 64,64,64 are a couple of possibil-ities — then you get a shade of gray.
As you add more of one color element over another, the resultant color becomes more like the color with the higher value. The RGB value 128,128,128 is medium gray, but 256,128,128 adds a healthy dose of red, and you end up with a shade of pink.
Not every window style can display an icon. If a window style displays no icon, adding one with the Icon command has no effect.
The Window Style
A window’s style determines what the title bar and window border look like. The style can also affect the buttons that appear in the title bar. If, for exam-ple, you choose to have a Normal window style, the title bar can (if you want) display all three window-control buttons: Minimize, Maximize, and Close. If, however, you choose a Toolbox-style window, only the Close button can be on the title bar.
To select a window style:
1. Click the Style button in the toolbox.
When you do, the Window Styles dialog box appears, as seen in Figure 4-5.
Figure 4-5:
The Window Styles dialog box.
Figure 4-4:
2. Select the style you want and click the OK button.
If you’re unsure which of the five styles you want, check out the following sections, which describe each style. The window in the display changes to show the selected style. If you click the Cancel button in the Window Styles dialog box, the editor applies no changes.
The Normal style
The Normal style contains the type of window you see with most Windows applications. A Normal window has the following features, shown in Figure 4-6:
⻬Standard title bar:The title bar is the standard height, unlike some other styles, such as a toolbox, which has a smaller title bar.
⻬Icon:This icon appears at the left end of the title bar.
⻬Window title:This title is the text you select for the window’s name. The title appears to the right of the icon in the title bar.
⻬Minimize button:This button is the first one on the right side of the title bar. It reduces the window to an icon on the taskbar.
⻬Maximize button:The second button on the right side of the title bar, it enlarges the window to fill the full screen. When the window is set to full screen, the Maximize button becomes the Restore button, which returns the window to its previous size.
⻬Close button:The third button on the right side of the title bar, this button closes the application, having the same effect as choosing Exit from the menu bar.
⻬Thick border:The border is the edge of the window. A normal window has a thick border that the user can drag to resize the window.
Although some window styles display the Minimize, Maximize, and Close but-tons, you’re not stuck with them. You can, for example, have a Normal window with only a Close button. See this chapter’s “Minimize, Maximize, and Close Buttons” section for more information.
The Normal Unsizable style
Thinner border
Figure 4-7:
The Normal Unsizable window style.
Icon
Window title
Title bar
Close button Maximize button Minimize button
Thick border
Figure 4-6:
The Toolbox style
The Toolbox style sports a different look than a normal Windows window (see Figure 4-8). The smaller title bar and buttons leave more room for the window’s client area, giving you extra space for your browser pane. The following list describes the differences between the Normal and Toolbox windows:
⻬Small title bar:The height of the title bar is less than with a Normal window.
⻬No icon:The Toolbox style window displays no icon.
⻬Minimize button:Doesn’t appear.
⻬Maximize button:Doesn’t appear.
⻬Close button:Smaller than in a Normal style window.
⻬Thin border:A Toolbox window has a thinner border than the one on a Normal window, but the user can still resize the window.
The Toolbox Unsizable style
The Toolbox Unsizable style window looks a lot like a regular Toolbox window, except that the border is slightly thinner, and the user can’t resize the window.
No icon Small title bar Only a Close button Thin border
Figure 4-8:
This style is great for those times when you want the extra room provided by a Toolbox window, but don’t want the user to change the window’s dimensions. A Toolbox Unsizable window has the following features, shown in Figure 4-9:
⻬Small title bar:The height of the title bar is less than with a Normal window.
⻬No icon:The Toolbox style window displays no icon.
⻬Window title:This title is the text you select for the window’s name. The title appears on the left of the title bar.
⻬Minimize button:Doesn’t appear.
⻬Maximize button:Doesn’t appear.
⻬Close button:Smaller than in a Normal style window.
⻬Thin border:A Toolbox Unsizable window has a slightly thinner border than the one on a Toolbox window, and the user can’t resize the window.
The No Controls style
The No Controls style window is nothing more than a blank rectangle. The window displays no controls of any kind (unless, of course, you add things like a toolbar or status bar). A No Controls style window doesn’t have any features, and the user can’t resize the window (see Figure 4-10). I wouldn’t
Thinner border than normal toolbar window
Figure 4-9: