by Deke McClelland and Galen Fott
Photoshop
Elements 3
FOR
111 River Street Hoboken, NJ 07030-5774
www.wiley.com
Copyright © 2005 by Wiley Publishing, Inc., Indianapolis, Indiana Published by Wiley Publishing, Inc., Indianapolis, Indiana Published simultaneously in Canada
No part of this publication may be reproduced, stored in a retrieval system or transmitted in any form or by any means, electronic, mechanical, photocopying, recording, scanning or otherwise, except as permit-ted under Sections 107 or 108 of the 1976 Unipermit-ted States Copyright Act, without either the prior written permission of the Publisher, or authorization through payment of the appropriate per-copy fee to the Copyright Clearance Center, 222 Rosewood Drive, Danvers, MA 01923, (978) 750-8400, fax (978) 646-8600. Requests to the Publisher for permission should be addressed to the Legal Department, Wiley Publishing, Inc., 10475 Crosspoint Blvd., Indianapolis, IN 46256, (317) 572-3447, fax (317) 572-4355, e-mail: brandreview@ wiley.com.
Trademarks:Wiley, the Wiley Publishing logo, For Dummies, the Dummies Man logo, A Reference for the Rest of Us!, The Dummies Way, Dummies Daily, The Fun and Easy Way, Dummies.com, and related trade dress are trademarks or registered trademarks of John Wiley & Sons, Inc. and/or its affiliates in the United States and other countries, and may not be used without written permission. Photoshop Elements is a reg-istered trademark of Adobe Systems, Incorporated. All other trademarks are the property of their respec-tive owners. Wiley Publishing, Inc., is not associated with any product or vendor mentioned in this book.
LIMIT OF LIABILITY/DISCLAIMER OF WARRANTY: THE PUBLISHER AND THE AUTHOR MAKE NO REP-RESENTATIONS OR WARRANTIES WITH RESPECT TO THE ACCURACY OR COMPLETENESS OF THE CONTENTS OF THIS WORK AND SPECIFICALLY DISCLAIM ALL WARRANTIES, INCLUDING WITHOUT LIMITATION WARRANTIES OF FITNESS FOR A PARTICULAR PURPOSE. NO WARRANTY MAY BE CRE-ATED OR EXTENDED BY SALES OR PROMOTIONAL MATERIALS. THE ADVICE AND STRATEGIES CON-TAINED HEREIN MAY NOT BE SUITABLE FOR EVERY SITUATION. THIS WORK IS SOLD WITH THE UNDERSTANDING THAT THE PUBLISHER IS NOT ENGAGED IN RENDERING LEGAL, ACCOUNTING, OR OTHER PROFESSIONAL SERVICES. IF PROFESSIONAL ASSISTANCE IS REQUIRED, THE SERVICES OF A COMPETENT PROFESSIONAL PERSON SHOULD BE SOUGHT. NEITHER THE PUBLISHER NOR THE AUTHOR SHALL BE LIABLE FOR DAMAGES ARISING HEREFROM. THE FACT THAT AN ORGANIZATION OR WEBSITE IS REFERRED TO IN THIS WORK AS A CITATION AND/OR A POTENTIAL SOURCE OF FUR-THER INFORMATION DOES NOT MEAN THAT THE AUTHOR OR THE PUBLISHER ENDORSES THE INFORMATION THE ORGANIZATION OR WEBSITE MAY PROVIDE OR RECOMMENDATIONS IT MAY MAKE. FURTHER, READERS SHOULD BE AWARE THAT INTERNET WEBSITES LISTED IN THIS WORK MAY HAVE CHANGED OR DISAPPEARED BETWEEN WHEN THIS WORK WAS WRITTEN AND WHEN IT IS READ.
For general information on our other products and services, please contact our Customer Care Department within the U.S. at 800-762-2974, outside the U.S. at 317-572-3993, or fax 317-572-4002. For technical support, please visit www.wiley.com/techsupport.
Wiley also publishes its books in a variety of electronic formats. Some content that appears in print may not be available in electronic books.
Library of Congress Control Number: 2004111024 ISBN: 0-7645-7062-5
Manufactured in the United States of America 10 9 8 7 6 5 4 3 2 1
Deke McClellandwrote the Photoshop Bibleand Photoshop Bible, Professional Edition(both published by Wiley), bestselling guides on digital imaging. He has written 76 titles in 25 languages with 3 million copies in print, including
Photoshop For Dummies (published by Wiley) and the tutorial-basedAdobe Photoshop One-on-One (published by O’Reilly/Deke Press). In addition to his books, Deke hosts the video training series Total Training for Adobe Photoshop
and Total Training Presents: Adobe Photoshop Elements(published by Total Training). One of the most award-winning writers in the business, Deke has received seven honors from the Computer Press Association. In 2002, he was inducted into the Photoshop Hall of Fame.
Galen Fottcontributed to two editions of Deke’s Photoshop Bibleand to
To Max, Sam, and Burton: The future of digital imaging is in good (if grubby) hands.
And to Elle and Laura: Whose good hands we’re glad to be in.
Authors’ Acknowledgments
Some of the people who helped bring this book to market include the following:
Acquisitions, Editorial, and Media Development
Project Editor:Susan Pink Acquisitions Editor:Bob Woerner Technical Editor:Allen L. Wyatt,
Discovery Computing Inc. Editorial Manager:Carol Sheehan Media Development Manager:
Laura VanWinkle
Media Development Supervisor: Richard Graves
Editorial Assistant:Amanda Foxworth
Cartoons:Rich Tennant, www.the5thwave.com
Composition
Project Coordinator: Maridee Ennis Layout and Graphics: Lauren Goddard,
Joyce Haughey, Stephanie D. Jumper, Barry Offringa, Jacque Roth, Ron Terry Proofreaders: John Greenough, Brian H. Walls
TECHBOOKS Production Services Indexer: TECHBOOKS Production Services
Publishing and Editorial for Technology Dummies
Richard Swadley,Vice President and Executive Group Publisher Andy Cummings,Vice President and Publisher
Mary Bednarek,Executive Acquisitions Director Mary C. Corder,Editorial Director
Publishing for Consumer Dummies
Diane Graves Steele,Vice President and Publisher Joyce Pepple,Acquisitions Director
Composition Services
Introduction ...1
Part I: Element-ary School ...9
Chapter 1: Braving the Elements ...11
Chapter 2: Dissecting Your Desktop ...23
Chapter 3: “Open!” Says Me ...37
Chapter 4: Pixels: It’s Hip to Be Square ...55
Chapter 5: Over (and Under) the Rainbow ...75
Part II: Be Prepared ...91
Chapter 6: Get Organized (Before It Gets You) ...93
Chapter 7: Saving with Grace ...121
Chapter 8: It’s Perfect. No, Wait! Okay, Print. ...139
Chapter 9: Making Selections on the Pixel Prairie ...153
Chapter 10: Fifty Ways to Love Your Layer ...179
Part III: Realer Than Life ...193
Chapter 11: The Midas Retouch ...195
Chapter 12: Darkroom Déjà Vu ...213
Chapter 13: The Rainbow Correction ...231
Part IV: Unreality Programming ...257
Chapter 14: Startling Style ...259
Chapter 15: If a Picture Paints a Thousand Words . . . Then Shut Up and Paint ...277
Chapter 16: Painting with the Digital Stencil ...303
Chapter 17: Type Righter ...319
Chapter 18: Can Photoshop Elements Do That?...331
Part V: The Part of Tens ...359
Chapter 19: Ten Shortcuts to Commit to Long-Term Memory ...361
Chapter 20: Ten Reasons Why You Might Want to Upgrade to Photoshop Someday ...367
Introduction ...1
About This Book ...3
Conventions Used in This Book ...4
What You’re Not to Read ...4
Foolish Assumptions ...4
How This Book Is Organized ...5
Part I: Element-ary School ...5
Part II: Be Prepared ...5
Part III: Realer Than Life ...5
Part IV: Unreality Programming ...5
Part V: The Part of Tens ...6
Icons Used in This Book ...6
Where to Go from Here ...7
Part I: Element-ary School ...9
Chapter 1: Braving the Elements . . . .11
The Bland but Benevolent Dr. Jekyll ...12
The Dynamic but Dastardly Mr. Hyde ...13
The Two Elements of Photoshop Elements ...13
Painting without the mess ...14
Editing existing image detail ...15
Psychiatric Help: The Doctor Is Built In ...17
The Welcome screen ...17
Adobe Help ...19
The How To palette ...20
Chapter 2: Dissecting Your Desktop . . . .23
Giving Elements the Electronic Breath of Life ...23
Working with Windows ...26
Switching between Elements and Macintosh Finder ...27
Maneuvering through Menus ...28
Talking Back to Dialog Boxes ...30
Playing Around with Palettes ...32
Opening Your Toolbox ...34
Chapter 3: “Open!” Says Me . . . .37
Don’t Just Sit There — Open Something! ...37
Opening with the File Browser ...38
Opening the ordinary way ...41
Creating an image ...43
Behold the Image Window ...43
The Screen Is Your Digital Oyster ...45
Using the hand tool ...46
Using keyboard shortcuts ...47
Zooming in and out on your work ...47
Navigating by palette ...50
Tools for the Terribly Precise ...52
Switching on the rulers ...52
Turning on the grid ...53
Information, please ...53
Chapter 4: Pixels: It’s Hip to Be Square . . . .55
Welcome to Pixeltown ...55
Screen Pixels versus Image Pixels ...56
Image Size, Resolution, and Other Tricky Pixel Stuff ...58
Resolving resolution ...59
Changing pixel dimensions ...61
Changing the physical dimensions of the image ...63
Keeping things proportionate ...64
Using the Image Size dialog box safely ...64
What Does This Canvas Size Command Do? ...66
Trimming Excess Gunk Off the Edges ...68
The sharp edges of the crop tool ...68
More good news about cropping ...71
The Divide Scanned Photos command ...72
Image Gymnastics ...73
Chapter 5: Over (and Under) the Rainbow . . . .75
Looking at Color in a Whole New Light ...76
Managing Photoshop Elements Color ...78
Gimme good gamma ...79
Choosing your color settings ...81
Choosing Color the Mix-and-Match Way ...82
Juggling foreground and background colors ...82
Defining colors ...83
Going Grayscale ...88
The road to grayscale ...89
Part II: Be Prepared ...91
Chapter 6: Get Organized (Before It Gets
You
) . . . .93
Getting Photos into Organizer ...95
Importing existing photos ...96
Scanning photos ...99
Organizing your cell phone photos ...99
Getting photos from an online sharing service ...100
Organizing Photos ...100
Correcting the date ...100
Tags — you’re it ...102
Collections ...105
Stacks and version sets ...105
Captions and notes ...106
Viewing and Finding Photos ...107
Reviewing and comparing photos ...108
Searching by date ...111
Searching by tags and collections ...113
Searching by caption or note ...114
Searching by filename ...114
Searching by history ...114
Searching by media type ...115
Searching by the rest ...115
Editing Your Photos ...115
Backing It All Up ...117
Backing up your catalog ...118
Making copies or moving files ...118
Printing Your Photos ...119
Chapter 7: Saving with Grace . . . .121
Save an Image, Save a Life ...121
Saving for the very first time ...122
Joining the frequent-saver program ...124
The Elemental Guide to File Formats ...125
What is a file format, anyway? ...125
TIFF: The great communicator ...125
Photoshop PDF: The can-do kid ...127
BMP: The wallpaper glue for PC users ...127
What about Elements’ native Photoshop format? ...128
What format to use when ...128
Saving for the Web ...129
Hey — what about PNG? ...129
The Save for Web command ...130
JPEG: The best choice for photos ...131
GIF: The choice of choosy Web designers ...133
The Preview menu ...136
File Association Manager ...137
Chapter 8: It’s Perfect. No, Wait! Okay, Print. . . . .139
Time Traveling ...140
Exploring the Undo History palette in nine easy steps ...140
Travel restrictions ...142
The Undo History palette ...142
Abandoning Edits en Masse ...144
The Command Formerly (and Currently) Known as Print ...144
This May Be All You Need to Know about Printing ...145
Choosing a Printer in Windows ...146
Choosing a Printer on a Mac ...147
Getting Image and Paper in Sync ...147
Sending the Image to the Printer ...150
Chapter 9: Making Selections on the Pixel Prairie . . . .153
Learning the Ropes of Selecting ...154
Throwing lassos ...156
Using the marquee tools ...161
Wielding the wand ...163
Greatness with a brush ...166
Selecting everything ...167
Deselecting everything ...168
Saving and Loading Selections ...168
Hiding the Ants ...169
Editing Selections ...170
Adding to and subtracting from a selection ...170
Intersecting a selection with a selection ...171
Avoiding keyboard collisions ...173
Automatic selection shifters ...174
Chapter 10: Fifty Ways to Love Your Layer . . . .179
Pasting Images Together ...180
Filling a selection with a selection ...181
Resizing an image to match its new home ...181
Excuse Me, but What’s a Layer? ...183
Finding your way around the Layers palette ...184
Moving and manipulating layers ...186
Flattening and merging layers ...187
Locking Layers ...188
Moving and Cloning Selections ...188
Transforming Layers and Selections ...190
Using the Image menu’s commands ...190
Using the transform tool ...191
Part III: Realer Than Life ...193
Chapter 11: The Midas Retouch . . . .195
Introducing Filters ...196
Applying filters ...197
A few fast filter facts ...198
Dialog box filters ...198
Previewing the filter effects ...199
The Filter Gallery ...201
Experimenting with the Highly Ethical Clone Stamp Tool ...203
Stamping out splatters ...203
Performing more magic with the clone stamp tool ...205
Performing Miracles with the Healing Brushes ...208
The healing brush ...208
The spot healing brush ...210
Getting the Red Out ...210
Chapter 12: Darkroom Déjà Vu . . . .213
Getting a Quick Fix for Your Image ...214
Touching Base with Retouching Tools ...215
Smudging Away Imperfections ...217
Light on the smudge, please ...217
Smudge-specific controls ...218
Dodge? Burn? Those Are Opposites? ...219
Playing with the Color Knob ...221
Focusing from the Hip ...222
Sharpening Those Wishy-Washy Details ...223
The single-shot sharpeners ...224
Unsharp Mask: The filter with the weird name ...225
Some sharpening scenarios ...227
Blurring Adds Depth ...229
Chapter 13: The Rainbow Correction . . . .231
Color-Correcting Quickly ...232
Auto Levels ...232
Further image enhancements ...234
Replacing Colors ...237
The Replace Color command ...237
The color replacement tool ...239
Fiddling with Adjustment Layers ...240
Using adjustment and fill layers ...240
Color-Correcting Correctly ...244
Leveling the Contrast Field ...245
Making friends with the Levels dialog box ...245
The Histogram palette ...247
Brightness and contrast as they should be ...247
Variations on a Color Scheme ...251
Turning plain old color into Technicolor ...251
Casting away bad colors ...253
Color Correcting in the Raw ...254
Part IV: Unreality Programming ...257
Chapter 14: Startling Style . . . .259
Using Layer Styles to Shine and Shadow ...260
Tending Your Many Splendid Blends ...264
Fooling with layer opacity ...265
Playing around with blending modes ...266
Those Funky Filters ...267
Creating motion and puzzle pieces ...268
Giving your images that gritty, streetwise look ...269
Stamping your image in metal ...270
Merging colors in flaky images ...271
Making Taffy with the Liquify Filter ...273
Chapter 15: If a Picture Paints a Thousand Words . . .
Then Shut Up and Paint . . . .277
Doodling with the Pencil and Brush ...278
Performing Special Painting-Tool Tricks ...281
Choosing Your Brush ...282
Switching the brush size ...282
Exploring the other brush sets ...283
Making your own brush ...284
Saving brushes ...287
Going nuts with the brushes palette ...287
Exploring More Painting Options ...288
Experimenting with painting modes ...289
“Painting” with the impressionist brush ...291
The Powers of the Eraser ...292
Working with the regular ol’ eraser tool ...292
Trying out the somewhat magic eraser ...293
Using the more magical background eraser ...295
Isn’t Elements Just a Paint Program? ...297
The shape tools ...297
The shape selection tool ...300
Chapter 16: Painting with the Digital Stencil . . . .303
Painting within the Lines ...303
Dribbling Paint from a Bucket ...305
Applying Color to Selection Innards ...306
Doctoring the Fill ...307
Selecting your stuffing ...307
Mixing colors the wrong way ...308
Gradients: The Ever-Changing Color Sea ...309
Checking out the gradient tool ...309
Changing the way of the gradient ...310
Becoming a gradient wizard ...313
Taking on Borders with the Stroke Dialog Box ...316
How the border rides the track ...317
Mix your stroke after you press Enter (or Return) ...318
Chapter 17: Type Righter . . . .319
Working with the Type Tools ...319
Putting Your Words On-Screen ...321
Typing what must be typed ...321
Changing how the type looks ...322
Warping type into strange and unusual shapes ...324
Editing the Text Layer ...325
Simplifying a Text Layer ...326
Declaring Open Season on Type Selection Outlines ...327
Chapter 18: Can Photoshop Elements Do
That?
. . . .331
Taking on the Effects ...332
Processing Multiple Files ...334
Converting a Multipage PDF File ...336
Creating an Animated GIF ...337
Creating Panoramic Pictures with Photomerge ...339
Attaching a File to E-Mail ...343
Projecting a Slide Show ...345
Creating a PDF slide show ...345
Creating a custom slide show in Windows ...347
Creating and Printing a Contact Sheet ...349
Creating and Printing a Picture Package ...352
Creating a Web Photo Gallery ...355
Part V: The Part of Tens ...359
Chapter 19: Ten Shortcuts to Commit to Long-Term Memory . . . .361
Hiding Selection Outlines ...362
Displaying and Hiding the Palette Bin ...362
Scrolling and Zooming ...362
Changing the Brush Size ...363
Creating Straight Lines ...363
Adding to, Subtracting from, and Reselecting Selection Outlines ...364
Moving, Nudging, and Cloning ...365
Filling a Selection ...366
Stepping through the Undo History Palette ...366
Chapter 20: Ten Reasons Why You Might Want to Upgrade
to Photoshop Someday . . . .367
The Layer Comps Palette ...368
The Channels Palette ...368
CMYK Color Mode ...369
The Brushes Palette ...370
Following the Paths ...370
Eyeing Those Curves ...371
Lights . . . Camera . . . Actions ...372
Being an Art Historian ...373
Photoshop Speaks! ...374
A Little Help to Get Your ImageReady ...375
W
ell, Photoshop Elements 3.0 is here, and we have good news and — for some, at least — bad news to report. But gee, let’s start with the good news. Adobe, once again, did an outstanding job updating Photoshop Elements, their popular image editor for Windows and Macintosh. They’ve packed in an amazingly generous assortment of new tools from the latest ver-sion of Photoshop, including the healing brush. (The healing brush! Infirm and sickly photos, rejoice!) Adobe has also thrown in a few new Elements-exclusive goodies for your delectation and delight.And now for the bad news (Mac users, brace yourselves). The Windows ver-sion of Elements gets another big addition to the program’s arsenal of tools — and that’s good — but the Mac version doesn’t get it, and that’s too bad. Windows users get not only the updated image editor, but also Photoshop Album, Adobe’s powerful image-organizing program. And Album isn’t just tagging along for the ride; it’s been integrated into Elements, so much so that it’s not even referred to as “Album,” but as the “Organizer” component of Elements. So what you used to think of as Photoshop Elements, the image editor, is now just one half of Photoshop Elements 3.0 — the “Editor” compo-nent. The other half is The Organizer Formerly Known As Photoshop Album.
Now, to be fair, Photoshop Album was always a Windows-only application, and Adobe would have had to do a huge amount of work to turn it into an Organizer component for the Mac. And truthfully, it would have been some-what redundant because the Mac already has a powerful built-in image orga-nizer in iPhoto. But as a consolation, Adobe stuck some great organizing and photo-searching features into Elements’ File Browser — for the Mac only.
So we’ve added a lengthy new Chapter 6, giving Windows users the lowdown on how Organizer works. (In truth, organizing photos is nowhere near as compli-cated as editing them can be.) But by and large, 19 chapters in this 20-chapter book apply equally to all, regardless of what flavor of computer you use.
Windows or Mac, Photoshop Elements’ main reason for being is still to make your photos look better; and it’s a powerhouse at that task. But all this power comes at a price. Elements is a great image editor, but it’s also complex. Adobe Photoshop Elements is an easier-to-use, scaled-down version of Adobe Photoshop, a program legendary for its power and complexity. Photoshop Elements is missing some of Photoshop’s high-end features, and it has some exclusive tools of its own. However, we said it in the last edition of this book, and we’ll say it again:
What exactly do we mean by that? Well, we don’t mean that Elements isn’t
anyeasier to use than Photoshop; Elements has an extensive, genuinely help-ful Help system. And we also don’t mean that Elements doesn’t need its own
Dummiesbook. (Perish the thought!) Here’s what we mean: To get the most out of Photoshop Elements, you still have to come to grips with the same complex concepts and tools that Photoshop uses. And if you’ve ever experi-mented with Photoshop, you know that isn’t easy.
You want examples? We’ve got examples. First, take a gander at this exceed-ingly cute cat photo in Figure 1.
Exceedingly cute, huh? Maybe the photo’s a little dark, but that can be cor-rected. Now, if you wanted to correct this somewhat dark photo with an image-editing application, and you saw a command called Brightness/Contrast, you’d be tempted to use it, wouldn’t you? Heck, your TV has brightness and contrast controls! Brightness/Contrast it is!
Terrible move. Brightness/Contrast is among the worst commands that Photoshop and Elements offer. Sure, it’s easy to use, but correcting photos on the computer is like many things in life: You get out of it what you put into it. Instead of Brightness/Contrast, what you should use to correct brightness — in Photoshop or Elements — is the Levels command. And Figure 2 shows you the Levels dialog box when applied to the exceedingly cute cat photo.
Yikes! What the heck is that jagged black blob? What do all those sliders and buttons do? And what does this monstrosity have to do with that exceedingly cute cat?
Figure 1:
Well, in truth, Levels isn’t really that difficult after you understand the con-cept it’s based on, but we show it to you here to prove a point: Levels is a splendid tool for brightening images, but it’s hardly intuitive. And Levels is the same in Elements as it is in Photoshop. If you think you would need help mastering Photoshop (and you would), you’ll need help using Elements, too.
And that’s where this book comes in.
About This Book
Because Elements’ roots are in Photoshop, we hope you’ll forgive us for feel-ing that we’re particularly well suited to guide you through Elements. Deke has been using Photoshop since version 1.0 was introduced and has gone on to become the best-selling author of Photoshop For Dummies, Photoshop Bible,and a bevy of other books on digital imaging. Galen, slacker that he is, didn’t get with Photoshop until version 2.0 came out in 1991, but since then he’s used it almost daily. It’s the benchmark against which he’s judged many other image-editing applications as a reviewer for Macworldand PC Magazine. For that matter, Deke — in cahoots with the fine folks at Total Training (www. totaltraining.com) — is officially responsible for introducing the Windows version of Elements 3.0 to the world! Windows users, just click the Product Overview icon on the main installer screen of your Elements installer CD, prop your feet up, and let Deke be your personal tour guide for a 30-minute introduction to Elements 3.0.
Figure 2:
In this book, we set out to explain Photoshop Elements 3.0 from the ground up, assuming that you know nothing about the program or even about image editing in general. (That, incidentally, is what’s meant by the word Dummies
in the title. We know you’re not a dummy about every topic, but the title
Photoshop Elements 3 For Dummies About Photoshop Elements 3was deemed to be lacking in elegance.) Step by step, concept by concept, we gradually work through a thorough examination of Photoshop Elements 3.0 and the incredible things it can do for your images.
Conventions Used in This Book
Many times in this book, you’ll be asked to press some keys on your com-puter keyboard to make Elements do its stuff. We tell you which keys to press like so:
Ctrl+Shift+P (Ô+Shift+P on the Mac)
This means to press the Ctrl key, and then press the Shift key while still hold-ing down Ctrl, and then press the P key while still holdhold-ing down the other two keys. (Mac users, substitute the Ôkey for Ctrl.) It doesn’t matter whether you press Shift or Ctrl (Ôon the Mac) first, but the letter key (P in this case) must always come last.
What You’re Not to Read
Mac users, you can sit out Chapter 6; it deals exclusively with the Organizer component, available only in Windows. A few other short sections in the book are Mac-only or Windows-only, particularly in Chapter 18; look for the icons in the margins to alert you.
Foolish Assumptions
We assume only three things:⻬You have a computer.
⻬It’s turned on.
⻬It has Photoshop Elements 3 installed on it.
How This Book Is Organized
To give you an overview of the kind of information you’re likely to find in these pages, here’s a quick rundown of the five parts.
Part I: Element-ary School
We begin at the beginning, by answering the question “What exactly isimage editing, anyway?” From there we get face to interface with Elements, exploring the array of tools and palettes it places on your screen. We talk about opening images and then do a profile on the pixel, without which digital images wouldn’t be. And although the last chapter is an examination of color, we hope it will be free of any purple prose.
Part II: Be Prepared
This is the part you’ll skip because you’re too eager to start cleaning up your photos, but you’ll come back when you can’t figure out what the heck is going on, or you can’t find the photo you want to clean up. Chapter 6 intro-duces Windows users to the fabulous new Organizer component of Elements. Then Chapter 7 tells everyone about how to save their files in the proper format. Chapter 8 tells you how to correct your mistakes and also how to print your images when there are no more mistakes to correct. Chapter 9 focuses on isolating parts of your pictures with selections, and Chapter 10 introduces the multileveled concept of layers.
Part III: Realer Than Life
This part of the book details how to take a bad image and make it better, or how to take a good image and make it great. In Chapter 11, we get down and dirty with the topic of cleaning up your images. In Chapter 12, we check out the editing tools in Elements. Chapter 13 looks at the powerful tools for bright-ening up your images — including that eagerly anticipated Levels command.
Part IV: Unreality Programming
the subject of painting and coloring. From painting pictures, we move on to how to create a thousand words (or fewer) with the type tools. And we wrap up this part with a bang as we reveal some extraordinary tricks that Elements can do all on its own.
Part V: The Part of Tens
The Part of Tens is a For Dummiestradition. You don’t want to follow tradi-tions? Don’t read this part. But then you’ll miss a couple of really neat Top Ten lists: ten important techniques to remember that utilize the keyboard, and ten reasons you might possibly want to upgrade from Elements to Photoshop someday.
Icons Used in This Book
After the release of the very first For Dummiesbooks, a scientific study revealed that although most people were indeed learning great amounts from the books, a few were distracted by a compulsive need to doodle in the mar-gins. The publishers decided there was only one solution: Do the margin doo-dling themselves. And so the For Dummiesicon system was born. Over the years, the icons have taken on specific meanings, alerting you to the type of information the text may contain. In this section, we describe the meaning of the icons in this book.
This icon lets you know that we’re talking about a new feature in Photoshop Elements 3.0 or a change that the program has undergone since the last ver-sion. This means that experienced Elements 2.0 users can just rifle through the book in search of this icon, culling all the juicy new bits and ignoring the rest of our deathless prose. (Sniff.)
This icon lets you know we’re talking about a Windows-only feature.
When Windows readers see this icon, take a snooze; this info works on the Mac only.
This is the really good stuff. Generally, a Tip is a less-than-obvious technique for accomplishing the task at hand. Here’s where you get to reap the benefits of our years of image-editing experience. Don’t bother to thank us. It’s our job. Oh, okay, you can go ahead and thank us.
Not that you should forget everything else, but these Remember sections contain particularly important points.
Okay, the worst thing that can happen when using Elements is that you’ll lose a few hours of work. You’re not going to find any warnings in this book that say “Clicking this command will make your laptop suddenly snap shut and break your fingers.” But hey, lost work is no fun, either.
Well, this is the stuff that’s not really technical, or a tip, or particularly worth remembering, or a warning about anything. And yet it seemed somehow icon-worthy. So . . . it’s gossip. So there.
Where to Go from Here
Want to send us congratulations, compliments, or complaints? If so, you can visit Deke’s Web site at www.dekemc.comand drop him a line, or stop by Galen’s Web site at www.grundoon.comand e-mail him as well. We get a ton of e-mail, but we definitely read it all and respond to a fair amount of it as well. We’d especially appreciate suggestions for improving this book in its next edition.
I
f just thinking about the name Photoshop Elementsmakes you feel as though you’re about to drown in a sea of confusing concepts and terminology, consider this part of the book a life preserver with your name on it. (Yeah, life preservers usually have the name of the ship on them, but whatever.) Taking in anything new can be intimidating, but we set out to make the process as pain-less as possible, starting with the very first chapter.
Speaking of that very first chapter, it seeks to answer the timeless question: “Just what exactly isPhotoshop Elements, anyway?” We very slowly pick up steam in the next chapter; even if you’re only vaguely acquainted with your own computer, you’ll be fine. From there we look at the all-important topic of opening images and how to view them from different perspectives. Next, we take a pene-trating look at that teeny tiny giant, the pixel. And finally, we teach you just enough about color theory to make you dangerous, yet keep your colors Web-safe.
By the end of Chapter 5, you won’t know everything there is to know about Elements — otherwise, we could have dis-pensed with the chapters that follow it — but you’ll know enough to phrase a few intelligent questions. And please remember that as you read these chapters, there’s no shame in starting out uninformed. Millions of For Dummies
Braving the Elements
In This Chapter
䊳Introducing Photoshop Elements
䊳Working with the painting tools
䊳Understanding the image-editing tools
䊳Using Elements’ helpful Help features
A
s you know if you read the Introduction to this book, the image-editing powers of Photoshop Elements are inherited from another Adobe applica-tion called simply “Photoshop.” But you still may not be aware that Photoshop is the most comprehensive and popular image editor around. In fact, there’s probably not a single computer artist who doesn’t use Photoshop almost daily. As an Elements user, you have most of that professional power coiled up inside your computer, waiting for you to discover how to harness it.Even if you haven’t yet used Elements or Photoshop, you probably have at least a vague idea of what they’re all about. But just so we’re all clear on the subject, the primary purpose of these applications is to make changes to pho-tographic images that you’ve managed to get on disk, whether from a digital camera, a scanner, or other means. Windows users also have the Organizer component of Elements, which lets you organize and arrange your digital image collection. We examine the Organizer half of Elements in Windows in Chapter 6; for now, when we refer to “Elements,” we’re referring to the Editor component of the Windows version, which is basically equivalent to the entire Mac version.
As you may recall from the last time you saw Abbott and Costello Meet Dr. Jekyll and Mr. Hyde — indisputably the foremost resource of information on this famous tale — this Jekyll character (not to be confused with the similarly named cartoon magpie) is normally your everyday, average, nice-guy scientist. Then one day, he drinks some potion or gets cut off in traffic or something and changes into his ornery alter ego, known at every dive bar in town by the sur-name Hyde. Elements behaves the same way, except no magical transformation is required to shift from the easy-to-use part of the program to the scary, tech-nical side. Both personalities — both “elements,” if you will — coexist simulta-neously in symbiotic harmony.
This chapter explores both the cuddly and not-so-cuddly parts of Elements’ brain. (We’ll leave the exploration of Abbott’s and Costello’s brains for another book.) We’ll also take a look at the built-in Help features, which are the chief means of distinguishing Elements from its not-so-friendly big brother, Photoshop.
The Bland but Benevolent Dr. Jekyll
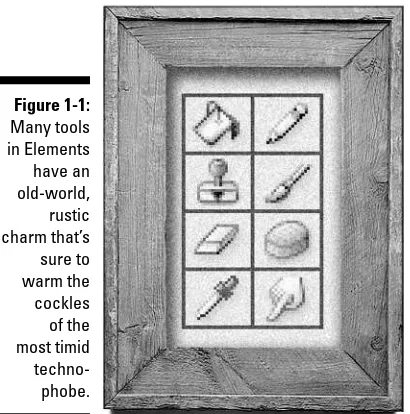
To discover the benevolent Dr. Jekyll side of Photoshop Elements, you need look no further than the standard painting and editing tools. Shown in Figure 1-1, these tools are so simple they’re practically pastoral, like the kind of household appliances your great-grandmother would have been comfortable with. The eraser tool erases, the pencil tool draws hard-edged lines, the brush tool paints, and so on. These incredibly straightforward tools attract new users just as surely as a light attracts miller moths.
Figure 1-1:
Many tools in Elements have an old-world,
rustic charm that’s sure to warm the cockles
of the most timid
But you quickly discover that these tools, just like the boring Dr. Jekyll, aren’t super-duper exciting on their own. They don’t work much like their tradi-tional counterparts — a line drawn with the pencil tool, for example, doesn’t look much like a line drawn with a real pencil — and they don’t seem to be particularly applicable to the job of editing images. Generally speaking, you have to be blessed with pretty strong hand-eye coordination to achieve good results using these tools.
The Dynamic but Dastardly Mr. Hyde
When the standard paint and editing tools don’t fit the bill, you might try to adjust the performance of the tools and experiment with the other image controls of Elements. Unfortunately, that’s when you discover the Mr. Hyde side of the program. You encounter options that have meaningless names such as Dissolve, Multiply, and Difference. Commands such as Image Size and Brightness/Contrast — both of which sound harmless enough — can easily damage your image. It’s enough to drive a reticent computer artist stark raving insane.The net result is that many folks return broken and frustrated to the under-equipped and boring but nonthreatening painting and editing tools that they’ve come to know. It’s sad, really. Especially when you consider all the wonderful things that the more complex Photoshop Elements controls can do. Oh sure, the controls have weird names, and they may not respond as you think they should at first. But after you come to terms with these slick puppies, they perform in ways you wouldn’t believe.
In fact, the dreaded Mr. Hyde side of Elements represents the core of this powerful program. Without its sinister side, Elements is just another rinky-dink piece of painting software whose most remarkable capability is keeping the kids out of mischief on a rainy day.
It must be noted, however, that even the dastardly Mr. Hyde side of Elements can have a friendly face, namely in Elements’ new Quick Fix mode. This mode lets you deal with the complex task of image editing using greatly simplified controls. Compared to a snarling, maniacal real-world encounter with the powerful Mr. Hyde, this is sort of the Hanna-Barbera cartoon version. We visit the Quick Fix mode in Chapter 12.
Painting without the mess
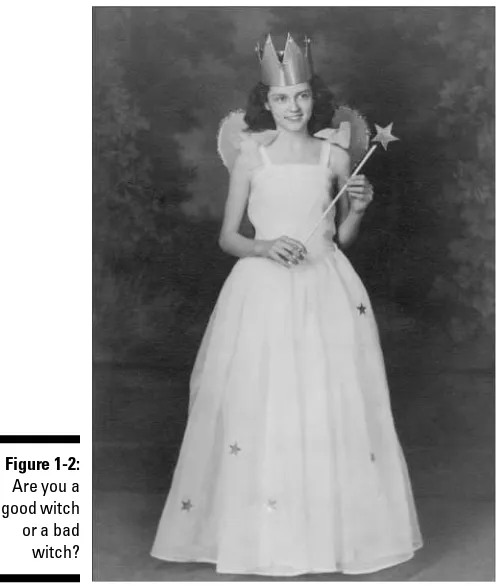
Paintingis just what it sounds like: You take a brush loaded with color and smear it all over your on-screen image. You can paint from scratch on a blank canvas, or you can paint directly on top of a photograph. Notice in Figure 1-2 the charming young lady, possibly in costume to portray Glinda the Good Witch in her high school’s production of the musical Wicked. We introduce this lovely person solely to demonstrate the amazing functions of Elements.
Were you to paint on our unsuspecting fairy queen, you might arrive at some-thing on the order of the image shown on the left in Figure 1-3. All these changes were invoked using a single tool — the brush — and just two colors — black and white. Clearly, the artistic work here is a little, shall we say, unsophisticated. However, it’s worth pointing out that the image isn’t permanently damaged, as it would have been with a real-life paintbrush. Because the original image is saved to disk (as explained in Chapter 7), we can restore details from the original whenever we get the whim.
Figure 1-2:
Editing existing image detail
The lady on the left in Figure 1-3 may be entertaining to look at, but she’s nothing compared to what she could be with the aid of some image editing. When you editan image, you distort and enhance its existing details. So rather than paint with color, you paint with the image itself.
The lady on the right in Figure 1-3 demonstrates what we mean. To arrive at this bizarre image, we started by doing a little plastic surgery on our subject, using the Liquify filter as a substitute for the traditional ugly stick. Liquify was also used to create her stylish hairdo. We selected her crown with the lasso tool and placed it back on her head at a mischievous tilt. Her skirt was turned into a sort of seahorse tail by the Twirl filter. We replaced her pitiful little fairy wings with a pair of eagle wings from another picture, and then cut the whole thing out and placed it on a new background. And finally, we used the custom shape tool to draw the yin-yang symbol at the end of her wand, and applied a couple of layer styles to give it dimensionality and a nice glow. We’re not sure exactly what it all means, but she certainly has a little more credibility as an authentic magical fairy-type creature than she did in the left image, huh?
Just for the record, here are a few common ways to edit photographs in Elements:
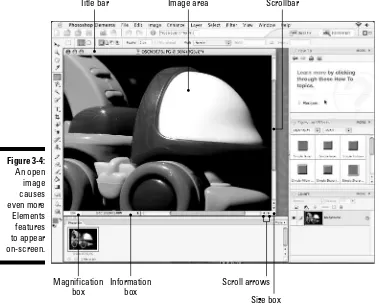
⻬You can sharpenan image to make it appear in better focus, as in Figure 1-4. Generally, sharpening is used to account for focus problems in the scan-ning process, but you can sometimes sharpen a photograph that was shot out of focus.
⻬If you want to accentuate a foreground image, you can blur the focus of the background.
⻬If a photograph is too light or too dark, you can fix it in a flash through the miracle of color correction. You can change the contrast, brighten or dim colors, and replace one color with another. The image in Figure 1-4 has been color-corrected.
⻬Using the selection and move tools, you can grab a chunk of your image and physically move it around. You can also clone the selection, stretch it, rotate it, or copy it to a different image.
And that’s only the tip of the iceberg. In the book’s remaining chapters you’ll see Photoshop Elements examined as both a painting program and an image editor. Some chapters contain a little bit of information on both topics, with Part III pertaining to image editing in particular. But you’ll find all sides of Photoshop Elements’ personality flourishing in this book.
Figure 1-4:
Psychiatric Help: The Doctor Is Built In
Poor Dr. Jekyll. He spent all his time trying in vain to mix a drinkable antidote for that split personality problem of his, when all he needed was to seek help from another doctor — one of the psychiatrickind. Luckily, Photoshop Elements has seen the light, and the many built-in Help features that it puts at your disposal ensure that you’ll never suffer by association with its split per-sonality. Elements has woven the various aspects of its Help system together in such a way that help is always just a click away.The Welcome screen
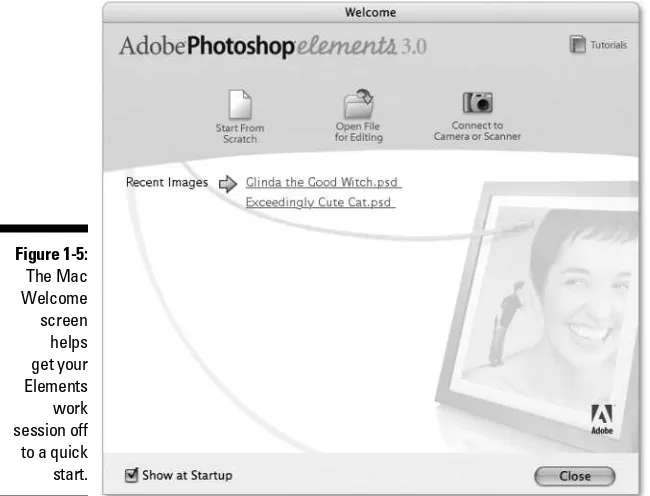
Let’s start with first things first: The Welcome screen is the very first thing you’ll see after you’ve fired up Photoshop Elements. (Don’t worry if you don’t know how to start Photoshop Elements yet — we’ll cover that in the next chapter. If you feel lost, just smile and nod as you read and come back to this section later. We’ll understand.)
The Mac Welcome screen
As Figure 1-5 makes clear, the Mac Welcome screen gives you these options:
⻬Start from Scratch:Click here to start out with a pristine new canvas, just waiting for you to express yourself all over it. You’ll be asked to specify some properties of the new canvas; we’ll get to those in the next few chapters.
⻬Open File for Editing:Click here to open the File Browser palette, which lets you search for images on your hard drive, giving you image thumb-nails to help you find exactly the file you’re looking for. We cover the File Browser palette thoroughly in Chapter 3.
You can also choose Frame from Video from the Import menu to be taken to the VCR-style controls, which let you import a frame from pre-captured video. Just click the Browse button to locate the video on your hard drive, use the controls to locate your frame, and click the Grab Frame button.
The Web site for the company that made your device can be a great place to turn for help as well as an easy source for downloading updated software for your device. And the Photoshop Elements manual that came with the program has a surprising amount of helpful information.
⻬Recent Images:If you’ve opened or created any images recently with Elements 3.0, you’ll see them listed here. Just click a name to open the file.
⻬Tutorials:Click here and Photoshop Elements will fire up your Web browser to show you Elements tutorials on the Adobe Web site.
⻬Close:If every Elements option were this easy to understand, we’d never sell any books. But don’t forget, you can always bring back the Welcome screen by choosing Window➪Welcome.
Okay, there’s one more button in this window, though technically it’s a check box. If you click the check box for Show at Startup to deactivate the Welcome screen feature, you’ll receive a thoughtful reminder that this screen can be turned on again by choosing Welcome under the Window menu.
Figure 1-5:
The Windows Welcome screen
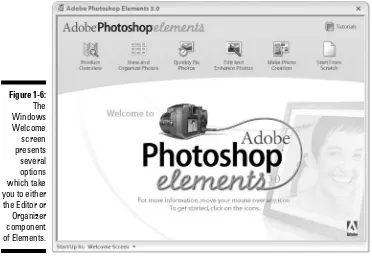
Figure 1-6 shows the Windows Welcome screen, which gives you seven icons to click:
⻬Product Overview:Click here to find out a little general information about Photoshop Elements. You’ll also find a link to special information for users of Elements 2.0.
⻬View and Organize Photos:Clicking this link takes you straight to the Organizer component of Elements, which we cover in Chapter 6.
⻬Quickly Fix Photos: This link takes you to the Quick Fix mode of the Editor component in Elements, giving you access to some simple image-editing controls.
⻬Edit and Enhance Photos:This link takes you to the Standard Edit mode of the Editor component.
⻬Make Photo Creation:Click here to open the Creation Setup window, part of the Organizer component. We cover Organizer’s creations in Chapter 18.
⻬Start from Scratch:This link opens the Editor component and takes you straight to the New dialog box, where you can specify some properties for the new canvas you want to create. We explain those properties in the next few chapters.
⻬Tutorials:Click here and Photoshop Elements will fire up your Web browser to show you Elements tutorials on the Adobe Web site.
The Start Up In menu at the bottom-left corner of the screen lets you specify how you want your Elements sessions to begin. Welcome Screen is selected by default, which means when you start Elements, the first thing you see is this screen. You can also choose Editor or Organizer if you want to skip the Welcome screen and have Elements open in one of its two components. But you can always choose Welcome from the Window menu of either Editor or Organizer to access the Welcome menu again.
Adobe Help
The scores of warnings, messages, and dialog boxes that appear throughout the program often feature technical words that you may find confusing. These words are usually underlined and colored blue, like links on Web pages. Sure enough, clicking one of these words gives you a link straight to Adobe Help, where you’ll find a definition of the word or term.
Yet another way to access Adobe Help is through the interface’s Search field. On the Mac, this feature is located in the shortcuts bar; in Windows, it’s in the main menu bar. By default, the field reads “Type a question for help”; if you follow its sage advice and then press Enter (Return on the Mac), you’ll be taken to Adobe Help for the answer. You can also click the adjacent question mark icon to activate Adobe Help.
The How To palette
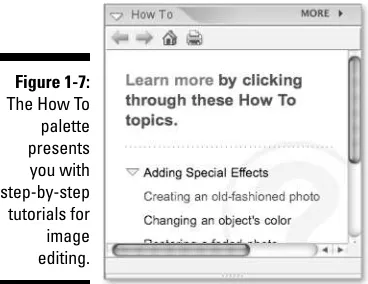
The How To palette, pictured in Figure 1-7, is the place to turn in Elements for the latest and greatest recipes. Now, if the thought of recipes makes you hungry, put down this book, make yourself a sandwich, eat it, and then come back to us when you’re finished (but please wipe your hands first). These recipes can’t help you remember how to make your great-aunt Naomi’s meat-loaf, but they are a big help where Photoshop Elements is concerned. Figure 1-6:
In the How To palette, you’ll find an assortment of image-editing recipes for doing common tasks such as removing dust and scratches from scanned photos and restoring faded photos. You can click to be guided through the tutorial step-by-step. Browser-style forward and backward icons are at the top of the How To palette, as well as a printer icon you can click to print the cur-rent tutorial.
You know, there’s another way you can apply the whole Jekyll/Hyde analogy to Photoshop Elements. Although Elements definitely has its wild and woolly Hyde side, full of intimidating tools and forbidding commands, the Dr. Jekyll side of Elements — represented by all the Help features — is dedicated to making sure you understand the darker side of the program. Doctors are gen-erally helpful that way. So with this much help at your fingertips, why have we decided to write this book? Well, we thought you might want a second opinion.
Figure 1-7:
Dissecting Your Desktop
In This Chapter
䊳Launching Elements䊳Taking some first, tentative looks at the Elements interface
䊳Working with the program window
䊳Choosing commands
䊳Using dialog boxes and palettes
䊳Picking up tools from the toolbox
䊳Using the photo bin
I
f you’re brand new to Photoshop Elements — or to computers in general — this is the chapter for you. You get the first of the basic stuff you need to know before you can begin using the program to distort the faces of all your family members.Even if you’re already familiar with the basic interface of Elements, you may want to give this chapter a once-over to make sure we’re all speaking the same language. Here, we can calibrate brains, so to speak.
Giving Elements the Electronic
Breath of Life
Before you can see the Elements interface, you have to start up, or launch, the program. Here’s how to do this on the Mac:
1. Locate the Adobe Photoshop Elements 3 folder.
2. Locate the Photoshop Elements 3 icon.
The Photoshop Elements 3 icon should be in the Adobe Photoshop Elements 3 folder.
3. Double-click the icon.
While the program is loading, you should see the Elements splash screen. Finally, the Welcome screen should appear on your desktop.
4. Close the Welcome screen.
You should see the Elements 3 interface on your desktop, as shown in Figure 2-1.
Shortcuts bar Tool options bar
Maximize mode Automatically
tile windows
Menu bar Toolbox
Palette bin Photo bin
Figure 2-1:
To see the corresponding interface in Windows, you need to launch the Editor component of Elements. Here’s how:
1. Click the Start button in the taskbar.
A menu should appear, giving you access to programs and utilities installed on your hard drive.
2. Click All Programs.
Another menu appears, listing the programs installed on your hard drive.
3. Choose Adobe Photoshop Elements 3.0.
The Welcome screen appears on your desktop.
4. Click the Edit and Enhance Photos icon.
The interface shown in Figure 2-2 should appear on your desktop.
Shortcuts bar Menu bar
Tool options bar Title bar
Toolbox Minimize Close
Restore down Maximize Automatically
tile windows
Photo bin Palette bin
Taskbar
Figure 2-2:
Don’t freak out and start running around the room in a frenzy if you’re a little fuzzy on the meaning of menu, taskbar,and a few other terms. We cover all this stuff in fairly hefty detail in this very same chapter.
Note:As you read, you’ll see that you can use the keyboard and mouse in tandem. For example, in Elements, you can draw a perfectly horizontal line by pressing the Shift key while dragging with the pencil tool. Or you can press Alt (Option on the Mac) and click the rectangular marquee tool in the upper-left corner of the toolbox to switch to the elliptical marquee tool. Such actions are so common that you often see key and mouse combinations joined into compound verbs, such as Shift+drag or Control-click.
Working with Windows
This section is relevant to PC users only. Mac people skip down to the “Switching between Elements and Macintosh Finder” section. In Elements, as in most other Windows programs, you have two kinds of windows: the pro-gram window, which contains the main Elements work area, and image win-dows, which contain any images that you create or edit. To see the program window, refer to Figure 2-2; for a look at image windows, see Chapter 3.
Why does Elements give your computer amnesia?
If your computer says it’s out of memory, it just means that a part of the machine is filled to capacity. Memory — known in computer dweeb circles as RAM(random-access memory, pro-nounced ram, like the sheep) — allows your computer to run programs. Elements needs lots of RAM, and the more the better. If you can’t launch Elements because of a memory error, you have three options:
⻬ Free up RAM by quitting all other programs that are currently running.
⻬ PC users: Windows XP users, restart your computer by choosing Turn Off Computer from the Start menu and then click Restart.
Windows 2000 users, restart your computer by choosing the Shut Down command from the Windows Start menu and then choosing the Restart the Computer option. After your computer restarts, try to launch Elements again.
Mac users: Restart the computer by choos-ing Restart from the Apple menu.
⻬ Buy and install more RAM.
Elements windows — both program and image — contain the same basic items as those in other Windows programs, though they may look a little dif-ferent in Elements. Just in case you need a refresher or you’re new to this whole computing business, here’s how the Elements program window works with Windows:
⻬Windows users can click the X in the upper-right corner of the program window to shut down Elements. If you have open images that haven’t been saved, the program prompts you to save them. (For details on saving images, see Chapter 7.) The quickest way to close your program window (and Elements) is to press the keyboard shortcut for the Exit command, Ctrl+Q (as in Quit).
⻬Click the Minimize button (refer to Figure 2-2) to reduce the program window to a button on the Windows taskbar at the bottom of the screen. To redisplay the program window, just click the taskbar button.
⻬You can also use the taskbar buttons to switch between Elements’ Editor and Organizer components, if they’re both running. In the taskbar, just click the button of the component you want to use.
⻬The appearance of the Maximize/Restore Down (or just Restore) button changes, depending on the current status of the window. If you see two boxes on the button, the button is the Restore Down button. Click this button to shrink the window so that you can also see other open pro-gram windows. You can then resize the window by placing your mouse cursor in the lower-right corner of the window. Just drag the corner to resize the window. To move the window around, drag its title bar.
⻬After you click the Restore Down button, it changes to the Maximize button, which looks like a single box. Click the button to zoom the pro-gram window so that it consumes your entire screen. After the window zooms, the button changes back to the Restore Down button. Click the button to restore your screen to its former size.
Switching between Elements
and Macintosh Finder
Here are some tips to help you manage working between Finder and Elements:
⻬If you inadvertently click yourself out of Elements, go to the Dock (located at the bottom of the screen by default) and click the Elements icon. Or you can just click the Elements image window. The toolbox and palettes return to the screen to show you that Elements is back in the game.
⻬You may be wondering why this program switching happens. Finder is a piece of software, just like Elements. The only difference is that Finder is running the entire time you use your Mac. This means that all the time you’re using Elements, Finder is working away in the background. When you click the desktop or some other component of Finder, it comes to the foreground and Elements goes to the background. But both programs continue to operate until you quit Elements or shut down your computer.
⻬If the clutter from Finder gets too distracting when you’re using Elements, choose the Hide Others command from the Photoshop Elements menu to hide every Finder element except the icons.
⻬Remember that you can always tell where you are just by looking at the menu bar. If you see the words Photoshop Elementsin the left corner of the menu bar, you’re in business.
Maneuvering through Menus
Elements, like all Windows and Macintosh programs, sports a menu bar at the top of its desktop (refer to Figures 2-1 and 2-2). Below that menu bar, though, are two things many other programs don’t have: a shortcuts bar and a tool options bar. The shortcuts bar is a handy way to perform common functions with just a single click of the mouse.
On the Mac only, the shortcuts bar also contains four items, labeled in Figure 2-1: the help icon, the search field, the automatically tile windows icon, and the maximize mode icon. In Windows, these four items were moved up into the menu bar to make room for the Create, Photo Browser, and Date View buttons, all of which take you over to the Organizer component of Elements. Both the Mac and Windows shortcuts bars have icons to switch you to Quick Mix mode, and back again to the default Standard Edit mode.
The tool options bar gives you control over the tool you currently have selected. If you want to reset the options in the tool options bar, click the tool icon on the far left of the bar and choose Reset Tool to reset the options for that particular tool, or Reset All Tools to return them all to their default set-tings. We’ll make frequent visits to both the tool options bar and the shortcuts bar when appropriate in the book; for now, let’s belly up to that menu bar.
close images, manipulate selected portions of a photograph, hide and display palettes, and initiate all kinds of procedures.
We explain the most essential Photoshop Elements commands throughout this book, but here’s a bit of background information on how to work with menus:
⻬To choose a command from a menu, click the menu name and then move the mouse down to the command name and click again. Or you can press and hold the menu name, drag down to the command name, and release the mouse button at the desired command.
⻬Some commands display additional menus called submenus. For example, if you choose File➪New, you display a submenu offering still more com-mands. If we ask you to choose File➪New➪Blank File, you choose New under the File menu to display the submenu and then choose the Blank File command from the submenu, all in one beautiful continuous move-ment. When you do it just right, it’s like something out of Swan Lake.
You can access some commands by pressing keyboard shortcuts. For example, to initiate the File➪Blank File command, you can press the key-board shortcut Ctrl+N (Ô+N on the Mac) — that is, press and hold the Ctrl key (Ôkey on the Mac), press the N key, and then release both keys.
⻬Some keyboard equivalents select tools, and some perform other func-tions. Either way, we keep you apprised of them throughout this book. If you take the time to memorize a few keyboard shortcuts here and there, you can save yourself a heck of a lot of time and effort. (For some essen-tial shortcuts, read Chapter 19. Also, tear out the Cheat Sheet at the front of this book and tape it up somewhere within easy ogling distance.)
⻬Elements offers you yet another way to access some commands. If you right-click (Control+click on the Mac) inside an image window, you display a context-sensitive menu. In nongeek-speak, a context-sensitive menu, also known as a shortcut menu,is a minimenu that contains commands related to the current tool, palette, or image, as shown in Figure 2-3.
Figure 2-3:
Talking Back to Dialog Boxes
Elements reacts immediately to some menu commands. But for other com-mands, the program requires you to fill out a few forms before it processes your request. If you see an ellipsis (three dots, like so . . .) next to a command name, that’s your clue that you’re about to see such a form, known in com-puter clubs everywhere as a dialog box.
Figure 2-4 shows a sample dialog box. As the figure demonstrates, dialog boxes can contain several basic kinds of options. The options work as follows:
⻬A box in which you can enter numbers or text is called an option box. Double-click or click and drag in an option box to highlight its contents and then replace the contents by entering new stuff from the keyboard.
⻬Some option boxes come with sliders.Drag the triangular slider to the left or right to lower or raise, respectively, the associated numerical value.
⻬You can select only one radio button(not shown in Figure 2-4) from any gang of radio buttons. To select a radio button, click the circle or the option name that follows it. A black dot fills the selected radio circle; all deselected radio circles are hollow.
⻬Although you can select only one radio button at a time, you can usually select as many check boxesas you want. Really, go nuts. To select a check box, click the box or the option name that follows it. A check fills the box to show that it’s selected. Clicking on a selected check box turns off the option.
⻬To conserve space, some multiple-choice options appear as drop-down menus.Click the menu to display the option choices. Then click the desired option in the menu to choose it, just as if you were choosing a command from a standard menu. As with radio buttons, you can choose only one option at a time from a drop-down menu.
⻬The normal, everyday variety of buttonenables you to close the current dialog box or display others. For example, click the Cancel button to close the dialog box and cancel the command. Click OK to close the dialog box and execute the command according to the current settings. Clicking a button with an ellipsis (such as Load. . . or Save. . .) displays yet another dialog box.
As you can with menus, you can select options and perform other feats of magic inside dialog boxes from the keyboard. The following shortcuts work in most dialog boxes:
⻬In Windows, press Enter to select the button surrounded by a heavy out-line (such as the OK button in Figure 2-4). On the Mac, you can always press Return to select the blue button. On either platform, press Esc to select the Cancel button.
⻬Press ↑to raise a selected option box value by one; press ↓to decrease the value by one. Pressing Shift+↑and Shift+↓raise and lower the value
by ten, respectively.
⻬If you change your mind about choices you make in a dialog box, you can quickly return things to the settings that were in force when you opened the dialog box. In most dialog boxes, pressing the Alt key (Option key on the Mac) magically changes the Cancel button to a Reset button. Click the Reset button to bring back the original values.
A wonderful new feature of Elements 3.0 is scrubbingon words to change option values. For example, in the Hue/Saturation dialog box featured in Figure 2-4, if you place your cursor over the word Hue, the cursor turns into a pointing hand, with arrows coming out on either side of the finger. If you click and drag, the value for Hue will change as you drag. This works in most dialog boxes, as well as in the tool options bar. Of the many ways Elements gives you to change numeric options, we think you’ll find scrubbing to be the easiest and fastest way of all.
If a dialog box gets in the way of your view of an image, you can reposition the box by dragging its title bar.
Check box Close button
Button Option box
Drop-down menu
Slider Scrubbing word
Title bar
Figure 2-4:
Playing Around with Palettes
One of the chief features of the Elements interface is the palette. A paletteis basically a dialog box that can remain on-screen while you work, providing access to options that change the appearance of images and otherwise assist you in your editing adventures.
Users of Elements 2.0 will notice the new version’s palette bin, a wide vertical strip running down the right side of the desktop. If you think the palette bin is eating up too much of your desktop, you can make it thinner by clicking and dragging on its left edge. You can also choose Window➪Palette Bin to make it disappear. Choose the command again to bring it back. Windows users can also click the Palette Bintext below the palette bin to hide and show the bin. By default, the palette bin features the How To, Styles and Effects, and Layers palettes. You can collapse a palette in the palette bin by clicking the white tri-angle to the left of the palette’s name. This is a great way to make room for viewing a different palette in the bin. You can also drag palettes out of the palette bin if you want, and place different ones inside.
When you drag a palette outside the palette bin, it becomes a floating palette that can be stationed wherever you want on the desktop. The palette’s appearance changes as well; Figure 2-5 shows a floating palette.
We cover the specifics of using the palettes in chapters to come, but here’s a brief introductory tour of how palettes work:
⻬What may look like just one floating palette can actually be a collection of palettes sharing the same palette window. For example, in Figure 2-5, the Color Swatches and Histogram palettes are housed in the same palette window. To switch to a different palette in a palette window, click its tab.
⻬When you’ve finished using a floating palette for the immediate future, you can click the Close button to make it vamoose. Exactly where it vamooses to depends on how you set the Place in Palette Bin option in the palette’s More menu. When there’s a check mark next to the option, clicking the Close button sends the palette into the palette bin. By default, the How To, Styles and Effects, and Layers palettes all have this feature turned on. If you drag one of them out of the palette bin and then click its Close button, the palette will appear in the palette bin again.
⻬Pressing Tab can hide various parts of the interface to free up more screen space. On the Mac, pressing Tab hides pretty much everything, including the toolbox, free-floating palettes, the palette and photo bins, and the shortcuts and tool options bars. In Windows, pressing Tab hides just the toolbox (if it’s in two-column mode, as explained later in this chapter) and any free-floating palettes; the bins and bars stay put. (Note that this trick doesn’t work if there’s an active option box in the tool options bar or in a palette.)
⻬Some palettes contain icons, just like the toolbox does. Click an icon to perform a function, such as adding or deleting a layer in the Layers palette (see Chapter 10).
⻬Drag the title bar at the top of a floating palette to move the palette around on-screen.
⻬Shift+click the title bar of a floating palette to snap the palette to the nearest corner of the screen. For example, if the palette is near the lower-left corner of the screen, Shift+clicking its title bar moves it all the way into the corner, giving you more space to view your image on-screen.
⻬Every palette except the Info and Histogram palettes has a size box, as labeled in Figure 2-5. Drag the size box to resize the palette. You can click the divider between palettes in the palette bin to resize palettes while they’re in the bin.
⻬Click the Collapse button (the green Zoom button on a Mac) on a float-ing palette to hide all but the title bar and the palette tabs. You can also double-click a palette tab to accomplish the same thing.
⻬You can combine multiple floating palettes into a single palette window by dragging a tab from one palette into another, as shown in Figure 2-6. You can also break any floating palette into its own window by dragging the palette tab out of the current window.
More menu Collapse button
Title bar
Palette tab
Close button
Size box
Icon
Figure 2-5:
⻬You can also dock floating palettes vertically. Move the tab of a palette to the bottom of a second palette and you should see a black outline at the bottom of the second palette, indicating that you can dock the first palette. You can also dock one palette to the top of another palette in the same manner.
⻬Press and hold the More button, located to the right of the palette’s name, to display the palette menu. Here’s yet another hiding place for commands.
⻬If you get your palettes in an unbearable muddle, you can always restore things to the way they were when you first launched Elements by choos-ing Window➪Reset Palette Locations.
Opening Your Toolbox
As Figures 2-1 and 2-2 show, by default the toolbox is a long, thin one-column-wide strip, stretched along the left side of the screen. However, if you click the line of dots at the top of the toolbox and drag it to the right, the toolbox will resize itself and become transformed into the two-column beauty seen in Figure 2-7. To switch back to one-column mode, drag the toolbox by its top bar until it snaps to the left side of the screen, and then release.
Figure 2-6: