66
IMPLEMENTASI DAN EVALUASI
4.1.
Spesifikasi Hardware
Pada bagian ini akan dibahas masalah Hardware yang digunakan untuk
komputer server dalam implementasi pada PT. Cybersama Technology
dideskripsikan sebagai berikut:
Hardware
Tipe
Gambar
Motherboard
Gigabyte
GA-EP45T-UD3LR
Processor
Intel
Core2Duo E7400.
Memory
V-Gen
DIMM, DDR3, PC 10.600, 2GB
Hard disk
Seagate Barracuda
7200 RPM, 500GB
Display Adapter
NVidia
Power Supply Unit
Powerlogic 500 W
Tabel 4.1 Spesifikasi Hardware
4.2.
Arsitektur Sistem
Pada bagian ini akan dibahas mengenai arsitektur sistem di PT.
Cybersama Technology.
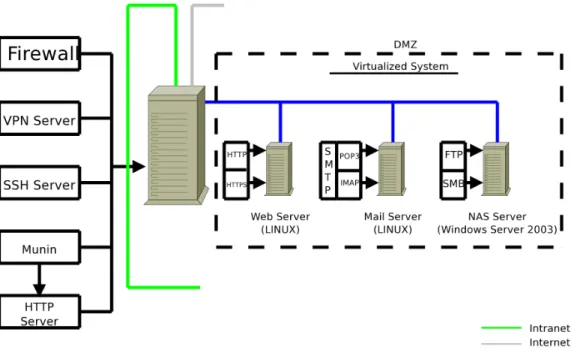
4.2.1. Gambaran Umum Sistem
Sistem di atas, memiliki tiga jalur ethernet yang berfungsi sebagai
jalur penghubung ke jaringan intranet, internet, dan virtual LAN. Pada
jaringan virtual ini terdapat tiga server virtual. Jaringan virtual pada
gambar di atas merupakan jaringan private yang menerapkan sistem
DMZ. Dalam server ini terdapat fitur-fitur seperti:
a.
Firewall yang berfungsi untuk mengatur jalur keluar masuk paket
data.
b.
VPN server yang berfungsi untuk melakukan tunneling dan
enkripsi data.
c.
SSH server yang berfungsi untuk melakukan remote ke server.
d.
HTTP server yang berfungsi untuk mengakses munin.
Virtual server pada gambar di atas mempunyai fungsi sebagai web
server, mail server, NAS server. Berikut ini adalah gambaran secara
umum dari server-server tersebut:
a. Web server diinstall dalam sistem operasi Linux yang menggunakan
protokol HTTP dan HTTPS.
b. Mail server diinstall dalam sistem operasi Linux yang menggunakan
protokol POP3 dan IMAP melalui protokol SMTP sebagai out going
e-mail transport protocol.
c. NAS server diinstall dalam sistem operasi Windows Server 2003
yang menggunakan protokol FTP dan SMB sebagai directory service.
4.2.2. Cara Kerja Sistem
Gambar 4.2 Cara Kerja Sistem
Sesuai pada gambar di atas, apabila sistem diakses melalui
jaringan internet, maka firewall hanya memperbolehkan user untuk
mengakses web server dan VPN server. Apabila sistem diakses melalui
jaringan intranet, maka firewall akan memperbolehkan user untuk
mengakses web server, mail server, NAS server (melalui protokol SMB)
dan VPN server. Apabila user telah mengakses VPN server melalui
jaringan internet maupun intranet, maka user tersebut dapat mengakses
SSH server, HTTP server (untuk mengakses munin), web server, mail
4.2.3. Cara Kerja Monitoring Sistem
Gambar 4.3 Monitoring Sistem
Gambar di atas menerangkan bagaimana proses untuk memonitor
server dan virtual server. Virtual server dapat dimonitor dengan
menggunakan program virt-top. Program virt-top dapat diakses secara
remote dengan memanfaatkan service ssh. Untuk memonitor server
secara umum dapat digunakan program munin. Program munin ini dapat
diakses dengan bantuan dari http server. http dan ssh server ini dapat
diakses oleh admin yang telah mengakses VPN server melalui jaringan
internet dan intranet.
4.2.4. Remote Sistem
Gambar 4.4 Remote Sistem
Gambar di atas menerangkan proses remote sistem pada server.
Pada web server, mail server dan NAS server dapat diremote dengan
menggunakan program VNC server. VNC server ini dapat diakses oleh
admin yang telah mengakses VPN server melalui jaringan internet dan
intranet.
4.3.
Instalasi dan Konfigurasi Sistem
Pada bagian ini akan dibahas proses instalasi dan konfigurasi sistem di
PT. Cybersama Technology.
4.3.1. Instalasi dan Konfigurasi Sistem Operasi
Pada bagian ini akan dibahas langkah-langkah instalasi Fedora 11
dalam server
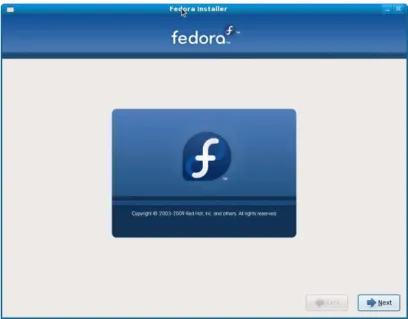
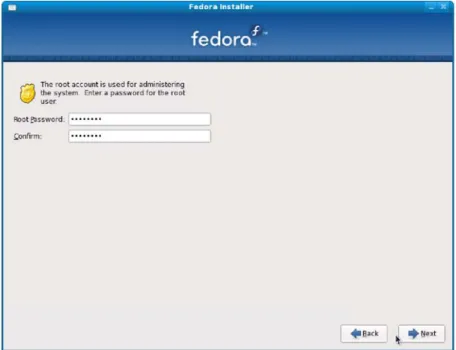
a. Instalasi Fedora 11
Gambar 4.5 Tampilan Awal Instalasi Fedora 11
Gambar 4.7 Pengisian Password untuk User root
Gambar 4.9 Proses Instalasi
b. Konfigurasi IP
1. Melihat network interface secara keseluruhan
[root@cybersama ~]# ifconfig -a
eth0 Link encap:Ethernet HWaddr 00:24:1D:8E:AF:0D UP BROADCAST MULTICAST MTU:1500 Metric:1 RX packets:0 errors:0 dropped:0 overruns:0 frame:0 TX packets:0 errors:0 dropped:0 overruns:0 carrier:0 collisions:0 txqueuelen:1000
RX bytes:0 (0.0 b) TX bytes:0 (0.0 b) Interrupt:28 Base address:0x6000
eth1 Link encap:Ethernet HWaddr 00:24:01:62:08:DC
inet addr:192.168.0.44 Bcast:192.168.0.255 Mask:255.255.255.0 inet6 addr: fe80::224:1ff:fe62:8dc/64 Scope:Link
UP BROADCAST RUNNING MULTICAST MTU:1500 Metric:1 RX packets:1156 errors:0 dropped:0 overruns:0 frame:0 TX packets:1043 errors:0 dropped:0 overruns:0 carrier:0 collisions:0 txqueuelen:1000
RX bytes:113430 (110.7 KiB) TX bytes:116077 (113.3 KiB) Interrupt:20 Base address:0xa000
lo Link encap:Local Loopback inet addr:127.0.0.1 Mask:255.0.0.0 inet6 addr: ::1/128 Scope:Host
UP LOOPBACK RUNNING MTU:16436 Metric:1
RX packets:20 errors:0 dropped:0 overruns:0 frame:0 TX packets:20 errors:0 dropped:0 overruns:0 carrier:0 collisions:0 txqueuelen:0
2. Mengatur IP pada setiap network interface
File konfigurasi IP untuk setiap network interface berada di
/etc/sysconfig/network-scripts/ifcfg-[network-interface]
[root@cybersama ~]# cat /etc/sysconfig/network-scripts/ifcfg-eth0 DEVICE=eth0 IPADDR=192.168.0.33 NETMASK=255.255.255.0 NETWORK=192.168.0.0 HWADDR=00:24:1D:8E:AF:0D BROADCAST=192.168.0.255 ONBOOT=yes NAME=eth0
[root@cybersama ~]# cat /etc/sysconfig/network-scripts/ifcfg-eth1 DEVICE=eth1 IPADDR=192.168.0.44 NETMASK=255.255.255.0 NETWORK=192.168.0.0 GATEWAY=192.168.0.1 HWADDR=00:24:01:62:08:DC BROADCAST=192.168.0.255 ONBOOT=yes NAME=eth1 DNS1=208.67.222.222
3. Menjalankan service network
[root@cybersama ~]# /etc/rc.d/init.d/network start
Bringing up loopback interface: [ OK ] Bringing up interface eth0: [ OK ] Bringing up interface eth1: [ OK ]
Untuk menjalan service network pada runlevel 2, 3, 4, dan 5
[root@cybersama ~]# chkconfig --level 2345 network on [root@cybersama ~]# chkconfig | grep network
network 0:off 1:off 2:on 3:on 4:on 5:on 6:off
c. Pengaturan runlevel
File konfigurasi untuk pengaturan runlevel berada di /etc/inittab
[root@cybersama ~]# cat /etc/inittab# 0 - halt (Do NOT set initdefault to this) # 1 - Single user mode
# 3 - Full multiuser mode # 4 - unused
# 5 - X11
# 6 - reboot (Do NOT set initdefault to this) #
id:3:initdefault:
4.3.2. Instalasi dan Konfigurasi Aplikasi OpenSSH-Server
a. Instalasi dengan menggunakan file rpm (Red Hat Package Manager)
[root@cybersama packages]# rpm -Uivh openssh-server-5.2p1-2.fc11.i586.rpm Preparing... ########################################### [100%] 1:openssh-server ########################################### [100%]
b. Konfigurasi OpenSSH-Server
File konfigurasi OpenSSH-Server berada di /etc/ssh/sshd_config
c. Menjalankan service OpenSSH-Server
[root@cybersama ~]# /etc/rc.d/init.d/sshd start
Starting sshd: [ OK ]
Untuk menjalankan service OpenSSH-Server pada runlevel 2, 3, 4,
dan 5
[root@cybersama ~]# chkconfig --level 2345 sshd on [root@cybersama ~]# chkconfig | grep sshd
sshd 0:off 1:off 2:on 3:on 4:on 5:on 6:off
4.3.3. Instalasi Sistem Hypervisor
Pada bagian ini akan dibahas proses instalasi sistem Hypervisor di
dalam linux yang menggunakan aplikasi Qemu dan Virtual-Manager.
a. Instalasi dengan menggunakan file rpm (Red Hat Package Manager)
1. Instalasi Qemu
[root@cybersama Packages]# rpm -Uivh qemu-*
bochs-bios-2.3.8-0.6.git04387139e3b.fc11.noarch.rpm etherboot-zroms-kvm-5.4.4-13.fc11.noarch.rpm vgabios-0.6-0.5.b.fc11.noarch.rpm Preparing... ########################################### [100%] 1:qemu-common ########################################### [ 14%] 2:qemu-img ########################################### [ 29%] 3:vgabios ########################################### [ 43%] 4:etherboot-zroms-kvm ########################################### [ 57%] 5:bochs-bios ########################################### [ 71%] 6:qemu-system-x86 ########################################### [ 86%] 7:qemu-kvm ########################################### [100%]
2. Instalasi Kqemu
[root@cybersama ~]# rpm -Uivh akmod* kmod* kqemu-1.4.0-0.4.pre1.fc11.noarch.rpm warning: akmod-kqemu-1.4.0-0.2.pre1.fc11.9.i686.rpm: Header V3 RSA/SHA256 signature: NOKEY, key ID 8fcff4da Preparing... ########################################### [100%] 1:kmodtool ########################################### [ 13%] 2:akmods ########################################### [ 25%] 3:kqemu ########################################### [ 38%] 4:kmod-kqemu-2.6.30.9-90.########################################### [ 50%] 5:akmod-kqemu ########################################### [ 63%] 6:kmod-kqemu ########################################### [ 75%] 7:kmod-kqemu-2.6.30.9-90.########################################### [ 88%] 8:kmod-kqemu-PAE ########################################### [100%]3. Instalasi Virtual-Manager
[root@cybersama Packages]# rpm -Uivh virt-* bridge-utils-1.2-7.fc11.i586.rpm gtk-vnc-* libvirt-* numactl-2.0.2-4.fc11.i586.rpm python-virtinst-0.400.3-8.fc11.noarch.rpm xen-libs-3.3.1-11.fc11.i586.rpm Preparing... ########################################### [100%] 1:gtk-vnc ########################################### [ 9%] 2:gtk-vnc-python ########################################### [ 18%] 3:xen-libs ########################################### [ 27%] 4:numactl ########################################### [ 36%] 5:bridge-utils ########################################### [ 45%] 6:libvirt ########################################### [ 55%] 7:libvirt-python ########################################### [ 64%] 8:virt-viewer ########################################### [ 73%] 9:python-virtinst ########################################### [ 82%] 10:virt-manager ########################################### [ 91%] 11:virt-top ########################################### [100%]b. Menjalankan service kqemu
[root@cybersama ~]# /etc/rc.d/init.d/kqemu start
Starting kqemu: WARNING: Deprecated config file /etc/modprobe.conf, all config files belong into /etc/modprobe.d/.
kernel 2.6.30.9-90.fc11.i686.PAE [ OK ]
Untuk menjalankan service kqemu pada runlevel 2, 3, 4, dan 5
[root@cybersama ~]# chkconfig --level 2345 kqemu on [root@cybersama ~]# chkconfig | grep kqemu
kqemu 0:off 1:off 2:on 3:on 4:on 5:on 6:off
c. Menjalankan service libvirtd
[root@cybersama ~]# /etc/rc.d/init.d/libvirtd start
Starting libvirtd daemon: [ OK ]
Untuk menjalan service libvirt pada runlevel 3, 4, dan 5
[root@cybersama ~]# chkconfig --level 345 libvirtd on [root@cybersama ~]# chkconfig | grep libvirtd
libvirtd 0:off 1:off 2:off 3:on 4:on 5:on 6:off
4.3.4. Konfigurasi Virtual LAN dalam Sistem Hypervisor
Pada bagian ini akan dibahas proses konfigurasi virtual LAN
a. Membuat file XML (Extensible Markup Language) untuk
mendefinisikan virtual LAN
[root@cybersama ~]# cat VirtNetwork <network>
<name>VirtNetwork</name>
<uuid>7addc173-e605-07ec-9fdd-d4d1cd1a0a04</uuid> <bridge name='virbr0' stp='on' forwardDelay='0' /> <ip address='192.168.122.1' netmask='255.255.255.0'> <dhcp>
<range start='192.168.122.128' end='192.168.122.254' /> </dhcp>
</ip> </network>
b. Mendefinisikan virtual LAN
[root@cybersama ~]# virsh net-define VirtNetwork Network VirtNetwork defined from VirtNetwork
c. Menjalankan virtual LAN
[root@cybersama ~]# virsh net-start VirtNetwork Network VirtNetwork started
d. Autostart virtual LAN
[root@cybersama ~]# virsh net-autostart VirtNetwork Network VirtNetwork marked as autostarted
e. Melihat Status virtual LAN
[root@cybersama ~]# virsh net-list --all Name State Autostart --- VirtNetwork active yes
4.3.5. Instalasi dan Konfigurasi Web Server dengan Menggunakan Sistem
Hypervisor
Pada bagian ini akan dibahas proses instalasi dan konfigurasi web
server dengan menggunakan sistem hypervisor.
a. Membuat virtual machine untuk web server
1. Membuat virtual hard disk untuk virtual web server
[root@cybersama ~]# qemu-img create -f raw /mnt/sda4/qemu-img/virtual_http_server 50G
Formatting '/mnt/sda4/qemu-img/virtual_http_server', fmt=raw, size=52428800 kB
2. Membuat file XML (Extensible Markup Language) untuk
mendefinisikan virtual web server
[root@cybersama ~]# cat virtual_http_server <domain type='kqemu'>
<name>virtual_http_server</name> <uuid>ada855ce-1007-92cb-daaf-faeade8cc430</uuid> <memory>524288</memory> <currentMemory>524288</currentMemory> <vcpu>1</vcpu> <os>
<type arch='i686' machine='pc'>hvm</type> <boot dev='cdrom'/> </os> <clock offset='utc'/> <on_poweroff>destroy</on_poweroff> <on_reboot>restart</on_reboot> <on_crash>restart</on_crash> <devices> <emulator>/usr/bin/qemu</emulator> <disk type='file' device='disk'>
<source file='/mnt/sda4/qemu-img/virtual_http_server'/> <target dev='hda' bus='ide'/>
</disk>
<disk type='file' device='cdrom'>
<source file='/mnt/sda4/iso/LINUX/Fedora-11-i386-DVD.iso'/> <target dev='hdc' bus='ide'/>
<readonly/> </disk> <interface type='network'> <mac address='54:52:00:1e:60:06'/> <source network='VirtNetwork'/> </interface> <serial type='pty'> <target port='0'/> </serial> <console type='pty'> <target port='0'/> </console>
<input type='mouse' bus='ps2'/>
<graphics type='vnc' port='5905' autoport='no'/> </devices>
</domain>
3. Mendefinisikan virtual web server
[root@cybersama ~]# virsh define virtual_http_server Domain virtual_http_server defined from virtual_http_server
4. Menjalankan virtual web server
[root@cybersama ~]# virsh start virtual_http_server Domain virtual_http_server started
5. Autostart web server
[root@cybersama ~]# virsh autostart virtual_http_server Domain virtual_http_server marked as autostarted
6. Melihat status virtual machine
[root@cybersama ~]# virsh list --all Id Name State 3 virtual_http_server running
b. Konfigurasi VNC Server untuk remote web server
[root@cybersama ~]# virsh edit virtual_http_server ...
<target port='0'/> </console>
<input type='mouse' bus='ps2'/>
<graphics type='vnc' port='5905' autoport='no' listen='0.0.0.0' passwd='cybernote'/>
</devices> </domain>
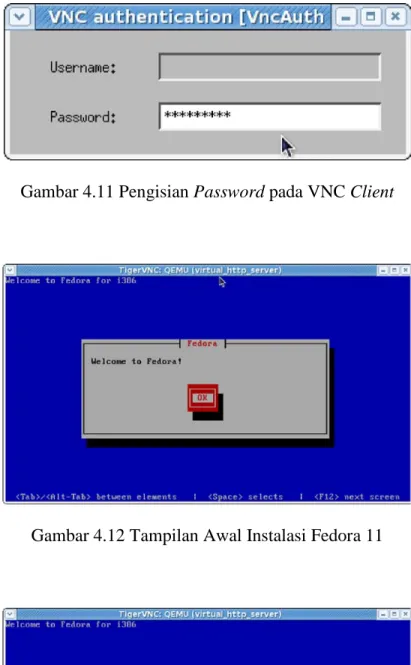
c. Instalasi Sistem Operasi Linux untuk web server
Proses instalasi dapat dilakukan dengan cara remote dengan
menggunakan VNC. Untuk mengakses VNC server, VNC client
harus masukkan IP dan port yang digunakan oleh VNC server.
Gambar 4.11 Pengisian Password pada VNC Client
Gambar 4.12 Tampilan Awal Instalasi Fedora 11
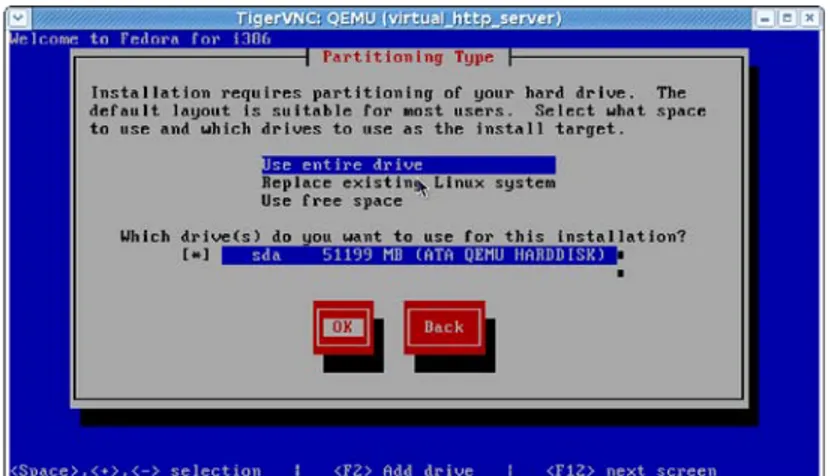
Gambar 4.14 Menentukan Partisi
Gambar 4.15 Proses Instalasi
d. Konfigurasi IP
[root@virtual_http_server ~]# ifconfig eth0
eth0 Link encap:Ethernet HWaddr 54:52:00:1E:60:06
inet addr:192.168.122.2 Bcast:192.168.122.255 Mask:255.255.255.0 inet6 addr: fe80::5652:ff:fe1e:6006/64 Scope:Link
UP BROADCAST RUNNING MULTICAST MTU:1500 Metric:1 RX packets:658 errors:0 dropped:0 overruns:0 frame:0 TX packets:476 errors:0 dropped:0 overruns:0 carrier:0 collisions:0 txqueuelen:1000
RX bytes:61967 (60.5 KiB) TX bytes:223907 (218.6 KiB) Interrupt:10
e. Instalasi httpd dan modssl
Instalasi dengan menggunakan file rpm (Red Hat Package Manager)
• Instalasi httpd
[root@virtual_http_server Packages]# rpm -Uivh httpd-2.2.11-8.i586.rpm apr-1.3.3-4.fc11.i586.rpm apr-util-1.3.4-3.fc11.i586.rpm apr-util-ldap-1.3.4-3.fc11.i586.rpm mailcap-2.1.29-2.fc11.noarch.rpm httpd-tools-2.2.11-8.i586.rpm warning: httpd-2.2.11-8.i586.rpm: Header V3 RSA/SHA256 signature: NOKEY, key ID d22e77f2 Preparing... ########################################### [100%] 1:apr ########################################### [ 17%] 2:mailcap ########################################### [ 33%] 3:apr-util ########################################### [ 50%] 4:apr-util-ldap ########################################### [ 67%] 5:httpd-tools ########################################### [ 83%] 6:httpd ########################################### [100%]
• Instalasi modssl
[root@virtual_http_server Packages]# rpm -Uivh mod_ssl-2.2.11-8.i586.rpm distcache-1.4.5-19.i586.rpm warning: mod_ssl-2.2.11-8.i586.rpm: Header V3 RSA/SHA256 signature: NOKEY, key ID d22e77f2 Preparing... ########################################### [100%]1:distcache ########################################### [ 50%]
2:mod_ssl ########################################### [100%]
f. Konfigurasi httpd dan modssl
1. Konfigurasi httpd
• Instalasi web source code
File-file source code yang digunakan oleh web server harus
berada di “/var/www/html/”.
[root@virtual_http_server ~]# scp -r [email protected]:/root/web/* /var/www/html/ [email protected]'s password: about_cycomconsulting.html 100% 33KB 32.6KB/s 00:00 about_cycomdesign.html 100% 33KB 33.2KB/s 00:00 about_cycomhardware.html 100% 34KB 33.7KB/s 00:00 about_cycomsoftware.html 100% 43KB 42.8KB/s 00:01 about.html 100% 31KB 31.4KB/s 00:00 business_units.html 100% 32KB 32.0KB/s 00:00 career.html 100% 31KB 31.4KB/s 00:00 contact-2.html 100% 34KB 34.2KB/s 00:00 contact.html 100% 37KB 36.7KB/s 00:00 UserMain.css 100% 7866 7.7KB/s 00:00 footer_loop.gif 100% 1176 1.2KB/s 00:00 career.gif 100% 10KB 10.2KB/s 00:00 ... ...[root@virtual_http_server ~]# chmod -R 0755 /var/www/html/* [root@virtual_http_server ~]# ls -la /var/www/html/ total 444
drwxr-xr-x. 4 root root 4096 2009-11-16 00:07 . drwxr-xr-x. 6 root root 4096 2009-11-11 07:01 ..
-rwxr-xr-x. 1 root root 33386 2009-11-16 00:21 about_cycomconsulting.html -rwxr-xr-x. 1 root root 34009 2009-11-16 00:21 about_cycomdesign.html -rwxr-xr-x. 1 root root 34475 2009-11-16 00:21 about_cycomhardware.html ...
...
2. Konfigurasi modssl
File konfigurasi modssl berada di /etc/httpd/conf.d/ssl.conf
• Membuat private key untuk web server
[root@virtual_http_server ~]# openssl genrsa -des3 -out localhost.key 2048 Generating RSA private key, 2048 bit long modulus
...+++ ...+++
e is 65537 (0x10001)
Enter pass phrase for localhost.key:
• Membuat CSR (Certificate Signing Request)
[root@virtual_http_server ~]# openssl req -new -key localhost.key -out localhost.csr
Enter pass phrase for localhost.key:
You are about to be asked to enter information that will be incorporated into your certificate request.
What you are about to enter is what is called a Distinguished Name or a DN. There are quite a few fields but you can leave some blank
For some fields there will be a default value, If you enter '.', the field will be left blank. ---
Country Name (2 letter code) [GB]:IN
State or Province Name (full name) [Berkshire]:Jakarta Locality Name (eg, city) [Newbury]:Harco ManggaDua Organization Name (eg, company) [My Company Ltd]:cybersama Organizational Unit Name (eg, section) []:cybercom
Common Name (eg, your name or your server's hostname) []:cybersama.co.id Email Address []:[email protected]
Please enter the following 'extra' attributes to be sent with your certificate request A challenge password []:
An optional company name []:
• Menghapus Passphrase untuk private key
[root@virtual_http_server ~]# openssl rsa -in localhost.key -out localhost.key
Enter pass phrase for localhost.key: writing RSA key
• Membuat Self-Signed Certificate
[root@virtual_http_server ~]# openssl x509 -req -days 730 -in localhost.csr -signkey localhost.key -out localhost.crt
Signature ok
subject=/C=IN/ST=Jakarta/L=Harco
ManggaDua/O=cybersama/OU=cybercom/CN=cybersama.co.id/emailAddress=admin@cyb ersama.co.id
Getting Private key
• Instalasi private key dan Self-Signed Certificate
[root@virtual_http_server ~]# cp localhost.crt /etc/pki/tls/certs/localhost.crt
cp: overwrite `/etc/pki/tls/certs/localhost.crt'? y
[root@localhost ~]# cp localhost.key /etc/pki/tls/private/localhost.key cp: overwrite `/etc/pki/tls/private/localhost.key'? y
[root@virtual_http_server ~]# chmod 0775 /etc/pki/tls/certs/localhost.crt [root@virtual_http_server ~]# chmod 0775 /etc/pki/tls/private/localhost.key
g. Menjalankan httpd dan modssl
[root@virtual_http_server ~]# /etc/rc.d/init.d/httpd start
Starting httpd: httpd: Could not reliably determine the server's fully qualified domain name, using localhost.localdomain for ServerName
[ OK ]
Untuk menjalan service httpd pada runlevel 3, 4, dan 5
[root@virtual_http_server ~]# chkconfig --level 345 httpd on [root@virtual_http_server ~]# chkconfig | grep httpd
httpd 0:off 1:off 2:off 3:on 4:on 5:on 6:off
4.3.6. Instalasi dan Konfigurasi Mail Server dengan Menggunakan Sistem
Hypervisor
Pada bagian ini akan dibahas proses instalasi dan konfigurasi mail
server dengan menggunakan sistem hypervisor.
a. Membuat virtual machine untuk mail server
1. Membuat virtual hard disk untuk virtual mail server
[root@cybersama ~]# qemu-img create -f raw /mnt/sda4/qemu-img/virtual_mail_server 100G
Formatting '/mnt/sda4/qemu-img/virtual_mail_server', fmt=raw, size=104857600 kB
2. Membuat file XML (Extensible Markup Language) untuk
mendefinisikan virtual mail server
[root@cybersama ~]# cat virtual_mail_server <domain type='kqemu'> <name>virtual_mail_server</name> <uuid>0e3816a7-8c99-4ac3-8201-830ad6781aaa</uuid> <memory>524288</memory> <currentMemory>524288</currentMemory> <vcpu>1</vcpu> <os>
<type arch='i686' machine='pc'>hvm</type> <boot dev='cdrom'/>
</os> <features> <acpi/> <apic/> <pae/> </features> <clock offset='utc'/> <on_poweroff>destroy</on_poweroff> <on_reboot>restart</on_reboot> <on_crash>restart</on_crash> <devices> <emulator>/usr/bin/qemu</emulator> <disk type='file' device='disk'>
<source file='/mnt/sda4/qemu-img/virtual_mail_server'/> <target dev='hda' bus='ide'/>
</disk>
<disk type='file' device='cdrom'>
<source file='/mnt/sda4/iso/LINUX/Fedora-11-i386-DVD.iso'/> <target dev='hdc' bus='ide'/>
<readonly/> </disk> <interface type='network'> <mac address='54:52:00:31:03:64'/> <source network='VirtNetwork'/> </interface> <serial type='pty'> <target port='0'/> </serial> <console type='pty'> <target port='0'/> </console>
<input type='mouse' bus='ps2'/>
<graphics type='vnc' port='5906' autoport='no'/> </devices>
</domain>
3. Mendefinisikan virtual mail server
[root@cybersama ~]# virsh define virtual_mail_server Domain virtual_mail_server defined from virtual_mail_server
4. Menjalankan virtual mail server
[root@cybersama ~]# virsh start virtual_mail_server Domain virtual_mail_server started
5. Autostart mail server
[root@cybersama ~]# virsh autostart virtual_mail_server Domain virtual_mail_server marked as autostarted
6. Melihat status virtual machine
[root@cybersama ~]# virsh list --all Id Name State 3 virtual_http_server running 4 virtual_mail_server running
b. Konfigurasi VNC Server untuk remote mail server
[root@cybersama ~]# virsh edit virtual_mail_server ...
...
<target port='0'/> </console>
<input type='mouse' bus='ps2'/>
<graphics type='vnc' port='5906' autoport='no' listen='0.0.0.0' passwd='cybernote'/>
</devices> </domain>
c. Instalasi Sistem Operasi Linux untuk mail server
Proses instalasi dapat dilakukan dengan cara remote dengan
menggunakan VNC. Untuk mengakses VNC server, VNC client
harus masukkan IP dan port yang digunakan oleh VNC server.
Gambar 4.18 Pengisian Password pada VNC Client
Gambar 4.19 Tampilan Awal Instalasi Fedora 11
Gambar 4.21 Menentukan Partisi
Gambar 4.22 Proses Instalasi
d. Konfigurasi IP
[root@virtual_mail_server ~]# ifconfig eth0
Eth0 Link encap:Ethernet HWaddr 54:52:00:31:03:64
inet addr:192.168.122.3 Bcast:192.168.122.255 Mask:255.255.255.0 inet6 addr: fe80::5652:ff:fe31:364/64 Scope:Link
UP BROADCAST RUNNING MULTICAST MTU:1500 Metric:1 RX packets:42 errors:0 dropped:0 overruns:0 frame:0 TX packets:44 errors:0 dropped:0 overruns:0 carrier:0 collisions:0 txqueuelen:1000
RX bytes:4447 (4.3 KiB) TX bytes:5645 (5.5 KiB) Interrupt:10 Base address:0xe000
e. Instalasi dovecot dan postfix
Instalasi dengan menggunakan file rpm (Red Hat Package Manager)
• Instalasi dovecot
[root@virtual_mail_server Packages]# rpm -Uivh dovecot-1.2-0.rc2.1.fc11.i586.rpm
warning: dovecot-1.2-0.rc2.1.fc11.i586.rpm: Header V3 RSA/SHA256 signature: NOKEY, key ID d22e77f2
Preparing... ########################################### [100%]
1:dovecot ########################################### [100%]
• Instalasi postfix
[root@virtual_mail_server Packages]# rpm -Uivh postfix-2.5.6-3.fc11.i586.rpm cyrus-sasl-2.1.22-22.fc11.i586.rpm mysql-libs-5.1.32-1.fc11.i586.rpm warning: postfix-2.5.6-3.fc11.i586.rpm: Header V3 RSA/SHA256 signature: NOKEY, key ID d22e77f2 Preparing... ########################################### [100%]1:mysql-libs ########################################### [ 33%]
2:cyrus-sasl ########################################### [ 67%]
3:postfix ########################################### [100%]
f. Konfigurasi dovecot dan postfix
1. Konfigurasi dovecot
File konfigurasi dovecot berada di /etc/dovecot.conf
[root@virtual_mail_server Packages]# cat /etc/dovecot.conf ...listen = *, [::] ...
2. Konfigurasi postfix
File konfigurasi postfix berada di /etc/postfix/main.cf
[root@virtual_mail_server Packages]# cat /etc/postfix/main.cf...
inet_interfaces = all
mydestination = $myhostname, localhost.$mydomain, localhost, cybersama.com home_mailbox = Maildir/
...
• Membuat mail account
Untuk membuat mail account dapat dilakukan dengan
menggunakan perintah useradd untuk setiap account-nya
[root@virtual_mail_server Packages]# useradd -s /sbin/nologin -d /home/admin admin
[root@virtual_mail_server Packages]# passwd admin Changing password for user admin.
New password: Retype new password:
passwd: all authentication tokens updated successfully.
root@virtual_mail_server Packages]# useradd -s /sbin/nologin -d /home/felix felix
[root@virtual_mail_server Packages]# passwd felix Changing password for user felix.
New password: Retype new password:
passwd: all authentication tokens updated successfully.
[root@virtual_mail_server Packages]# useradd -s /sbin/nologin -d /home/indra indra
[root@virtual_mail_server Packages]# passwd indra Changing password for user indra.
New password: Retype new password:
[root@virtual_mail_server Packages]# useradd -s /sbin/nologin -d /home/henson henson
[root@virtual_mail_server Packages]# passwd henson Changing password for user henson.
New password: Retype new password:
passwd: all authentication tokens updated successfully.
[root@virtual_mail_server Packages]# ls -l /home/ total 16
drwx---. 2 admin admin 4096 2009-11-16 18:52 admin drwx---. 2 felix felix 4096 2009-11-16 18:56 felix drwx---. 2 henson henson 4096 2009-11-16 18:56 henson drwx---. 2 indra indra 4096 2009-11-16 18:56 indra
g. Menjalankan dovecot dan postfix
1. Menjalankan service dovecot
[root@virtual_mail_server ~]# /etc/rc.d/init.d/dovecot start
Starting Dovecot Imap: Info: If you have trouble with authentication failures, enable auth_debug setting. See http://wiki.dovecot.org/WhyDoesItNotWork [ OK ]
Untuk menjalan service dovecot pada runlevel 3, 4, dan 5
[root@virtual_mail_server ~]# chkconfig --level 345 dovecot on [root@virtual_mail_server ~]# chkconfig | grep dovecot
dovecot 0:off 1:off 2:off 3:on 4:on 5:on 6:off
2. Menjalankan service postfix
[root@virtual_mail_server ~]# /etc/rc.d/init.d/postfix start
Starting Dovecot Imap: Info: If you have trouble with authentication failures, enable auth_debug setting. See http://wiki.postfix.org/WhyDoesItNotWork [ OK ]
Untuk menjalan service postfix pada runlevel 3, 4, dan 5
[root@virtual_mail_server ~]# chkconfig --level 345 postfix on [root@virtual_mail_server ~]# chkconfig | grep postfix
4.3.7. Instalasi dan Konfigurasi NAS Server dengan Menggunakan Sistem
Hypervisor
Pada bagian ini akan dibahas proses instalasi dan konfigurasi
NAS server dengan menggunakan sistem hypervisor
a. Membuat virtual machine untuk NAS server
1. Membuat virtual hard disk untuk virtual NAS server
[root@cybersama ~]# qemu-img create -f raw /mnt/sda4/qemu-img/virtual_nas_server 100G
Formatting '/mnt/sda4/qemu-img/virtual_nas_server', fmt=raw, size=104857600 kB
2. Membuat file XML (Extensible Markup Language) untuk
mendefinisikan virtual NAS server
[root@cybersama ~]# cat virtual_nas_server <domain type='kqemu'> <name>virtual_nas_server</name> <uuid>4ae29a51-a371-4425-81b4-72a5687f4ed1</uuid> <memory>524288</memory> <currentMemory>524288</currentMemory> <vcpu>1</vcpu> <os>
<type arch='i686' machine='pc'>hvm</type> <boot dev='cdrom'/> </os> <features> <acpi/> <apic/> <pae/> </features> <clock offset='utc'/> <on_poweroff>destroy</on_poweroff> <on_reboot>restart</on_reboot> <on_crash>restart</on_crash> <devices> <emulator>/usr/bin/qemu</emulator> <disk type='file' device='disk'>
<source file='/mnt/sda4/qemu-img/virtual_nas_server'/> <target dev='hda' bus='ide'/>
</disk>
<disk type='file' device='cdrom'>
<source file='/mnt/sda4/iso/Windows/WINDOWS SERVER 2003/server 2003.iso'/>
<target dev='hdc' bus='ide'/> <readonly/>
</disk> <interface type='network'> <mac address='54:52:00:e0:f3:d4'/> <source network='VirtNetwork'/> </interface> <serial type='pty'> <target port='0'/> </serial> <console type='pty'> <target port='0'/> </console>
<input type='mouse' bus='ps2'/>
<graphics type='vnc' port='5907' autoport='no'/> </devices>
</domain>
3. Mendefinisikan virtual NAS server
[root@cybersama ~]# virsh define virtual_nas_server Domain virtual_nas_server defined from virtual_nas_server
4. Menjalankan virtual NAS server
[root@cybersama ~]# virsh start virtual_nas_server Domain virtual_nas_server started
5. Autostart NAS server
[root@cybersama ~]# virsh autostart virtual_nas_server Domain virtual_nas_server marked as autostarted
6. Melihat status virtual machine
[root@cybersama ~]# virsh list Id Name State --- 1 virtual_http_server running 3 virtual_mail_server running 4 virtual_nas_server running
b. Konfigurasi VNC Server untuk remote NAS server
[root@cybersama ~]# virsh edit virtual_nas_server ...
...
</console>
<input type='mouse' bus='ps2'/>
<graphics type='vnc' port='5907' autoport='no' listen='0.0.0.0' passwd='cybernote'/>
</devices> </domain>