Digital Photography
A L L - I N - O N E D E S K R E F E R E N C E
FOR
DUMmIES
‰by David D. Busch
Digital Photography
A L L - I N - O N E D E S K R E F E R E N C E
FOR
DUMmIES
‰Hoboken, NJ 07030-5774
Copyright © 2005 by Wiley Publishing, Inc., Indianapolis, Indiana Published by Wiley Publishing, Inc., Indianapolis, Indiana Published simultaneously in Canada
No part of this publication may be reproduced, stored in a retrieval system or transmitted in any form or by any means, electronic, mechanical, photocopying, recording, scanning or otherwise, except as permitted under Sections 107 or 108 of the 1976 United States Copyright Act, without either the prior written permission of the Publisher, or authorization through payment of the appropriate per-copy fee to the Copyright Clearance Center, 222 Rosewood Drive, Danvers, MA 01923, (978) 750-8400, fax (978) 646-8600. Requests to the Publisher for permission should be addressed to the Legal Department, Wiley Publishing, Inc., 10475 Crosspoint Blvd., Indianapolis, IN 46256, (317) 572-3447, fax (317) 572-4355, e-mail: [email protected].
Trademarks:Wiley, the Wiley Publishing logo, For Dummies, the Dummies Man logo, A Reference for the Rest of Us!, The Dummies Way, Dummies Daily, The Fun and Easy Way, Dummies.com, and related trade dress are trademarks or registered trademarks of John Wiley & Sons, Inc. and/or its affiliates in the United States and other countries, and may not be used without written permission. All other trademarks are the property of their respective owners. Wiley Publishing, Inc., is not associated with any product or vendor mentioned in this book.
LIMIT OF LIABILITY/DISCLAIMER OF WARRANTY: THE PUBLISHER AND THE AUTHOR MAKE NO REPRESENTATIONS OR WARRANTIES WITH RESPECT TO THE ACCURACY OR COMPLETENESS OF THE CONTENTS OF THIS WORK AND SPECIFICALLY DISCLAIM ALL WARRANTIES, INCLUDING WITHOUT LIMITATION WARRANTIES OF FITNESS FOR A PARTICULAR PURPOSE. NO WARRANTY MAY BE CREATED OR EXTENDED BY SALES OR PROMOTIONAL MATERIALS. THE ADVICE AND STRATEGIES CONTAINED HEREIN MAY NOT BE SUITABLE FOR EVERY SITUATION. THIS WORK IS SOLD WITH THE UNDERSTANDING THAT THE PUBLISHER IS NOT ENGAGED IN RENDERING LEGAL, ACCOUNTING, OR OTHER PROFESSIONAL SERVICES. IF PROFESSIONAL ASSISTANCE IS REQUIRED, THE SERVICES OF A COMPE-TENT PROFESSIONAL PERSON SHOULD BE SOUGHT. NEITHER THE PUBLISHER NOR THE AUTHOR SHALL BE LIABLE FOR DAMAGES ARISING HEREFROM. THE FACT THAT AN ORGANIZATION OR WEBSITE IS REFERRED TO IN THIS WORK AS A CITATION AND/OR A POTENTIAL SOURCE OF FURTHER INFORMATION DOES NOT MEAN THAT THE AUTHOR OR THE PUBLISHER ENDORSES THE INFORMATION THE ORGANIZATION OR WEBSITE MAY PROVIDE OR RECOMMENDATIONS IT MAY MAKE. FURTHER, READERS SHOULD BE AWARE THAT INTERNET WEBSITES LISTED IN THIS WORK MAY HAVE CHANGED OR DISAPPEARED BETWEEN WHEN THIS WORK WAS WRITTEN AND WHEN IT IS READ.
For general information on our other products and services, please contact our Customer Care Department within the U.S. at 800-762-2974, outside the U.S. at 317-572-3993, or fax 317-572-4002. For technical support, please visit www.wiley.com/techsupport.
Wiley also publishes its books in a variety of electronic formats. Some content that appears in print may not be available in electronic books.
Library of Congress Control Number: 2004112315
ISBN: 0-7645-7328-4
Manufactured in the United States of America
10 9 8 7 6 5 4 3 2 1
About the Author
David D. Buschhas demystified imaging and computer technology since 1980 through more than 75 books and several thousand articles on digital imaging, photography, and computer technology for leading photography and computer media, includingPopular Photography and Imaging, Petersen’s PhotoGraphic, The Professional Photographer, The Rangefinder, Computer Shopper,and CNet Networks. A two-time winner of Computer Press Awards, Busch has also oper-ated his own commercial photo studio and lab, worked as a newspaper photog-rapher, and taught photo posing at a New York modeling agency.
Contributing author Dan Simonhas spent the past 25 years as a journalist and photographer. He began his career as a Navy journalist with assignments aboard several ships, and in Norfolk, Va., Dededo, Guam, and McMurdo Station, Antarctica. After leaving the service in 1990, Dan worked as a river guide and photographer on Pennsylvania’s Lehigh River. During the past ten years, he has worked as a writer/photographer for several Pennsylvania and New Jersey newspapers including the Wilkes-Barre/Hazleton Times Leader
and Allentown Morning Call. Simon’s writing and photography have appeared in numerous books, magazines, Web sites, and newspapers including The New York Timesand ESPN.
Contributor Laurie Anne Ulrich’s books include Photoshop Elements 2 Restoration and Retouching, Photoshop Elements 2 Bible,and Photoshop 7: The Complete Reference.
Contributor Michael Meadhrahas authored, co-authored, and contributed to dozens of books, including How to Do Everything with Dreamweaver MX 2004, Lotus SmartSuite Millennium Edition for Windows For Dummies , Lego Mindstorms For Dummies, StarOffice 5.2 For Linux For Dummies, KDE For Dummies,and Windows 2000 Professional Bible.While a member of the Cobb Group, Michael served as editor-in-chief of several newsletters covering topics such as PageMaker, QuarkXPress, Freehand, Illustrator, CorelDraw, Illustrator, and Photoshop.
Dedication
Author’s Acknowledgments
Some of the people who helped bring this book to market include the following:
Acquisitions, Editorial, and Media Development
Project Editor:Nicole Sholly
Sr. Acquisitions Editor:Steven H. Hayes
Sr. Copy Editor:Teresa Artman
Technical Editor:Michael D. Sullivan
Editorial Manager:Kevin Kirschner
Media Development Manager: Laura Carpenter VanWinkle Media Development Supervisor:
Richard Graves
Editorial Assistant:Amanda Foxworth
Cartoons:Rich Tennant (www.the5thwave.com)
Production
Project Coordinator: Courtney MacIntyre, Nancee Reeves
Layout and Graphics: Karl Brandt, Andrea Dahl, Brian Drumm, Lauren Goddard, Joyce Haughey, Michael Kruzil, Jacque Roth, Heather Ryan, Julie Trippetti Special Help: Jacque Roth
Proofreaders: John Greenough, Carl William Pierce, Sossity R. Smith Indexer:Steve Rath
Publishing and Editorial for Technology Dummies
Richard Swadley,Vice President and Executive Group Publisher
Andy Cummings,Vice President and Publisher
Mary Bednarek,Executive Acquisitions Director
Mary C. Corder,Editorial Director
Publishing for Consumer Dummies
Diane Graves Steele,Vice President and Publisher
Joyce Pepple,Acquisitions Director
Composition Services
Gerry Fahey,Vice President of Production Services
Contents at a Glance
Introduction ...1
Book I: Digital Photography Overview ...7
Chapter 1: The Essentials of Good Digital Photography ...9
Chapter 2: Basics of Equipment ...19
Chapter 3: Acquiring Your Digital Pictures ...33
Chapter 4: Electronically Editing or Restoring a Photo ...41
Chapter 5: Storing and Organizing Your Digital Photos ...65
Chapter 6: Printing and Sharing Your Pictures ...81
Book II: Building Your Digital Photography Studio...85
Chapter 1: Choosing the Right Camera ...87
Chapter 2: Setting Up a Computer for Digital Photography ...125
Chapter 3: Getting Your Picture from the Camera to the Digital Darkroom ...141
Chapter 4: Adding a Printer and Scanner ...163
Chapter 5: Picking Up Some Accessories ...179
Book III: Taking Great Pictures...197
Chapter 1: Tools and Techniques of Composition ...199
Chapter 2: Close-Up Photography ...225
Chapter 3: Photographing People ...249
Chapter 4: Shooting for Publication ...297
Chapter 5: Sports and Action Photography ...331
Chapter 6: Travel Photography ...365
Book IV: Basics of Image Editing ...401
Chapter 1: What You Can and Can’t Do with Image Editing Tools ...403
Chapter 2: Common Editing Options ...441
Chapter 3: Choosing the Right Image Editor for You ...479
Book V: Editing with Adobe Photoshop
and Photoshop Elements...509
Chapter 1: Latest Features of Photoshop Elements 3.0 and Photoshop CS...511
Chapter 2: Making Selections ...517
Chapter 3: Brushing Away Problems with Digital Photos ...535
Book VI: Restoring Old Photos ...607
Chapter 1: Scanning Print Images ...609
Chapter 2: Restoring Images Captured from Slides, Negatives, and Other Formats ...623
Chapter 3: Some Common Fixes for Vintage Photos ...637
Book VII: Printing and Sharing Your Digital Images ....655
Chapter 1: Printing Your Final Result ...657
Chapter 2: Sharing Pictures on the Web ...667
Glossary ...681
Table of Contents
Introduction...1
About This Book ...2
What’s in This Book ...2
Book I: Digital Photography Overview ...3
Book II: Building Your Digital Photography Studio ...3
Book III: Taking Great Pictures ...4
Book IV: Basics of Image Editing ...4
Book V: Editing with Adobe Photoshop and Photoshop Elements ...4
Book VI: Restoring Old Photos ...4
Book VII: Printing and Sharing Your Digital Images ...5
Color insert ...5
Conventions Used in This Book ...5
Icons Used in This Book ...6
Where To Go From Here ...6
Book I: Digital Photography Overview...7
Chapter 1: The Essentials of Good Digital Photography . . . .9
Knowing What Equipment You Need ...10
Minimum and Maximum Specs ...12
Taking Great Digital Shots ...14
Understand how your camera works ...14
Know some photography fundamentals ...14
Find out how to use an image editor ...15
Master a scanner ...15
Making Any Photo Digital ...16
Printing Your Final Pictures ...17
Chapter 2: Basics of Equipment . . . .19
Deciding What You Need ...20
How much resolution do you need? ...20
Do you plan to manipulate your photos? ...22
Are you a photo hobbyist? ...23
How often do you plan to upgrade? ...24
Defining Categories ...24
Web cams ...25
Point-and-shoot models ...25
Intermediate models ...26
Prosumer models ...27
Professional models ...28
Checking for Key Camera Features ...30
Chapter 3: Acquiring Your Digital Pictures . . . .33
From Camera to PC ...33
Grabbing Images of Hard Copies ...35
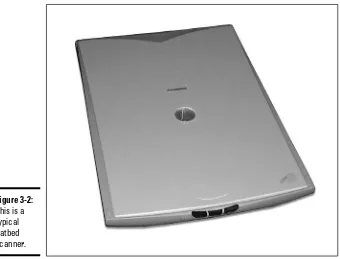
Kinds of scanners ...36
What to look for in a scanner ...37
Letting the Other Guy Do It ...39
Chapter 4: Electronically Editing or Restoring a Photo . . . .41
Choosing an Image Editing Program ...42
Determining your needs ...42
Checking out different applications ...44
Performing Photographic Triage ...47
Making Quick Fixes ...48
Fixing red-eye ...48
Removing dust spots ...50
Correcting color ...53
Restoring, Replacing, and Removing Photographic Content ...55
Replacing missing or unwanted content ...56
Rearranging parts of the picture ...61
Getting rid of unwanted content ...63
Chapter 5: Storing and Organizing Your Digital Photos . . . .65
Organizing Your Photos ...65
Using your computer’s file-management tools ...66
Using photo album software ...70
Using online galleries ...74
Archiving and Backing Up Photos ...76
Backing up your best shots ...77
Using CD-R and CD-RW ...77
Using DVD storage ...78
Offsite storage for maximum safety ...79
Chapter 6: Printing and Sharing Your Pictures . . . .81
Creating Prints on Demand ...81
Getting the Most from Your Printer and Supplies ...83
Sharing Your Photos ...83
Book II: Building Your Digital Photography Studio ...85
Chapter 1: Choosing the Right Camera . . . .87
Choosing a Camera Category ...88
Table of Contents
xv
Evaluating Your Lens Requirements ...93
Understanding How Lenses Work ...94
Magnifications and focal lengths ...95
Lens apertures ...99
Considering Your Storage Options ...116
No Flash in the Pan: Determining Your Lighting Needs ...118
The Digital SLR Revolution ...119
Ten reasons why digital SLRs are cool ...119
Some digital SLR considerations ...119
A Dozen Exotic Digital Camera Features ...122
Checking Out Ease of Use ...123
Chapter 2: Setting Up a Computer for Digital Photography . . . .125
Hardware Wars Revisited ...126
What Equipment Do You Need? ...130
Determining How Much Memory You Need ...131
Choosing Local Storage ...132
SCSI and EIDE hard disks ...132
External hard disks ...133
Archiving and Backing Up ...134
Zip disks ...134
CD-Rs and CD-RWs ...134
DVDs ...134
Kodak Photo CD ...135
Avoiding Microprocessor No-brainers ...136
Determining What’s Most Important ...137
Choosing Pointing Devices ...139
Chapter 3: Getting Your Picture from the Camera
to the Digital Darkroom . . . .141
Making the Connection between Camera and Computer ...142
Getting wired ...143
Memory cards and disks ...149
Transferring Images from Camera to Computer ...156
Transferring pictures using camera utility software ...156
Copying files to your hard drive ...158
Chapter 4: Adding a Printer and Scanner . . . .163
Why You Want Prints ...164
Choosing a Printer for Digital Photography ...165
Choosing a Scanner ...168
Types of scanners ...169
Scanner prices and features ...170
What scanner features do you need? ...172
Resolution mythconceptions ...176
Color depth confusion ...177
Chapter 5: Picking Up Some Accessories . . . .179
Getting Support from Tripods ...180
Types of tripods ...182
Scrutinizing tripod features ...183
Checking out tripod alternatives ...186
Making Good Use of an Electronic Flash ...186
Types of electronic flash units ...188
What to look for in a photographic slave flash ...189
Lighting/flash accessories ...191
Choosing a Camera Bag ...192
Acquiring Other Useful Devices ...192
A filter holder ...192
A second camera ...193
Cleaning kits ...193
Waterproof casings and housings ...194
Filters ...194
Battery packs ...196
Book III: Taking Great Pictures ...197
Chapter 1: Tools and Techniques of Composition . . . .199
Photo Composition: The Big Picture ...199
Visualizing a Concept for Your Picture ...201
What do you want your image to say? ...201
Where will the image be used? ...202
Whom are you creating the image for? ...202
Selecting a Subject and a Center of Interest ...203
Narrowing down your subject matter ...203
Choosing one main subject ...203
Using secondary subjects ...205
Choosing an Orientation ...206
Arranging Your Subjects ...209
Choosing subject distance ...209
Table of Contents
xvii
The Rule of Thirds ...212
Placing important objects at imaginary junction points ...212
When to break the Rule of Thirds ...213
Some Compositional Guidelines ...215
Using Straight Lines and Curves ...216
Balancing an Image ...219
Framing an Image ...219
What’s That Tree Doing Growing Out of My Head? ...221
Chapter 2: Close-Up Photography . . . .225
Defining Macro Photography ...226
Why Digital Macro Photography Is Cool ...228
Picking a Place to Shoot ...229
Setting Up Your Macro Studio ...230
Background check ...231
Visible means of support ...233
Lighting equipment ...235
Other equipment ...238
Shooting Tips for Macro Photography ...240
Setting up your subject and background ...240
Setting up your camera ...240
Lights, please ...241
Ready . . . aim . . . ...242
Fire! ...244
Digital SLRs and Close-Up Photography ...246
Chapter 3: Photographing People . . . .249
Capturing Satisfying Portraits ...250
Shooting in the Studio or on Location ...252
Setting Up an Informal Portrait Studio ...254
Choosing backgrounds ...254
Selecting supports for lights, camera, and subjects ...256
Basic lighting equipment ...257
Professional studio lighting ...261
Lighting gadgets ...262
Lighting Basics ...268
Using multiple light sources ...269
Arranging a multiple-light setup ...269
Basic Lighting Techniques ...277
Advanced Lighting Techniques ...278
Short lighting ...278
Broad lighting ...280
Butterfly lighting ...282
Backlighting ...282
Shooting the Portrait ...288
Posing your subjects ...289
Arranging your lighting ...293
Taking the picture ...293
Advantages of Digital Cameras ...294
Chapter 4: Shooting for Publication . . . .297
Finding Outlets for Print Publication ...298
Local newspapers ...300
Understanding what newspapers need ...300
Working as a Professional Newspaper Photographer ...302
Being a stringer versus freelancing ...303
Getting your foot in the door ...306
Magazines and Magazine-Like Markets ...306
Making contact ...310
Submitting photos ...312
Shooting for Publication ...313
Understanding group photography basics ...313
Photographing groups of two to two dozen ...314
Composing effective group shots ...315
Managing the group ...315
PR Photography ...317
Executive portraits ...317
Company events ...320
Arranging a PR event worth photographing ...321
Other photoworthy events ...321
Producing placeable PR photos ...322
Printing your PR photos ...323
Writing cutlines ...323
Preparing the cutline for submission ...324
Submitting the photo ...326
Following up ...326
Product Photography ...326
Product shot opportunities ...327
Product demo shots ...328
Chapter 5: Sports and Action Photography . . . .331
Choosing Your Weapons ...331
Digital camera features and action photography ...333
Digital cameras and latency ...338
Taking Great Sports Photos ...341
Choosing your sport and your spot ...342
Winter sports: A special case ...350
Taking Your First Action Photo ...352
Setting your ISO speed ...352
Understanding how to stop action ...353
Table of Contents
xix
Panning ...356
Action approaching the camera ...357
Using blur creatively ...358
Taking the Picture ...360
Capturing great sports moments ...360
Setting up for predictable action ...360
Capturing the fans ...363
Chapter 6: Travel Photography . . . .365
Choosing Equipment ...365
Selecting a camera for your needs ...365
Choosing key camera features ...368
Choosing lenses for travel ...369
Considering a tripod ...369
Choosing an electronic flash ...370
Selecting a camera bag ...372
Keeping your camera powered ...374
Other useful devices ...376
Getting Ready to Go on the Road ...378
Meeting Your Storage Requirements ...379
Tried-and-True Travel Photography Techniques ...380
Shooting scenics ...380
Capturing monuments and architecture ...382
Shooting panoramas ...386
Shooting adventure sports ...387
Photographing people ...388
Capturing people and their places ...391
Documenting Your Trip ...393
Varying your shots ...393
Composing your shots ...394
Getting organized ...395
Book IV: Basics of Image Editing...401
Chapter 1: What You Can and Can’t Do with Image
Editing Tools . . . .403
Correcting Colors ...403
You can’t add color that isn’t there ...404
Fixing color casts ...405
Causes of color catastrophe ...407
Adjusting Brightness and Contrast ...408
Murky shadows and washed-out highlights ...410
Maintaining consistency ...413
Using Blurring and Sharpening Tools ...416
Sharpening here and there ...417
Blurring for effect ...418
Repairing Damage, Small and Large ...421
Removing artifacts (or tiny blemishes) ...421
Spackling over more serious damage ...425
Removing Unwanted Image Content ...429
Delete your ex-brother-in-law ...429
Cranial tree-ectomies ...430
Combining Pictures ...434
Pasting content from other images ...435
Using layers to create overlapping images ...436
Adjusting opacity for interesting effects ...438
Chapter 2: Common Editing Options . . . .441
Checking Out Your Editing Toolkit ...441
Painting Tools ...444
Customizing your Brush and Pencil tools ...445
Choosing a paint color ...446
Applying the paint ...449
Using the Eraser as a painting tool ...455
Selection Tools ...456
Making geometric selections ...456
Drawing freeform selections ...461
Selecting pixels by color with the Magic Wand ...465
Blending Tools ...469
Smudging and smearing your colors ...469
Blurring the edges ...470
Using the Scratch Remover ...471
Correction Tools ...473
Using the Sponge tool to add and remove color ...473
Adjusting lights and darks ...474
Chapter 3: Choosing the Right Image Editor for You . . . .479
Looking at Popular Image Editors: The Basics ...479
Adobe Photoshop — Alone at the Top ...481
What’s good about Photoshop ...482
What’s not so good about Photoshop ...482
What you can do with Photoshop ...483
Where to get Photoshop ...485
Second-Tier Image Editors ...485
Adobe Photoshop Elements ...486
Corel PhotoPaint ...488
Jasc Paint Shop Pro ...490
Macromedia Fireworks ...493
Corel Painter ...496
Table of Contents
xxi
Third-Tier Image Editors ...502 Microsoft image editing software ...502 Roxio PhotoSuite ...504 Apple iPhoto ...505 Deciding Whether You Need More Than One Image Editor ...506
Book V: Editing with Adobe Photoshop
and Photoshop Elements ...509
Chapter 1: Latest Features of Photoshop Elements 3.0
and Photoshop CS
. . . .511
The Relationship between Photoshop and Photoshop Elements ...511 What’s New in Photoshop cs and Elements ...512 What’s New in Elements 3.0 ...514 What’s New in Photoshop cs ...516
Chapter 2: Making Selections . . . .517
Making Simple Selections with the Marquee Tools ...517 Selecting geometric shapes ...518 Selecting single-pixel rows and columns ...520 Adding to, reducing, and combining selections ...520 Snagging Irregular Shapes with the Lasso Tools ...523 Selecting freeform shapes ...524 Selecting magnetically ...526 The Magic Wand Tool’s Digital Prestidigitation ...527 Making and adjusting selections based on color ...528 Controlling the magic ...529 Specialized Selection Tools ...529 Using the Selection Brush tool ...529 Selecting in Quick Mask mode ...531 Using the Select Menu ...532
Chapter 3: Brushing Away Problems with Digital Photos . . . .535
Photoshop and Photoshop Elements’ Painting and Drawing Tools ...535 Working with Brushes and Pencils ...536 Painting with the Brush tool ...537 Working with the Pencil tool ...539 Customizing Your Brushes and Pencils ...539 Choosing the right size and shape ...541 Obtaining third-party brush sets ...545
Chapter 4: Restoring Images . . . .547
Using Smudging, Sharpening, and Blurring Tools ...551 Finger painting to blend colors and textures ...552 Using the Sharpen tool to add detail ...554 Blurring some or all of your image ...556 Finding Relief with the Healing Tools ...559 Using the Healing Brush ...559 Working with the Patch tool ...562 Cloning content to cover damage and unwanted content ...564 Removing red-eye ...567
Chapter 5: Correcting Faded, Funny, and Funky Colors . . . .571
Using Automated Tools in Photoshop and Elements ...571 Auto correction in Photoshop ...572 Auto correction in Photoshop Elements ...572 Adjusting Color Balance ...573 Adjusting color levels ...573 Using the Variations dialog box ...574 Equalizing colors ...576 Fixing a color cast ...577 Displaying and using channels ...579 Working with Color Intensity and Quality ...580 Increasing and decreasing color intensity ...581 Tinkering with brightness and contrast ...583 Riding the curves ...583
Chapter 6: Restoring and Enhancing Photos with Filters
and Special Effects . . . .585
Working with Photoshop and Photoshop Elements’ Filters ...586 Understanding how filters work ...586 Fixing flaws with corrective filters ...588 Turning photos into paintings with artistic filters ...593 Going a little crazy with special effects filters ...596 The Photoshop Elements’ Effects Tab Palette ...601 Displaying and moving the tab ...603 Applying an effect ...603 Getting Your Hands on Third-Party Filters ...604
Book VI: Restoring Old Photos...607
Chapter 1: Scanning Print Images . . . .609
Table of Contents
xxiii
Sharpening ...617 Blurring/descreening ...618 Knowing when to halftone ...618 Other scanner controls ...619
Chapter 2: Restoring Images Captured from Slides,
Negatives, and Other Formats . . . .623
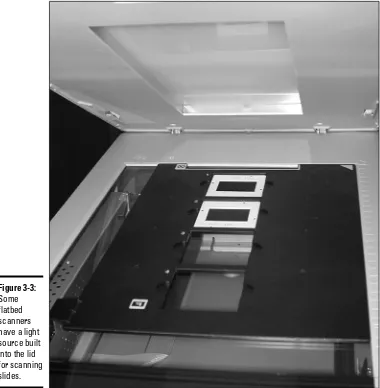
Film and Photography ...624 Scanning Options ...626 Let the pros do it ...626 Buy a slide scanner ...626 Use a transparency-capable flatbed ...627 Try the Rube Goldberg approach ...629 Types of Originals ...629 Prints ...629 Slides ...630 Transparencies ...630 Black-and-white or color negatives ...631 Exotica ...632 Scanning Film ...633 Prepping the film ...633 Performing the scan ...635
Chapter 3: Some Common Fixes for Vintage Photos . . . .637
Repairing Vintage Photos: The Basics ...638 Replacing Depth and Detail ...640 Shedding light on the subject ...641 Don’t be afraid of dark shadows ...641 Creating focus by sharpening images ...643 Correcting Faded Colors ...645 Adjusting color levels ...645 Increasing saturation ...646 Adding color adjustment layers ...647 Getting Nostalgic with Sepia Tones ...649 Evening out existing sepia tones ...650 Converting a black-and-white photo to sepia tone ...650 Rip! Replacing Torn or Missing Content ...652
Book VII: Printing and Sharing Your Digital Images...655
Chapter 1: Printing Your Final Result . . . .657
Laser printers ...659 Dye-sublimation printers ...660 Touring the Print Process ...660 Preventing surprises with Print Preview ...661 Understanding your output options ...662 Printing your photos ...663 Using Professional Printing Services ...664 Choosing a service bureau ...664 Tell them what you want, what you really, really want ...665 Knowing when you need a service bureau ...666
Chapter 2: Sharing Pictures on the Web . . . .667
Appreciating the Advantages of Web Sharing ...667 Sharing your personal photos ...669 Sharing images with business associates ...670 Choosing a Sharing System ...671 Using commercial sharing sites and services ...672 Using You’ve Got Pictures and Kodak Picture Center
with America Online ...673 Using your own Web space ...676
Glossary ...681
Introduction
T
he future of photography is in your hands, and it’s becoming all digital! Not since the 19th century, when photographers had to be artisan, craftsperson, artist, chemist, and public relations expert rolled into one, has so much of the photographic process been entirely in the control of the person taking the picture. Now you can compose and view the exact picture you’re going to take, using your camera’s full liquid crystal display (LCD) screen. Review the picture an instant after pressing the shutter. If your computer is nearby, you can upload it seconds later, view a super-large version on your display, crop, enhance, and then make your own sparkling full-color print — all within minutes!When you go digital, you never need to buy film or wait while your photos are processed in a lab. You decide which images to print and how large to make them. You can display your digital photographic work framed on your wall or displayed proudly over your fireplace. You can make wallet-size photos, send copies to friends in e-mail, or create an online gallery that can be viewed by relatives and colleagues over the Web.
And if alchemy is in your blood, you can transform the simplest picture into a digital masterpiece using an image editor. Correct your photos, delete your ex-brother-in-law from a family portrait, or transplant the Eiffel Tower to the seashore.
Digital photography gives you the power to take pictures on a whim, or to create careful professional quality work that others might be willing to pay for. The choices are all yours, and digital photography puts all the power in your hands. All you need is a little information on how to choose and use your tools, and how to put them to work. That’s what you’ll find within the pages of this thick, comprehensive All-in-One guidebook.
cameras for $500 or so, and even 8MP models are widely available for less than $1,000. Digital single lens reflex cameras (SLRs) with interchangeable lenses are available from companies like Nikon, Canon, and Minolta. Adobe Photoshop CShas bumped up the image editing ante with lots of
new capabilities of interest to digital photographers, and even inexpensive applications like Adobe Photoshop Elements 3.0 have more features than you could find in the most powerful image editor four or five years ago. Your new hardware and software tools make working with digital images easier while giving you important new capabilities.
About This Book
This book is written for the person who has a good grasp of using a com-puter, navigating an operating system, and at least a cursory knowledge of the operation of a digital camera. It would help if you have some familiarity with an image editor, such as Paint Shop Pro, Corel PhotoPaint, or Adobe’s Photoshop or Photoshop Elements. It is intended to be a comprehensive reference book that you can read cover to cover or reach for when you’re looking for specific information about a particular task.
Wherever I can, I sneak in a useful tip or an interesting technique to help you put digital photography to work for your project needs.
If you have some knowledge of conventional photography, too, this book will help you fine-tune your capabilities. If you know very little about photography, there’s help for you here, too. One large chunk of the book is devoted to tips on the most popular genres of photography, from close-up and sports pho-tography to travel phopho-tography and shooting for publication. Check out the helpful section on getting the best composition. If you’re puzzled over what equipment to buy, look to the sections on choosing cameras, photo acces-sories, and related equipment such as printers and scanners.
What’s in This Book
This book is broken down into mini-books, each covering a general topic. Each mini-book comprises chapters, each covering a more specific topic under the general one. Each chapter is then divided into sections, and some of those sections have subsections. I’m sure you get the picture.
What’s in This Book
3
cross-reference to another book and chapter where you’ll find all the details. If you’re looking for something specific, check out either the Table of Contents or the index.
The Cheat Sheet at the beginning of the book is a quick guide to file for-mats and lingo. Tear it out, tape it to your monitor, and don’t forget to say, “Thanks.” (You’re welcome.)
The glossary at the back of the book provides a comprehensive listing of digital photography terminology.
And finally, I’ve got pictures. Lots of them. Many of these pictures illustrate good photo techniques as well as traps to avoid. You’ll find examples of the kinds of pictures you can take right away and maybe a few that you’ll want to strive to equal or exceed.
This book contains seven mini-books. The following sections offer a quick synopsis of what each book contains.
Book I: Digital Photography Overview
This section is your digital photography short course, providing all the infor-mation on a variety of topics that you really need to get started. Each of the six chapters is an overview of topics covered in depth later in the book. You’ll find the essentials of good digital photography, the basics of equipment, and how to acquire digital pictures. Buzz through the quickie introduction into some of the ways you can edit or restore a photo electronically, and take a look at how you can store and organize your digital photos. Then, if you’re interested in what’s involved in selecting a printer or scanner, you’ll find all the basic information summarized for you in an easy-to-understand way.
Book II: Building Your Digital Photography Studio
Book III: Taking Great Pictures
This is the meat of the book for veteran and aspiring photographers alike. Each of the six chapters is devoted to a different kind of photography. You’ll see the basic rules for composing great photos — and when to break them. You’ll discover the secrets of close-up photography and how to make pleas-ing portraits of individuals and groups.
Whether shooting for publication is part of your job description or just a goal, you’ll find tips on how to take publishable photos and how to market them. I also include chapters on sports and action photography as well tips on travel photography.
Book IV: Basics of Image Editing
This book is your introduction to image editing, providing general tips on what you can — and can’t — do with popular image editors such as Paint Shop Pro, Corel PhotoPaint, PhotoImpact, or Adobe Photoshop and Photoshop Elements. You’ll see the capabilities of these programs, discover-ing the full range of tools at your disposal.
The book winds up with a chapter that compares and contrasts the most popular image editors, so you can choose which image editing program you really need (or whether you might even benefit from owning two).
Book V: Editing with Adobe Photoshop and
Photoshop Elements
This book goes into a little more detail on the use of the two favorite image editing programs: Adobe Photoshop CS(favored by professionals) and Adobe Photoshop Elements 3.0 (an inexpensive younger sibling with lots of power yet easy to use). You discover the power of making selections, brush away problems with your digital photos, correct your colors, and apply special effects with filters.
Although this book is not a complete guide to Photoshop, you’ll find lots of good information you can use right away to try out your digital photo editing muscles. For tons of in-depth coverage, read Photoshop CSAll-in-One Desk
Reference For Dummies,by Barbara Obermeier (Wiley).
Book VI: Restoring Old Photos
Conventions Used in This Book
5
for working with slides and negatives, and some common fixes for vintage photos.
Book VII: Printing and Sharing Your Digital Images
Your digital photos are going to be so good that you won’t be able to keep them to yourself. This mini-book provides more information on printing your photos, showing you ways to share your pictures over the Internet. You’ll become more comfortable with your printer’s capabilities, discovering all the things that you can do with photos online, whether it’s showcasing your pictures among your friends and colleagues, or making photo greeting cards, T-shirts, or other gift items.
Color insert
Trying to illustrate the powers of digital photography without showing some images in full, living color would be about as useful as if I handed you a broken umbrella on a rainy day. The 16-page color insert does just that, so don’t miss it.
Conventions Used in This Book
Digital photography knows no operating system limits. All digital cameras and many software applications work equally well on a PC as on a Macintosh. To that end, this book is cross-platform. Understandably, some differences do crop up, however, particularly in the chapters that deal with image editing. In these, Windows commands are given first, followed by Mac commands, like this:
Press Enter (or Return on the Mac) to begin a new line.
Occasionally, text will be specific to one platform or another. Commands listed often involve using the keyboard along with the mouse: for example, “Press Shift while dragging with the Rectangular Marquee tool to create a square,” or “Alt+click (Option+click) the eyeball to redisplay all layers.” When you see a command arrow (➪) in the text, it indicates that you should select a command from the menu bar. For example, “Choose Edit➪
Define Custom Shape” means to click the Edit menu and then choose the Define Custom Shape option.
Although this book has been written using the latest digital cameras and the newest software (such as Paint Shop Pro 8 and Photoshop CS), if you’re still
might just have to poke around a little more to find a tool or option that’s moved — and of course, the topics covering new features won’t be applica-ble. But hey, seeing the cool new features might just be the impetus you need to go out and upgrade!
Icons Used in This Book
While perusing this book, you’ll notice some icons in the margins beckoning you for your attention. Don’t ignore them; embrace them! These icons point out fun, useful, and memorable tidbits about Photoshop, plus facts you’d be unwise to ignore.
This icon indicates information that will make your digital photography experience easier. It also gives you an icebreaker at your next cocktail party. Whipping out, “Did you know that many digital cameras can focus down to within an inch of an object?” is bound to make you the center of conversation.
This icon is a reminder of things that I want to gentlyre-emphasize. Or I might be pointing out things that I want you to take note of in your future digital photography excursions.
The little bomb icon is a red flag. Heed these warnings, or else your camera or image editor might show its ugly side.
This icon points out info you don’t necessarily need to know. If you’re interested in getting more technical, however, you’ll find such information interesting.
Where To Go From Here
If you want your voice to be heard, you can contact the publisher or authors of the For Dummies books by visiting the publisher’s Web site atwww.dummies.com, sending an e-mail to [email protected], or sending snail mail to Wiley Publishing, Inc., 10475 Crosspoint Boulevard, Indianapolis, IN 46256.
Book I
Chapter 2: Basics of Equipment ...19
Chapter 3: Acquiring Your Digital Pictures ...33
Chapter 4: Electronically Editing or Restoring a Photo ...41
Chapter 5: Storing and Organizing Your Digital Photos...65
Chapter 1: The Essentials of
Good Digital Photography
In This Chapter
⻬Choosing equipment
⻬Making great digital photos
⻬Converting other photos to digital format
⻬Making hard-copy prints
I
n 1888, George Eastman began promoting the first hand-held Kodak camera with the slogan, “You press the button, we do the rest.” His idea was to make the camera as ubiquitous as the pencil. However, the film king’s dream didn’t really come true until the invention of the digital camera. Certainly, conventional photography has long been as simple as pressing a button, but the “we do the rest” part — taking the film to a photo lab, decid-ing what size and kind of prints to make, and then waitdecid-ing for the results — is a lot less convenient than using a pencil.Digital photography has finally put the entire process of making pictures in the hands of the person holding the camera. You compose the picture through the viewfinder (as always), but now you can preview the exact pho-tograph that you’re going to take with a bright liquid crystal display (LCD) screen on the back of your camera, or through an electronic viewfinder inside. Then, after snapping a shot, you can instantly review the photos you’ve taken and erase the bad pictures on the spot.
Even better, you don’t need to remember to stop and buy film; digital “film” (storage memory) is almost infinitely reusable. And you don’t have to drop off film for finishing any more: It’s “processed” instantly, ready for viewing or printing from your own inexpensive color printer. Wow, no more sifting through stacks of prints of marginal images. You decide which images to print up and whether to make them 4 x 6 inches or 5 x 7 inches or some other size.
You also don’t need to fret if your images aren’t exactly right or could benefit from a little cropping. With an image editor, such as Photoshop CS
Digital photography puts everything in your hands: You press the button, and you can do as much of the rest yourself as you’re comfortable with. If all you want to do is point and shoot, you can do that. Taking photos and making prints can be as simple as snapping a picture and then slipping your digital film card (also referred to as a memory card) into a slot in your color printer to crank out selected snapshots. Or, you can take your memory card to a kiosk or digital workstation at your local retailer and make prints there. On the other hand, if you want to have full control over your photos, digital photography gives you that, too, to a degree that has never before been possible.
This chapter provides an overview of the sort of things you can find out how to do in this book. I cover each topic in more detail in a mini-book and chapter of its own.
Knowing What Equipment You Need
I realize that not all of you are curled up with this book in one hand and a digital camera in the other. You might already have a digital camera and have just purchased this book to find out exactly what you can do with it. However, I’m guessing that quite a few of you haven’t taken the plunge yet. You bought this book to find out more about digital photography before expending your hard-earned money on the equipment you need. You have questions that need answered first: Can a camera that I can afford do the things I need it to do? Can a computer fumble-fingers like me really do digital photography? What’s the best camera to buy? Others of you are digital camera veterans who are already thinking of upgrading. You, too, need some advice about equipment, which you can find in this book.
Choosing a digital camera that’s right for you can be tricky because a lot more goes into your selection than simply the specifications. Two cameras with identical specs can perform quite differently. One can exceed your expectations while the other one frustrates the heck out of you. I explore some of the subtleties of camera selection in Chapter 2 of this mini-book. However, if you want to get the most from this book, your digital camera should have certain minimal features and capabilities. For example, if your digital camera is one of those Web cams that can capture stills measuring 320 x 200 pixels, or maybe 640 x 480 pixels, you probably don’t have what you need to take serious or semi-serious digital photos.
Book I Chapter 1
The Essentials of
Good Digital
Photography
Knowing What Equipment You Need
11
Any digital camera costing a couple hundred dollars or more will probably do a fine job for you. Even the least-expensive, true digital cameras today boast resolutions of at least 2 megapixels (MP). (That is, at least two million pixels of information, usually 1600 x 1200 pixels or more.) Typical digital cameras have automatic exposure, a color LCD viewing screen for previewing or reviewing your photos, and removable storage so you can take out your digital film card when it’s full and replace it with a new one and keep shooting. Most have a zoom lens so that you can magnify an image without moving forward, which is invaluable when you want to take pictures of different subjects from one spot. Those minimum specs give you everything you need to take great photos. After all, it’s the photographer, not the camera, that produces the best images. I once wrote an article for Petersen’s PHOTOGraphic magazine, in which I presented photos of the same subjects, side-by-side, taken with an inexpensive point-and-shoot camera and a full-blown professional system that cost 100 times as much. After both sets of photos had been subjected to the vagaries of halftone reproduction, it was difficult to tell them apart. Spending a lot on a digital camera buys you a few new capabilities from better zooms, enhanced resolution, interchangeable lenses, or a more sophisticated built-in flash. If you have a full-featured model, you can find lots of information in this book on how to get the most from your camera’s capabilities. But this book also contains workarounds for those owning more modest equipment. You can find digital cameras suitable for the most exotic of photographic pursuits, such as the underwater set-up shown in Figure 1-1. It’s a Canon WP-DC300 waterproof case for the Canon PowerShot S50 digital camera. It provides full access to all your camera’s controls while letting you photo-graph those colorful coral reefs in Tahiti at depths down to 100 feet!
Figure 1-1:
Minimum and Maximum Specs
For most of this book, I assume that you have a digital camera with at least 2MP of resolution. (If you don’t understand resolution right now, see Chapter 2 of this mini-book for an explanation.) A camera with a 2MP sensor corresponds to about 1600 x 1200 pixels, which is enough detail to give you decent 6 x 8" prints or larger at 200 dots per inch (dpi) printer resolution. A 2MP camera also can capture enough information to allow some cropping, especially if you plan to use the image on a Web page, where high resolution isn’t neces-sary. A 5MP resolution was a standard midrange spec as I wrote this book. However, if you have an older 1.0–1.3MP camera, you can still do plenty of things, even though such cameras are becoming rare. You can prepare images for dynamite Web pages and make sparkling 4 x 5" prints. I still use an ancient Epson digital camera that maxes out at 1024 x 768 resolution to take pictures for eBay auctions; most of the time, the snaps are taken at a lower 640 x 480 setting that’s plenty sharp enough for photos shown at small sizes.
Cameras with up to 8MP of resolution have dipped into the $1,000 range and will probably become common during the life of this book. If you own one of these babies, you can do even more. You can make tack-sharp 8 x 10" prints (and even larger prints if your printer supports them), crop out the center of an image, and still have sharpness to spare. Your camera will have loads of automated features, such as automatic bracketing(taking several exposures at different settings to make sure one is ideal) or a very long zoom lens (to reach way out and capture distant objects).
Although I seem to focus on the number of pixels a camera has, other consid-erations, such as the zoom lens that I just mentioned, might also be important to you. Even the least expensive cameras can have a 2:1 to 3:1 zoom, which can magnify an image 2X and 3X (respectively). Better cameras have 4:1 or longer zooms, up to 12:1 or more. Your camera probably has macro,or close-up, capability, which lets you grab images from inches away from your subject. Book III, Chapter 2 is devoted to close-up techniques.
Most of the other components (such as amount and type of memory storage, manual/automatic exposure and focusing options, built-in flash capability, and so on) can vary widely. You can find discussions of these in Chapter 2 of this mini-book.
Book I Chapter 1
The Essentials of
Good Digital
Photography
Minimum and Maximum Specs
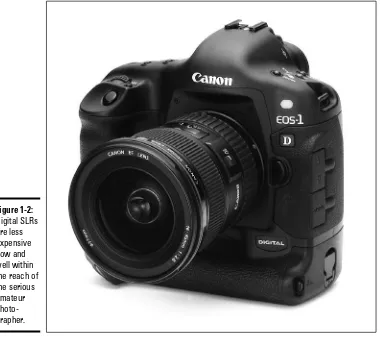
13
recently considered high-end capabilities. Those of you with these sophisti-cated cameras should still find lots to like in this book because one of my goals has been to present pro-level techniques in ways that can help begin-ners, too. If you have a digital SLR like the one shown in Figure 1-2, you’ll find these techniques even more useful.
One thing that I avoid in this book is mentioning specific camera models except as a matter of interest from time to time. My oldest digital camera in regular use is a half-decade-old (plus) Epson PhotoPC 600. When camera model matters, I might mention 6MP or 4MP or 2MP models in a generic sense. You won’t find any discussion in this book about the relative merits of the latest Nikon or Canon cameras or other references that will be hope-lessly outdated in a few months. (Those of you reading this in the year 2006 with your $400 12MP cameras should refrain from laughing.)
Figure 1-2:
Taking Great Digital Shots
So, when you have a camera in hand, what do you need to know to take great digital photos? In this section, I discuss the knowledge that needs to reside in your brain (or be otherwise available) to take great pictures.
Understand how your camera works
No digital photography book can tell you how to turn on your camera, how to adjust the autoexposure settings, or how to use your model’s self-timer to take a picture with you in it. Those are things found only in your camera’s instruction manual. Read it. I promise that the information you seek is in there; it just might be hard to find. The instructions for my own Nikon digital camera are so cryptic that I found myself creating a cheat sheet with lists of steps, such as, “To turn off the autosharpening feature, press the Menu button, then. . . .”
Some of the techniques in this book call for using a specific exposure mode or lens setting. I might ask you to switch to your camera’s close-up mode to take photos a few inches from your subject. You might need to use your camera’s built-in flash. Learn how to do these now so that you can add some simple but effective tools to your shooting repertoire.
Know some photography fundamentals
Certainly, you can point your camera and snap off a picture that might turn out great. Some prize-winning shots were taken in an instant as a fast-breaking news event unfolded without warning. Amateur photographers took more than a few of those photos, such as the famous Pulitzer Prize winner of a woman falling from a burning hotel captured by a 26-year-old Georgia Tech student. However, whatever part instinct and luck take in the production of great pictures, a little knowledge can be much more important.
✦ Composition:If you know a little about composition, you can nudge
your images into a more pleasing arrangement. (See Book III, Chapter 1, for a full course in photographic composition.)
✦ Focus:Understanding how focus can make parts of your image sharp
Book I Chapter 1
The Essentials of
Good Digital
Photography
Taking Great Digital Shots
15
✦ Shutter speeds:Some background in how shutter speeds can freeze
action can improve your sports photography (see Book III, Chapter 5).
✦ Lighting:Although you don’t need to become an expert in lighting
effects, understanding how light works can improve your people pic-tures (see Book III, Chapter 3).
Find out how to use an image editor
In digital photography, the pseudo-snap of an electronic shutter is only the beginning. With an image editor, you can do lots of things after the shot to improve your photo or even transform it into an entirely new one. Simple image editors enable you to crop pictures, fix bad color, or remove defects such as those glaring red eyes found in many flash photos. However, you can find even more creative freedom in more advanced image editors that let you do anything from eliminating trees that appear to be growing out of your subject’s head to bringing seriously damaged photos back to life. If you want to polish your reputation as an all-around digital photographer, plan on developing at least a modicum of skill with a decent image editing program. You’ll find general information on a broad range of image editors in Book IV as well as specifics on Adobe Photoshop CSand Photoshop Elements 3.0 in
Book V.
Master a scanner
Digital photographers don’t haveto own a scanner, but you don’t haveto own a camera bag or an extra digital film card, either. Like other digital accessories, a scanner provides you with some supplemental techniques that let your scanner complement or substitute for your digital camera. For example, a scanner can be used for producing close-up images of relatively flat three-dimensional (3-D) objects, such as coins. A scanner can grab pic-tures of very small objects (less than 1 x 1 inch) that are difficult to capture with a digital camera.
Making Any Photo Digital
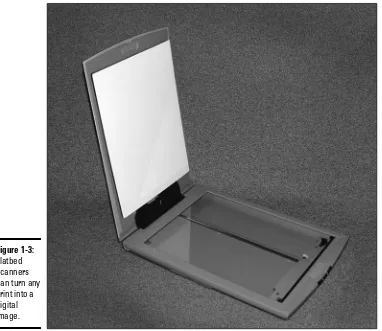
In this book, you can also find out how to transform any photo you happen to have into a digital image. Scanners are one way to do this: Slap an existing photo down on the scanning bed, scan it into your image editor, and you have a digital image that’s the equal of anything you might capture with your digi-tal camera — except it’s likely to have dust spots!
Or, drop off your film at your local photo lab and request a Picture CD along with (or instead of ) your prints. Picture CDs and their cousin Photo CDs can be produced from slide film, too, or even stacks of existing prints. What you receive for your money is a high-resolution scan of your images, perfect for manipulating in your image editor and printing on your own color printer. You don’t even need to own a scanner: Your photo lab does all the work for you.
Figure 1-3:
Book I Chapter 1
The Essentials of
Good Digital
Photography
Printing Your Final Pictures
17
Another option is using a local or mail-order service that processes your film and puts the finished images on the Internet. You can download your photos to your computer or make them available for viewing by family, friends, and colleagues on a Web page. What could be easier? You can find more informa-tion on this topic in Book VII, Chapter 2.
Printing Your Final Pictures
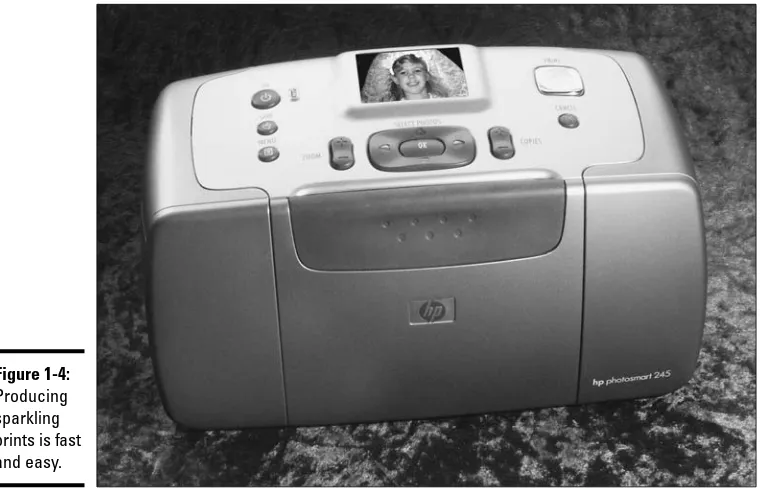
The final piece of the digital photography puzzle is the hard-copy print. You can create photos electronically, view them on your computer, post them on your Web site, and send them to others as e-mail, but nothing beats having a stack of prints to pass around or an enlargement to hang over the fireplace. In Chapter 6 of this mini-book, you can find basic information on making prints, and you can find more advanced advice in Book VII. The good news is that the equipment you need is inexpensive and easy to use. A photo-quality inkjet printer can set you back $100 or so. It probably plugs directly into a USB port on your computer and requires little or no setup. Making the prints can be a point-and-click operation. A variety of printers can do the job for you. The one shown in Figure 1-4 has slots for your camera’s memory cards and an LCD display that shows each photo you took, so it can produce prints directly from your digital film, with no computer required at all!
Figure 1-4:
Chapter 2: Basics of Equipment
In This Chapter
⻬Choosing the best camera
⻬Looking at resolution
⻬Examining camera categories
⻬Checking out basic camera features
C
hoosing a digital camera isn’t a once-in-a-lifetime thing any more than buying a car, choosing a computer system, or purchasing a television is. Your goal should be to select the digital camera that can do the job you want today and for the foreseeable future but not for the rest of your life. Odds are that you’ll be making the decision all over again two or three years down the road when prices have dropped even further and new features are available. You want to choose wisely now while planning to make future upgrades. In that sense, purchasing a digital camera is more like buying a television than a computer system. Most computers can be easily upgraded to add features or improve performance. You can increase the amount of memory, substi-tute a DVD drive for an older CD-ROM drive, and perhaps even double or triple the speed with a new processor.Comparatively, digital cameras aren’t easily overhauled. Except for models with interchangeable lenses, you’re pretty much stuck with the lens, sensor, and storage system built in to the camera when you purchased it. You can certainly enhance your camera with add-ons, such as lens attachments, additional removable storage, or a better external electronic flash unit. But essentially, no matter how much digital cameras improve over the next few years, yours will stay the same. Just like you wouldn’t purchase a 45-inch conventional projection TV now if you’re going to need a 42-inch HDTV set next year, you want a digital camera that’s ready for everything you plan to throw at it.
Deciding What You Need
What’s the best car on the market? That’s hard to say without knowing your driving plans, isn’t it? Will you be making a 40-mile commute on crowded freeways every day? You might find that a 40 miles-per-gallon econobox suits your needs. Do you have six kids to transport? Plan on driving off-road? Need to impress the country club set? Will you be running in road rallies during the weekends? You can see why the automotive world has so many options. The same holds true in the digital camera realm. Some kinds of cameras do some kinds of things better or more easily. Although you can use workarounds to get great sports photos or close-ups with cameras that aren’t particularly suited to those situations, you’re better off carefully defining your expectations before you purchase a camera.
Unfortunately, price isn’t the best indicator. If you want to take lots of differ-ent kinds of pictures, you can’t just buy the most expensive camera and figure that it has every feature you can possibly need. You’ll probably end up with a camera so complicated that you’ll spend more time trying to figure out how to access a feature than actually taking the photo. I’ve used digital cameras that force you to access a menu, press several buttons, and then turn a dial just to be able to manually focus.
In the following sections, I discuss some of the things that you need to con-sider before you begin to narrow your choice to a particular category or brand of digital camera.
How much resolution do you need?
Digital cameras are often categorized simply by the amount of detail they can capture — resolution— which is measured by the number of pixels avail-able in the sensor, regardless of their other features. Although the resolution of the camera might be 1600 x 1200 pixels (or some other figure), it’s adver-tised only by the total number of pixels that it can grab. Thus, it’s classified as a 2 megapixel (MP), 4MP, or 6MP camera, as if that resolution figure is the only measure of the camera’s value. I can almost visualize digital cameras on shelves with unit pricing stickers like you find at a supermarket. Hmmm . . . one camera offers 4000 pixels per $1 whereas this other one gives you 6600 pixels per $1. Clearly a better deal!
Book I Chapter 2
Basics of Equipment
Deciding What You Need
21
Figure 2-1:
On the other hand, do most of the photos you take end up in digital presen-tations viewed on your computer screen? Are you creating newsletters or other desktop publications? Will you rarely make prints larger than 4" x 6"? A camera with 2–4MP will probably do the job for you and will probably also exceed your expectations. With the money you would have spent on pixels, you can invest in a camera with a better zoom lens or more digital film (so that you can take more vacation pictures).
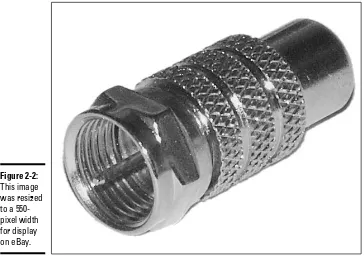
Perhaps you’ll be taking pictures of things you plan to sell at eBay. Figure 2-2 shows a photo that I took for an eBay auction. It was resized to 550 pixels (wide) so that people who viewed the auction page could download the photo quickly. In such situations, you rarely want images wider than 600 pixels. Or, you might be setting up a Web page of your own with lots of indi-vidual photos. A camera with as few as 2MP might be best for you. You can find tiny digital cameras in this range that slip in a pocket and are always available for a quick snapshot. There really are times when less is more. As you decide the amount of resolution you need, remember that digital cameras are downwardly compatible. That is, a higher resolution camera has shooting modes at lower resolutions, so your 4MP camera can take 2MP photos, which saves space on your digital film and hard drive when the extra resolution isn’t needed. If 90 percent of your photos require only 2MP of res-olution but a solid 10 percent could benefit from a bit more pixel-grabbing capability, seriously consider getting a higher-res model.
I look at resolution in more depth in Book II, Chapter 1.
Do you plan to manipulate your photos?
Many digital photographers don’t want to mess with image editing programs. All they want to do is take pictures and either make prints or view them in digital albums onscreen. They see the need to spend extra time with an image as a drawback, finding tasks (such as cropping or correcting colors) to be a needless waste of time. Such snapshooters fall into two broad categories. Many are amateurs with little interest in photography itself: Their interest is in the pictures that capture memories of vacations or document their little ones as they grow up. Others are business professionals who use photo-graphs as a means to an end and want the process to be as fast and simple as possible. If you were a real estate agent preparing an online database of homes for sale, would you want to spend a lot of time editing hundreds of photos of your listings?
Book I Chapter 2
Basics of Equipment
Deciding What You Need
23
If you belong in the latter camp, you’ll want a camera with lots of features and lots of options so that you can get sharp images worthy of your image editing efforts. But if all you want are pictures, consider a basic point-and-shoot digital camera.
Are you a photo hobbyist?
If photography was in your life long before you considered buying a digital camera, you’ll want all the manual features you can get, a powerful zoom lens to give you a variety of perspectives, and compatibility with as many add-on gadgets as possible. Dedicated photo hobbyists talk about the impor-tance of composition, darkroom skills, and the photographer’s eye. But I haven’t met one yet who didn’t think that a bit of technology, properly applied, couldn’t make a good photo even better.
Photo hobbyists tend to spend a lot on their pastime and understand and value all those features that others seldom use. If you’re an avid amateur photographer, don’t try to scrimp when the time comes to buy your digital camera. You’ll regret it later.
Figure 2-2:
How often do you plan to upgrade?
If you don’t intend to replace your digital camera for a long time, consider spending a little more now on a camera that will avoid the shadow of obso-lescence a little longer. On the other hand, if you know you’ll buy a new camera next year, go ahead and buy one that suits your needs today. Tomorrow will take care of itself.
Believe it or not, you can purchase a digital camera for the long term if you opt for more than a basic model. For example, you can use a 4MP digital camera with a zoom lens and a standard removable storage system, such as CompactFlash, for most applications for a long time to come. Such a camera has enough resolution for good-looking, 5 x 7" photos and is versatile enough to take a broad range of pictures. Unless your needs change drastically, a good digital camera in that range can serve you well for two or more years. In fact, two of my favorite and most-used film cameras are a 120 roll-film SLR (single lens reflex) and a 35mm SLR that are each almost 30 years old. They still do the job, even if batteries for them have become hard to come by. If you find yourself yearning to take different kinds of photos and constantly upgrading your expectations, however, you’ll probably want to upgrade cam-eras more frequently. Digital camcam-eras are adding features at reduced prices at an amazing rate. When I wrote my first digital photography book in 1995, a 2MP SLR digital camera cost up to $30,000. By the turn of the century, 6MP SLRs were available for $5,000; today, they cost $1,000 or less.
If you can afford it, you might want to upgrade every year or so. Even if you can do that, it’s wise to take your upgrade plans into account when buying today. You’ll want to use the accessories that you buy now with your new camera. Or if your pocketbook has restrictions, you might want to scale back your expectations today so that you can afford to dump your current camera when you upgrade.
Defining Categories
Book I Chapter 2
Basics of Equipment
Defining Categories
25
Web cams
This book more or less ignores Web cams. They’re not toys, but they’re not digital cameras within the scope of this book. Web cams are low-cost (less than $100) TV cameras that can supply low-resolution (640 x 480 or 320 x 200/240 pixel), full-motion images that can be transmitted over the Internet, put on Web pages, or attached to e-mails. Most can also capture low-resolution still images.
These cameras frequently lack removable storage or controls, have lenses that don’t zoom, and might not even have a facility for changing focus. A good first camera for kids or a spare digital camera, they’re useful for note-taking (say, to document the various steps of a science project experiment). However, most Web cams aren’t flexible enough for serious digital photogra-phy. Moreover, in a pinch, most conventional digital cameras can grab motion clips. My advice: Unless you really need a Web cam, don’t consider buying one.
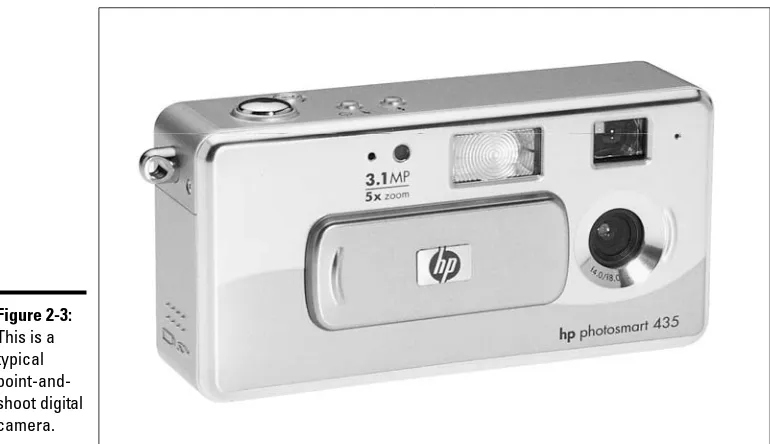
Point-and-shoot models
Point-and-shoot digital cameras cost about $200 and can do anything that a simple film camera can do. Most will have 2–3.2MP resolution; a built-in flash; some sort of removable storage; and either a fixed focal length, nonzooming lens (in the ultracompact models) or a modest 3:1 to 5:1 zoom that provides a little magnification. Expect automatic exposure and no manual controls. Figure 2-3 shows a typical point-and-shoot model.
Figure 2-3:
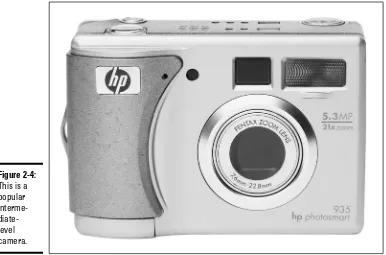
Intermediate models
Intermediate digital cameras, priced in the $200–$500 range, are the most widely used. As such, they have the best compromise of features to suit most consumer needs. Look for 3.2–5MP resolution; a 3:1 to 4:1 zoom lens; either CompactFlash or Secure Digital (SD) storage; and at least a few special options, such as different exposure modes, close-up focusing, or manual con-trols. Figure 2-4 shows a popular, intermediate-level digital camera.
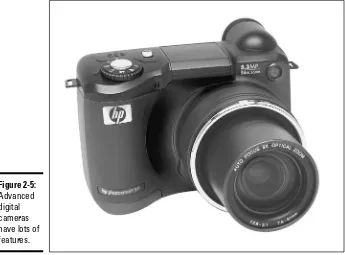
Advanced consumer models
In the $500–$600 price range, you can find digital cameras aimed at those who want some special features, extra resolution, or a longer zoom lens. These are 4–6MP models with 4:1 to 10:1 zooms (or better) and plenty of add-on accessories, such as wide-angle and telephoto attachments, filters, external flash units, and more. You can also find lots of optional exposure modes, customizable settings, and other (potentially confusing) features. Advanced consumer cameras usually require a session or two with the instruction manual to master all their capabilities, but they have few limita-tions. Figure 2-5 shows an advanced digital camera.
Figure 2-4: