Oracle® Fusion Middleware
Installation Guide for Oracle Business Intelligence
11g Release 1 (11.1.1)
E10539-02
Copyright © 2010, 2011, Oracle and/or its affiliates. All rights reserved.
Primary Author: Joe Paradise
Contributing Author: Pete Brownbridge
Contributors: Oracle Business Intelligence development, product management, and quality assurance teams
This software and related documentation are provided under a license agreement containing restrictions on use and disclosure and are protected by intellectual property laws. Except as expressly permitted in your license agreement or allowed by law, you may not use, copy, reproduce, translate, broadcast, modify, license, transmit, distribute, exhibit, perform, publish, or display any part, in any form, or by any means. Reverse engineering, disassembly, or decompilation of this software, unless required by law for interoperability, is prohibited.
The information contained herein is subject to change without notice and is not warranted to be error-free. If you find any errors, please report them to us in writing.
If this is software or related documentation that is delivered to the U.S. Government or anyone licensing it on behalf of the U.S. Government, the following notice is applicable:
U.S. GOVERNMENT RIGHTS Programs, software, databases, and related documentation and technical data delivered to U.S. Government customers are "commercial computer software" or "commercial technical data" pursuant to the applicable Federal Acquisition Regulation and agency-specific supplemental regulations. As such, the use, duplication, disclosure, modification, and adaptation shall be subject to the restrictions and license terms set forth in the applicable Government contract, and, to the extent applicable by the terms of the Government contract, the additional rights set forth in FAR 52.227-19, Commercial Computer Software License (December 2007). Oracle America, Inc., 500 Oracle Parkway, Redwood City, CA 94065.
This software or hardware is developed for general use in a variety of information management applications. It is not developed or intended for use in any inherently dangerous applications, including applications that may create a risk of personal injury. If you use this software or hardware in dangerous applications, then you shall be responsible to take all appropriate fail-safe, backup, redundancy, and other measures to ensure its safe use. Oracle Corporation and its affiliates disclaim any liability for any damages caused by use of this software or hardware in dangerous applications.
Oracle and Java are registered trademarks of Oracle and/or its affiliates. Other names may be trademarks of their respective owners.
Intel and Intel Xeon are trademarks or registered trademarks of Intel Corporation. All SPARC trademarks are used under license and are trademarks or registered trademarks of SPARC International, Inc. AMD, Opteron, the AMD logo, and the AMD Opteron logo are trademarks or registered trademarks of Advanced Micro Devices. UNIX is a registered trademark licensed through X/Open Company, Ltd.
iii
Contents
Preface
... ixAudience... ix
Documentation Accessibility ... ix
Related Documentation ... x
Conventions ... x
What's New... xiii
New Features in Oracle Business Intelligence 11g Release 1 (11.1.1.5) ... xiii
New Features in Oracle Business Intelligence 11g Release 1 (11.1.1.3) ... xiv
New Concepts for Oracle Business Intelligence ... xiv
Topics of Interest in Other Guides... xiv
1
Installation Overview
1.1 Installable Products ... 1-1 1.2 Installation Roadmap ... 1-2 1.3 Installation Modes ... 1-3 1.4 Installation Types... 1-3 1.4.1 Simple Install ... 1-3 1.4.1.1 What is Installed ... 1-4 1.4.1.2 What is Configured ... 1-4 1.4.2 Enterprise Install ... 1-4 1.4.2.1 What is Installed ... 1-4 1.4.2.2 What is Configured ... 1-4 1.4.3 Software Only Install... 1-4 1.5 Oracle Business Intelligence Architecture... 1-5 1.6 Oracle Business Intelligence Directory Structure... 1-6
2
Recommended Installation Scenarios for Oracle Business Intelligence
2.1 Installation Starting Points ... 2-1 2.2 Installation Scenarios... 2-2 2.2.1 Installation Scenario #1: Demonstration, Evaluation, or Proof of Concept... 2-2 2.2.2 Installation Scenario #2: Single-User Development... 2-3 2.2.3 Installation Scenario #3: Enterprise Deployment for Hosted Development and
2.2.3.2 Installing Multiple, Standalone Oracle Business Intelligence Instances on a Single Computer ... 2-3 2.2.4 Installation Scenario #4: Enterprise Deployment for Highest Levels of Availability and Security ... 2-4
3
Oracle Business Intelligence Requirements
3.1 System Requirements and Certification ... 3-1 3.2 Additional Oracle Business Intelligence 11g Installer Requirements... 3-1 3.3 Create Database Schemas Using the Repository Creation Utility (RCU)... 3-2 3.3.1 Database Schemas Created by RCU... 3-2 3.3.2 Sharing Schemas Required by Oracle Business Intelligence ... 3-3 3.3.3 Creating Oracle Business Intelligence 11g Schemas on IBM DB2 ... 3-3 3.3.4 Database Privileges Granted to Oracle Business Intelligence Users ... 3-4 3.3.5 Obtaining RCU... 3-4 3.3.6 Running RCU to Create Oracle Business Intelligence Database Schemas ... 3-4
4
Installing Oracle Business Intelligence
4.1 Before You Install Oracle Business Intelligence ... 4-1 4.2 Other Considerations Before Installing Oracle Business Intelligence... 4-2 4.2.1 Installing Oracle Business Intelligence 11.1.1.5 Patch Set ... 4-2 4.2.2 Installing Oracle Business Intelligence 11g on Multiple Computers ... 4-3 4.2.3 Installing Oracle Business Intelligence 11g on a Computer that Uses Dynamic Host
Configuration Protocol (DHCP) ... 4-3 4.2.4 Installing Oracle Business Intelligence 11g on 64-bit Operating Systems ... 4-3 4.2.5 Installing Oracle Business Intelligence 11g with Your Own Java Development Kit
(JDK) ... 4-3 4.2.6 Installing Oracle Business Intelligence 11g on a Computer that Contains Oracle
Business Intelligence 10g ... 4-4 4.2.7 Installing Oracle Business Intelligence 11g on a Computer Running Microsoft
v
4.5.3.1 Considerations and Limitations of Enterprise Install Type for Scaling Out Existing Installations ... 4-19 4.5.3.2 Summary of Enterprise Install Procedure to Scale Out Existing Installations . 4-20 4.5.3.3 Enterprise Install Procedure to Scale Out Existing Installations ... 4-21 4.5.4 Software Only Install... 4-24 4.5.4.1 Considerations and Limitations for Software Only Install Type ... 4-25 4.5.4.2 Summary of Software Only Install Procedure ... 4-25 4.5.4.3 Software Only Install Procedure ... 4-26 4.6 Installing Oracle Business Intelligence in Silent Mode ... 4-28 4.6.1 What is a Silent Installation? ... 4-28 4.6.2 Creating Response Files ... 4-28 4.6.2.1 Command Line Variables... 4-29 4.6.2.2 Sample Commands ... 4-29 4.6.3 Creating the oraInst.loc File ... 4-29 4.6.4 Pre-Installation Tasks ... 4-29 4.6.5 Software Update Options Supported by Silent Installation ... 4-30 4.6.6 Silent Installation Instructions ... 4-30 4.7 Troubleshooting the Installation and Configuration Processes ... 4-30 4.8 Reinstalling Oracle Business Intelligence ... 4-31
5
Postinstallation Tasks
5.1 Installing and Uninstalling Oracle Business Intelligence Client Tools ... 5-1 5.1.1 About Oracle Business Intelligence Client Tools ... 5-2 5.1.2 Considerations for Installing Oracle Business Intelligence Client Tools... 5-2 5.1.3 Installing and Uninstalling Oracle Business Intelligence Client Tools with the Oracle
Business Intelligence Enterprise Edition Plus Client Installer ... 5-3 5.1.3.1 Prerequisites for Running the Oracle Business Intelligence Enterprise Edition Plus
Client Installer 5-3
5.1.3.2 Running the Oracle Business Intelligence Enterprise Edition Plus Client
Installer ... 5-4 5.1.3.3 Uninstalling Oracle Business Intelligence Client Tools ... 5-4 5.1.4 Installing Oracle Business Intelligence Client Tools with the Oracle Business
Intelligence 11g Installer ... 5-5 5.2 Configuring Oracle Business Intelligence with the Configuration Assistant ... 5-6 5.2.1 Considerations and Limitations for Configuring Oracle Business Intelligence with the
Configuration Assistant ... 5-6 5.2.2 Starting the Oracle Business Intelligence Configuration Assistant... 5-7 5.2.3 Configuring a New Enterprise Installation of Oracle Business Intelligence... 5-7 5.2.4 Configuring a Scaled Out Enterprise Installation of Oracle Business Intelligence . 5-10 5.2.5 Extending an Oracle WebLogic Server Domain with Oracle Business Intelligence 5-11 5.3 Creating a DSN for IBM DB2 or Microsoft SQL Server... 5-14 5.4 Managing the OPMN Service on Windows Operating Systems ... 5-15 5.5 Configuring Sample Reports for BI Publisher ... 5-16 5.6 Changing the Default RPD Password... 5-16
6
Deinstalling Oracle Business Intelligence
6.1.3 Deinstalling Oracle Business Intelligence Scaled Out ... 6-2 6.2 About the Deinstallation Script... 6-2 6.2.1 Deinstallation Script Location... 6-3 6.2.2 Deinstallation Script Options ... 6-3 6.3 Before You Deinstall Oracle Business Intelligence... 6-3 6.4 Deinstallation Tasks... 6-3 6.4.1 Starting the Deinstallation Script... 6-4 6.4.2 Deinstalling Oracle Business Intelligence Instances... 6-4 6.4.3 Stopping Java Enterprise Edition (JEE) Components... 6-6 6.4.4 Dropping Oracle BI Schemas ... 6-6 6.4.5 Deinstalling the Oracle Home... 6-7 6.4.6 Deinstalling the Oracle Common Home ... 6-8 6.4.7 Uninstalling Oracle WebLogic Server ... 6-9 6.4.8 Removing the Oracle Business Intelligence Domain... 6-9 6.4.9 Removing the Oracle Home ... 6-10 6.4.10 Removing the Middleware Home and Homes Installed Outside of the Middleware
Home ... 6-10 6.5 Silent Deinstallation... 6-11 6.5.1 Creating Response Files to Silently Deinstall Oracle Business Intelligence... 6-12 6.5.1.1 Creating Response Files for Silently Deinstalling Oracle Business Intelligence
Instances ... 6-12 6.5.1.2 Creating Response Files for Silently Deinstalling Oracle Homes ... 6-13 6.5.2 Silently Deinstalling Oracle Instances ... 6-13 6.5.3 Silently Deinstalling Oracle Homes ... 6-14
A
Oracle Business Intelligence Installation Screens
A.1 Select Installation Type ... A-1 A.2 Specify Installation Location (Simple) ... A-2 A.3 Specify Installation Location (Software Only)... A-3 A.4 Create, Scale Out, or Extend BI System ... A-3 A.5 Specify Installation Location (Enterprise) ... A-4 A.6 Scale Out BI System Details... A-5 A.7 Configure Components... A-7 A.8 Administrator Details... A-7 A.9 BIPLATFORM Schema... A-8 A.10 MDS Schema... A-8 A.11 Configure Ports ... A-8
B
Installer Screens Common to All Oracle Fusion Middleware Suites
vii
B.7 Specify Installation Location ... B-4 B.8 Installation Summary ... B-6 B.9 Installation Progress ... B-6 B.10 Configuration Progress ... B-6 B.11 Installation Complete ... B-7
C
Oracle Business Intelligence Deinstallation Screens
C.1 Select Deinstallation Type ... C-1 C.2 Specify WebLogic Domain Detail... C-1 C.3 Select Managed Instance ... C-2 C.4 Deinstallation Summary ... C-2
ix
Preface
The Oracle Business Intelligence Foundation Suite is a complete, open, and integrated solution for all enterprise business intelligence needs, including reporting, ad hoc queries, OLAP, dashboards, scorecards, and what-if analysis. The Oracle Business Intelligence Foundation Suite includes Oracle Business Intelligence Enterprise Edition (Oracle BI EE) and Oracle Business Intelligence Publisher (Oracle BI Publisher).
This guide describes how to install Oracle BI EE, Oracle BI Publisher, and Oracle Real-Time Decisions – collectively referred to in this guide as Oracle Business Intelligence.
Oracle Business Intelligence is a comprehensive set of enterprise business intelligence tools and infrastructure, including a scalable and efficient query and analysis server, an ad-hoc query and analysis tool, interactive dashboards, proactive intelligence and alerts, real-time predictive intelligence, and an enterprise reporting engine.
This guide contains information about requirements, new features in the Oracle Business Intelligence 11g Installer, and Oracle Fusion Middleware concepts that affect installation procedures. In addition, this guide provides some sample scenarios for installing and running Oracle Business Intelligence.
Audience
This guide is intended for developers, system administrators, and repository developers who want to install Oracle Business Intelligence. This guide assumes the reader is comfortable performing common system administration operations, such as creating users and groups, adding users to groups, and installing operating system patches.
Documentation Accessibility
Our goal is to make Oracle products, services, and supporting documentation accessible to all users, including users that are disabled. To that end, our
documentation includes features that make information available to users of assistive technology. This documentation is available in HTML format, and contains markup to facilitate access by the disabled community. Accessibility standards will continue to evolve over time, and Oracle is actively engaged with other market-leading
conventions for writing code require that closing braces should appear on an
otherwise empty line; however, some screen readers may not always read a line of text that consists solely of a bracket or brace.
Accessibility of Links to External Web Sites in Documentation
This documentation may contain links to Web sites of other companies or
organizations that Oracle does not own or control. Oracle neither evaluates nor makes any representations regarding the accessibility of these Web sites.
Access to Oracle Support
Oracle customers have access to electronic support through My Oracle Support. For information, visit http://www.oracle.com/support/contact.html or visit
http://www.oracle.com/accessibility/support.html if you are hearing impaired.
Related Documentation
For more information, see the following documents in the Oracle Business Intelligence 11g Release 1 (11.1.1) documentation set:
■ The Oracle Business Intelligence chapter in the Oracle Fusion Middleware Release
Notes for your platform
■ Oracle Fusion Middleware Developer's Guide for Oracle Business Intelligence Enterprise
Edition
■ Oracle Fusion Middleware Enterprise Deployment Guide for Oracle Business Intelligence ■ Oracle Fusion Middleware Integrator's Guide for Oracle Business Intelligence Enterprise
Edition
■ Oracle Fusion Middleware Metadata Repository Builder's Guide for Oracle Business
Intelligence Enterprise Edition
■ Oracle Fusion Middleware Quick Installation Guide for Oracle Business Intelligence ■ Oracle Fusion Middleware Security Guide for Oracle Business Intelligence Enterprise
Edition
■ Oracle Fusion Middleware System Administrator's Guide for Oracle Business Intelligence
Enterprise Edition
■ Oracle Fusion Middleware Upgrade Guide for Oracle Business Intelligence Enterprise
Edition
■ Oracle Fusion Middleware User's Guide for Oracle Business Intelligence Enterprise
Edition
Conventions
The following text conventions are used in this document:
Convention Meaning
xi
italic Italic type indicates book titles, emphasis, or placeholder variables for which you supply particular values.
monospace Monospace type indicates commands within a paragraph, URLs, code in examples, text that appears on the screen, or text that you enter.
xiii
What's New
This chapter describes new features, concepts, and terminology for Oracle Business Intelligence 11g Release 1 (11.1.1).
New Features in Oracle Business Intelligence 11
g
Release 1 (11.1.1.5)
Oracle Business Intelligence 11g Release 1 (11.1.1.5) includes many new features, including those related to installation:■ The ability to install software updates for the Oracle Business Intelligence 11g Installer, as part of the Oracle Business Intelligence installation process. This includes the option to download and install updates through your My Oracle Support account (if one exists), install updates previously downloaded to a local directory, or skip software updates altogether.
■ Key optimizations for the Simple Install type. With the Simple Install type, all architectural components are installed except Node Manager and the Managed Server. Furthermore, the components that are typically hosted and executed by the Managed Server are instead hosted and executed by the Administration Server. These optimizations reduce the memory footprint and complexity of Oracle Business Intelligence, and are especially targeted for demonstration, evaluation, and proof of concept use cases.
■ A separate, standalone installer for the Oracle Business Intelligence client tools (Oracle Business Intelligence Administration Tool and Job Manager). The Oracle Business Intelligence client tools installer is provided for organizations that install Oracle Business Intelligence on computers running a UNIX operating system, or that install Oracle Business Intelligence on computers running 32- or 64-bit Windows operating system but want to use the client tools on other computers. The installer significantly simplifies the installation, uninstallation, and
configuration for the Oracle Business Intelligence client tools. It is supported on computers running 32- and 64-bit Windows operating systems only.
Oracle Business Intelligence 11g Release 1 (11.1.1.3) includes many new features, including those related to installation:
■ Oracle Business Intelligence 11g Installer is used for installation tasks. Oracle Business Intelligence 11g Installer replaces the installer that was used in previous versions of Oracle Business Intelligence. See Chapter 1, "Installation Overview."
Oracle Business Intelligence 11g Installer includes online help for each installation screen.
■ Oracle Business Intelligence 11g Installer is used to seamlessly install and configure all Oracle Business Intelligence products, such as Oracle Business Intelligence Enterprise Edition, Oracle Real-Time Decisions, and Oracle Business Intelligence Publisher.
■ Oracle Business Intelligence 11g Installer provides the flexibility to perform software installation and configuration steps in the same process or separately in their own processes.
■ Oracle WebLogic Server replaces Oracle Application Server and Oracle Containers for Java (OC4J), which were used in previous Oracle Business Intelligence releases. WebLogic Server also handles the Java components and provides many of the administrative services formerly provided by Oracle Business Intelligence services in previous releases.
■ In addition to the Oracle Business Intelligence command-line utilities from earlier releases, this release uses the following command-line utilities:
– Oracle WebLogic Server scripting tool (WLST) for managing the Oracle WebLogic Server domain.
– OPMN and the opmnctl commands for the Oracle Process Manager and Notification Server.
For more information on these command-line utilities, see "Getting Started Using Command-Line Tools" in Oracle Fusion Middleware Administrator's Guide.
New Concepts for Oracle Business Intelligence
There are many new concepts in Oracle Business Intelligence 11g Release 1, and other concepts whose meanings have changed since the 10g release. For a detailed
description of these concepts, see "Understanding Oracle Fusion Middleware
Concepts" in Oracle Fusion Middleware Administrator's Guide. You may also refer to the "Glossary" in other Oracle Business Intelligence guides, such as in Oracle Fusion Middleware System Administrator's Guide for Oracle Business Intelligence Enterprise Edition.
Topics of Interest in Other Guides
Additional topics may be of interest to those installing and upgrading Oracle Business Intelligence. These topics are covered in other guides and shown in the following list by general topic and titles of books to consult for more information.
■ Managing Oracle Business Intelligence
– Oracle Fusion Middleware System Administrator's Guide for Oracle Business Intelligence Enterprise Edition
xv
– Oracle Fusion Middleware Metadata Repository Builder's Guide for Oracle Business Intelligence Enterprise Edition
– Oracle Fusion Middleware Repository Creation Utility User's Guide
■ Deployments across a network or enterprise
– Oracle Fusion Middleware Enterprise Deployment Guide for Oracle Business Intelligence
■ Upgrading to Oracle Business Intelligence 11g
– Oracle Fusion Middleware Upgrade Guide for Oracle Business Intelligence Enterprise Edition
■ Application development
1
Installation Overview 1-1
1
Installation Overview
Oracle Business Intelligence is a comprehensive set of integrated tools and technologies for delivering enterprise business intelligence, and includes Oracle Business Intelligence Enterprise Edition, Oracle Real-Time Decisions, and Oracle Business Intelligence Publisher.
This chapter includes the following sections:
■ Section 1.1, "Installable Products"
■ Section 1.2, "Installation Roadmap"
■ Section 1.3, "Installation Modes"
■ Section 1.4, "Installation Types"
■ Section 1.5, "Oracle Business Intelligence Architecture"
■ Section 1.6, "Oracle Business Intelligence Directory Structure"
1.1 Installable Products
The Oracle Business Intelligence installation package includes the following products, with all the technology required to install, configure, and run them:
■ Oracle Business Intelligence Enterprise Edition (Oracle BI Answers, Oracle BI Interactive Dashboards, Oracle BI Delivers, Oracle BI Administration Tool, Oracle BI Add-in for Microsoft Office, and Oracle BI Publisher)
■ Oracle Business Intelligence Publisher
■ Oracle Real-Time Decisions
You can install one, two, or all three of these products using Oracle Business Intelligence 11g Installer. Oracle Business Intelligence 11g Installer creates all the run-time components and the infrastructure for the products you choose to install. After running Oracle Business Intelligence 11g Installer, the installed products share the same Oracle Fusion Middleware infrastructure in a single WebLogic domain.
All Oracle Business Intelligence products intended for a WebLogic domain must be installed and configured at the same time. You cannot install some products now and then install others to the same WebLogic domain later. For example, if you choose to install and configure Oracle Business Intelligence Enterprise Edition but not Oracle Real-Time Decisions, you cannot later add Oracle Real-Time Decisions to the WebLogic domain. Similarly, any WebLogic domains that contain Oracle Business Intelligence 11g products should not be extended later to include other Oracle Fusion Middleware products.
1.2 Installation Roadmap
Table 1–1 describes the high-level tasks for installing and configuring Oracle Business Intelligence. The table also provides information on where to get more details on each task.
Table 1–1 Tasks in the Oracle Business Intelligence Installation Procedure
Task Description Documentation
Task 1 Obtain the Oracle Business Intelligence installation media through one of the following methods: (Mandatory)
■ Oracle Business Intelligence installation DVD
■ Oracle Technology Network (OTN)
■ Oracle E-Delivery
See Section 4.3, "Obtaining Oracle Business Intelligence 11g Installer."
Task 2 Complete the installation planning requirements. (Mandatory)
Ensure that your system environment meets the installation requirements for Oracle Fusion Middleware, Oracle Business Intelligence, and the Repository Creation Utility (RCU).
See the Oracle Fusion Middleware Certification Document for more information.
Go to:
http://www.oracle.com/technology /software/products/ias/files/fus ion_certification.html
Installation Types
Installation Overview 1-3
1.3 Installation Modes
Oracle Business Intelligence supports the following modes of installation:
■ Interactive mode, using the Oracle Business Intelligence 11g Installer. Most installations are performed in interactive mode. For more information, see
Chapter 4, "Installing Oracle Business Intelligence."
■ Silent mode, using a response file modified for your particular installation. For more information, see Section 4.6, "Installing Oracle Business Intelligence in Silent Mode."
1.4 Installation Types
Oracle Business Intelligence 11g Installer supports the following types of installation:
■ Section 1.4.1, "Simple Install"
■ Section 1.4.2, "Enterprise Install"
■ Section 1.4.3, "Software Only Install"
1.4.1 Simple Install
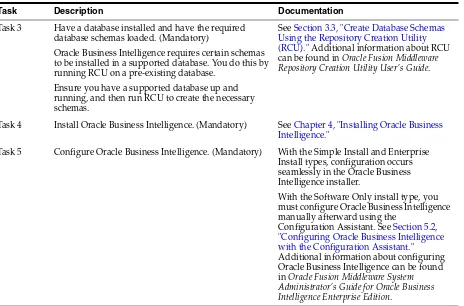
The Simple Install type installs Oracle Business Intelligence components with the default settings on a single computer in the minimum number of steps. The Managed Server is not installed with the Simple Install type. The components that are typically hosted and executed by the Managed Server are instead hosted and executed by the Administration Server. These optimizations reduce the memory footprint and Task 3 Have a database installed and have the required
database schemas loaded. (Mandatory)
Oracle Business Intelligence requires certain schemas to be installed in a supported database. You do this by running RCU on a pre-existing database.
Ensure you have a supported database up and running, and then run RCU to create the necessary schemas.
See Section 3.3, "Create Database Schemas Using the Repository Creation Utility (RCU)." Additional information about RCU can be found in Oracle Fusion Middleware Repository Creation Utility User's Guide.
Task 4 Install Oracle Business Intelligence. (Mandatory) See Chapter 4, "Installing Oracle Business Intelligence."
Task 5 Configure Oracle Business Intelligence. (Mandatory) With the Simple Install and Enterprise Install types, configuration occurs seamlessly in the Oracle Business Intelligence installer.
With the Software Only install type, you must configure Oracle Business Intelligence manually afterward using the
Configuration Assistant. See Section 5.2, "Configuring Oracle Business Intelligence with the Configuration Assistant."
Additional information about configuring Oracle Business Intelligence can be found in Oracle Fusion Middleware System Administrator's Guide for Oracle Business Intelligence Enterprise Edition.
Table 1–1 (Cont.) Tasks in the Oracle Business Intelligence Installation Procedure
complexity of Oracle Business Intelligence, and are especially targeted for demonstration, evaluation, and proof of concept use cases.
1.4.1.1 What is Installed
When you select the Simple Install type, Oracle Business Intelligence 11g Installer installs the binary files for the Oracle Business Intelligence components that you specify.
1.4.1.2 What is Configured
When you select the Simple Install type, Oracle Business Intelligence 11g Installer applies default configuration settings for all the components that you choose to install.
To perform the installation, Oracle Business Intelligence 11g Installer prompts you for the location of the Middleware home.
For more information about installation locations, see Oracle Fusion Middleware Installation Planning Guide.
1.4.2 Enterprise Install
The Enterprise Install type enables you to install Oracle Business Intelligence components to create a new enterprise deployment, or to scale out an existing enterprise deployment of Oracle Business Intelligence 11g. As a result, the Enterprise Install type enables you to specify several more configuration settings (directory paths, host names, port numbers, and so on) than the Simple Install type.
1.4.2.1 What is Installed
The Enterprise Install type does one of the following, depending on which option you choose during the installation:
■ New installation: Oracle Business Intelligence 11g Installer installs the Oracle Business Intelligence components that you select.
■ Scale out an existing installation: Oracle Business Intelligence 11g Installer installs all Oracle Business Intelligence components that were installed on the primary host computer of the cluster, which you must specify.
1.4.2.2 What is Configured
The Enterprise Install type does one of the following, depending on which option you choose during the installation:
■ New installation: Oracle Business Intelligence 11g Installer configures the Oracle Business Intelligence components that you select and associates them with the Middleware, Oracle, and WebLogic Server homes that you specify.
■ Scale out an existing installation: Oracle Business Intelligence 11g Installer
configures the same Oracle Business Intelligence components that were configured on the primary host computer, which you must specify.
1.4.3 Software Only Install
Oracle Business Intelligence Architecture
Installation Overview 1-5 The Software Only Install type is required to install Oracle Business Intelligence with your own JDK. See Section 4.2.5, "Installing Oracle Business Intelligence 11g with Your Own Java Development Kit (JDK)."
When you select this installation type, Oracle Business Intelligence 11g Installer does not perform any configuration during installation. Instead, after installation, you use the Configuration Assistant to configure the binary files into a new domain and instance home, to scale out, or to extend an empty WebLogic domain. See Section 5.2, "Configuring Oracle Business Intelligence with the Configuration Assistant."
1.5 Oracle Business Intelligence Architecture
The architecture for Oracle Business Intelligence depends on whether the product is installed with the Simple Install type or the Enterprise Install type. With the Enterprise Install type, all architectural components are installed. With the Simple Install type, all architectural components are installed except Node Manager and the Managed Server. Furthermore, with the Simple Install type, components that are typically hosted and executed by the Managed Server are instead hosted and executed by the
Administration Server. The following figures highlight these differences.
Figure 1–1 provides the architecture for Oracle Business Intelligence after it is installed with the Simple Install type:
Figure 1–1 Oracle Business Intelligence Architecture for Simple Install
Figure 1–2 Oracle Business Intelligence Architecture for Enterprise Install
1.6 Oracle Business Intelligence Directory Structure
A typical Oracle Business Intelligence installation consists of a Fusion Middleware home and the following main subdirectories:
■ wlserver_10.3: The WebLogic Server home, which contains Java components. ■ user_projects: The User Projects directory, which contains product domains
(including one or more Oracle Business Intelligence domains), the Administration Server, and one or more Managed Servers.
■ Oracle_BI1: The Oracle home, which contains all the binary files (read-only) that are specific to Oracle Business Intelligence.
Figure 1–3 shows the directory structure of a typical Oracle Business Intelligence installation on a single host, using all of the default values.
2
Recommended Installation Scenarios for Oracle Business Intelligence 2-1
2
Recommended Installation Scenarios for
Oracle Business Intelligence
Oracle Business Intelligence can be installed to satisfy a variety of distinct objectives ranging from a simple, single-user deployment to a highly secure, highly available deployment suitable for thousands of concurrent users. The installer functionality is targeted to make deployment for the most common deployment scenarios
straightforward and easy to achieve.
Your particular deployment of Oracle Business Intelligence depends on several related product deployment considerations. These deployment options are described in the following topics:
■ Section 2.1, "Installation Starting Points"
■ Section 2.2, "Installation Scenarios"
2.1 Installation Starting Points
This chapter describes common scenarios for installing Oracle Business Intelligence. For the purposes of this guide, installing is narrowly defined as the process of copying new Oracle Business Intelligence software on a system where no prior installation of Oracle Business Intelligence exists. The processes for patching and upgrading differ from the installation process.
The following table provides a quick reference of the definitions and examples for each process type, and where to find more information about them.
Process Type Definition(s) Example
For More Information
Installation Copying new software on a system where no prior installation of the software exists
Installing a new instance of Oracle Business Intelligence 11.1.1.5
2.2 Installation Scenarios
There are four main Oracle Business Intelligence installation scenarios, which apply to all Oracle Business Intelligence products, including Oracle Business Intelligence Publisher and Oracle Real-Time Decisions:
■ Installation Scenario #1: Demonstration, Evaluation, or Proof of Concept
■ Installation Scenario #2: Single-User Development
■ Installation Scenario #3: Enterprise Deployment for Hosted Development and
Production
■ Installation Scenario #4: Enterprise Deployment for Highest Levels of Availability
and Security
2.2.1 Installation Scenario #1: Demonstration, Evaluation, or Proof of Concept
The Demonstration, Evaluation, or Proof of Concept scenario is for users and organizations that want to install Oracle Business Intelligence quickly for Patching Copying a small
collection of files over an existing instance (also referred to as an "in-place minor version of the product to a newer minor version of the same product.
A patch set is a single patch that contains a collection of patches designed to be applied together.
Copying the Oracle Business Intelligence 11.1.1.5 patch set over an Oracle Business Intelligence 11.1.1.3 instance
See Oracle Fusion Middleware Patching Guide, especially the section entitled "Summary of the Patch Set Installation Process"
Upgrade Moving from a previous major
See Oracle Fusion Middleware Upgrade Guide for Oracle Business Intelligence Enterprise Edition
Note: After you install Oracle Business Intelligence 11g on a computer, do not install earlier versions of Oracle Business
Intelligence on that computer, such as Oracle Business Intelligence 10g. This action is neither recommended nor supported, even if the goal is to upgrade from Oracle Business Intelligence 10g to Oracle Business Intelligence 11g.
Process Type Definition(s) Example
Installation Scenarios
Recommended Installation Scenarios for Oracle Business Intelligence 2-3 demonstration and evaluation purposes. In this installation scenario, you perform a
Simple Install of Oracle Business Intelligence on a single computer.
Before initiating this scenario, verify that your system meets the installation requirements for Oracle Fusion Middleware, Oracle Business Intelligence, and the Repository Creation Utility (RCU). Then, run RCU to create the Metadata Services (MDS) and Business Intelligence Platform (BIPLATFORM) schemas.
2.2.2 Installation Scenario #2: Single-User Development
The Single-User Development scenario is for individual developers that want to install Oracle Business Intelligence for the purposes of customizing existing functionality, building new functionality, or integrating custom applications in isolation. In this scenario, you perform a Simple Install of Oracle Business Intelligence on a single computer.
Before initiating this scenario, verify that your system meets the installation requirements for Oracle Fusion Middleware, Oracle Business Intelligence, and the Repository Creation Utility (RCU). Then, run RCU to create the Metadata Services (MDS) and Business Intelligence Platform (BIPLATFORM) schemas.
2.2.3 Installation Scenario #3: Enterprise Deployment for Hosted Development and
Production
The Enterprise Deployment for Hosted Development and Production scenario is for organizations with multiple users, and possibly developers, that want to install Oracle Business Intelligence in a secure, clustered environment. The tasks you perform depend on whether you want to support a single, scaled-out instance on multiple computers or multiple, standalone instances on a single computer.
2.2.3.1 Installing a Single, Scaled-out Oracle Business Intelligence Instance on
Multiple Computers
To install a single, scaled-out instance on multiple computers, you perform an
Enterprise Install with the New BI System option on one computer. You then perform another Enterprise Install, but this time with the Scale Out BI System option. You repeat this latter task on each computer where you want to scale out your Oracle Business Intelligence system.
Before initiating this scenario, verify that your system meets the installation requirements for Oracle Fusion Middleware, Oracle Business Intelligence, and the Repository Creation Utility (RCU), and then run RCU to create the Metadata Services (MDS) and Business Intelligence Platform (BIPLATFORM) schemas.
2.2.3.2 Installing Multiple, Standalone Oracle Business Intelligence Instances on a
Single Computer
To install multiple, standalone instances on a single computer, use one of the following methods:
■ Perform either a Simple Install or an Enterprise Install (with the New BI System option) multiple times on the computer. Ensure that you install each Oracle Business Intelligence instance into a separate Middleware home on that computer.
This method provides two main benefits over performing a Simple Install or an
Enterprise Install multiple times. First, it uses less disk space because each Oracle Business Intelligence instance, and specifically each domain, shares binary files contained in the Middleware home. Second, it enables you to apply patches to all domains in the shared Middleware home at the same time.
Before initiating any of these scenarios, do the following:
■ Verify that your system meets the installation requirements for Oracle Fusion Middleware, Oracle Business Intelligence, and the Repository Creation Utility (RCU), and then run RCU to create the Metadata Services (MDS) and Business Intelligence Platform (BIPLATFORM) schemas.
■ Decide on a port management strategy. You can either allow Oracle Business Intelligence 11g Installer to automatically assign the ports for each instance or you can assign them yourself through a custom port configuration file (.ini). If you choose the former method, ensure that all processes are running for any installed instances before you install subsequent instances. This enables Oracle Business Intelligence 11g Installer to automatically identify and assign ports that are not yet in use. To assign the ports yourself through a custom port configuration file, see
Section 4.2.8, "Setting Custom Port Values for Oracle Business Intelligence."
2.2.4 Installation Scenario #4: Enterprise Deployment for Highest Levels of Availability
and Security
The Enterprise Deployment for Highest Levels of Availability and Security scenario is for organizations with multiple users that want to install Oracle Business Intelligence with the highest levels of security and performance across a distributed network.
To install Oracle Business Intelligence for this scenario, use one of the following methods depending on your needs:
■ Perform an Enterprise Install with the New BI System option on one computer. Then, perform another Enterprise Install, but this time with the Scale Out BI System option. You repeat this latter task on each computer where you want to scale out your Oracle Business Intelligence system
■ Install Oracle WebLogic Server and then perform a Software Only Install of Oracle Business Intelligence on two or more computers, as needed. Afterward, configure your system, such as by using the Configuration Assistant.
Before initiating any of these scenarios, verify that your system meets the installation requirements for Oracle Fusion Middleware, Oracle Business Intelligence, and the Repository Creation Utility (RCU), and then run RCU to create the Metadata Services (MDS) and Business Intelligence Platform (BIPLATFORM) schemas.
The Enterprise Deployment for Highest Levels of Availability and Security scenario is the most complex scenario, and requires a thorough understanding of the deployment options that Oracle Fusion Middleware and Oracle Business Intelligence support.
Installation Scenarios
Recommended Installation Scenarios for Oracle Business Intelligence 2-5 Before pursuing this scenario, you are strongly encouraged to refer to the following guides:
■ Oracle Fusion Middleware Installation Planning Guide
■ Oracle Fusion Middleware Installation Guide for Oracle WebLogic Server
■ Oracle Fusion Middleware Enterprise Deployment Guide for Oracle Business Intelligence ■ Oracle Fusion Middleware Security Guide for Oracle Business Intelligence Enterprise
3
Oracle Business Intelligence Requirements 3-1
3
Oracle Business Intelligence Requirements
This chapter provides information you must know before installing Oracle Business Intelligence software. It contains the following sections:
■ Section 3.1, "System Requirements and Certification"
■ Section 3.2, "Additional Oracle Business Intelligence 11g Installer Requirements"
■ Section 3.3, "Create Database Schemas Using the Repository Creation Utility
(RCU)"
3.1 System Requirements and Certification
Refer to the system requirements and certification documentation for information about hardware and software requirements, platforms, databases, and other information. Both of these documents are available on Oracle Technology Network (OTN).
The system requirements document covers information such as hardware and
software requirements, minimum disk space and memory requirements, and required system libraries, packages, or patches:
http://www.oracle.com/technology/software/products/ias/files/fus ion_requirements.htm
The certification document covers supported installation types, platforms, operating systems, databases, JDKs, and third-party products:
http://www.oracle.com/technology/software/products/ias/files/fus ion_certification.html
3.2 Additional Oracle Business Intelligence 11g Installer Requirements
Before performing any installation, you should read the system requirements and certification documentation to ensure that your environment meets the minimum installation requirements for the products you are installing.
This topic defines the additional requirements that must be met before following any of the installation scenarios outlined in Chapter 2, "Recommended Installation Scenarios for Oracle Business Intelligence."
Section 3.3, "Create Database Schemas Using the Repository Creation Utility (RCU)" describes this process.
■ Before you begin using RCU, you should review the "Repository Creation Utility (RCU) Requirements" section in the Oracle Fusion Middleware System
Requirements document:
http://www.oracle.com/technology/software/products/ias/files/ fusion_requirements.htm
This section contains important information about your system and
component-specific database requirements that should be met before you run RCU.
3.3 Create Database Schemas Using the Repository Creation Utility
(RCU)
The Repository Creation Utility (RCU) is a graphical tool for creating and managing Oracle Fusion Middleware database schemas in your database.
The topics in this section relate to the RCU:
■ Section 3.3.1, "Database Schemas Created by RCU"
■ Section 3.3.2, "Sharing Schemas Required by Oracle Business Intelligence"
■ Section 3.3.3, "Creating Oracle Business Intelligence 11g Schemas on IBM DB2"
■ Section 3.3.4, "Database Privileges Granted to Oracle Business Intelligence Users"
■ Section 3.3.5, "Obtaining RCU"
■ Section 3.3.6, "Running RCU to Create Oracle Business Intelligence Database
Schemas"
3.3.1 Database Schemas Created by RCU
Before installing Oracle Business Intelligence, use RCU to create the Metadata Services (MDS) and Business Intelligence Platform (BIPLATFORM) schemas in your database.
To create the BIPLATFORM and MDS schemas with RCU on Oracle databases, you must possess the DBA privilege and be logged in as SYSDBA (for example, as user
SYS). Although you can use another database user that has been granted the SYSDBA role, this is not recommended. Using database users other than SYS requires additional steps, which are described in "RCU Requirements for Oracle Databases" in Oracle Fusion Middleware System Requirements and Specifications.
When you run RCU, you are creating databases schemas and tablespaces using
CREATE ANY SCHEMA, ALTER ANY SCHEMA, CREATE TABLE, CREATE TABLESPACE, and so on. RCU updates the schema_version_registry by writing entries to the system.schema_version_registry$ system table.
Create Database Schemas Using the Repository Creation Utility (RCU)
Oracle Business Intelligence Requirements 3-3
3.3.2 Sharing Schemas Required by Oracle Business Intelligence
If your organization has an MDS schema installed in a supported database, you do not need to install the MDS schema again with RCU. You can use the existing MDS schema for your Oracle Business Intelligence installation. For this option, deselect the Metadata Services schema in the Select Components screen of RCU. Then, when you install Oracle Business Intelligence, specify the details for the existing MDS schema in the MDS Schema screen.
However, each Oracle Business Intelligence system (BI domain) requires its own BIPLATFORM schema. Two or more systems cannot share the same BIPLATFORM schema, although they can share the same database. Therefore, you must run RCU and install the BIPLATFORM schema and the MDS schema (if no MDS schema exists) before installing each distinct Oracle Business Intelligence system (BI domain). For example, if you plan to install two Oracle Business Intelligence systems, you must run RCU and install the required schemas twice, or once for each system.
This requirement does not apply when you scale out an Oracle Business Intelligence system. In a scaled out (clustered) system, you only run RCU and install the database schemas once, before installing the primary node of the Oracle Business Intelligence cluster (the BI domain for the cluster is created at that time). Additional Oracle Business Intelligence nodes that you install during the scale-out process become members of that domain and, therefore, use the same set of schemas.
3.3.3 Creating Oracle Business Intelligence 11
g
Schemas on IBM DB2
When using Repository Creation Utility (RCU) with an IBM DB2 database, ensure that the database schemas created by RCU have the required permissions to use the DataDirect ODBC drivers. If these permissions are not set, then Oracle BI Scheduler fails to start because it cannot query the Oracle BI Scheduler tables. You can find the correct permissions in the DataDirect driver documentation at the following location:
http://www.datadirect.com/docs/public/tutorials/Connect-for-ODBC /odbcdb2bind.pdf
Additionally, when using RCU to install the BIPLATFORM and MDS schemas on an IBM DB2 database in a Linux environment, note the following:
■ Ensure that the schema names are eight characters or less.
For example, if you use the prefix "dev," you must edit the default schema name of "dev_BIPLATFORM" to be eight characters or less. You can shorten the suffix, but the prefix for both schema names must be the same. You can edit the schema name by clicking the name to make it an editable field.
If you do not shorten the schema name to eight characters or less, then RCU returns an error on the Password page that states, "Please enter valid
username/password." This is the same error that is returned if the user on the DB2 instance does not have the same password as entered in RCU.
■ There may be a name length restriction for the temporary tablespace name. If the BIPLATFORM tablespace name is too long, then see Oracle Fusion Middleware Repository Creation Utility User's Guide for information about creating a new tablespace with a shorter name. You can also use the same tablespace as that for the MDS schema.
3.3.4 Database Privileges Granted to Oracle Business Intelligence Users
The following privileges are granted to users created by RCU:
■ resource ■ connect
■ create sequence
For information about the use of RCU, refer to "Repository Creation Utility Overview" in Oracle Fusion Middleware Repository Creation Utility User's Guide.
3.3.5 Obtaining RCU
RCU is available either on its own installation CD-ROM in the bin directory, or in a .zip file on Oracle Technology Network (OTN):
http://www.oracle.com/technology/software/products/middleware/ht docs/111110_fmw.html
Scroll down to the "Required Additional Software" table and download the RCU package for your operating system and Oracle Business Intelligence version. For example, if you plan to install Oracle Business Intelligence 11g Release 11.1.1.5.0 on Linux, download RCU 11.1.1.5.0 for Linux.
After downloading the .zip file, extract the contents to a directory of your choice; this is referred to as the RCU_HOME directory.
RCU is available on 32- and 64-bit Linux and Windows operating systems. Either the Linux RCU or Windows RCU can be used to create schemas on any supported database.
3.3.6 Running RCU to Create Oracle Business Intelligence Database Schemas
You can run RCU locally (from the CD-ROM or your RCU_HOME) or remotely. In situations where the application administrator is not allowed to install components in the database server, RCU can be started directly from the CD.
To create the Oracle Business Intelligence schemas using RCU:
1. Do one of the following:
■ If you downloaded and extracted the RCU .zip file, access the bin directory in the RCU_HOME.
■ If you have the RCU CD-ROM, insert the CD-ROM into your computer and access the bin directory.
2. Start RCU:
■ UNIX:
./rcu
■ Windows:
rcu.bat
The Welcome screen opens.
Create Database Schemas Using the Repository Creation Utility (RCU)
Oracle Business Intelligence Requirements 3-5 3. In the Welcome screen, click Next. The Create Repository screen opens.
4. In the Create Repository screen, select Create and then click Next. The Database Connection Details screen opens.
5. In the Database Connection Details screen, select the type of database on your system. This is the database in which you create the Oracle Business Intelligence schemas. Provide the necessary credentials for RCU to be able to connect to your database.
Click Next. The Checking Prerequisites screen opens. After the checking is complete with no errors, click OK to dismiss the screen and proceed to the Select Components screen.
6. In the Select Components screen, near the top of the screen, select Create a new Prefix. The default prefix is DEV. You can provide another prefix, if preferred. Oracle Business Intelligence 11g Installer automatically creates schema names in the format prefix_schemaname. For example, if you provide the prefix BI, Oracle Business Intelligence 11g Installer creates a schema named
BI_BIPLATFORM.
Important! Make a note of these schema names and the prefix values from this screen. You need them to configure your products later in the installation process.
7. Click the plus sign (+) next to the Business Intelligence component group. Then, click Business Intelligence Platform so that a check appears next to it. This action automatically selects the Metadata Services (MDS) schema (under the AS
Common Schemas group), which is also required by Oracle Business Intelligence.
If you have another MDS schema installed to use with Oracle Business Intelligence, deselect the Metadata Services (MDS) check box and ignore the warning message that appears in the Messages box.
Do not click the Oracle AS Repository Components check box, as this configures RCU to install many other schemas that are not required by Oracle Business Intelligence.
8. Click Next. The Checking Prerequisites screen opens. After the checking is
complete with no errors, click OK to dismiss the screen and proceed to the Schema Passwords screen.
9. In the Schema Passwords screen, select Use same password for all schemas, and provide and confirm a password for the schemas.
Click Next to proceed to the Map Tablespaces screen. 10. In the Map Tablespaces screen, confirm the schema names.
Click Next to create the tablespaces for the schemas. After the tablespaces are created with no errors, click OK to dismiss the screen and proceed to the Summary screen.
11. In the Summary screen, click Create. The Create screen opens and RCU creates the schemas. After the schemas are created with no errors, the Completion Summary screen opens.
4
Installing Oracle Business Intelligence 4-1
4
Installing Oracle Business Intelligence
This chapter describes the process of installing some or all Oracle Business Intelligence components, including Oracle Business Intelligence Enterprise Edition, Oracle
Business Intelligence Publisher, or Oracle Real-Time Decisions. This chapter contains the following sections:
■ Section 4.1, "Before You Install Oracle Business Intelligence"
■ Section 4.2, "Other Considerations Before Installing Oracle Business Intelligence"
■ Section 4.3, "Obtaining Oracle Business Intelligence 11g Installer"
■ Section 4.4, "Starting Oracle Business Intelligence 11g Installer"
■ Section 4.5, "Installing Oracle Business Intelligence with Oracle Business
Intelligence 11g Installer"
■ Section 4.6, "Installing Oracle Business Intelligence in Silent Mode"
■ Section 4.7, "Troubleshooting the Installation and Configuration Processes"
■ Section 4.8, "Reinstalling Oracle Business Intelligence"
4.1 Before You Install Oracle Business Intelligence
Before you install Oracle Business Intelligence and related components, do the following:
■ Review the Oracle Business Intelligence chapter in the Oracle Fusion Middleware
Release Notes for your platform, to ensure you understand the differences between Oracle Business Intelligence and its documented functionality, and any other issues that apply to the current release.
■ Review Chapter 1, "Installation Overview," to ensure you understand the options and features related to installing Oracle Business Intelligence.
■ Review Chapter 3, "Oracle Business Intelligence Requirements," to ensure that your environment meets the minimum requirements.
■ Install your database or verify that the database you want to use is available before running Oracle Business Intelligence 11g Installer. Also, ensure the database is running during the installation.
■ Verify that you have sufficient administrator privileges to install the software. For example, on computers running Windows 7 or Windows 2008, install Oracle Business Intelligence with the Run as Administrator option enabled.
■ Ensure that your database is not hardened for security purposes. Installing Oracle Business Intelligence against a hardened database is not supported.
■ If you plan to install multiple instances of Oracle Business Intelligence on a single computer, decide on a port management strategy. You can either allow Oracle Business Intelligence 11g Installer to assign the ports for each instance
automatically or you can assign them yourself through a custom port
configuration file (.ini). If you choose the former method, ensure that all processes are running for any installed instances before you install subsequent instances. This enables Oracle Business Intelligence 11g Installer to automatically identify and assign ports that are not yet in use. To assign the ports yourself through a custom port configuration file, see Section 4.2.8, "Setting Custom Port Values for Oracle Business Intelligence."
■ Review Section 4.2, "Other Considerations Before Installing Oracle Business
Intelligence," which contains information on additional pre-installation considerations that might apply to your deployment.
4.2 Other Considerations Before Installing Oracle Business Intelligence
This section contains information on additional options and possible requirements that you should consider before installing Oracle Business Intelligence:
■ Section 4.2.1, "Installing Oracle Business Intelligence 11.1.1.5 Patch Set"
■ Section 4.2.2, "Installing Oracle Business Intelligence 11g on Multiple Computers"
■ Section 4.2.3, "Installing Oracle Business Intelligence 11g on a Computer that Uses
Dynamic Host Configuration Protocol (DHCP)"
■ Section 4.2.4, "Installing Oracle Business Intelligence 11g on 64-bit Operating
Systems"
■ Section 4.2.5, "Installing Oracle Business Intelligence 11g with Your Own Java
Development Kit (JDK)"
■ Section 4.2.6, "Installing Oracle Business Intelligence 11g on a Computer that
Contains Oracle Business Intelligence 10g"
■ Section 4.2.7, "Installing Oracle Business Intelligence 11g on a Computer Running
Microsoft Windows"
■ Section 4.2.8, "Setting Custom Port Values for Oracle Business Intelligence"
■ Section 4.2.9, "Specifying a Database Connect String"
■ Section 4.2.10, "Using Command Line Parameters to Install Oracle Business
Intelligence 11g"
4.2.1 Installing Oracle Business Intelligence 11.1.1.5 Patch Set
Other Considerations Before Installing Oracle Business Intelligence
Installing Oracle Business Intelligence 4-3
4.2.2 Installing Oracle Business Intelligence 11
g
on Multiple Computers
If you are installing on multiple computers, review Chapter 2, "Recommended Installation Scenarios for Oracle Business Intelligence" for common scenarios.
4.2.3 Installing Oracle Business Intelligence 11
g
on a Computer that Uses Dynamic
Host Configuration Protocol (DHCP)
If you plan to install Oracle Business Intelligence on a computer that uses Dynamic Host Configuration Protocol (DHCP), you must perform additional configuration tasks before you install Oracle Business Intelligence. See "Installing on DHCP Hosts" in
Oracle Fusion Middleware Installation Planning Guide.
4.2.4 Installing Oracle Business Intelligence 11
g
on 64-bit Operating Systems
Oracle Business Intelligence supports many 64-bit Linux, UNIX, and Windows operating systems. For the full list of supported 64-bit operating systems, refer to the "System Requirements and Supported Platforms for Oracle Business Intelligence Suite Enterprise Edition 11gR1" document on Oracle Technology Network at the following link:http://www.oracle.com/technology/software/products/ias/files/fus ion_certification.html
For all install types (Simple, Enterprise, and Software Only), the steps for installing Oracle Business Intelligence are the same on 32-bit and 64-bit operating systems if you want to use the JDK that is provided with Oracle Business Intelligence. Simply follow the steps provided for those install types whether you’re installing on a 32-bit or 64-bit operating system.
However, to use another JDK, you must install it before installing Oracle WebLogic Server and Oracle Business Intelligence. See Section 4.2.5, "Installing Oracle Business Intelligence 11g with Your Own Java Development Kit (JDK)."
4.2.5 Installing Oracle Business Intelligence 11
g
with Your Own Java Development Kit
(JDK)
The Simple Install and Enterprise Install types provide and install, by default, a Java Development Kit (JDK). However, you can choose to install your own JDK. For this, you must use the Software Only Install type in the following process:
1. Install your JDK. Follow the instructions provided with the documentation for your JDK.
2. Install Oracle WebLogic Server. Follow the instructions in Oracle Fusion Middleware Installation Guide for Oracle WebLogic Server.
3. Install Oracle Business Intelligence 11g using the Software Only Install type. Follow the instructions in Section 4.5.4, "Software Only Install."
4. Configure Oracle Business Intelligence 11g. Follow the instructions in Section 5.2, "Configuring Oracle Business Intelligence with the Configuration Assistant."
In addition to the requirements described above, be aware of the following:
■ If you install a 32/64-bit hybrid JDK on a 64-bit operating system, ensure that it is deployed in 64-bit mode. On UNIX and Linux, this can be accomplished by using the -d64 flag when installing Oracle WebLogic Server.
■ If you install your own 64-bit JDK, ensure that your JAVA_HOME refers to it. You can check this by running the java -version command or the java -d64 -version command (on UNIX or Linux operating systems using a 32/64-bit hybrid JDK). For this and other considerations related to installing 64-bit JDKs, see "Installing WebLogic Server on 64-Bit Platforms Using a 64-Bit JDK" in the Oracle Fusion Middleware Installation Guide for Oracle WebLogic Server.
4.2.6 Installing Oracle Business Intelligence 11
g
on a Computer that Contains Oracle
Business Intelligence 10
g
Do not install Oracle Business Intelligence 11g on a computer that is running Oracle Business Intelligence 10g, as this installation scenario is not supported. For instructions on how to upgrade from Oracle Business Intelligence 10g to Oracle Business
Intelligence 11g, see Oracle Fusion Middleware Upgrade Guide for Oracle Business Intelligence Enterprise Edition.
4.2.7 Installing Oracle Business Intelligence 11
g
on a Computer Running Microsoft
Windows
If you plan to install Oracle Business Intelligence 11g on a computer running a Microsoft Windows operating system, ensure that the environment variable
_JAVA_OPTIONS is not set. To verify whether or not _JAVA_OPTIONS is set, do one of the following:
■ Open a command prompt, navigate to the C:\ prompt, and enter the following command:
set _JAVA_OPTIONS
If you receive a message "Environment variable _JAVA_OPTIONS not defined", the variable is not set.
■ On your desktop, right-click My Computer and select Properties to open the System Properties dialog. Click the Advanced tab, and then click Environment Variables. In the Environment Variables dialog, look for the _JAVA_OPTIONS
variable in User Variables and System Variables list boxes. If the _JAVA_OPTIONS
variable does not appear in either of these list boxes, the variable is not set.
If you determine that the _JAVA_OPTIONS variable is set, or if you have any related questions, contact your system administrator.
4.2.8 Setting Custom Port Values for Oracle Business Intelligence
When the Enterprise Install type is selected, the Oracle Business Intelligence 11g
Installer enables you to set custom Oracle Business Intelligence port values in a configuration file (.ini). You can create the configuration file manually using one of the following methods:
■ Create the file from scratch in a text editor and save it in the .ini format.
Other Considerations Before Installing Oracle Business Intelligence
Installing Oracle Business Intelligence 4-5 The sample staticports.ini file contains a template for setting custom port values for Oracle Business Intelligence components. You can find the sample
staticports.ini file using one of the following methods:
– If you downloaded and extracted the Oracle Business Intelligence 11g Installer .zip file, access the bi_installer_loc/Disk1/stage/Response
directory.
– If you have the Oracle Business Intelligence 11g Installer DVD, insert the DVD into your computer and access the Disk1/stage/Response directory. In your configuration file, enter the keys and values for your custom port values using the following format:
key = value
where key is the Oracle-defined key for the component and value is the port number for that component.
For example, to assign a custom port value for Oracle Business Intelligence Presentation Services, enter the following string:
Oracle BI Presentation Services Port No = 9705
To uncomment a line that contains a port value in staticports.ini, delete the pound sign (#) at the beginning of that line.
You may assign any file name to your configuration file. However, you must append the file name with the .ini file extension and save the file in a location that is accessible to the computer where you plan to run the Oracle Business Intelligence 11g Installer. When you install Oracle Business Intelligence, the Oracle Business Intelligence 11g
Installer enables you to specify the configuration file that contains your custom port values.
4.2.9 Specifying a Database Connect String
During the Oracle Business Intelligence installation, you specify a database connect string for the BIPLATFORM and MDS schemas. The connect string is required for all installation types.
The format that you use for the connect string depends on your database type, as follows:
Database Type Format Description Example
4.2.10 Using Command Line Parameters to Install Oracle Business Intelligence 11
g
You can install Oracle Business Intelligence through the command line. Table 4–1shows installer command line parameters. Oracle Database with
Oracle RAC
host1:port1:instance1^ host2:port2:instance2[ @service_name]
hostn is the fully qualified name of the computer that hosts instancen is the name of your database qualified name of the computer that hosts
Microsoft SQL Server host:port:[instance_na
me]:db_name hostqualified name of the is the fully computer that hosts (optional) is the name of your database