Building Flash
®
Web Sites
FOR
DUMmIES
‰Building Flash
®
Web Sites
FOR
Building Flash
®
Web Sites
FOR
DUMmIES
‰111 River Street Hoboken, NJ 07030-5774 www.wiley.com
Copyright © 2006 by Wiley Publishing, Inc., Indianapolis, Indiana Published by Wiley Publishing, Inc., Indianapolis, Indiana Published simultaneously in Canada
No part of this publication may be reproduced, stored in a retrieval system or transmitted in any form or by any means, electronic, mechanical, photocopying, recording, scanning or otherwise, except as permit-ted under Sections 107 or 108 of the 1976 Unipermit-ted States Copyright Act, without either the prior written permission of the Publisher, or authorization through payment of the appropriate per-copy fee to the Copyright Clearance Center, 222 Rosewood Drive, Danvers, MA 01923, (978) 750-8400, fax (978) 646-8600. Requests to the Publisher for permission should be addressed to the Legal Department, Wiley Publishing, Inc., 10475 Crosspoint Blvd., Indianapolis, IN 46256, (317) 572-3447, fax (317) 572-4355, or online at http://www.wiley.com/go/permissions.
Trademarks:Wiley, the Wiley Publishing logo, For Dummies, the Dummies Man logo, A Reference for the Rest of Us!, The Dummies Way, Dummies Daily, The Fun and Easy Way, Dummies.com, and related trade dress are trademarks or registered trademarks of John Wiley & Sons, Inc. and/or its affiliates in the United States and other countries, and may not be used without written permission. Flash is a registered trade-mark of Adobe Systems Incorporated in the United States and/or other countries. All other tradetrade-marks are the property of their respective owners. Wiley Publishing, Inc., is not associated with any product or vendor mentioned in this book.
LIMIT OF LIABILITY/DISCLAIMER OF WARRANTY: THE PUBLISHER AND THE AUTHOR MAKE NO REP-RESENTATIONS OR WARRANTIES WITH RESPECT TO THE ACCURACY OR COMPLETENESS OF THE CON-TENTS OF THIS WORK AND SPECIFICALLY DISCLAIM ALL WARRANTIES, INCLUDING WITHOUT LIMITATION WARRANTIES OF FITNESS FOR A PARTICULAR PURPOSE. NO WARRANTY MAY BE CRE-ATED OR EXTENDED BY SALES OR PROMOTIONAL MATERIALS. THE ADVICE AND STRATEGIES CON-TAINED HEREIN MAY NOT BE SUITABLE FOR EVERY SITUATION. THIS WORK IS SOLD WITH THE UNDERSTANDING THAT THE PUBLISHER IS NOT ENGAGED IN RENDERING LEGAL, ACCOUNTING, OR OTHER PROFESSIONAL SERVICES. IF PROFESSIONAL ASSISTANCE IS REQUIRED, THE SERVICES OF A COMPETENT PROFESSIONAL PERSON SHOULD BE SOUGHT. NEITHER THE PUBLISHER NOR THE AUTHOR SHALL BE LIABLE FOR DAMAGES ARISING HEREFROM. THE FACT THAT AN ORGANIZATION OR WEBSITE IS REFERRED TO IN THIS WORK AS A CITATION AND/OR A POTENTIAL SOURCE OF FUR-THER INFORMATION DOES NOT MEAN THAT THE AUTHOR OR THE PUBLISHER ENDORSES THE INFOR-MATION THE ORGANIZATION OR WEBSITE MAY PROVIDE OR RECOMMENDATIONS IT MAY MAKE. FURTHER, READERS SHOULD BE AWARE THAT INTERNET WEBSITES LISTED IN THIS WORK MAY HAVE CHANGED OR DISAPPEARED BETWEEN WHEN THIS WORK WAS WRITTEN AND WHEN IT IS READ.
For general information on our other products and services, please contact our Customer Care Department within the U.S. at 800-762-2974, outside the U.S. at 317-572-3993, or fax 317-572-4002. For technical support, please visit www.wiley.com/techsupport.
Wiley also publishes its books in a variety of electronic formats. Some content that appears in print may not be available in electronic books.
Library of Congress Control Number: 2006921152 ISBN-13: 978-0-471-79220-8
ISBN-10: 0-471-79220-9
Manufactured in the United States of America 10 9 8 7 6 5 4 3 2 1
About the Author
Dedication
Dedicated to the memory of my mother, Inez, my best friend and one of the kindest and wisest souls to walk the face of this earth.
Author’s Acknowledgments
Thanks to Acquisitions Editor Steve Hayes for making this project possi-ble. Special thanks to Project Editor Nicole Sholly and Copy Editor Andy Hollandbeck — an upstanding kind of guy and fellow Frank Zappa fan — for manicuring this work for public consumption. My sincere thanks to the Wiley editorial staff for their support and contribution to this work. Kudos to the lovely and talented Margot Maley Hutchison for being the best literary agent on the planet.
Some of the people who helped bring this book to market include the following:
Acquisitions, Editorial, and Media Development
Project Editor:Nicole Sholly
Senior Acquisitions Editor:Steven Hayes
Copy Editor:Andy Hollandbeck
Technical Editor:Jim Kelly
Editorial Manager:Kevin Kirschner
Media Development Specialists:Angela Denny, Kate Jenkins, Steven Kudirka, Kit Malone, Travis Silvers
Media Development Coordinator:
Laura Atkinson
Media Project Supervisor:Laura Moss
Media Development Manager:
Laura VanWinkle
Editorial Assistant:Amanda Foxworth
Cartoons:Rich Tennant (www.the5thwave.com)
Composition Services
Project Coordinator: Erin Smith
Layout and Graphics: Carl Byers, Andrea Dahl, Joyce Haughey, Barbara Moore, Lynsey Osborn
Proofreaders: Leeann Harney, Jessica Kramer, Techbooks
Indexer: Techbooks
Publishing and Editorial for Technology Dummies
Richard Swadley,Vice President and Executive Group Publisher
Andy Cummings,Vice President and Publisher
Mary Bednarek,Executive Acquisitions Director
Mary C. Corder,Editorial Director
Publishing for Consumer Dummies
Diane Graves Steele,Vice President and Publisher
Joyce Pepple,Acquisitions Director
Composition Services
Gerry Fahey,Vice President of Production Services
Contents at a Glance
Introduction ...1
Part I: Building the Perfect Beast ...7
Chapter 1: Creating the Perfect Flash Site...9
Chapter 2: Before You Build Your Site ...21
Part II: Fleshing Out Your Design...39
Chapter 3: Creating the Interface ...41
Chapter 4: Getting the Word Out ...65
Chapter 5: Adding Site Navigation ...83
Chapter 6: Get a Move On and Animate the Site ...105
Part III: Adding Bells and Whistles...129
Chapter 7: Making Your Site Interactive ...131
Chapter 8: Creating ActionScript Objects ...155
Chapter 9: Going Visual ...181
Chapter 10: Going Commercial ...217
Chapter 11: Creating Flash Eye Candy...233
Part IV: Sharing Your Site with the World...251
Chapter 12: Optimizing Your Site ...253
Chapter 13: Publishing the Site ...263
Part V: The Part of Tens ...273
Chapter 14: Ten Tips for Creating Flash Sites That Work...275
Chapter 15: Ten Tips for Working with Clients...283
Chapter 16: Ten Tips for Promoting the Site...289
Appendix: Flash Internet Resources...295
Table of Contents
Introduction...1
About This Book...1
Foolish Assumptions ...1
Conventions Used in This Book ...2
What You Don’t Have to Read ...2
How This Book Is Organized...3
Part I: Building the Perfect Beast ...3
Part II: Fleshing Out Your Design...3
Part III: Adding Bells and Whistles ...3
Part IV: Sharing Your Site with the World...4
Part V: The Part of Tens...4
The appendix ...4
The color insert ...4
The companion Web site ...5
Icons Used in This Book...5
Where to Go from Here...6
Part I: Building the Perfect Beast...7
Chapter 1: Creating the Perfect Flash Site . . . .9
Flash versus HTML . . . The Winner Is? ...9
Setting Goals for the Design...11
Planning Your Site ...11
Gathering Assets for Your Site...12
Building the Interface ...12
Simplifying your workflow with symbols ...13
A tall tale of buttons and navigation menus ...14
Adding text and other delights...14
Adding the WOW Factor...15
Making your site interactive with ActionScript...16
Get a move on with animation...17
Soundtracks and other operatic delights...18
Optimizing and Publishing Your Site ...18
Testing your design...19
Getting the bugs out...19
Optimizing the beast...20
Chapter 2: Before You Build Your Site . . . .21
Knowing Your Mission...21
Working with clients ...22
Making it crystal clear with a client questionnaire...23
Defining your target audience...24
What’s the Bandwidth, Kenneth? ...24
A tale of two bandwidths...24
Do you need Freddy the Preloader?...25
Put Your Ideas Down on Paper...26
Mind mapping your brainstorm ...26
Creating a storyboard...27
Gathering Your Assets (Or, Wool Gathering)...30
Creating and optimizing your images ...30
Rounding up sound bites for your site ...33
Adding vexing video...34
Part II: Fleshing Out Your Design ...39
Chapter 3: Creating the Interface . . . .41
Creating a Bandwidth-Friendly Flash Site ...41
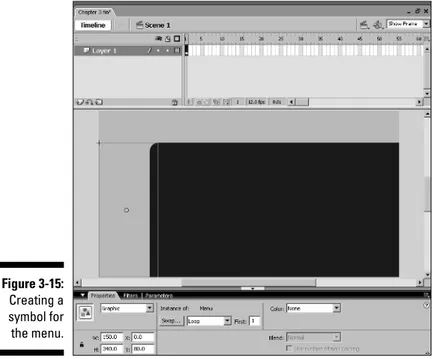
Creating Symbols ...45
Using the Ink Bottle and Paint Bucket tools ...50
Creating colorful gradients ...51
Using the Color Mixer ...51
Using the Gradient Transform tool ...53
Fleshing Out the Interface...54
Creating Symbols for Content...55
Creating a template for content...59
Working with layers ...59
Chapter 4: Getting the Word Out . . . .65
Using the Text Tool ...65
Creating static text ...66
Making text pretty ...67
Formatting paragraph text ...69
Checking your spelling, Aaron...70
Adding text hyperlinks ...73
Active Text for Fun and Profit...75
Breaking text apart...75
Creating input text boxes ...77
Creating dynamic text...78
Stuffing 50 Pounds of Text in a 30-Pound Bag ...79
Chapter 5: Adding Site Navigation . . . .83
Button, Button, Build Me a Button...83
Building a basic button...83
A button with many states ...85
Saying Goodbye to Boring Buttons...88
Creating animated buttons...88
Building a noisy button ...89
Creating an invisible button...90
Hanging Out at the Navigation Bar ...92
Bellying up to the nav bar ...92
Duplicating buttons...93
Building a navigation bar ...94
Assigning actions to buttons ...96
Assigning the proper event to a button action...98
Creating a drop-down menu...99
Chapter 6: Get a Move On and Animate the Site . . . .105
Animation 101: A Tale of Frames and Keyframes and Blank Keyframes ...105
Working with frames ...106
Working with keyframes ...107
Animating Symbols with Motion Tweening ...108
Removing a motion tween...111
In search of the perfect motion tween...111
Creating custom easing ...112
Taking an object for a spin ...114
Editing your animation ...114
Animating along a Motion Path ...115
Creating a guide layer ...115
Creating a motion path ...116
Getting objects to follow a motion path...116
Orienting a symbol instance to its motion path...117
Linking additional motion tween animations to a layer guide ...118
Animating Objects with Shape Tweening...119
Removing a shape tween...121
Modifying a shape tween animation ...121
Creating a shape tween animation for complex objects ...123
Animating Image Sequences ...125
xiii
Part III: Adding Bells and Whistles ...129
Chapter 7: Making Your Site Interactive . . . .131
Adding Sizzle to the Steak with ActionScript ...131
Introducing ActionScript classes, objects, and methods...132
Using the Actions panel...134
Loading External Movies into Your Flash Site ...141
Understanding levels ...141
Loading movies into targets...141
Unloading movies ...143
Giving Flash a Brain (Variables 101) ...144
Understanding variable data types...144
Vive la différence between string data and numeric data...145
Creating mathematical expressions...147
Understanding operator precedence...148
Christening a variable...149
Declaring a variable ...150
Passing the variable baton to other objects...152
Resetting a variable...153
Chapter 8: Creating ActionScript Objects . . . .155
Telling Time with a Digital Clock...155
Using the Date object...156
Making the clock tick tock ...156
Displaying the current time ...158
Adding Background Music ...161
Controlling the volume with a sound controller ...162
Creating a soundtrack movie ...167
Creating a Preloader ...168
Using the Bandwith profiler ...168
Scripting a one-act preloader...169
Hiding Objects with an ActionScript Mask ...172
Creating Drag-and-Drop Elements...175
Creating an element that can be dragged ...176
Using the startDrag action ...177
Using the stopDrag action...179
Chapter 9: Going Visual . . . .181
Adding Tool Tips to Your Web Site ...181
Creating the tool tips ...182
Creating the tool tip functions...185
Programming the buttons ...187
Creating a Moving Navigation Menu...188
Creating an endless menu ...189
Creating a Flash Photo Gallery ...193
Preparing images for the gallery ...193
Laying out the gallery ...194
Creating the XML document ...196
Scripting the gallery...197
Dissecting the code ...199
Importing Full-Motion Video — A Moving Tale ...202
Encoding the video in Flash ...202
Linking encoded video to a Flash document ...207
Modifying video playback control parameters ...210
Adding Pop-ups ...210
Chapter 10: Going Commercial . . . .217
Creating Flashy Forms ...217
Creating form elements ...218
Scripting the form...218
Creating ActionScript for the Reset button ...219
Creating ActionScript for the Submit button...220
Creating a Printable Page ...222
Designing a Flash Catalog ...224
Creating an E-Commerce Shopping Cart ...227
Chapter 11: Creating Flash Eye Candy . . . .233
Creating a Mouse Chaser ...233
Creating a Custom Cursor...235
Building a Moving Backdrop...237
Creating a Ticker Tape Marquee ...241
Creating Flying Text ...246
Part IV: Sharing Your Site with the World ...251
Chapter 12: Optimizing Your Site . . . .253
Optimizing Your Site ...253
Test Each Web Site Movie ...256
Debugging the Site ...257
Adding Breakpoints ...259
Chapter 13: Publishing the Site . . . .263
Setting Publish Settings...263
Specifying Flash settings ...264
Specifying HTML settings...268
Publishing Your Site...271
xv
Part V: The Part of Tens ...273
Chapter 14: Ten Tips for Creating Flash Sites That Work . . . .275
Optimize Images Before Building the Flash Site...275
Don’t Put All Your Eggs in One Basket ...276
Get the Bugs Out of Your Scripts ...277
Label Your Frames and Scenes...278
Use Named Anchors ...278
Create Linkage ...279
Make Your Site Skinny with Symbols...279
Create a Separate Layer for Your ActionScript ...280
Use Comments...280
Think Modular ...281
Chapter 15: Ten Tips for Working with Clients . . . .283
Create a Client Survey ...283
Create a Static Mock-up...284
Get the Client to Sign Off on the Design ...285
Dot the Eyes and Cross the Tees...285
Cover the Bases...286
Get It in Writing ...287
Get an Initial Payment ...287
Get Frequent Feedback...287
Get Feedback in Writing ...288
Bill for Extras ...288
Chapter 16: Ten Tips for Promoting the Site . . . .289
Choose a Meaningful Domain Name ...289
Optimize the HTML Page in Which Your Flash Site Is Embedded ...290
Add Meta Tags ...290
Research High-Ranking Web Sites...291
Add Alt Text ...291
Add Text to the HTML Page in Which Your Flash Site Is Embedded...292
Tell the World ...293
Get Web Sites to Link to You...293
Promote the Site in Blogs and Forums ...293
Submit Your Site ...294
Appendix: Flash Internet Resources ...295
Flash Training and Tutorial Resources ...295
www.computerarts.co.uk ...295
www.ultrashock.com...295
www.ellenfinkelstein.com/flashtips.html ...296
www.swift3d.com...296
www.actionscripts.org ...296
www.flash-creations.com...296
www.communitymx.com ...296
www.flashstreamworks.com ...297
www.were-here.com ...297
www.flashkit.com ...297
www.lynda.com...297
www.flzone.net...297
www.moock.org ...297
www.macromedia.com ...298
Flash Animation...298
www.coolhomepages.com...298
www.bestflashanimationsite.com ...298
www.melondezign.com ...298
www.webmonkey.com ...298
www.djojostudios.com/flash...299
Sound ...299
www.soundshopper.com ...299
www.flashkit.com ...299
www.sonymediasoftware.com ...299
www.groovemaker.com...299
Index...301
xvii
Introduction
S
o you want to be a Flash Web designer, but you can’t design Flash Web sites in a flash? It all takes time. And it also requires a modicum of knowl-edge, which is where this book comes in. If you’ve read other Flash how-to books, you know that they cover the sundry topics like how to create really cool animations with Flash. However, this book takes you to the next level and shows you how to create a Flash Web site from soup to nuts.About This Book
Here are some of the things you can do with this book:
⻬Use it as a doorstop. (Kidding!)
⻬Plan a Flash Web site.
⻬Create a lean, fast-loading Flash interface.
⻬Create content for your Flash Web site.
⻬Create interactive Web sites with Flash.
⻬Optimize and publish your Flash Web site.
⻬Add eye candy to your Flash Web site.
⻬Create an e-commerce Flash Web site.
⻬Debug your ActionScript.
⻬Sharpen your ability to deal with clients.
Foolish Assumptions
You should know your way around the Flash workspace. But don’t worry; I do give you a brief refresher course on some of the basic Flash stuff, like creat-ing animations, workcreat-ing with text, and so on. When you create animations, and for that matter format text, choose colors, and so on, you use the Properties Inspector to set the parameters for the object with which you are working. Therefore, you should have a working knowledge of the Properties Inspector. I also show you how to work with ActionScript. However, in order to follow along, you should have a basic knowledge of the Actions panel. Another thing you should know is how to manipulate HTML documents. Although your main work in this book uses Flash, you still have to do some editing to the HTML document in which your Flash Web site is embedded. If you have working knowledge of an HTML editor, such as Dreamweaver, you’re one step ahead of the game. Another benefit of Dreamweaver is the fact that you can use the software to upload files to the Web provider that hosts the Web site.
Conventions Used in This Book
I’m not a conventional kind of guy. But of course, without some kind of con-ventions, such as punctuation and grammar, people wouldn’t be able to understand each other. This book is no different. Without conventions, you’d have no idea of what to do or when to do it. Therefore, we use the following conventions in this book. When you’re asked to input information — you know, type something — the required input is boldfaced.When you see exam-ples of ActionScript code, URLs, and e-mail addresses, these are in a monofont typeface, like so: [email protected]. New terms are italicized.
What You Don’t Have to Read
How This Book Is Organized
Building Flash Web Sites For Dummies is split into five parts. You don’t have to read the book sequentially, and you don’t even have to read all the sections in any particular chapter. You can use the Table of Contents and the Index to find the information you need and quickly get your answer. In this section, I briefly describe what you’ll find in each part.
Part I: Building the Perfect Beast
In this part, I present information on how to plan your Flash Web site prior to building it. I show you several things you should consider prior to building the site, as well as techniques for working with clients. I show you how to create a mock-up for your client and how to begin gathering assets for your Web site before launching Flash.
Part II: Fleshing Out Your Design
After you’re done with the preliminaries, you can start creating some actual content, which is what this part is all about. First, I show you how to make an interface. I know what you’re thinking: Why just an interface? Well, in order to have a lean and mean Web site, you create a fast-loading interface into which you load other content. In this part, I also show you how to create text for the Web site and how to create some spiffy navigation bars and buttons, as well as how to animate your site.
Part III: Adding Bells and Whistles
So what’s a Flash Web site without bells and whistles? Boring!In this part, I show you how to kick it up a notch. I introduce you to the wonders of ActionScript and what it can do for you, your site, or your client’s site. I also show you how to create some spiffy things with ActionScript, like a clock that shows Web site visitors what time it is. Other interesting tidbits include how to create a Flash photo gallery, add video to your Web site, create an e-commerce site, and more.
3
Part IV: Sharing Your Site with the World
If you build it, they will come. But first you have to optimize the site for the viewing public and then publish it, the main topic of discussion in — you guessed it — this part of the book. First, I show you how to make your site lean and mean by getting rid of things that are not needed. I also give you other tips and techniques you can use to create a Skinny Minny Web site. Then I show you how to exterminate pesky little bugs in your ActionScript. And finally, I show you how to publish your site.
Part V: The Part of Tens
In the Part of Tens, you’ll find three chapters. Each chapter contains ten tidbits — you know, useful nuggets of information — about creating Flash Web sites. I share with you some tips for creating trouble-free Flash Web sites, tips for dealing with clients, and tips for promoting your site. And I’ve done so much work on this introduction that I’m going to take this moment to take ten.
The appendix
Although Flash is super-popular, it’s not the easiest application in the world to master. So I’ve added this handy appendix, which lists several Flash Internet resources. I waxed my board and actually surfed to each site to verify that it’s still there as of this writing. But you know how the Net is . . . here today, gone tomorrow.
The color insert
The companion Web site
I want to make Flash source files available to you, so this book has an accompanying Web site. The site is located at www.dummies.com/go/ flashwebsites. There, you can find folders for the chapters in this book. In each chapter’s folder, you can find FLA files that give you an example of a project created using the topics covered in that particular chapter.
Icons Used in This Book
What’s a For Dummiesbook without icons pointing you in the direction of really great information that’s sure to help you along your way? In this section, I briefly describe each icon I use in this book.
The Tip icon points out helpful information that is likely to make your job easier.
This icon marks a generally interesting and useful fact — something that you might want to remember for later use.
The Warning icon highlights lurking danger. With this icon, I’m telling you to pay attention and proceed with caution.
When you see this icon, you know that there’s techie stuff nearby. If you’re not feeling very techie, you can skip this info.
I’ve placed several files on the Web for your use. This icon denotes an activity where you might want to first download the named file before continuing.
5
Where to Go from Here
Okay. So now that you’ve read this far, or maybe you started with this section of the intro, and you need someone to tell you where to go. Not a problem. If you want to plan your site and get everything ready to rock and roll before launching Flash, check out Part I. In Chapter 1, I give you the skinny on every-thing you need to do while designing a Flash Web site. In Chapter 2, I show you how to get all your ducks in a row by gathering all the information and assets you need to hit the ground running.
If you’re a take-charge, grab-the-bull-by-the-horns, press-on-regardless kind of person, you’ll find the information you need to start designing your site in Part II. In Chapter 3, I show how to create the site interface, whereas in Chapter 4, I show you everything you ever wanted to know — well almost — about Flash text but were afraid to ask. In Chapter 5, I show you how to add site navigation, and if you need motion in your Flash Web site, I show you how to get animated in Chapter 6.
If bells and whistles are your thing, or your client’s thing, you can easily include them using Flash. If you want cool Flash stuff, mosey on over to Part III. Here I show you how to add cool things to your Web site with ActionScript and also show you how to add Flash eye candy to your site. If your site is going to be commercial, check out Chapter 10.
Part IV is all about finalizing your site and then publishing it. In Chapter 12, I show you how to optimize your site and get the bugs out of your Action-Script. In Chapter 13, I show you how to publish your site.
Part I
I
show you everything you need to know to hit the ground running. I show you all the steps involved in creating a Flash Web site and then show you how to begin laying out the Web site.If you’re working with clients, you’ll find useful tidbits on how to deal with them and how to figure out exactly what they want. After you have that information in hand, you create a mockup for the client, a task I show you how to accomplish in this part.
Chapter 1
Creating the Perfect Flash Site
In This Chapter
䊳Planning your Flash site
䊳Assembling the site assets
䊳Building the Flash site
䊳Publishing your site
T
he first page of Chapter 1 is always an exciting place in any book. It’s where you find out what’s in store for you in the upcoming pages. Or hey, maybe you’ve already read three chapters and have just decided to restart at the beginning. (What a novel concept!) Well, you can get away with that when reading a book, but if you try to create an interface for your Flash site without first having done your homework, it’s almost like trying to fly without knowing how to operate an airplane — but not nearly as hazardous to your health. In this chapter, I show you the steps you go through to create a Flash site. And like anything else you build, there is a process. Whether you’re creating a Flash site for your son’s baseball team or for your boss — who plopped an unopened box on your desk that says “Flash Professional 8” and said, “Build me a Flash site” — if you don’t approach the process logically, you’re destined to have more than your share of headaches. Like the self-help gurus say, “Fail to plan, and you plan to fail.”Flash versus HTML . . . The Winner Is?
To Flash or not to Flash, that is the question. Whether ’tis nobler to create a ho-hum HTML Web site or to up the ante with a Flash design with more bells and whistles than . . . but I digress.
kinds of imaginative coding and workarounds to create some really cool Web sites with HTML. HTML designers use JavaScript to add interactivity to their designs. They write complex code to embed video and audio in their designs, and they use form elements to create interactive forms to gather information, to create virtual shopping carts, and so on. Or maybe they’re lucky and have a good WYSIWYG (What You See Is What You Get) HTML application, like Dreamweaver, that takes care of a lot of the grunt work.
Either way, there’s still a steep learning curve to create anything more complex than a hum-drum, text-only Web page sprinkled with the odd JPEG image or three. Simply put, modern-day Web designers need to know a lot. And they often have to resort to other colleagues in order to create the latest “all-singing, all-dancing” Web design that will blow the socks off their client’s competitors.
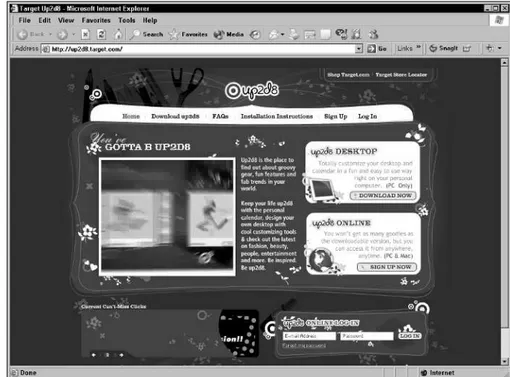
However, when you want to have your cake and eat it too, nothing beats Flash. You have everything you need within the application to add all of the interactivity and WOW factor the law allows, and then some. Lots of people think of Flash as a really cool animation tool. But it’s so much more than that. You can build high-powered, compelling Web sites with Flash. And the only time HTML comes into the picture is as the document within which you embed your Flash Web site. Figure 1-1 shows a cool Flash Web site.
Within Flash is a powerful scripting language known as ActionScript, which bears a similarity to JavaScript. If the design you envision includes full-motion video, that’s available from within Flash as well. In fact, Flash has its own video codec(an algorithm that compresses the movie when it is ren-dered, and decompresses the movie when it is viewed) called FLV (Flash Video). But that’s only the tip of the iceberg. You say you want to gather information from customers at your Flash site? Piece of cake! You can design an artistic Flash form that makes its HTML brother look positively archaic. And you can do all of this within Flash. I show you how to incorporate these elements and more in your Flash Web design in the upcoming chapters.
Setting Goals for the Design
Before you can build the site, you need some kind of road map. Trying to create a Flash movie without a plan is like trying to drive from Florida to Alaska without a map or planned route. You may get there, but you’ll end up taking a world of detours and wrong turns.
The easiest way to know where you’re going with your Flash Web design is to interview the client. In fact, this step is an absolute necessity. After all, how can you create a proposal if you don’t know what the client wants? If the Web site is for a friend or a family member, the interview process will probably be an ongoing give-and-take of ideas. After the goals for the design have been defined, put it in writing and get the client to sign off on it. Remember, no job is done until the paperwork is handled. And in the case of a Web design, no job should be started until the paperwork is handled. I discuss this issue in more depth in Chapter 2.
Planning Your Site
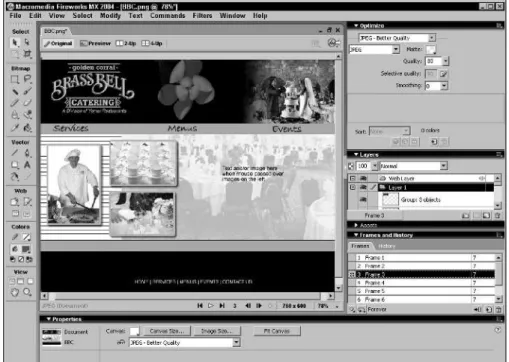
After you have the goals for your design on paper, it’s time to put you design paper again. Yes, you read correctly. Only this time, you’re not putting words on paper; you’re sketching the design. The sketch doesn’t have to be elaborate — just enough to give you a visual clue as to what the finished design will look like. You can create a series of sketches on a legal pad, an illustration applica-tion, or, if you’re meeting with the client in a restaurant, a napkin works well as a makeshift sketchpad. If you prefer to be a little more elaborate, you can sketch your design and actually build different iterations of the design in Macromedia Fireworks (an application used to create graphics, edit images, and create HTML for Web sites). After the sketch is done, you’ll know exactly what you need to build the site. The sketch also gives you an idea of what, if any, ActionScript you need to pull off the design. Don’t worry, I show you everything you need to know about ActionScript for a Flash Web design in Chapter 7.
11
Gathering Assets for Your Site
After you create preliminary sketches for your site, it’s time to get your ducks in a row, so to speak. In this phase of the project, you get or create everything that cannot be created in Flash and store it in a neat little folder. There’s nothing worse than being two-thirds of the way into your project, with the creative juices flowing like a river in flood, only to discover that you don’t have everything you need to complete the project.
The assets you gather will vary depending on what your design encompasses. If your site has a slide show, you’ll gather the images, optimize them for Web site viewing, and size them to suit your design. Granted, you can do some of this work in Flash. However, a Web-friendly image editing application like Fireworks will give you more options. Other assets you may have to gather are sound clips and full-motion video. Animation? Forget it. You can do all that in Flash. Chapter 2 has more about gathering the necessary assets.
Building the Interface
Every good Web site needs an interface. In a nutshell, an interfaceis a graphic device that your viewers can use to navigate from one part of the site to another. The acronym for an interface is GUI — graphical user interface.The interface generally consists of a background, a banner, and navigation buttons. You can build most of the assets for your interface in Flash. However, some designers prefer to lay out the background for the interface in an application like Fireworks and then import the graphic into their Flash design.
You’ll create many parts of the interface by using Flash drawing tools. When you create an object with Flash drawing tools, you create a vector object.
Vector objectsare graphic objects that can be scaled infinitely, that is, unless the object has a complex gradient(a fill that consists of two or more colors blended together in a linear or radial manner). Some Flash Web designers prefer to create their vector objects in a drawing application like Adobe Illustrator or CorelDraw.
Simplifying your workflow with symbols
So you have an idea for your Flash Web site, but you shudder at the thought of creating all the artwork. It’s a good thing you decided to create a Flash Web site, because in Flash, anything you create can be converted into a symbol. Symbols come in three flavors: graphic, button, and movie clip. The beauty of symbols is that they’re reusable. You can add a symbol wherever you need one without breaking the bandwidth bank. When you take a symbol from the Library and add it to the timeline, you create a symbol instance. When the instance is encountered, the Flash Player re-creates it from the information in the Library. Figure 1-3 shows a Library that lacks a live librarian but is chock-full of symbols.
And guess what? You can have a symbol within a symbol, which in Flash is known as nesting.This opens all manner of possibilities for the creative Flash Web designer. You can also house ActionScript in the Movie Clip symbol. This makes it possible for you to use the same ActionScript in other parts of your movie, or for that matter, in other movies. Now how cool is that? I give you a symbolic baptism by fire in Chapter 3.
Figure 1-2: You can create unique interfaces by using Flash.
13
A tall tale of buttons and navigation menus
An important part of any interface is the navigation menu. The navigation menu consists of buttons. But you don’t need to reinvent the wheel to create a navigation menu. Whenever you create a button, or for that matter any other symbol, it’s stored in the Flash Library. Unlike your local library, you don’t need a card to take something from the Library, you just do it. I show you how to create a navigation menu by creating one button, duplicating the button for the other links in your navigation menu, and then editing the dupli-cated buttons. It’s really child’s play after you get the hang of it.
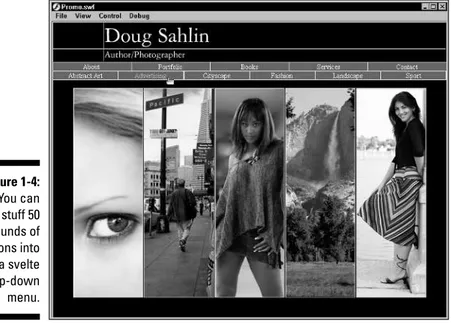
If you have lots of content in your Web site, you might have to stuff the but-tons into drop-down menus. Creating a drop-down menu might seem rather labor-intensive, especially if your site holds a whole lot of buttons that link to different content. Not to worry, in Chapter 5, I show you how to whip up a vertical or horizontal drop-down menu like the one in Figure 1-4 in no time. In this figure, the second row of buttons drops down when the Portfolio button is clicked.
Adding text and other delights
Sometimes you have to tell instead of show. When you’re faced with this task, you need to create text. You may also need text for buttons. Creating text in Flash is almost as easy as working with your favorite word processor. The most basic form of Flash text is static text.When you create static text, it just
sits there and gets the word out. You can make pretty static text by choosing a fancy font and rainbow colors, or you can create ho-hum text by using the basic Flash fonts dressed up in one of Halloween’s favorite colors: jet black. Flash offers two other forms of text: input and dynamic. Input textaccepts information from your Flash site’s visitors. This information can be stored in a variable. Dynamic textis just the opposite: It takes information from a vari-able and displays it within your Flash movie. You can use this dynamic duo to personalize a viewer’s visit to your site. You can also use it to store a visitor’s information when shopping in your Flash e-Store. I show you how to create fancy (and not-so-fancy) Flash text in Chapter 4.
Adding the WOW Factor
The indescribable WOW factor is something that can only be experienced with the senses. Sight and sound make a Flash site pop. And it’s something that’s hard to do with HTML, but relatively easy to do with Flash. You say you want to introduce your site with a bang? You can — literally. All the bells and whistles you need to create an award-winning Flash site that’ll rock your visi-tors’ worlds are included with Flash. All you have to do is harness the power. I show you how in Part III.
Figure 1-4: You can stuff 50 pounds of buttons into a svelte drop-down menu.
15
Making your site interactive
with ActionScript
The thought of writing code strikes fear into the heart of any Web designer — with the exception of card-carrying geeks, also known as Web developers.
Flash ActionScript, however, is a non-geek’s answer to code. All you have to know is which action to use to pull off an effect. With Script Assist in Flash 8, you select the action and then fill in the parameters. You don’t have to know how to enter code with Script Assist, which is a blessing after having to man-ually script everything in Flash MX 2004. You’ve probably seen plenty of Web sites with Flash intros. Virtually anyone with the slightest bit of Flashpertise can put together one of those. But what separates the men from the boys is the clever use of ActionScript.
The first place you’ll use ActionScript is creating a preloader. A preloaderis either a graphic, animation, or text that displays while enough content loads for the main Flash movie to play without interruption. Are preloaders neces-sary? Well, sometimes. If your audience accesses the Internet via a dialup connection, a preloader ensures that enough information loads to view your design without interruption. Some Flash designers go over the top with pre-loaders that contain so many bells and whistles that it loads slowly and needs a pre-preloader of its own. How’s that for redundancy? In Chapter 8, I show you how to create a preloader, such as the one shown in Figure 1-5.
If you want a unique menu, you can use ActionScript to create a drag-and-drop menu. Whether you create a cool drag-and-drag-and-drop menu or a conventional navigation bar, when your visitors click a button, you can literally show them where to go. And when they get there, you can up the ante with ActionScript. You can use ActionScript for games, to create animated banners, to create moving menus, to add the time of day to your Web site, and much more. Figure 1-6 shows a Flash Web site with some ActionScript bells and whistles.
Get a move on with animation
The clever use of animation gets the attention of your visitors and has them returning on a regular basis. If you create a tricked-out navigation menu, you can use animation to instruct your visitors how to use it. And if you’re really adventurous, you can use animation to create a text banner with text that dances or flies into position, such as the one shown in Figure 1-7.
Animation takes place on a timeline. The timeline is broken down into frames. The number of frames that occupy one second of the timeline is determined by the frame rate of the movie. The more frames you have, the smoother the motion. However, a higher frame rate increases the file size. You can find out all about frames and keyframes and blank keyframes, oh my, in Chapter 6. If you’ve created animation in the past, you may have meticulously made changes on every frame to get it to work. However, with Flash, you can auto-mate your animations. All you need to do is create a symbol, a few keyframes, and let motion tweeningdo the rest. Another cool way to attract attention is with an animated banner. I show you almost everything you wanted to know about animation but were afraid to ask in Chapter 6.
Figure 1-6: You add interactivity with Action-Script.
17
Flash has another form of automated animation known as shape tweening.
Shape tweening can be used on editable shapes to change them into different shapes. Shape tweening isn’t sophisticated enough to morph your ex-significant-other into a donkey, but it can create interesting animations.
Soundtracks and other operatic delights
Flash soundtracks can be a joyful noise or irritating enough to make your viewers hightail it without ever looking at your site. Everyone has different musical tastes; that’s why there are so many music genres. Instead of subject-ing your visitors to your personal taste in music, you can give them a choice. And to go with the choice, you can put the viewer in control of the experience with a sound controller. Now how cool is that? I show you how to add sound to your site in Chapter 8.
You can also add sound to buttons. If you’re a photographer showing off your portfolio with a Flash Web site, what would be cooler than a shutter click when one of your visitors clicks a button? I show you how to make noisy but-tons in Chapter 5.
Optimizing and Publishing Your Site
If you build it, they will come. But will they stay? The answer to that question is noif you create a Web site that takes a long time to load. The average Web surfer has the attention span of a sand flea, and that isn’t very long. If you want your visitors to delve deeply into your site, you have to give them some-thing to look at almost immediately. The secret to creating a quick-loading site is to carefully plan the site, create a skinny interface, and load content into the interface, which is what I show you how to do in this book. If you get to the
eleventh hour and you have a 2MB site that takes eons to load, well, there’s not much you can do except start all over again. But if you have a svelte siren of a Flash site, you can make the site load even faster by optimizing it. See Chapter 12 to find out how.
Testing your design
Test, test, and then test again. That should be the motto of every Flash designer. There’s nothing more frustrating than being nearly finished, just to find a glaring error in your logic, or, for that matter, in the ActionScript, that prevents the site from doing all you wanted. It’s in your best interest to test early and test often. You can do some testing in authoring mode, and do a full-fledged test in another window, as shown in Figure 1-8. I show you how to test your site in Chapter 13.
Getting the bugs out
If your Web site contains ActionScript, variables, and dynamic text, you have a recipe for disaster if you don’t know how to debug your site. Murphy’s Law can and will raise its ugly head. But you can nip Murphy in the bud by using Flash’s powerful debugger. You can track every variable in your Flash movie as well as in your ActionScript. However, even at the default frame rate, a snippet of ActionScript code executes in 1⁄
12of a second. In other words, things happen so
fast that you can’t track them without a little help from a friend.
Those friends are known as breakpoints(not to be confused with the formerly popular break dance), which you place on complicated lines of ActionScript. A breakpoint stops ActionScript cold in its tracks when you debug your movie. After getting the skinny on what your code is doing, you resume the movie from within the Debugger (more on that in Chapter 12), shown in Figure 1-9.
Figure 1-8: You test your site prior to publishing it.
19
Optimizing the beast
After you get the bugs out, you have some housecleaning to do. You need to optimize your Flash movie in order for it to load as quickly as possible. One of the first things you do is clean out the Library. Publishing a Flash movie with unused symbols in the Library is like preparing a car for the Indy 500 and leaving a whole bunch of extra parts in the engine compartment; the extra baggage makes the Web page load slower.
Other issues you’ll deal with while optimizing the site are the quality of the images and the data rate of any sounds in your movie. Optimizing your Flash movie means it will load faster, which is a good thing for your site’s viewers. I show you how to optimize your Flash Web site in Chapter 12.
Publishing and uploading your brainchild
After creating your Flash site, it’s time to share it with the world, or at least with a few close friends. To convert your Flash document into a Flash movie, you publish it. When you publish the movie, you create an SWF file and an HTML file into which your movie is embedded. Or if you create a large Flash site, you publish several SWF files that load into your interface, which is yet another SWF file. The interface SWF file is embedded in an HTML document, which you also publish.
When you publish a Flash movie, you have several decisions to make that deter-mine who can view your Flash movie. After you publish your Flash Web site, you upload it to your server. But not to worry, publishing and uploading a Flash movie isn’t rocket science. I show you everything you need to know about pub-lishing and uploading Flash movies, and maybe a little more, in Chapter 13.
Chapter 2
Before You Build Your Site
In This Chapter
䊳Planning your site
䊳Getting information from your client
䊳Knowing your target audience
䊳Creating a storyboard
䊳Gathering raw material for the site
I
t is always best to begin at the beginning. I know that sounds like useless advice, but many Web designers launch Flash as soon as they think they know where they’re going. Then, lo and behold, they start assembling a Flash document for their Web site and find out that they don’t have a clue. Planning and doing legwork before you actually start building the site takes time, but in the long run, it saves time. To quote George Harrison, “If you don’t know where you’re going, any road will get you there.” In this chapter, I show you how to lay out a path that ensures success. You find out how to get your ducks in a row ahead of time by getting all the necessary information from your client and then gathering all of the assets you can’t build in Flash.Knowing Your Mission
Working with clients
You probably know the old adage that the client is always right. But in reality, the client is always the client. When you work with a prospective client, your first task is to size him or her up. Does the client have a firm idea of the mes-sage he or she wants to get across with the site you’ll be designing? If the client frequently changes his mind — you know, waffles — during your initial meeting, that’s a red flag that he’ll probably change his mind once or twice while you’re creating the site. Be sure to factor this in when creating your proposal and, of course, when you’re estimating the price you’ll charge the client for your services.
Remember that the client is also sizing youup. When you’re working with a client, you’re in a sales situation: You’re selling yourself and your services. Your initial session with the client will be give and take. The client will ask you a lot of questions, and you’ll ask the client a lot of questions to get an idea of your client’s needs. Sometimes it’s appropriate to answer a question with a question. One very good question/answer is, “Why is that important to you?” The answer your client gives you is valuable information you can later use to overcome any objections.
Another thing you should do up front is establish your value. When you tell the client about your services, don’t just blurt out facts. The client wants to listen to radio station WIIFM (What’s In It For Me). So when you tell the client something — for example, that your Flash sites are fast-loading — you’re telling the client a feature of your services. Back that up with why it’s impor-tant for the customer. In this case, you tell the customer that your fast-loading site will prevent potential visitors from losing interest while waiting for con-tent to load and surfing to another site.
Another good sales tool is a portfolio. You can use screen-capture hardware, such as SnagIt, to capture still images of your best Flash Web sites. You can then print these out on high-quality paper and put them in a professional-looking portfolio.
Making it crystal clear with
a client questionnaire
Whether you meet in person or do business over the Internet, you can get a solid grasp on your customer’s expectations if you have the client fill out a questionnaire. Many Web designers have a questionnaire that potential clients can fill out and submit on their Web sites. The following is a list of useful questions you can ask your potential client to get a better idea of the type of Web site he or she desires:
⻬What type of business or organization are you trying to promote?
⻬Do you have a Web hosting service?
⻬Do you have a Web domain name reserved?
⻬Do you have a logo? If not, will you need me to design one?
⻬What is the purpose or goal of your Web site? • Promote products?
• Sell products?
• Create customer awareness? • Foster customer service? • Gather customer feedback?
• Distribute company information via an internal Web site?
⻬How many sections will your Web site need?
⻬Will your customers be ordering products online?
⻬Will you provide the text for your Web site?
⻬Will you need full-motion video on your Web site?
⻬Do you want a soundtrack? If so, do you want me to provide a sound controller?
The answers to these questions will give you some of the information you need to prepare a quote.
23
Defining your target audience
After meeting with your client, you’ll have a good idea of what your target audi-ence is. This will determine a good deal of the content you’ll add to your Flash Web site. The age and income level of your target audience determines the content for the site. For example, if you’re creating a site for baby boomers, don’t use a hip-hop soundtrack for background music. After you define your target audience, you’ll know which part of the country or world they reside in. This will also give you an idea of what type of connection they use to surf the Internet, which will determine the bandwidth you can pump into your design.
What’s the Bandwidth, Kenneth?
Another thing you’ll identify when you define your target audience is the type of equipment they’re likely to use to connect to the Internet. This factor determines the type of content you can put into your Flash Web site. If your target audience uses a DSL or cable modem, you have considerably more leeway than if your audience uses a dialup modem. The overall bandwidth pipeline is determined when your movie is finished. However, the techniques I show you to create Flash Web sites feature a reasonably svelte interface into which content is loaded.
However, the bandwidth issue is a factor with the individual content you load into the interface. For example, if your target audience accesses the Internet with a dialup modem, you’ll have to apply more compression to the images and video that will be displayed. You will also have to use a lower frame rate to ensure that the content you load into the interface has a smaller file size and will load quickly. Importing Flash video is discussed in Chapter 9. I show you how to batch process video with the Flash 8 Video Encoder in an upcoming section in this chapter.
Soundtracks are another factor in bandwidth. For a dialup audience, you’ll have to specify a lower bit rate so that the music streams into the viewer’s Flash Player without any interruptions. I show you how to add background music to your site in Chapter 8.
A tale of two bandwidths
Do you need Freddy the Preloader?
Bandwidth is one issue, and the file size of each Flash movie that you load into the main interface is another. Even though you have a lean-and-mean interface, you can still run into a bandwidth issue with content you load into the interface. Flash movies are streaming content. The movie begins playing as soon as the Flash Player downloads enough information. However, you may have some frames with so much content that the Flash movie stops dead in its tracks. This is annoying enough. But the problem is exacerbated (love that word), when you’ve got an item such as a soundtrack that has already loaded and continues to play while the rest of the content pauses until enough information downloads for the movie to advance to the next frame. Talk about your bad lip-synch.
You’ll be able to ferret out this information when your content is created. However, this doesn’t help you at the beginning of the project, especially when you’re creating a bid for the client. So do you have to waffle and tell the client that you mighthave to bill them additional for a preloader (which I discuss in Chapter 8)? No. You can safely assume that you should include a preloader in your bid if the following are to be included in the content:
Figure 2-1: You create an HTML portal to direct viewers to the version of your site that suits their connection speed.
25
⻬Streaming video
⻬Music soundtrack
⻬Extensive use of bitmap images, especially if they occur near the start of the movie
When you present a proposal to a client, leave a spot for the client to accept the proposal. Never begin work until the client returns the signed proposal.
Put Your Ideas Down on Paper
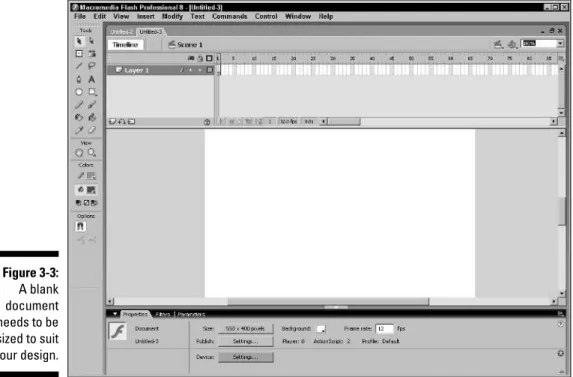
At this stage of the workflow, you have a pretty good idea of where you’re headed. Your client has given you enough information to begin laying out the design. Now it’s your turn to bring your client’s vision to life. Before you launch Flash and start creating symbols and graphics with reckless abandon, take a deep breath and prepare to do some creative mind mapping in your favorite graphics application. After you have a rough handle on the design, you can start laying out different versions of the design for client approval.
Mind mapping your brainstorm
Most people think of mind mappingas visual graffiti filled with circles and words of wisdom. When you mind map to create a Flash Web design, you can jot the design down on paper. However, you’ll have a lot more control if you use an illustration application or a good image editing/Web design applica-tion such as Fireworks. The following steps give you a starting point for your own creative mind mapping:
1. Launch Fireworks.
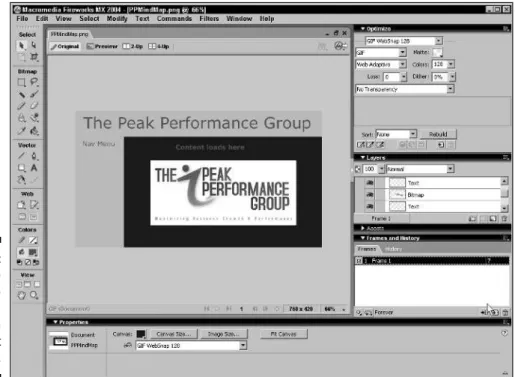
2. Create a new document that’s the same size as your Flash Web site.
The default size for a Flash document is 550 pixels by 400 pixels. Eventually, you’re going to use a variation of your mind map to show your design ideas to your client. If you’re going to provide the client with a printed image, specify an image resolution of 300 dpi. If you’re going to e-mail images to your customer, specify an image resolution of 72 dpi.
3. Use the drawing tools to map out the various sections of your Flash Web site.
Traditional design calls for a banner and a vertical or horizontal menu.
4. When creating shapes, choose colors to suit your design.
5. Add images and text as placeholders for other content.
You can create an effective color scheme by sampling colors from your favorite image.
Creating a storyboard
After you have a couple of ideas on how to assemble the site, your next job is to create a storyboard (or as some designers call them, comps) to present to the client. You can easily create multiple variations of an idea by using a Fireworks feature normally used for animation. To use Fireworks to create a storyboard of your Web design for client review, follow these steps:
1. Launch Fireworks.
2. Open your mind-mapping session.
3. Refine the shapes and add text to the banner.
4. Flesh out the navigation menu section of the site by adding type to show each section of the site.
5. Add your client’s logo and any images that will appear when the site opens.
Figure 2-3 shows one version of a Web site created in Fireworks.
Figure 2-2: You can use an image editing application to map out your design.
27
6. Open the Frames palette, select the first frame, and then click the New/Duplicate Frame icon.
Fireworks creates a carbon copy of the first frame.
7. Create a variation of the first frame.
This will be the second design you present to the client. You can change the manner in which the menu is displayed, change the placement of objects, change colors, and so on. Figure 2-4 shows another variation of the design.
8. Create additional frames to create different variations of the design.
9. After creating different variations of your design, choose File➪Export to open the Export dialog box, shown in Figure 2-5.
10. Choose the desired file format in which to save the images and then, from the Save as Type drop-down menu, choose Frames to Files.
11. Name the document and then click Save.
After you export the frames, you’ll have multiple files with the same base filename but appended with the number of the frame. You can now e-mail the individual versions to your client for consideration.
Figure 2-3: You can
Figure 2-5: You export each frame of your storyboard as a file. Figure 2-4: Create a frame for each variation of your design.
29
You can achieve similar results in other image editing applications by dupli-cating the document and then making changes to the individual elements to create a variation of your original design. This process is easier if your image editing application features layers. If you own Photoshop CS or CS2, you can use the Layer Comps feature to manage alternate versions of the design. When the client returns your e-mail with his or her choice, print a copy of the e-mail and save it in the client’s file. If you really want to be efficient, have the client initial his or her choice and return it to you by mail.
Gathering Your Assets
(Or, Wool Gathering)
Believe it or not, even though you have approval from the client to start with the design, you’re still not ready to rock and roll in Flash. Flash does many things well and tries to do them all. However, there are still a few housekeep-ing details you need to tend to outside of Flash. In the upcomhousekeep-ing sections, I show you how to deal with images, sounds, and video prior to beginning your design in Flash.
Creating and optimizing your images
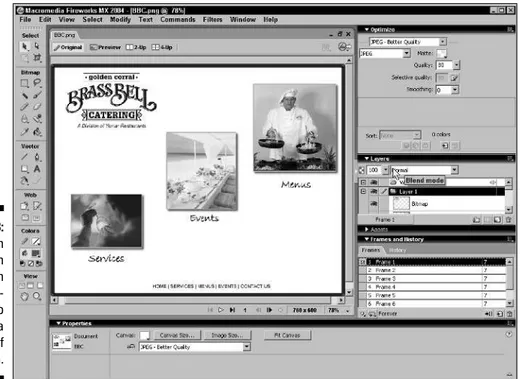
If your Flash Web design calls for images, you should optimize your images in an image editing application prior to importing them into the Flash Library. Flash can apply wholesale compression to every image in your Flash docu-ments; however, you always do best using a WYSIWYG (What You See Is What You Get) image optimization command in an application such as Photoshop or Fireworks. With these applications, you can also create montages and add text to create some really flashy images for your Flash document. The follow-ing steps illustrate how you can optimize an image for a Flash movie with Fireworks:
1. Launch Fireworks and open the image you need to optimize.
The images you use in a Flash movie can come from a wide variety of sources: clip art, your client, your digital camera, a scanned image, and so on. The only real limit is your imagination. Figure 2-6 shows an image in Fireworks undergoing a complete makeover prior to entering the witness-protection program.
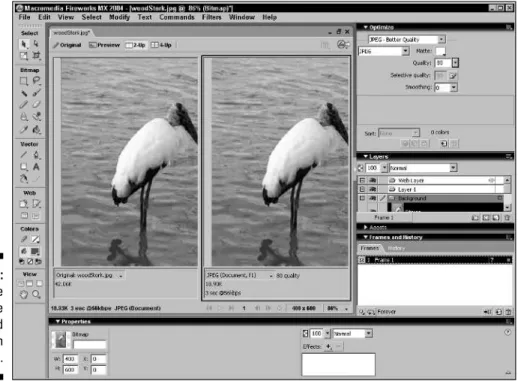
3. In the Optimize panel, shown in Figure 2-7, choose JPEG from the Export File Format drop-down menu.
4. In the Document window (refer to Figure 2-6), click the 2-Up button to display the original version of your image side by side with the image using the current optimization settings.
5. In the Optimize palette, click the Quality down arrow and then drag the Quality slider to determine image quality.
Figure 2-7: You use the Optimize panel to fine tune the image for use in Flash. Figure 2-6: You optimize images prior to importing them to Flash.
31
Alternatively, you can enter a value between 0 (high compression, low image quality, small file size) and 100 (little or no compression, high image quality, large file size) in the Quality text field.
Use a value of 70 to 80 for any large images that will be prominent in your design. Of course, file size is a factor. You’ll be able to see the file size with the current optimization settings by looking in the right pane of the Document window, as shown in Figure 2-8. You’ll also be able to see the effects of your optimization on the quality of the image. If you begin to see individual pixels, you’ve gone way too far.
6. Choose File➪Export to open the Export dialog box.
7. From the Save as Type drop-down menu, choose Images Only.
8. Name the document and then click Save.
If you’re optimizing several images that will be shown in a Flash slide show, give the images the same name and append them with _01, _02, _03, and so on. When you import the images into Flash, Flash recognizes that you are importing images that appear to be part of an image sequence and gives you the option to import them to consecutive frames.
Rounding up sound bites for your site
Sound is a staple at many Flash Web sites. Flash Web designers use sound for buttons and add soundtracks to their Flash productions. Back in the Jurassic period of Flash development, Flash shipped with a library of button sounds. But, like the Jurassic period, button sounds have gone the way of the dodo. Therefore, you’ll have to create your own or do some surfing on the Net to pick up some royalty-free sounds. You can also find royalty-free soundtracks at many of these sites. The easiest way to find sound for your Flash movies is to do a Google search. Listed here are a few sites where you can find royalty-free button sounds and soundtracks:
⻬Flash Kit Sound Loops(www.flashkit.com/loops): Here you can download a wide variety of free sound loops in various musical genres.
⻬Flash Kit Sounds(www.flashkit.com/soundfx): At this URL, you can download free sound effects that you can use for buttons and Flash games.
⻬Shockwave.com(www.shockwave-sound.com): This site features a wide array of reasonably priced sound loops that you can use in your Flash productions. You can preview sound loops prior to purchasing them.
⻬Soundrangers.com(www.soundrangers.com): Yet another site chock-full of a wide variety of reasonably priced, royalty-free sound loops. Loops can be previewed prior to purchase.
⻬Loopsound.com (www.loopsound.com): This site features a diverse collection of reasonably priced, royalty-free sound loops that can be previewed prior to purchase.
If you’re the real creative type and you have a bit of musical background, you can create your own Flash soundtracks and button sounds by using applica-tions like Sony Acid Music (Windows only) or Garage Band (Macintosh only). After you create a soundtrack for your production, save it as an MP3 file with a data rate of 128 Kbps. In Flash, you can optimize the soundtrack for the intended audience, a topic I discuss in Chapter 12. Figure 2-9 shows an Acid project under construction. With this application, you use royalty-free music samples to create your soundtrack. The software is quite sophisticated, enabling you to mix and match samples with different numbers of beats per measure. The software matches the beat of each sample to the project beat. The end result is a seamless sound loop that is perfect for a Flash soundtrack.
33
Adding vexing video
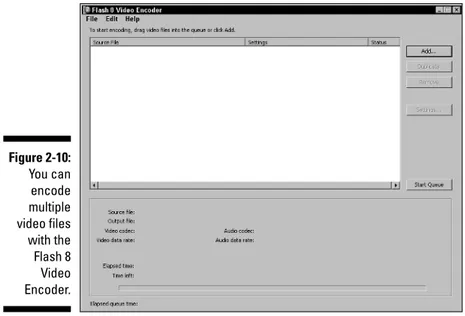
Video can be used to good effect at many Web sites. Fortunately for the Flash Web designer, video can be added fairly painlessly. And painless video is a good thing, especially if you’re creating a Flash Web site for a dentist. But I digress. . . . Flash 8 Professional ships with a gem known as the Flash 8 Video Encoder, an application that enables you to encode supported video into the *FLV (Flash Video) format. From within the application, you can compress video to suit the connection speed of your intended audience. And with the Flash 8 Video Encoder, you can process multiple files while you’re doing something more important, like catching up on your sleep or giving your cat a bath. To compress video using the Flash 8 Video Encoder:
1. Launch the Flash 8 Video Encoder.
The Flash 8 Video Encoder application appears, as shown in Figure 2-10.
2. Click the Add button.
The Open dialog box appears.
3. Navigate to the video files you want to encode, select them, and then click Open.
The video files appear in the Flash 8 Video Encoder window, showing the default settings, as shown in Figure 2-11.
At this stage in the encoding process, all files are selected, so you can apply the same settings to all files, or select an individual file and tailor the settings for that particular file. In most instances, you’ll be applying the same settings to all files because they’re all going in the same Web site.
If you’re creating alternate versions of the Web site for people who access the Internet with different equipment than your main target audi-ence, click the Duplicate button to create a duplicate of each file to which you can apply settings that are appropriate for the type of equip-ment used by the target audience of your alternate Web site.
Figure 2-10: You can encode multiple video files with the Flash 8 Video Encoder.
35
4. Click the Settings button.
The Flash Video Encoding Settings dialog box, shown in Figure 2-12, appears.
5. Choose the desired setting from the Encoding Profile drop-down list.
You can choose from Flash 7 and Flash 8 Player presets. You can choose from settings applicable for modem users, or choose low-, medium-, or high-quality video. The default medium-quality setting is good for view-ers who access the Internet with DSL modems. If your target audience accesses the Internet with high-speed cable modems, you can use the high-quality setting. Note that each setting has a different data rate,
which is the amount of data transmitted to users’ modems as measured in kilobytes per second. You can choose one of the defaults or modify a default by clicking the Show Advanced Settings button, as shown in the next step.
Figure 2-12: Choosing the applicable encoding settings for your target audience. Figure 2-11: How sweet it is to be encoded
6. Click the Show Advanced Settings button if you want to modify any default settings.
The Flash Video Encoding Settings dialog box reconfigures, as shown in Figure 2-13.
The advanced settings enable you to encode both video and audio, which is the default, or you can encode either one or the other by deselecting the applicable check box.
7. In the Encode Video section, set the following parameters:
•Video Codec:Click the down arrow and choose On2 VP6 (for the Flash 8 Player) or Sorenson Spark (for the Flash 7 Player). •Quality:Choose Low (150 kbps), Medium (400 kbps), High (700
kbps), or Custom. If you choose Custom, the Custom text field becomes available, which enables you to type the desired setting in kbps.
•Frame Rate:Accept the default Same As Source option or choose the desired frame rate from the drop-down menu.
The frame rate of the video must match the frame rate of the Flash movie in which the video plays.
•Resize Video:Select this check box to reveal the Width and Height fields. Then type the desired values in either field if you have the Maintain Aspect Ratio check box enabled. If the video you are resizing was captured with an NTSC video camera, the aspect ratio of the original video is configured for a TV screen, and the pixels
Figure 2-13: Specifying custom video settings.