11
g
Release 1 (11.1.1.5.0)
E16580-07Copyright © 2008, 2011, Oracle and/or its affiliates. All rights reserved. Primary Author: Vimmika Dinesh
Contributing Author: Aditi Dalia, Atturu Chandra Prasad Reddy, David DiFranco, Dennis Chin, Jeff Cunnigham, John Yoder, Mike Wallace, Scott Spieker, Sharon Fay, Viswanatha Basavalingappa, Ramya Chandramohan
This software and related documentation are provided under a license agreement containing restrictions on use and disclosure and are protected by intellectual property laws. Except as expressly permitted in your license agreement or allowed by law, you may not use, copy, reproduce, translate, broadcast, modify, license, transmit, distribute, exhibit, perform, publish, or display any part, in any form, or by any means. Reverse engineering, disassembly, or decompilation of this software, unless required by law for interoperability, is prohibited.
The information contained herein is subject to change without notice and is not warranted to be error-free. If you find any errors, please report them to us in writing.
If this software or related documentation is delivered to the U.S. Government or anyone licensing it on behalf of the U.S. Government, the following notice is applicable:
U.S. GOVERNMENT RIGHTS Programs, software, databases, and related documentation and technical data delivered to U.S. Government customers are "commercial computer software" or "commercial technical data" pursuant to the applicable Federal Acquisition Regulation and agency-specific supplemental regulations. As such, the use, duplication, disclosure, modification, and adaptation shall be subject to the restrictions and license terms set forth in the applicable Government contract, and, to the extent applicable by the terms of the Government contract, the additional rights set forth in FAR 52.227-19, Commercial Computer Software License (December 2007). Oracle USA, Inc., 500 Oracle Parkway, Redwood City, CA 94065.
This software is developed for general use in a variety of information management applications. It is not developed or intended for use in any inherently dangerous applications, including applications which may create a risk of personal injury. If you use this software in dangerous applications, then you shall be responsible to take all appropriate fail-safe, backup, redundancy, and other measures to ensure the safe use of this software. Oracle Corporation and its affiliates disclaim any liability for any damages caused by use of this software in dangerous applications.
Oracle is a registered trademark of Oracle Corporation and/or its affiliates. Other names may be trademarks of their respective owners.
Preface
... xviiAudience... xvii
Documentation Accessibility ... xvii
Related Documents ... xviii
Conventions ... xviii
1
Basic Configuration
1.7 Sessions... 1-26 1.7.1 Viewing Sessions ... 1-26 1.7.2 Deleting a Single Session ... 1-27 1.7.3 Deleting Multiple Session... 1-27
2
Customizing Oracle Enterprise Repository
2.1 Overview... 2-1 2.1.1 Accessing the Oracle Enterprise Repository Home Page ... 2-1 2.1.2 Customizing the Oracle Enterprise Repository Home Page ... 2-2 2.2 Rebranding Oracle Enterprise Repository ... 2-2 2.2.1 Start with CSS... 2-2 2.2.2 Customizing Skins ... 2-3 2.2.2.1 Choosing a Skin ... 2-3 2.2.2.2 Creating a Skin ... 2-3 2.2.2.3 Images ... 2-3 2.2.2.4 Activating Your Custom Skin... 2-4 2.2.2.5 Installing a Oracle-supplied Custom Skin in Oracle Enterprise Repository ... 2-4 2.2.2.6 Using the Directory Structure... 2-4 2.3 Role/Department-based Homepage Display... 2-5 2.3.1 Installation ... 2-6 2.4 Install Oracle Enterprise Repository Solution Packs ... 2-7
3
Configuring Oracle Enterprise Repository to use External Authentication
Tooling
3.1 LDAP/Active Directory... 3-1 3.1.1 Overview... 3-1 3.1.2 Enable LDAP Integration System Properties... 3-2 3.1.3 Modify LDAP/Active Directory Properties ... 3-3 3.1.4 Security Considerations ... 3-5 3.1.4.1 Use Case Sample Scenarios ... 3-6 3.1.5 LDAP Property Examples ... 3-7 3.2 eTrust Single Sign-On ... 3-8 3.2.1 Overview... 3-8 3.2.2 Configure Oracle Enterprise Repository For Use With Single Sign-On Authentication ..
3-8
3.2.2.1 Enable Single Sign-On Integration System Properties... 3-9 3.2.2.2 Using the Oracle Enterprise Repository SSO Integration with Basic Authentication
3-12
3.3 Container Managed Setup ... 3-19 3.3.1 Overview... 3-19 3.3.2 Configure the Container to Support Realm Authentication ... 3-19 3.3.3 Configure Oracle Enterprise Repository for Container Managed Authentication . 3-20 3.3.4 Modify the Web Application's Web.xml File to Allow for Container Authentication...
3-21
4
Configuring Advanced Role-based Access Control
4.8.3 Use Case 3: Establish a Federated Repository ... 4-37 4.8.3.3.3 Create the Custom Access Settings... 4-38 4.8.3.3.4 Validation Test... 4-41 4.8.4 Use Case 4: Manage the Asset Lifecycle... 4-42 4.8.4.1 Benefit... 4-42 4.8.4.2 Overview ... 4-43 4.8.4.2.1 Asset Lifecycle Stages ... 4-43 4.8.4.2.2 General Configuration... 4-44 4.8.4.2.3 Create the Roles ... 4-44 4.8.4.2.4 Create the Custom Access Settings... 4-44 4.8.4.3 Configuring the Use Case Solutions ... 4-49 4.8.4.3.1 Requirements Gathering Stage Solution ... 4-49 4.8.4.3.2 Design and Development Stage Solution ... 4-51 4.8.4.3.3 Beta Release Stage Solution... 4-51 4.8.4.3.4 Release Stage Solution ... 4-52 4.8.4.3.5 Scheduled for Retirement Stage Solution ... 4-52 4.8.4.3.6 Retired Stage Solution ... 4-52 4.8.4.4 Asset Lifecycle Management Solution Validation Tests... 4-52 4.8.5 Use Case 5: Limit Access to Source Code Files to Asset Production Teams ... 4-54 4.8.5.1 Benefit... 4-54 4.8.5.2 Overview ... 4-54 4.8.5.3 Solution ... 4-54 4.8.5.3.1 Create the Roles ... 4-54 4.8.5.3.2 Create the Customer Access Settings ... 4-54 4.8.5.3.3 Results ... 4-57 4.8.5.3.4 Validation Test... 4-58 4.8.6 Use Case 6: Grant Browse-only Repository Access to Specific Groups... 4-59 4.8.6.1 Benefit... 4-59 4.8.6.2 Overview ... 4-59 4.8.6.3 Solution ... 4-59 4.8.6.4 Validation Test ... 4-60
5
Password Encryption
6
Configuring and Using Automated Harvesting in Design-time and Runtime
Environments
6.3.7 Detecting Duplicate Artifacts... 6-38 6.3.8 Downloading Harvested Artifacts ... 6-39 6.3.9 Searching Harvested Assets ... 6-39 6.3.9.1 Using Consumption Method ... 6-39 6.3.9.2 Using Metadata... 6-40 6.3.10 Previewing of the Created Assets in Harvester ... 6-41 6.3.11 Best Practices ... 6-42 6.3.11.1 Recommended Privileges for Harvesting ... 6-42 6.3.11.2 Do Not Override the Namespace Parameter... 6-42 6.3.11.3 Namespaces in WSDL Files... 6-42 6.3.11.4 Harvesting Completed Work... 6-43 6.3.11.5 Harvesting and Maintenance Releases of XSD ... 6-43 6.3.11.6 Harvesting Metadata throughout the Asset Lifecycle ... 6-43 6.3.11.7 Downloading WSDL Artifacts... 6-44 6.3.11.8 Harvesting Retired Endpoints ... 6-44 6.3.11.9 Harvesting SOA Projects ... 6-44 6.3.11.10 Harvesting from Oracle JDeveloper 11g... 6-45 6.3.11.11 Harvesting a File in the Harvester Folder... 6-45 6.3.11.12 Running Harvester and Exchange Utility on the Same Computer ... 6-45 6.3.11.13 Harvesting Composite Service WSDL... 6-45 6.3.12 Known Issues ... 6-45 6.3.12.1 Asset Types Must be Present in the System ... 6-45 6.3.12.2 Two Versions of an Asset Type ... 6-45 6.3.12.3 Do Not Delete the Harvester-Specific Metadata Entries in a in a Harvested Asset ...
6-46
6.3.12.4 Supported Remote Server Types... 6-46 6.3.12.5 Using Incorrect Encrypted Password ... 6-46 6.3.12.6 View in Repository Option ... 6-47
7
Configuring Metrics
7.1 Introduction ... 7-1 7.2 Metrics Elements ... 7-1 7.2.1 Overview... 7-1 7.2.2 Adding a Reusable Metrics Tab... 7-2 7.3 Validate the Elements on the Asset Type ... 7-3 7.4 Running Queries Against the Database... 7-4 7.4.1 dbqueries... 7-5
9
Configuring Oracle Enterprise Repository Workflow
9.1 Overview... 9-1 9.1.1 Understanding the Registration Process ... 9-1 9.1.1.1 Automated Asset Registration Using Automated Workflows ... 9-3 9.1.1.2 Accepting a Submission... 9-3 9.1.1.3 Registering an Asset... 9-4 9.1.1.4 Completing the Tab Approval Process ... 9-10 9.1.1.5 Audit Log, Reviews, and Notes... 9-11 9.1.2 Installing Oracle Enterprise Repository Workflow into Oracle BPM 10.3 ... 9-12 9.1.2.1 Step 1: Requirements... 9-13 9.1.2.2 Step 2: Install OBPM and Apply Patch... 9-13 9.1.2.3 Step 3: Obtain the Oracle Enterprise Repository Workflow Installer ... 9-14 9.1.2.4 Step 4: Configure the build.properties File... 9-14 9.1.2.5 Step 5: Configure the setenv File ... 9-16 9.1.2.6 Step 6: Edit the workflow.xml File... 9-17 9.1.2.7 Step 7: Regenerate the workflow.xml File ... 9-17 9.1.2.8 Step 8: Encrypt the workflow.xml File ... 9-17 9.1.2.9 Step 9: Copy the JDBC jar(s)... 9-17 9.1.2.10 Step 10: Change Permissions ... 9-18 9.1.2.11 Step 11: Run the Setup Script ... 9-18 9.1.2.12 Step 12: Verify the Setup Script ... 9-18 9.2 Introduction to the Oracle Enterprise Repository Automated Workflows ... 9-19 9.2.1 Example "Community Flow" Use Case ... 9-19 9.2.1.1 Software Components... 9-20 9.2.1.1.1 Oracle Enterprise Repository Event Manager... 9-20 9.2.1.1.2 Subscription Manager... 9-20 9.2.1.1.3 JMS Server ... 9-20 9.2.1.1.4 Event Monitor ... 9-20 9.2.1.1.5 Oracle Business Process Management ... 9-20 9.2.1.2 Automated Workflows ... 9-20 9.2.1.3 Event Management Tools... 9-21 9.2.1.3.1 Web-based Process Administrator ... 9-21 9.2.1.3.2 Log Viewer ... 9-21 9.2.1.3.3 Email Notification Templates ... 9-21 9.2.1.3.4 Workflow Configuration Tools ... 9-21 9.2.1.3.5 Generating a New Config File ... 9-22 9.2.1.3.6 Refreshing an Existing Config File ... 9-22 9.2.1.3.7 Encrypting Config File Passwords ... 9-22 9.2.2 Getting Started with Automated Workflows ... 9-22 9.2.2.1 Steps to Configure the Oracle Enterprise Repository Event Manager ... 9-22 9.2.2.2 Use Cases ... 9-22 9.2.2.3 Configuring the Event Manager... 9-23 9.2.2.4 Triggering an Asset Event ... 9-24 9.2.2.5 Steps to Configure and Run the Oracle Business Process Management Process
9-48
9.5.4.1.7 Configuring a Community to Automatically Register an Asset ... 9-48 9.5.4.1.8 Configuring a Community to Have a Dedicated Registrar ... 9-48 9.5.4.2 Configuring Automated Acceptance and Automated Registration Flows... 9-48 9.5.4.2.1 Asset Type ... 9-48 9.5.4.2.2 Categorization Settings... 9-48 9.5.4.2.3 Submitter Role ... 9-49 9.5.4.2.4 Conflict Resolution and Precedence ... 9-49 9.5.5 Multi-tier Automatic Assignment Flows ... 9-49 9.5.5.1 Use Cases ... 9-49 9.5.5.2 Using an <alerid> for Tab Approvals... 9-50 9.5.5.3 Setting Up a Community for Multi-tier Tab Approval... 9-51 9.5.5.4 Setting Up an Asset Type for Multi-tier Tab Approval ... 9-51 9.5.6 Metadata Change Flows ... 9-52 9.5.6.1 Use Cases ... 9-52 9.5.6.2 Configuring Metadata Change Flows ... 9-53 9.5.6.2.1 Available Metadata Change Events/States... 9-53 9.5.6.2.2 Available Flows That Can Be Wired to Actions ... 9-54 9.5.6.2.3 Example Metadata Change Configuration... 9-55 9.5.6.2.4 Example Metadata Change Configuration That Checks for Metadata Value...
9-55
9.6.2.1 Enabling and Configuring an External JMS Server ... 9-67 9.6.2.2 Configuring JMS Message Header Properties ... 9-68 9.6.2.3 Miscellaneous JMS Properties ... 9-69 9.6.2.4 Configuring External JMS Jar Files ... 9-69 9.6.3 Configuring the Embedded ActiveMQ JMS Server to Use a Database ... 9-69 9.6.3.1 Configuring JMS Durable Subscribers for Web Service Endpoints ... 9-70 9.6.4 Configuring JMS Servers in an Oracle Enterprise Repository Cluster ... 9-70 9.6.4.1 Enabling JMS Clustering Mode ... 9-70 9.6.4.2 Configuring Embedded JMS Servers for Clustering ... 9-70 9.6.4.3 Configuring External JMS Servers for Clustering... 9-71 9.6.5 Configuring a JMS Provider In WebSphere 6.1.0.5... 9-71 9.7 Monitoring and Managing Events ... 9-74 9.7.4.1 Refreshing the Workflow Config File... 9-77 9.7.5 Encrypting Your Passwords... 9-78 9.8 Extending the Event Manager for Web Service Endpoints ... 9-79 9.8.1 Overview... 9-79 9.8.2 Developing a Web Service Endpoint ... 9-79 9.8.3 Web Service Operations... 9-80 9.8.3.1 Available Web Service Operations... 9-80 9.8.3.2 Selecting a Web Service Operation ... 9-81 9.8.3.3 Developing a Notifier Plug-in ... 9-82 9.8.4 Developing an Endpoint with an Incompatible Contract... 9-83
10
Configuring Oracle Enterprise Repository to Exchange Metadata with the
Oracle Service Registry
10.2.3.3 Setting the Repository Query... 10-6 10.2.3.3.1 Query by Name ... 10-6 10.2.3.3.2 Query by Registration Status... 10-6 10.2.3.3.3 Query by Categorizations ... 10-7 10.2.3.3.4 Query by Filters ... 10-7 10.2.3.4 Setting the Destination Registries ... 10-9 10.2.3.5 Setting the Registry Query ... 10-10 10.2.3.6 Setting the Source Registry ... 10-11 10.2.4 Configuring Oracle Enterprise Repository Categorizations in the UDDI Mappings File
10-11
10.2.5 Configuring the tModelKey UDDI Setting ... 10-11 10.2.6 Understanding the Oracle Registry Repository Exchange Utility’s Property File 10-15 10.3 Using the Oracle Enterprise Repository Exchange Utility ... 10-16 10.3.1 Running the Oracle Registry Repository Exchange Utility ... 10-17 10.3.1.1 Invoking the Oracle Registry Repository Exchange Utility Using Workflows ...
10-18
10.3.1.1.1 Prerequisities... 10-18 10.3.1.1.2 Synchronizing Using Timer Based Workflows... 10-18 10.3.1.1.3 Synchronizing When Events are Triggered... 10-19 10.3.1.1.4 Example Use Cases ... 10-19 10.3.2 How the Exchanged Metadata Is Synchronized ... 10-20 10.3.2.1 Synchronizing the Metadata Published from Oracle Enterprise Repository to
Oracle Service Registry 10-20
10.3.2.1.1 Business Entities ... 10-20 10.3.2.1.2 Service Keys ... 10-21 10.3.2.1.3 Endpoint ... 10-21 10.3.2.1.4 Categorizations ... 10-22 10.3.2.1.5 Registration and Active Status ... 10-22 10.3.2.1.6 Sample Flow of Metadata from Oracle Enterprise Repository to Oracle Service
Registry 10-24
10.3.2.2 Synchronizing the Metadata from Oracle Service Registry to Oracle Enterprise Repository 10-24
10.3.2.2.1 Business Entities ... 10-25 10.3.2.2.2 Endpoint ... 10-25 10.3.2.2.3 Categorizations ... 10-25 10.3.2.2.4 Sample Flow of Metadata from Oracle Service Registry to Oracle Enterprise
Repository 10-25
10.3.3 Searching for Oracle Service Registry Exchanged Metadata in Oracle Enterprise Repository 10-26
11.1 Overview... 11-1 11.2 Creating a Compliance Template Type ... 11-2 11.3 Creating a Compliance Template ... 11-5 11.4 Apply a Compliance Template to a Project... 11-6 11.5 Using Assets Associated with Compliance Templates (Prescribed Assets)... 11-7 11.6 Running a Project Compliance Report... 11-9
12
Configuring Assets in Progress
12.1 Overview... 12-1 12.2 Viewing Assets in Progress ... 12-2 12.3 Enabling Assets in Progress ... 12-3 12.4 Disabling Assets in Progress ... 12-4 12.5 Enabling Viewing of Assets in Progress Through an IDE ... 12-4
13
Configuring Automated Usage Detection
13.1 Overview... 13-1 13.5.1 Installation and Configuration ... 13-6 13.5.1.1 Enabling Harvesting of Unrecognized SFIDs ... 13-6 13.5.1.2 Object Model ... 13-7 13.5.1.3 Description of Sample Directory Crawler... 13-7 13.6 SFID Manager... 13-8 13.6.1 Enabling the SFID Manager ... 13-9 13.6.2 Using the SFID Manager... 13-9 13.7 Calculating the SFID Programmatically ... 13-11 13.8 SFID Limitations ... 13-11
14
Configuring Policy Management
15.1 Deploy Oracle Enterprise Repository Pre-configured BI Publisher Content... 15-1 15.2 Define Security Model... 15-3 15.2.1 Users ... 15-3 15.2.2 Roles and Permissions ... 15-3 15.3 Configuring the Oracle Enterprise Repository JDBC Data Source... 15-3 15.4 Configuring the BI Publisher Server - Cache Expiration ... 15-5 15.5 Validating the Installation and Configuration of BI Publisher ... 15-5 15.6 Configuring the Oracle Enterprise Repository System Settings to Enable Reporting.. 15-6 15.7 Configuring the Oracle Enterprise Repository System Settings to Allow Authenication
Proxying 15-7
16
System Settings Overview
16.5.3.9 Guest Login Settings ... 16-47 16.5.4 Open API Settings... 16-47 16.5.4.1 Open API ... 16-48 16.5.5 External Integration Settings... 16-48 16.5.5.1 UDDI ... 16-49 16.5.5.2 File Stores... 16-49 16.5.5.3 Rational ClearCase ... 16-50 16.5.5.4 Eventing ... 16-50 16.5.6 Import / Export and Introspection Settings ... 16-51 16.5.6.1 Import / Export ... 16-51 16.5.6.2 WSDL and XSD... 16-52 16.6 Known Issues... 16-52 A.1 Customize the Oracle Enterprise Repository Help System ... A-1 A.1.1 Download the Help File... A-1 A.1.2 Configure the Custom Help URL Property ... A-1 A.2 Creating and Configuring an Upload Submission Directory... A-2 A.2.1 Asset Upload System Settings ... A-3 A.2.2 Creating and Configuring an Artifact Store ... A-5 A.2.3 Selecting a New Artifact Store ... A-7 A.3 Creating an Asset Audit Log... A-7 A.4 Plug-ins and Adapters ... A-7 A.5 Oracle Enterprise Repository Default Artifact Store Integration... A-8 A.6 Maintaining XSLT Templates for use with the Export-to-PDF Feature... A-10 A.6.1 Under Tomcat... A-10 A.6.2 Maintaining XSL:FO Templates for use with Oracle Enterprise Repository ... A-11 A.7 Support for UTF-8/Unicode Characters... A-13 A.8 Asset Type Inventory ... A-15 A.9.4 Elements Required to Exist on Asset Types... A-20 A.9.5 Elements Tied to Functionality ... A-20 A.9.6 Description of the Asset Type Catalog ... A-23 A.10 Harvester Properties Matrix... A-23
Oracle Fusion Middleware Configuration Guide for Oracle Enterprise Repository provides the information needed to configure various Oracle Enterprise Repository features to support your Governance initiative.
This guide covers the basic configuration information such as setting up departments, users, projects, roles, basic access settings, etc. It also covers more advanced topics such as configuring Oracle Enterprise Repository for external authorization, setting up advanced role-based access controls, configuring Oracle Enterprise Repository to harvest from design-time and runtime environments, tailoring Oracle Enterprise Repository's automated workflows and notifications, configuring Oracle Enterprise Repository to exchange metadata with the Oracle Service Registry, Prescriptive Reuse, assets in Progress, Automated Usage Detection, and Policy Management.
In addition, this guide provides an overview of all Oracle Enterprise Repository system settings, and a workbook that allows you to record the settings that are used by your organization.
Audience
This document is intended for individuals who are running the Governance initiative. These are the individuals who will determine the Governance practices and map those practices to the features offered in Oracle Enterprise Repository.
Documentation Accessibility
Our goal is to make Oracle products, services, and supporting documentation accessible to all users, including users that are disabled. To that end, our
documentation includes features that make information available to users of assistive technology. This documentation is available in HTML format, and contains markup to facilitate access by the disabled community. Accessibility standards will continue to evolve over time, and Oracle is actively engaged with other market-leading
technology vendors to address technical obstacles so that our documentation can be accessible to all of our customers. For more information, visit the Oracle Accessibility Program Web site at http://www.oracle.com/accessibility/.
Accessibility of Code Examples in Documentation
Screen readers may not always correctly read the code examples in this document. The conventions for writing code require that closing braces should appear on an
organizations that Oracle does not own or control. Oracle neither evaluates nor makes any representations regarding the accessibility of these Web sites.
Access to Oracle Support
Oracle customers have access to electronic support through My Oracle Support. For information, visit http://www.oracle.com/support/contact.html or visit
http://www.oracle.com/accessibility/support.html if you are hearing impaired.
Related Documents
For more information, see the following documents in the Oracle Enterprise Repository 11g Release 1 (11.1.1.5.0) documentation set:
■ Oracle Fusion Middleware Installation Guide for Oracle Enterprise Repository
■ Oracle Fusion Middleware Upgrade Guide for Oracle Enterprise Repository
■ Oracle Fusion Middleware User's Guide for Oracle Enterprise Repository
■ Oracle Fusion Middleware Integration Guide for Oracle Enterprise Repository
■ Oracle Fusion Middleware Quick Start Guide for Oracle Enterprise Repository
■ Oracle Fusion Middleware Release Notes for Microsoft Windows (32-Bit)
Conventions
The following text conventions are used in this document:
Convention Meaning
boldface Boldface type indicates graphical user interface elements associated with an action, or terms defined in text or the glossary.
italic Italic type indicates book titles, emphasis, or placeholder variables for which you supply particular values.
1
1
Basic Configuration
This chapter provides an overview of the basic configurations required to use Oracle Enterprise Repository.
This chapter contains the following sections:
■ Section 1.1, "Overview"
■ Section 1.2, "Departments"
■ Section 1.3, "Users"
■ Section 1.4, "Projects"
■ Section 1.5, "Roles"
■ Section 1.6, "Access Settings"
■ Section 1.7, "Sessions"
1.1 Overview
In Oracle Enterprise Repository, all users are assigned roles. Roles define the Oracle Enterprise Repository functionality that can be exercised by each user. In order for a user to access any files associated with assets in Oracle Enterprise Repository, the user must be assigned to a project.
Projects are the primary means of gathering metrics in Oracle Enterprise Repository. Oracle Enterprise Repository tracks assets produced by projects, as well as assets consumed by projects. Oracle Enterprise Repository users are assigned to projects, and when a user submits a new asset, they are prompted for the producing project.
Similarly, when a user wants to reuse an asset, they are prompted for the project on which the asset is reused. Both Users and Projects are assigned to Departments. This is convenient from a reporting standpoint, as organizations can then track the
production and consumption of reusable assets to a specific department.
Figure 1–1 Relationship Diagram
1.2 Departments
You need to set up or create departments before creating users and projects. This section contains the following topics:
■ Section 1.2.1, "Creating a New Department"
■ Section 1.2.2, "Editing Department Information"
1.2.1 Creating a New Department
To create a new department, perform the following steps in the Oracle Enterprise Repository Admin screen:
1. In the left panel, click Departments.
2. Click Create New. The Create New Department dialog is displayed.
3. Enter the appropriate information in each of the text boxes.
Figure 1–2 Create New Department Dialog
2. Click List All, or search for a particular department.
3. Select the department to be edited from the list in the right panel. The department's detail is displayed.
4. Click Edit in the department detail. The Edit Department dialog is displayed.
5. Update the text boxes as required.
6. When finished, click Save.
1.3 Users
This section describes the following topics:
■ Section 1.3.1, "Creating a New User"
■ Section 1.3.2, "Viewing User Information"
■ Section 1.3.3, "User Search"
■ Section 1.3.4, "Cloning a User"
■ Section 1.3.5, "Editing User Information"
1.3.1 Creating a New User
This procedure is performed on the Oracle Enterprise Repository Admin screen.
1. In the left panel, click Users.
2. Click Create New in the Users section. The Create New User dialog is displayed.
3. Enter the appropriate information in each of the text boxes in the Overview section, as shown in Figure 1–3.
Figure 1–3 Overview Section
4. Select Active in the Status list.
Figure 1–4 Roles Section
6. In the Departments section, assign the new user to departments by using the >> and << buttons to move items from the Available Departments column to the Selected Departments column, as shown in Figure 1–5.
Figure 1–5 Departments Section
7. When finished, click Save.
1.3.2 Viewing User Information
This procedure is performed on the Oracle Enterprise Repository Admin screen.
1. In the Users section, use Search or List All to locate the user(s) to be viewed.
Figure 1–6 List of Users
2. Select a user from the list. The user's information is displayed in the lower pane.
3. Click Hide/Display Search Results button to expand the User detail to fill the main pane.
4. Click the first button in Figure 1–6 to switch to the tabbed view of the User detail.
Figure 1–7 User Details Page
5. Click the first button in Figure 1–7 to switch back to the standard view of the User detail.
6. Click the second and third button in Figure 1–7 to scroll through the list of users.
1.3.3 User Search
This procedure is performed on the Oracle Enterprise Repository Admin screen.
1. Enter appropriate text in the Name text box.
2. Use the Department, Role, and Status lists as appropriate to narrow the search.
1.3.4 Cloning a User
Cloning a user provides an easy way for administrators to quickly duplicate user accounts.
This procedure is performed on the Oracle Enterprise Repository Admin screen.
1. In the Users section, use Search or List All to locate the user to be cloned.
2. Click the Clone button in the user detail.
The Clone User dialog is displayed. The Overview section is blank, but
information in the Roles and Departments sections duplicates that of the cloned user.
3. Enter the appropriate information in each of the text boxes in the Overview section.
4. If necessary, edit the information in the in the Roles and Departments sections by using the >> and << buttons to move items between the Available and Selected columns.
5. When finished, click Save.
1.3.5 Editing User Information
This procedure is performed on the Oracle Enterprise Repository Admin screen.
1. In the Users section, use Search or List All to locate the user(s) to be edited. The list of users opens in the main pane.
2. Select a user from the list. The user's information is displayed in the lower pane.
3. Click the Edit button in the user detail. The Edit User dialog is displayed (same form as the Create New User and Clone User dialogs).
4. Make changes as necessary in the Overview, Roles, and Departments sections.
5. When finished, click Save.
1.4 Projects
Projects are the primary means of gathering metrics in Oracle Enterprise Repository. Oracle Enterprise Repository tracks assets produced by projects, as well as assets consumed by projects. Oracle Enterprise Repository users are assigned to projects, and when a user submits a new asset, they are prompted for the producing project.
Likewise, when a user wants to reuse an asset, they are prompted for the project on which the asset is reused. This allows Oracle Enterprise Repository to generate reports on the reuse savings per project. It also allows Oracle Enterprise Repository to report on the savings generated by asset production teams. Projects are also hierarchical, which allows organizations to, for example, establish a program that may spawn many projects.
■ Section 1.4.3, "Editing a Project"
■ Section 1.4.4, "Reassigning Users/Usage"
■ Section 1.4.5, "Locating a Project"
■ Section 1.4.6, "Closing a Project"
■ Section 1.4.7, "Adding a Relationship to a Project"
1.4.1 Viewing Project Details
Project information may be displayed as a series of portlets or tabs:
Overview
Includes a project Description, and indicates the assigned Department, Start Date, Estimated Hours, and project Status.
Compliance Templates
Displays the Compliance Template(s) assigned to the project.
Figure 1–8 Compliance Templates Tab
Consumed Assets
Lists any assets used in (or under consideration for use in) the project.
Figure 1–9 Consumed Assets Tab
Click the Zoom icon next to any listed asset to display its Reported Asset Value.
■ Project members can view the Asset Usage Detail.
Figure 1–10 Reported Asset Value of Asset
Reported Asset Value represents the hours saved by reusing assets on their projects. This value is derived from either the Predicted Value, Consumer Value, or a
completely new value determined by the project leader. Only the project leader can set this value.
Produced Assets
Lists any assets produced by the project.
Figure 1–11 Produced Assets Tab
Users
Lists all users associated with the project, as well as each user's role on the project (leader/members). Project leaders have the ability to assign a Reported Asset Value value to assets consumed by the project.
Figure 1–12 Users Tab
Related Projects
Figure 1–13 Create New Project
2. Enter the appropriate information in the Name, Description, and Estimated Development Hours text boxes.
3. Click the ... button to open the calendar to select a Start Date.
4. Select a department from the Department list.
5. Select the appropriate status in the Status list. There are two options that you can select from - Open and Closed. An Open status indicates that the project is still open for changes. A Closed status would mean that the project is closed and is not open for changes.
6. If necessary, select Automatically Assign to New Users.
Figure 1–14 Add/Remove Users Dialog
8. Use Search or List All Users to display a list of users in the Search Results section. Use the Department list to filter search results.
9. Use the >> and << icons to move users between the Search Results, Project Leaders, and Selected Users sections.
10. Click OK. The assigned Project Leaders and Project Members appear in the Users section of the Create New Project dialog is displayed.
Figure 1–15 User Dialog
Figure 1–16 Overview Tab
1.4.3 Editing a Project
This procedure is performed in the Projects page.
1. Use Search or other means to locate the project to be edited.
2. Click Edit in the project detail.
3. Edit the project information as necessary. (See Section 1.4.2, "Creating a Project").
1.4.4 Reassigning Users/Usage
This procedure is performed in the Projects page.
1. Select the Users tab.
Figure 1–17 Users Tab
2. Click Reassign Users/Usage. The Reassign dialog is displayed.
3. Use the options to select the appropriate action.
4. Click Choose a New Project. The Search for a Project dialog is displayed.
Figure 1–18 Search for a Project
5. Use Search or List All Projects to display a list of projects.
6. Select the project to which the users and/or usages are to be reassigned.
7. Click OK.
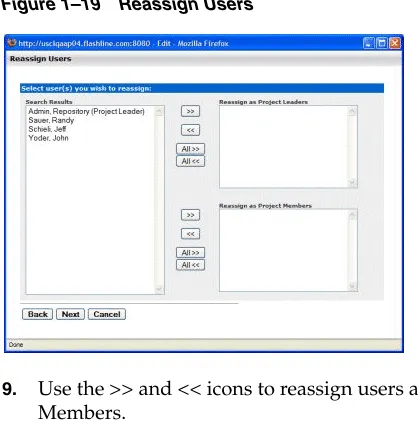
Figure 1–19 Reassign Users
9. Use the >> and << icons to reassign users as Project Leaders and/or Project Members.
10. Click Next. A confirmation message appears.
11. Click Done.
1.4.5 Locating a Project
This procedure is performed on the Projects page.
1. Enter a keyword or search term in the Name text box.
2. Use the Department and Status lists as necessary to filter the search.
3. Click Search. Search results are listed in the main pane.
1.4.6 Closing a Project
This procedure is performed on the Projects page.
1. Select the project to be closed. The project detail is displayed in the bottom frame.
2. Click Edit. The Edit Project dialog is displayed.
Figure 1–20 Edit Project Dialog
4. Click Save. If the project has consumed assets, the Update Usage Status dialog is displayed, as shown in Figure 1–21. The consumed assets are listed in this dialog, each with a Status list.
Figure 1–21 Update Status
5. Update the status of each consumed asset as necessary.
6. When the Update Usage Status pop-closes the view returns to the Edit Project dialog.
7. Click Save. The project is closed.
1.4.7 Adding a Relationship to a Project
The Project Relationships feature enables you to map the relationships between projects on a parent/child basis.
This procedure is performed on the Projects page.
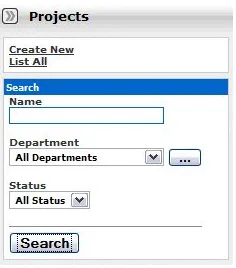
1. Click List All on the Projects page, as shown in Figure 1–22.
Figure 1–22 Projects Page
A list of projects appears in the top section of the main pane, as shown in
Figure 1–23.
Figure 1–23 List of Projects
2. Select the project to be edited. The Project Detail pane is displayed in the bottom section of the main pane, as shown in Figure 1–24.
Figure 1–24 Project Detail Pane
Figure 1–25 Edit Project Dialog
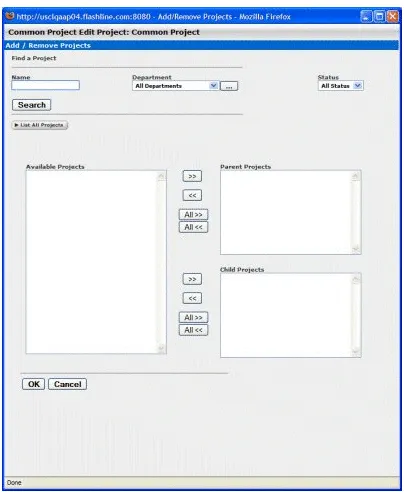
4. Click Edit in the Related Projects section of the Edit Projects dialog. The Add/Remove Projects dialog is displayed, as shown in Figure 1–26.
Figure 1–26 Add / Remove Projects
5. Click List All Projects. A list appears in the Available Projects window.
6. Select the project to be added and use the >> icon to move it to either the Parent Projects or the Child Projects category window, as appropriate. The project appears in the selected window.
Figure 1–27 Related Projects Section
8. Click OK to close the Edit Project dialog. The new project relationship appears in the Related Projects section of the Asset Detail, as shown in Figure 1–28.
Figure 1–28 Related Projects Section
Project relationship are also displayed in the Oracle Enterprise Repository Navigator.
1.5 Roles
Clicking the Roles link in the Oracle Enterprise Repository menu bar allows administrators to set up roles for an organization's various functions. Oracle Enterprise Repository access settings are established for each role, and each user is assigned a specific role based on his/her function within the organization.
Users assigned the admin role have unlimited access to all Oracle Enterprise Repository functions. By default, in either a new installation or a migration from a previous version, the user account identified as admin is assigned the admin role in order to facilitate initial installation and configuration. It is highly recommended that you limit the assignment of admin privileges to the original Oracle Enterprise Repository* user account and no more than one additional account. The various default roles established in Oracle Enterprise Repository offer a variety of privileges to satisfy the functions and responsibilities for any and all Oracle Enterprise Repository users. These roles may be customized to suit the particular needs of your organization.
■ Section 1.5.1, "User Role Descriptions"
■ Section 1.5.2, "Creating a New Role"
■ Section 1.5.3, "Editing a Role"
■ Section 1.5.4, "Deleting a Role"
1.5.1 User Role Descriptions
Anyone with an Oracle Enterprise Repository user name and password is considered to be a user. This role can be assigned as the default role for any new users at the time the user is created. All Oracle Enterprise Repository users can:
– View news about the company's reuse initiatives
– Locate, evaluate, and use/download assets
– View projects
– Generate reports
– Submit assets to the registrar
■ Access Administrator
The access administrator creates all Oracle Enterprise Repository users, and assigns permissions to them. The access administrator must be familiar with the functions of the Admin Tab. Typically, access administrators can:
– Create, view, and edit users and permissions
– Generate reports
■ Advance Submitter
The advanced submitter role is typically assigned to asset builders and harvesters. Asset builders focus on building the asset content base. They respond to
organization-wide asset needs as well as individual project needs. Harvesters study post-implementation projects for asset reuse potential. Typically, advanced submitters can:
– Locate, evaluate, and use/download assets
– View projects
– Generate reports
– Submit assets to the registrar
– Edit asset metadata prior to asset registration
■ Registrar
The registrar is responsible for the acceptance or rejection of any asset. There may be more than one person functioning as a repository registrar, depending on the functions addressed. Typically, registrars can::
– Locate, evaluate, and use/download assets
– View projects
– Generate reports
– Submit assets to the registrar
– Edit asset metadata prior to asset registration
– Accept assets for the registration process
– Approve tabs
– Register assets
– Edit access settings
■ Registrar Administrator
– Locate, evaluate, and use/download assets
– View projects
– Generate reports
– Submit assets to the registrar
– Edit asset metadata prior to asset registration
– Accept assets for the registration process
– Approve tabs
– Register assets
– Edit access settings
– Edit Artifact Stores and Types
■ Project Administrator
Oracle Enterprise Repository tracks asset use at the project level in order to maintain a history for maintenance purposes. Project administrators create projects and assign users to projects using the Projects tab. Project administrators can close projects, indicate which assets were deployed, review, validate, and optionally override the predicted and consumer-reported value of assets used in a project through the project-reported asset value user interface. Typically, project administrators can:
– Create, edit, and View projects
– Generate reports
■ System Administrator
The system administrator configures Oracle Enterprise Repository for use, including, possibly, installation as well as the post-installation configurations. The system administrator typically can:
– Enable and edit system settings
– Generate reports
(The system administrator role should not be assigned to general users.)
1.5.2 Creating a New Role
This procedure is performed on the Oracle Enterprise Repository Admin screen.
1. In the left panel, click Roles. The Roles section is displayed, as shown in
Figure 1–29 Roles Section
2. Click Create New. The Create New Role dialog is displayed, as shown in
Figure 1–30.
Figure 1–30 Create New Role Dialog
3. In Figure 1–30, enter a role name and description in the text fields in the Overview section.
4. If necessary, select the Automatically assign to new users? box.
5. Click the Edit Users in the Users section. The Add New Users dialog is displayed, as shown in Figure 1–31.
Figure 1–31 Add New Users Dialog
6. Use Search or click List All to locate users.
8. When finished, click Save.
To add access settings to the role, see Section 1.6.1, "Granting Permissions to a Role".
1.5.3 Editing a Role
This procedure is performed on the Oracle Enterprise Repository Admin screen.
1. In the left panel, click Roles. A list of roles is displayed in the main pane, as shown in Figure 1–32.
Figure 1–32 List of Roles
2. Use Search or browse the list to locate the Role to be edited.
3. Click the role to display its information in the lower pane.
4. Click the Edit button in the role detail (bottom frame). The Edit Role dialog is displayed, as shown in Figure 1–33.
Figure 1–33 Edit Role: User Dialog
1. In the left panel, click Roles. A list of roles is displayed in the main pane.
2. Use Search or browse the list to locate the role to be deleted.
3. Option 1:
■ In the list in the upper frame, place a check in the box next to each role to be
deleted.
■ Click Delete. 4. Option 2:
■ Select the role in the list in the upper pane to display its information in the
lower pane.
■ Click the Delete button in the role detail (lower frame). 5. Click OK in the delete confirmation.
1.6 Access Settings
Access Settings allow the administrator to assign permissions to each role. Access settings identify the functions and responsibilities of a role, and determine each role's level of access to assets and asset management features in Oracle Enterprise
Repository.
System safeguards prevent an administrator from inadvertently modifying
permissions in such a way that would prevent his/her subsequent access to Access Settings.
■ Basic Access Settings (BAS)
Control the access to assets in Oracle Enterprise Repository across the board, based on the roles to which users are assigned. Access to Oracle Enterprise Repository tools, such as the Asset Editor or the Type Manager, is similarly controlled. Basic Access Settings establish access across the system. For example, permission to view assets applies to all assets; as does permission to
Use/Download assets.
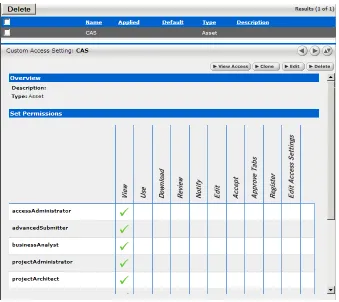
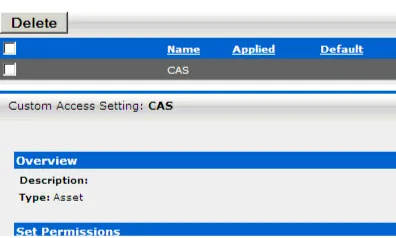
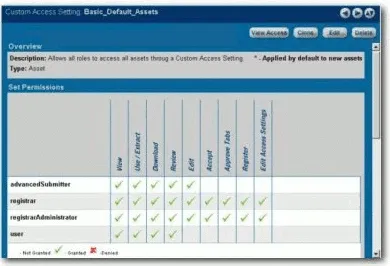
■ Custom Access Settings (CAS)
Establish Advanced Role-based Access Control to restrict access to specific assets or groups of assets in Oracle Enterprise Repository to specific user roles.
■ Section 1.6.1, "Granting Permissions to a Role"
■ Section 1.6.2, "Editing Permissions"
■ Section 1.6.3, "Verifying User Permissions"
■ Section 1.6.4, "Security Considerations"
1.6.1 Granting Permissions to a Role
This procedure is performed on the Oracle Enterprise Repository Admin screen.
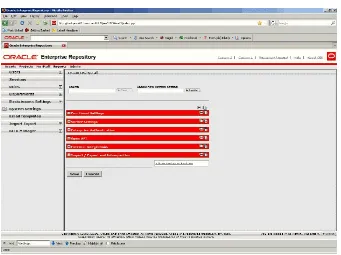
1. In the left panel, click Basic Access Settings.
2. Select the appropriate grouping from the list in the Basic Access Settings section.
Figure 1–34 Basic Access Settings
The selected grouping's access settings are displayed in the main pane.
Figure 1–35 Set Permissions
3. Click the Edit button (upper right corner of the main pane.) The Edit Basic Access Settings for:... dialog is displayed.
Figure 1–36 Set Permissions
Roles are listed on the left; Permissions are listed along the top.
4. Select the appropriate option to determine which roles are displayed.
5. Select the role to which permissions are to be granted.
6. Use the check boxes to assign the appropriate permission.
■ One click on an empty box adds a check mark (Granted)
■ A second click adds an X (Denied).
■ A third click clears the box (Not Granted).
7. When finished, click Save.
1.6.2 Editing Permissions
See: Section 1.6.1, "Granting Permissions to a Role"
1.6.3 Verifying User Permissions
This procedure is performed on the Oracle Enterprise Repository Admin screen.
1. In the left panel, click Basic Access Settings.
2. Select the appropriate grouping from the list in the Basic Access Settings section.
The selected grouping's access settings are displayed in the main pane.
3. Click the View Access button (upper right corner of the main pane). A message dialog is displayed.
Figure 1–38 View Access for Basic Access Settings for Assets
4. Click Configure. The Search / Filter Users and Access Settings dialog is displayed.
Figure 1–39 Search / Filter Users and Access Settings
6. Use the >> button to move user(s) from the Available Users column to the Selected Users column.
7. Click OK. The selected user's access settings are displayed.
Figure 1–40 User Access Settings
8. If multiple users are selected, clicking the > icon next to a user's name displays information specific to that user.
9. When finished, click Close.
1.6.4 Security Considerations
Role-based Access Control (RBAC) allows Oracle Enterprise Repository to track asset usage and production on a by-user basis and personalizes the presentation of assets, limiting visibility to designated portions of Oracle Enterprise Repository. However, Role-based Access Control is not intended to provide security for asset metadata, nor is it intended to supplement the security of underlying asset repositories.
Oracle Enterprise Repository access settings provide no additional security for otherwise unsecured assets or data. For maximum security, asset metadata should be managed in a manner that prevents access to the metadata via an unsecured
repository. Confidential information should be embedded in the asset's payload, or attached as documentation files and hosted in a secure repository.
If you choose to circumvent an authentication and permission challenge from the underlying asset repository, you do so at your own risk.
The following actions also have security implications:
■ Configuring SCM systems for access via a single Oracle Enterprise Repository user
account
■ Allowing system access by unapproved users
■ Creating guest account logins
– Guest accounts are strictly forbidden under the Oracle Enterprise Repository license.
Any of these actions has the potential to open the contents of Oracle Enterprise Repository to anyone with network access to Oracle Enterprise Repository.
1.6.4.1 Access Setting and the Asset Editor
the invisible asset is inaccessible to the users in question, the relationship cannot be restored by those users.
1.6.4.2 Permissions
Permissions may be:
■ Granted (Permission is explicitly granted)
■ Denied (Permission is explicitly denied)
■ Not Granted (Permission is not explicitly granted nor denied.)
The table below identifies permissions that may be managed within Basic Access Settings.
Access Definitions
Assets: Tools regulated: Oracle Enterprise Repository Asset screen, Asset Editor, Type Manager.
Access: Tools regulated: Oracle Enterprise Repository Admin screen: Users, Sessions, Roles, Departments, File Stores, Basic Access Settings, Custom Access Settings
Permission Description
View Assets may be viewed in Oracle Enterprise Repository.
Use Displays/enables the Use - Download button in Oracle Enterprise Repository.
Download Asset files may be downloaded. Provides visibility to file links after pressing the Use - Download button.
Review Reviewing assets using Oracle Enterprise Repository.
Edit Editing assets in the Asset Editor.
Accept Accepting assets. This button, in the Asset Editor, moves assets from the Submitted -- Pending Review to the Submitted -- Under Review queue.
Approve Tabs Approving metadata for assets. This button is available at the bottom of each tab in the Asset Editor display of each asset. Approving a tab logs the name of the approver and the date in the metadata, moves the asset out of the Submitted - Under Review queue for that tab, and changes the tab's text label to green.
Register Registering assets. This permission providers the user with the ability to register all assets in the Asset Editor.
Edit Access Settings Applicable only with Custom Access Settings. Provides the ability to assign Custom Access Settings to assets and files.
Create/Submit Gives a user the ability to submit assets through or create new assets through the Asset Editor.
Launch Asset Editor Gives a user the ability to open the Asset Editor tool. One must use this tool to edit and register assets.
Edit Artifact Store Gives a user the ability to create and edit artifact stores (through the Asset Editor).
Edit Types Gives a user the ability to configure asset type/compliance template metadata. Requires the Launch Asset Editor permission.
Notify Determines if the user is allowed to send an ad-hoc email to users.
Projects: Tools regulated: Oracle Enterprise Repository Projects screen
Policies: Tools regulated: Oracle Enterprise Repository Asset screen
Reports: Tools regulated: Oracle Enterprise Repository Reports screen
System Administration: Tools regulated: Oracle Enterprise Repository Admin screen: System Settings, Email Templates.
1.7 Sessions
Sessions allows the administrator to see which users are logged in to Oracle Enterprise Repository and, if necessary, shut down a user session.
■ Section 1.7.1, "Viewing Sessions"
■ Section 1.7.2, "Deleting a Single Session"
■ Section 1.7.3, "Deleting Multiple Session" Permission Description
View Viewing entries in the sections noted above.
Edit Editing entries in the sections noted above.
Create Creating users, roles, departments, file stores, and custom access settings.
Delete Deleting sessions, roles, and custom access settings.
Permission Description
View Viewing projects on the Projects page.
Edit Editing projects on the Projects page.
Create Creating projects on the Projects page.
Apply Template Apply a compliance template to a project.
Permission Description
Apply Policy Allows user to apply a policy to other assets.
Permission Description
View Viewing reports.
Permission Description
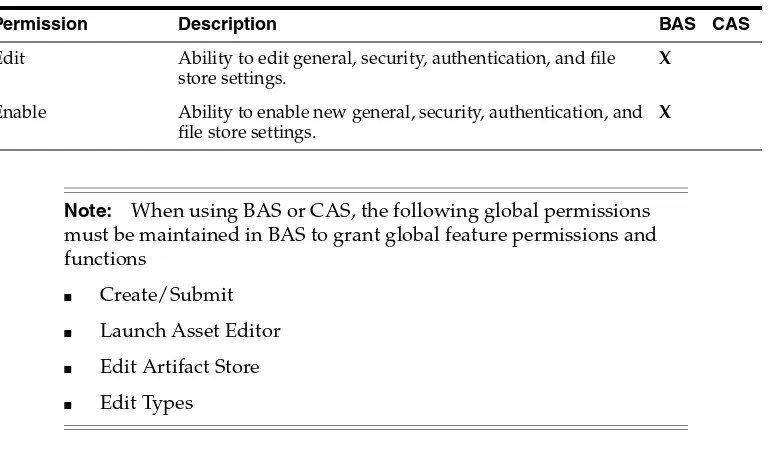
Edit Ability to edit general, security, authentication, and file store settings.
Figure 1–41 Sessions Pane
1.7.2 Deleting a Single Session
1. Select the session to be deleted from the list in the main pane. The session's detail opens in the bottom frame.
2. Click the Delete button in the session detail. A confirmation dialog is displayed.
3. Click OK. The session is deleted.
1.7.3 Deleting Multiple Session
1. In the list of session in the main pane, place a checkmark next to each session to be deleted. (Place a checkmark in the check box at the top of the column to select all listed sessions.)
2. Click the Delete button in the session detail. A confirmation dialog is displayed.
3. Click OK. The session is deleted.
2
2
Customizing Oracle Enterprise Repository
This chapter provides information about customizing Oracle Enterprise Repository for your organization.
This chapter contains the following sections:
■ Section 2.1, "Overview"
■ Section 2.2, "Rebranding Oracle Enterprise Repository"
■ Section 2.3, "Role/Department-based Homepage Display"
■ Section 2.4, "Install Oracle Enterprise Repository Solution Packs"
2.1 Overview
Organizations can customize the look and feel of Oracle Enterprise Repository. The Oracle Enterprise Repository color palette can be modified. In addition, the Oracle Enterprise Repository home page can be customized by role or by department. This allows organizations to promote governance and specific assets to a subset of Oracle Enterprise Repository users.
You can access the Oracle Enterprise Repository homepage and customize it with the your company logo and company specific information. This section contains the following topics:
■ Section 2.1.1, "Accessing the Oracle Enterprise Repository Home Page"
■ Section 2.1.2, "Customizing the Oracle Enterprise Repository Home Page"
2.1.1 Accessing the Oracle Enterprise Repository Home Page
To access the Oracle Enterprise Repository home page, perform the following steps:
1. Log in to http://<host>:<port>/<oer_instance_name> where you have installed Oracle Enterprise Repository. Alternatively, you can also log in to
http://<host>:<port>:/<oer-app-name>.
2. On the login screen, enter the appropriate information in the Username and Password boxes.
3. Click Login. The Login Status dialog displays a welcome message that includes the date and time of your login.
4. In the Login Stats dialog, click Close.
The Oracle Enterprise Repository home page is displayed.
2.1.2 Customizing the Oracle Enterprise Repository Home Page
To customize the Oracle Enterprise Repository home page with the your company logo and company specific information, perform the following steps:
1. Log into the Oracle Enterprise Repository home page.
2. Set the cmee.enterprisetab.homepage setting to any Web site of your choice. By default, this system setting is set to http://localhost:8080/oer/custom/home.jsp.
3. Alternatively, you can also create a Web page and add it to the Custom directory in the Oracle Enterprise Repository installation. The Custom directory path depends on the application server that Oracle Enterprise Repository is installed on. For example, in Tomcat, the custom directory is located in webapps/<app-name>/custom.
For more information about the Oracle Enterprise Repository home page, see Oracle Fusion Middleware User's Guide for Oracle Enterprise Repository.
2.2 Rebranding Oracle Enterprise Repository
This section describes how to rebrand Oracle Enterprise Repository and how to customize skins in Oracle Enterprise Repository. It contains the following topics:
■ Section 2.2.1, "Start with CSS"
■ Section 2.2.2, "Customizing Skins"
2.2.1 Start with CSS
Oracle Enterprise Repository uses CSS (cascading style sheets) that can be edited to control colors and other visual aspects of the application. Oracle Enterprise Repository is built on a mostly-neutral color palette and is branded around a single color. You can edit the color and type faces from the CSS, as shown in Figure 2–1.
Figure 2–1 Cascading Style Sheets
Oracle Enterprise Repository ships with the following skins:
■ Blue -- #0066CC
■ Grey -- #EEEEEE
2.2.2 Customizing Skins
This section describes how you can customize the skin in Oracle Enterprise Repository. It contains the following topics:
■ Section 2.2.2.1, "Choosing a Skin"
■ Section 2.2.2.2, "Creating a Skin"
■ Section 2.2.2.3, "Images"
■ Section 2.2.2.4, "Activating Your Custom Skin"
■ Section 2.2.2.5, "Installing a Oracle-supplied Custom Skin in Oracle Enterprise Repository"
■ Section 2.2.2.6, "Using the Directory Structure"
2.2.2.1 Choosing a Skin
Oracle Enterprise Repository ships with the Oracle skin as the default, but you can change the active skin. The file that controls the skin is the
WEB-INF/classes/skin.properties file. In the skin.properties file, you can change the skin.name.org property to either "green", "blue", or "neutral" for the skin you want to use and restart the server, then new color palette for the application is displayed.
2.2.2.2 Creating a Skin
If you want to create your own custom skin for Oracle Enterprise Repository, you must create a new folder for the skin and add it to the skins folder. A good way to get started is to copy an existing skin folder and rename it. Oracle has designed the interface of Oracle Enterprise Repository around a single color. A recommended best-practice is for a new skin’s color palette to be in a similar, mid-tonal range as the default palettes shipped with Oracle Enterprise Repository.
To update the CSS with your new color, do a search and replace on the hex number of the color you want to replace. For instance, if you copied the Blue skin, replace 0066CC with the new color. Do this for the settings.css and style.css files. The
following CSS files are located in the <Oracle_home>/ user_projects\applications\base_ domain\applications\oer_11.1.1.4.0\oer-web\skins directory:
■ settings.css
■ style.css
■ tabs.css (ignore this file)
■ tree.css (ignore this file)
2.2.2.3 Images
You can complete rebranding by updating the default images. The images are stored in two different places, but the paths look the same. As a best-practice, your new images should be the same size (width and height) as the images they replace. The following images are located in the <Oracle_home>\user_projects\applications\base_
domain\applications\oer_11.1.1.4.0\oer-web\skins\blue\images\menu directory:
■ smalllogo.gif (271 X 21)
■ oracleicon.gif (68 X 51)
■ logo.gif (414 X 28)
■ menuLogo.jpg (423 X 54)
■ login_splash.jpg (338 X 508)
This location on "skins" folder has all the color skins including default oracle. The folder also has all the .css and other folders.
2.2.2.4 Activating Your Custom Skin
After completing the previous steps, you should have a custom skin that looks much like one of default skins in the skins folder. The final step is to create a new
skin.properties file for your new skin. This is accomplished by copying and editing an existing skin.properties file. There are two items in the properties file that need to be edited: the name and the color values.
■ In the line skin.name.org=blue, replace blue with the name of the new skin.
■ Replace any hexadecimal color values with the values for the colors in the new
skin's palette.
Once these changes are made, the new skin is activated by restarting the server.
2.2.2.5 Installing a Oracle-supplied Custom Skin in Oracle Enterprise Repository
To install a Oracle-supplied Custom Skin:
1. Obtain the custom skin ZIP file from OTN.
2. Extract the contents of the ZIP file into a temporary directory. Be sure to retain the directory paths for each of the files within the ZIP file.
3. Make a backup copy of the existing Oracle Enterprise Repository <Oracle_ home>\user_projects\applications\base_domain\applications\oer_
11.1.1.4.0\oer-app\WEB-INF\classes\skin.properties file.
4. Copy the new skin.properties file from the custom skin ZIP archive to the Oracle Enterprise Repository <Oracle_home>\user_projects\applications\base_ domain\applications\oer_11.1.1.4.0\oer-app\WEB-INF\classes directory.
5. Replace the existing Oracle Enterprise Repository <Oracle_home>\user_ projects\applications\base_domain\applications\oer_
11.1.1.4.0\oer-app\WEB-INF\classes\skin.properties file with new file.
6. Move the extracted custom skin directory containing the images and CSS files into the <Oracle_home>/ user_projects\applications\base_domain\applications\oer_
11.1.1.4.0\oer-web\skins directory. The skin.properties file points to this directory to find the skin resources.
7. Restart the application server to apply the changes.
2.2.2.6 Using the Directory Structure
■ "Image"
Creating a New Skin
To create a new skin:
1. Create a your_skins_folder under /skins.
2. Change CSS and images as needed.
3. Edit the skins.properties file so the entry skins.org.name reflects your_skins_ folder.
4. Restart the application server.
You must follow the naming conventions as shown in the example below:
/skins/your_skins/folder/style.css /skins/your_skins/folder/images/logo.gif
/skins/your_skins/folder/buttons/all_the_buttons /skins/your_skins/folder/icons/the_other_icons
Using the Custom Tag Library
A skintags custom tag library is used to point CSS and image references to the proper
/skins folder. Currently, there are two skin tags: css and image. Existing JSPs have been updated. Any new JSPs must use the skintags library.
Using the Skintags Library Tags
To use any of the skin tags, add the following to the JSP:
<%@ taglib uri="/skintags" prefix="skin" %>
(The prefix can be anything you like because it is a reference within the JSP only).
CSS
Tags for cascading style sheets resemble the following example:
<skin:css element='the_relative_path_to_the_style_sheet'/>
To use it within a stylesheet:
<LINK HREF="" REL="stylesheet" TYPE="text/css">
Image
An image tag resembles the following example:
<skin:image element='the_relative_path_to_the_image'/>
The example below illustrates the use of an image tag within an HTML IMG tag:
<IMG SRC="" WIDTH="182" HEIGHT="32" BORDER="0" ALT="Geneva">
(where the relative_path starts from the skin folder (as defined in the
skin.properties file.)
2.3 Role/Department-based Homepage Display
This feature displays a specific homepage based on user role or department assignment. This section contains the following topic:
2.3.1 Installation
You can customize the Oracle Enterprise Repository homepage by role or by department. Perform the following steps:
1. Create a file named homepages.xml. See Example 2–1.
2. Add the homepages.xml file to the application classpath. The Oracle Enterprise Repository application's WEB-INF/classes directory is recommended.
3. Set the Homepage property cmee.enterprisetab.homepage to
http://SERVER/APP/custom/autoselect.jsp, where SERVER is the name of the server and APP is the context name of the Oracle Enterprise Repository Web application.
Homepage selection is defined by the contents of the homepages.xml file.
Example 2–1 Example homepages.xml File
The following provides an example of the contents of a homepages.xml file:
1 <HomepageSelector>
Note the following line numbers:
■ Lines 2:
– Sets the value for criteria. Valid values are
* roles
* departments
■ Lines 3-6:
– The option value is indicated by the name of the role or department used for selection.
– The node value is a relative path or absolute path to the page to which the user is redirected. The path for a home page hosted on the Oracle Enterprise Repository application server is relative to the custom/autoselect.jsp
file. In the above example, the architect.jsp file is also located in the custom directory.
– Order is important. Users with multiple roles or memberships in multiple departments are directed to the first matching selection.
■ Line 7
2.4 Install Oracle Enterprise Repository Solution Packs
This section describes the install instructions for the base data pack and harvester solution pack.
Base Data Pack
Base data pack is installed as part of the Oracle Enterprise Repository database installation. The Base data is not available by any other method. It is not delivered during any upgrades from one version of Oracle Enterprise Repository to the next.
The asset types delivered as part of Base Data are largely considered templates. The creation of a new asset type originates by cloning something that already exists. It is recommended that two best practices are applied to these asset types.
1. The base data asset types must not be deleted until at least one asset type is created, which is specific to the new Oracle Enterprise Repository application.
2. If enhancements are desired to a base asset type, it is recommended to clone that base asset type, consider the clone to be the real type for all future operations, and inactivate the base asset type to avoid confusion.
Harvester Solution Pack
The Harvester is available in 11.1.1.x.x-OER-Harvester-Solution-Pack.zip, which is bundled with the Oracle Enterprise Repository 11g installation.
The installation of the Harvester Solution Pack requires use of the Import /Export tool. This tool is available from the Admin tab of Oracle Enterprise Repository in the Import Export option. The asset types delivered as part of the Harvester Solution Pack are required by the Harvester tool.
For information about the Import/Export tool, see the Import/Export Tool chapter in
3
3
Configuring Oracle Enterprise Repository to
use External Authentication Tooling
This chapter describes how to authenticate Oracle Enterprise Repository using the external authentication tools.
This chapter contains the following sections:
■ Section 3.1, "LDAP/Active Directory"
■ Section 3.2, "eTrust Single Sign-On"
■ Section 3.3, "Container Managed Setup"
3.1 LDAP/Active Directory
This section describes how to use LDAP/Active Directory to authenticate the users in Oracle Enterprise Repository.
This section contains the following topics:
■ Section 3.1.1, "Overview"
■ Section 3.1.2, "Enable LDAP Integration System Properties"
■ Section 3.1.3, "Modify LDAP/Active Directory Properties"
■ Section 3.1.4, "Security Considerations"
■ Section 3.1.5, "LDAP Property Examples"
3.1.1 Overview
When utilizing LDAP / Active Directory (AD) to authenticate users, some
consideration must be given to the user's department and role configurations prior to the utilization of LDAP / Active Directory server. All users are authenticated through LDAP/AD once the integration is enabled; it is essential to have at least one
admin-level user account created within the Oracle Enterprise Repository database that matches the username from LDAP/AD. This user account should be assigned the admin role so that administrative functions within Oracle Enterprise Repository can still be performed when LDAP/AD is enabled.
If role synchronization is enabled from LDAP/AD, at least one user account should be assigned an administrative-level role. LDAP roles should be created and appropriate Oracle Enterprise Repository permissions assigned within Oracle Enterprise