•
•
•
•
•
• • It’s Mac-tacular— get to know what’s so special about Macs,
why they’re less likely to crash and burn than PCs, and how their versatility has oodles to offer
• Pick your apple— compare the different desktop and laptop models to choose your perfect match
• Get to the core— power on, navigate the desktop and menus, master the mouse, and connect to peripherals
• Live the iLife— take a tour of the iTunes jukebox, find out how to manage your music collection, get all your stuff in the Cloud, and download books, podcasts, videos, and more
• Customize and organize— make friends with OS X, manage files and folders, and create and print documents
• Make movies— capture footage, get it onto your Mac, make sense of postproduction, and share your iMovies with friends
M
ac
s
n
Edward C. Baig
Personal Tech columnist for
USA Today
Learn to:
•
Set up your Mac®, personalize the desktop,
and navigate with Mission Control
•
Browse the Web, keep in touch via
e-mail, and make FaceTime® calls
•
Get the most from OS X® and create
cool projects with iLife®
•
Set up a network and keep your
Mac safe
Start with
FREE
Cheat Sheets
Cheat Sheets include
• Checklists
• Charts
• Common Instructions
• And Other Good Stuff!
Get Smart at Dummies.com
Dummies.com makes your life easier with 1,000s
of answers on everything from removing wallpaper
to using the latest version of Windows.
Check out our
• Videos
• Illustrated Articles
• Step-by-Step Instructions
Plus, each month you can win valuable prizes by entering
our Dummies.com sweepstakes. *
Want a weekly dose of Dummies? Sign up for Newsletters on
• Digital Photography
• Microsoft Windows & Office
• Personal Finance & Investing
• Health & Wellness
• Computing, iPods & Cell Phones
• eBay
• Internet
• Food, Home & Garden
Find out “HOW” at Dummies.com
*Sweepstakes not currently available in all countries; visit Dummies.com for official rules.
To access the Cheat Sheet created specifically for this book, go to
www.dummies.com/cheatsheet/macs
by Edward C. Baig
USA TODAY Personal Technology columnist
Macs
Copyright © 2014 by John Wiley & Sons, Inc., Hoboken, New Jersey Published simultaneously in Canada
No part of this publication may be reproduced, stored in a retrieval system or transmitted in any form or by any means, electronic, mechanical, photocopying, recording, scanning or otherwise, except as permit-ted under Sections 107 or 108 of the 1976 Unipermit-ted States Copyright Act, without the prior written permis-sion of the Publisher. Requests to the Publisher for permispermis-sion should be addressed to the Permispermis-sions Department, John Wiley & Sons, Inc., 111 River Street, Hoboken, NJ 07030, (201) 748-6011, fax (201) 748-6008, or online at http://www.wiley.com/go/permissions.
Trademarks: Wiley, For Dummies, the Dummies Man logo, Dummies.com, Making Everything Easier, and related trade dress are trademarks or registered trademarks of John Wiley & Sons, Inc. and may not be used without written permission. All other trademarks are the property of their respective owners. John Wiley & Sons, Inc. is not associated with any product or vendor mentioned in this book.
LIMIT OF LIABILITY/DISCLAIMER OF WARRANTY: THE PUBLISHER AND THE AUTHOR MAKE NO REPRESENTATIONS OR WARRANTIES WITH RESPECT TO THE ACCURACY OR COMPLETENESS OF THE CONTENTS OF THIS WORK AND SPECIFICALLY DISCLAIM ALL WARRANTIES, INCLUDING WITHOUT LIMITATION WARRANTIES OF FITNESS FOR A PARTICULAR PURPOSE. NO WARRANTY MAY BE CREATED OR EXTENDED BY SALES OR PROMOTIONAL MATERIALS. THE ADVICE AND STRATEGIES CONTAINED HEREIN MAY NOT BE SUITABLE FOR EVERY SITUATION. THIS WORK IS SOLD WITH THE UNDERSTANDING THAT THE PUBLISHER IS NOT ENGAGED IN RENDERING LEGAL, ACCOUNTING, OR OTHER PROFESSIONAL SERVICES. IF PROFESSIONAL ASSISTANCE IS REQUIRED, THE SERVICES OF A COMPETENT PROFESSIONAL PERSON SHOULD BE SOUGHT. NEITHER THE PUBLISHER NOR THE AUTHOR SHALL BE LIABLE FOR DAMAGES ARISING HEREFROM. THE FACT THAT AN ORGANIZATION OR WEBSITE IS REFERRED TO IN THIS WORK AS A CITATION AND/OR A POTENTIAL SOURCE OF FURTHER INFORMATION DOES NOT MEAN THAT THE AUTHOR OR THE PUBLISHER ENDORSES THE INFORMATION THE ORGANIZATION OR WEBSITE MAY PROVIDE OR RECOMMENDATIONS IT MAY MAKE. FURTHER, READERS SHOULD BE AWARE THAT INTERNET WEBSITES LISTED IN THIS WORK MAY HAVE CHANGED OR DISAPPEARED BETWEEN WHEN THIS WORK WAS WRITTEN AND WHEN IT IS READ.
For general information on our other products and services, please contact our Customer Care Department within the U.S. at 877-762-2974, outside the U.S. at 317-572-3993, or fax 317-572-4002. For technical support, please visit www.wiley.com/techsupport.
Wiley publishes in a variety of print and electronic formats and by print-on-demand. Some material included with standard print versions of this book may not be included in e-books or in print-on-demand. If this book refers to media such as a CD or DVD that is not included in the version you purchased, you may download this material at http://booksupport.wiley.com. For more information about Wiley
products, visit www.wiley.com.
Library of Congress Control Number: 2014935511
ISBN 978-1-118-89869-7 (pbk); ISBN 978-1-118-89918-2 (ebk); ISBN 978-1-118-89885-7 (ebk) Manufactured in the United States of America
Introduction ... 1
Part I: Getting Started with Macs ... 5
Chapter 1: Adventuring into the Mac World ... 7
Chapter 2: The Nuts and Bolts of Your Mac ... 15
Chapter 3: Getting to the Core of the Apple ... 37
Chapter 4: Here a Mac, There a Mac, Ever y where a Mac Mac ... 65
Part II: Mac Daily Dealings ... 75
Chapter 5: Making the Mac Your Own ... 77
Chapter 6: Mavericks: No More Feline Fetish... 105
Chapter 7: Handling All That Busy Work ... 117
Chapter 8: Printing and Scanning ... 141
Part III: Rocketing into Cyberspace... 153
Chapter 9: Stairway to the Internet ... 155
Chapter 10: Delivering the Goods on E-Mail ... 181
Chapter 11: Schmoozing, Shopping, and Moving in Cyberspace ... 205
Chapter 12: Joining iCloud, the Club That Will Have You for a Member ... 239
Chapter 13: Mounting a Defense Strategy... 249
Part IV: Getting an iLife ... 263
Chapter 14: Living in an iTunes Nation ... 265
Chapter 15: Taking an iPhoto Close-Up ... 297
Chapter 16: Shooting an iMovie Screen Test... 333
Chapter 17: The Show Must Go On ... 359
Part V: The Creepy Geeky Section ... 373
Chapter 18: Networking Madness ... 375
Chapter 19: Surviving in a Windows World ... 387
Chapter 20: Handling Trouble in Paradise... 395
Part VI: The Part of Tens ... 413
Chapter 21: Ten Indispensable Mac Websites ... 415
Introduction ... 1
About This Book ... 1
Foolish Assumptions ... 2
Icons Used in This Book ... 2
Beyond the Book ... 3
Where to Go from Here ... 3
Part I: Getting Started with Macs ... 5
Chapter 1: Adventuring into the Mac World . . . . 7
Mac-Spectacular Computing ... 7
Checking out shapes and sizes ... 8
Matching a Mac to your needs ... 8
Selecting handy peripherals ... 9
Communicating with Your Mac ... 9
It’s a GUI ... 9
With great tools for you ... 10
And output, too ... 10
Living the iLife ... 11
Working with iWork ... 11
Reaching Outside the Box ... 12
Getting online ... 12
Hanging in the iClouds ... 12
Networking with or without wires ... 12
Staying Safe and Trouble-Free ... 13
Chapter 2: The Nuts and Bolts of Your Mac . . . . 15
Turning On and Tuning In Your Mac ... 15
Finding the On button ... 16
Getting credentials ... 16
Creating an identity ... 19
Clocking in ... 20
Registering your Mac... 20
Making acquaintances ... 20
Shutting down ... 20
Giving your Mac a nap ... 21
Mousing Around the Interface ... 22
Knowing your mouse type ... 23
Knowing What’s Handy about the Keyboard ... 25
Finding the major functions ... 25
Pressing the keys to success ... 27
Taking a shortcut ... 28
Storing Stuff on the Hard Drive or SSD ... 29
Memory Essentials, or RAM On ... 30
Locating the Common Ports and Connectors ... 31
Adding everyday peripherals with USB ... 32
FireWire: Pumping data through a bigger hose ... 33
Introducing Thunderbolt ... 33
Jacks of all trades... 34
Chapter 3: Getting to the Core of the Apple . . . . 37
Navigating the Mac Desktop ... 37
Biting into the Apple menu ... 39
Finding icons and folders ... 40
Unlocking the Finder window ... 40
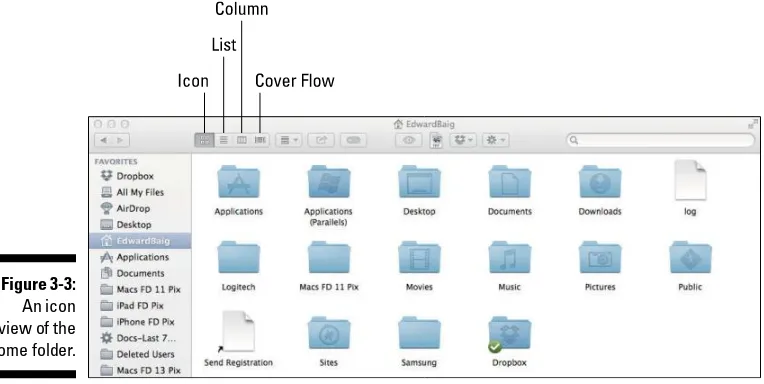
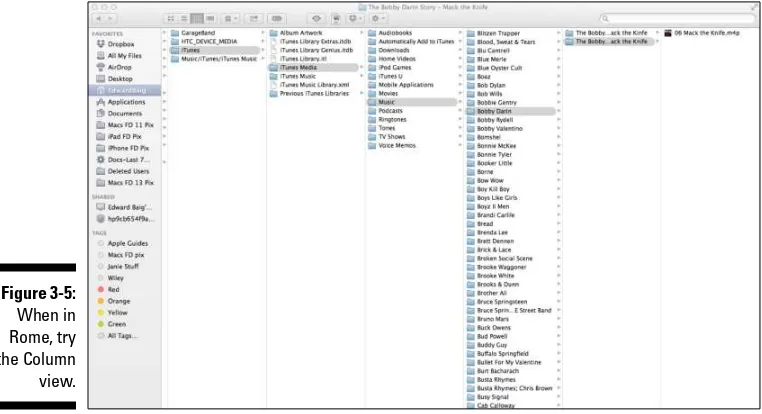
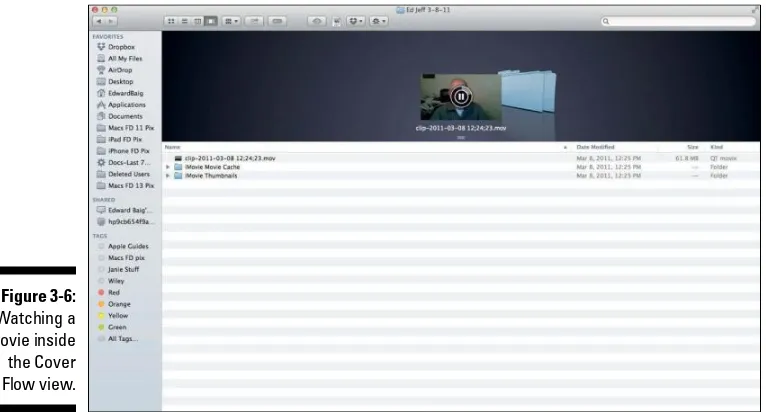
Getting a stunning view ... 42
Having a Quick Look ... 46
What’s Up, Dock? ... 48
What you’ll find on the Dock ... 48
Loading up the Dock ... 50
Docking the Dock ... 51
Re-opening minimized windows ... 51
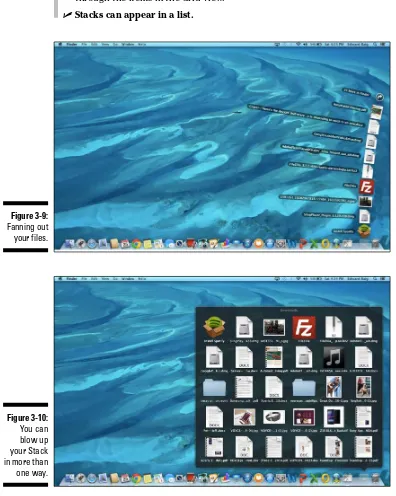
Stockpiling Stacks ... 52
Quitting time ... 54
A Gaggle of Freebie Programs ... 55
Staying organized ... 55
Tooling around for a reference ... 62
Chapter 4: Here a Mac, There a Mac, Ever y where
a Mac Mac . . . . 65
Big Mac or Little Mac?: The Laptop-versus-Desktop Decision ... 65
If a Desktop Is Your Poison ... 66
iMac ... 66
Mac mini ... 68
Mac Pro: A Mac with muscle ... 69
Going Mobile ... 69
MacBook Pro ... 70
MacBook Air ... 71
Taming the Trackpad ... 72
Part II: Mac Daily Dealings ... 75
Taking a Photo Booth picture ... 82
Applying special effects ... 83
Admiring and sharing Photo Booth photos... 84
Using Parental Controls: When Father (or Mother) Knows Best ... 85
The Lowdown on Logging In ... 88
. . . And logging out ... 89
Pulling a fast one ... 89
Letting Someone Go ... 90
Changing Appearances ... 90
Altering buttons menus, and windows ... 90
Setting your wallpaper and screen saver ... 91
Choosing a screen saver ... 92
Tidying Up with Mission Control ... 94
Working on multiple Desktops ... 96
Navigating application windows ... 97
Customizing Misson Control ... 97
Launching Launchpad ... 98
System Preferences: Choosing Priorities ... 99
Date and time ... 100
How Many Features? Let Me Count the Ways ... 106
Searching with Spotlight ... 107
Form and Function: The Essentials of Word Processing ... 118
Creating a document ... 119
Dragging and dropping... 123
Cutting and pasting... 125
Changing the font ... 125
Formatting your document ... 130
Speaking what’s on your mind ... 134
Saving your work ... 134
Securing, copying, and otherwise managing your file ... 136
Tagging a File ... 136
Making Revisions ... 137
Taking Out the Trash ... 138
Never Mind: Retrieving What You’ve Tossed ... 139
Making an Alias ... 139
Connecting and Activating a Printer ... 144
Ready, Set, Print ... 145
Printing it your way ... 147
Previewing your print ... 149
When Printers Stop Printing ... 149
Running out of ink or toner ... 149
Running out of paper ... 149
Hooking Up a Scanner ... 150
Part III: Rocketing into Cyberspace ... 153
Chapter 9: Stairway to the Internet . . . . 155
Dialing In ... 156
Taking the Broadband Express ... 157
DSL, cable . . . ... 157
Always on, always connected ... 158
Let Me In ... 159
Employing the tools of the trade in Safari ... 165
Using an Alternative Browser ... 177
The Skinny on Search Engines ... 178
Google this ... 178
Chapter 10: Delivering the Goods on E-Mail . . . . 181
Understanding E-Mail ... 181
Setting Up a New E-Mail Account ... 182
Before You Click Send ... 184
Addressing your missive... 185
Signing off with a signature ... 191
Managing the Flood of Incoming Mail ... 191
Choosing what to read ... 193
Making the Most of Your Mail ... 201
Chapter 11: Schmoozing, Shopping, and Moving in Cyberspace . . . 205
Messaging with the Messages App ... 206
Getting started with the Messages app ... 206
Hey, buddy ... 208
Chatting ... 212
Seeing is believing; hearing, too... 214
Screen sharing ... 216
Face Time for FaceTime ... 217
Getting started with FaceTime ... 217
Making a FaceTime call ... 218
Receiving a FaceTime call ... 220
Doing more FaceTime tricks ... 221
Social Networking ... 222
Facebook ... 223
LinkedIn and others ... 224
Twitter ... 224
Buying Stuff Online: The Mac App Store ... 226
Finding apps ... 227
Figuring out whether an app is worth it ... 227
Read All About It: iBooks ... 230
Finding something to read ... 230
Reading a book ... 231
Mapping Your Way Around ... 234
Showing Your Game Face ... 236
Chapter 12: Joining iCloud, the Club That
Will Have You for a Member . . . . 239
Why Belong? ... 239
Setting Up iCloud on Your Mac ... 242
Storage in the Sky ... 243
iCloud Mail ... 244
Back to My Mac ... 245
Find My Mac ... 246
Chapter 13: Mounting a Defense Strategy . . . . 249
The Truth about Internet Security ... 249
Spies in our midst ... 251
Gone phishing ... 251
Firewalls ... 253
FileVault ... 254
Password Management: The Key to Keychains ... 255
Logging In and Logging Out ... 256
Restricting App Downloads ... 257
Hiding Your Mac’s Whereabouts ... 257
Securing Your Privacy ... 258
Entering a Time Machine ... 258
Setting up Time Machine ... 259
Going back in time ... 260
Part IV: Getting an iLife ... 263
Chapter 14: Living in an iTunes Nation . . . . 265
iTunes: The Great Mac Jukebox ... 265
Tuning in to the iTunes interface... 266
When playlists get smart ... 275
When playlists get even smarter ... 277
Genius Mixes ... 279
MiniPlayer ... 281
Loading tunes onto a portable device... 282
Burning audio CDs ... 282
Tuning In to Internet Radio ... 283
Exploring the Internet tab ... 284
iTunes Radio ... 285
Finding Music (And More) Online ... 286
Seeking online music recommendations ... 287
The search for great music continues ... 289
When you’re ready to buy ... 290
Allowances and gifts ... 292
Sharing music with other computers ... 292
iTunes: More Than Just Music ... 293
Reading books ... 293
Listening to audiobooks ... 293
Capturing podcasts ... 294
Catching up on Mad Men and Game of Thrones ... 294
Buying and renting movies ... 295
App Store ... 295
iTunes U ... 296
Chapter 15: Taking an iPhoto Close-Up . . . . 297
Getting Pictures into the Computer ... 297
Connecting a digital camera ... 299
Importing images from the camera ... 300
Importing images from other sources ... 302
Using Photo Stream ... 303
Finding and Organizing Images ... 304
Seeing everything in Photos view ... 305
Browsing and organizing in Events view ... 305
Finding pictures by date ... 308
Facing everyone in Faces view ... 309
Mapping photos in Places view... 312
Assigning keywords ... 313
Assigning ratings ... 315
Placing your work in albums ... 316
Creating a Smart Album for photos ... 317
Viewing pictures ... 317
Something to hide ... 318
Touching Up Your Photos ... 318
Admiring and Sharing Pictures ... 323
Sharing on Facebook, Flickr, and Twitter ... 332
Chapter 16: Shooting an iMovie Screen Test . . . . 333
Touring the iMovie Interface ... 334
Shooting Your Oscar Winner ... 335
From Here to Eternity: Camcorder to iMovie ... 336
Using a tape-based camcorder ... 337
Using a DVD, hard drive, or flash-memory camcorder ... 338
Importing videos from other destinations ... 339
Using an iSight, FaceTime, or other camera to record directly to iMovie ... 339
Turning Your Clips into a Movie ... 346
Pick a theme, any theme ... 346
Movie trailers ... 347
Adding music or sound effects... 349
Recording a voiceover ... 351
The cutting-room floor ... 351
Adding transitions between clips ... 351
Adding titles ... 352
Adding photos to a movie ... 353
Making further adjustments ... 354
Sharing Your Blockbuster ... 355
QuickTime Marks the Spot ... 356
Making a quick QuickTime movie ... 356
Building an arrangement ... 367
Part V: The Creepy Geeky Section ... 373
Chapter 18: Networking Madness . . . . 375
Networking Done Right ... 375
The wired way ... 376
Cutting the cord ... 376
Landing safely at the AirPort ... 377
Boarding the AirPort Express ... 378
What the Mac and Windows Have in Common ... 388
Making the Switch ... 388
A Parallels (and Fusion) Universe ... 394
Chapter 20: Handling Trouble in Paradise . . . . 395
A Cranky Computer ... 395
A Frozen Computer or Program ... 397
Force Quit ... 397
When a program quits on you ... 398
Forcing a restart ... 399
Safe boot ... 399
Startup Problems ... 402
Reinstalling OS X ... 402
Common Fixes for Other Problems ... 404
A jumpy mouse... 404
A stuck CD ... 404
My Mac can no longer tell time ... 405
Kernel clink ... 405
SOS for DNS... 405
Curing the trash-can blues... 406
Useful Routine Maintenance ... 406
Purge unnecessary files and programs ... 406
Backing up your treasures ... 407
Help, I need somebody ... 410
Part VI: The Part of Tens ... 413
The Unofficial Apple Weblog ... 417
VersionTracker ... 418
Last but Not Least, Apple.com ... 418
Chapter 22: Ten Things to Leave You With . . . . 419
Screen Capture (Stills and Video) ... 423
Watching Live TV on a Mac ... 424
Would You Like to Play a Game of Chess? ... 425
Using the Mac for Work ... 425
Speech Recognition ... 426
W
hat an amazing time to get to know the Mac. For years, these elegantly designed computers have been models of simplicity and virus-free stability. But that’s never stopped Apple from making these machines even harder to resist by applying stunning changes.You can benefit from what remains the best marriage in personal computing — the blessed union between Mac hardware and Mac software. You also don’t have to ditch the Microsoft Windows–based software you currently use out of habit, due to business obligations, or because you don’t know any better.
Indeed, this book partially targets Windows vets who are at least thinking about defecting to the Mac. It’s also squarely aimed at people who are new to computers — and the Internet — period. And though this book is primarily for beginners, I trust that people who have already dabbled in computers in general and Macs in particular will find it useful.
About This Book
A word about the For Dummies franchise, of which I’m proud to be a part:
These books are built around the idea that all of us feel like dopes whenever we tackle something new, especially when the subject at hand (technology) reeks with a jargon-y stench.
I happen to know that you don’t have a dummy bone in your body, and the publishers at Wiley know it too. Au contraire. (How dumb can you be if you
speak French?) If anything, you’ve already demonstrated smarts by purchas-ing this book. You’re ready to plunge into the best computpurchas-ing environment I know.
What you won’t find in the bio is this: I’m a relative latecomer to the Mac. I grew up on MS-DOS computing and then migrated to Windows, like most of the rest of the world. I still use Windows machines every day.
But I’ve long since become a devoted Mac convert, and I use my various Apples every day, too. (No snide remarks, please; I find time for other pursuits.)
Foolish Assumptions
The most foolish assumption that I can make as a writer of a book like this is to assume I should reach out to one specific type of reader. Not the way to go, friends. My assumption — not foolish at all, actually — is that all of you are coming at this from different levels of computing knowledge, from tyro to more seasoned user, if not quite a full-fledged computer engineer or program-mer. Maybe this entire computing world is foreign to you. Maybe you’re the only one on your block who hasn’t spent any time on the Internet, or at least it seems that way. Or maybe you’re just new to Apple’s way of doing things. Heck, you can just rely on this book as a reference when you need an assist at troubleshooting.
My takeaway: You need not apologize for what you do or don’t know. As I laid out the groundwork for your Mac education, I’ve tried explaining the stuff that needs explaining without talking down to those of you who’ve already mastered this or that topic. Back when I started as a journalist, one of my editors occasionally added the acronym “DARK” to my raw copy. It stood for “Don’t Assume Reader Knows.” It’s a piece of advice that has served me well through the years.
Icons Used in This Book
Sprinkled in the margins of these pages are little pictures, or icons. I use the following four throughout this book.
A Remember icon means that a point of emphasis is here. So along with remembering your spouse’s birthday and where you put the house keys, you may want to retain some of this stuff.
Some percentage of For Dummies readers get so hooked on computing that they become the geeks of tomorrow. These people will welcome the presence of these pointy-faced little icons. Others among you would rather swallow tur-pentine than read an overly technical passage. You can safely ignore this mate-rial. (Still, won’t you be the least bit curious about what you may be missing?)
This icon is my way of saying, “Pay heed to this passage and proceed gingerly, lest you wreak the kind of havoc that can cause real and possibly permanent damage to your computer and (by extension) your wallet.”
Beyond the Book
I’ve provided a lot of extra content that you won’t find in this book. Go online to find the following:
✓ Cheat Sheet: The Cheat Sheet for this book (www.dummies.com/
cheatsheet/macs) has handy Mac shortcuts, comparisons to Windows
terminology, and tips on other cool features worth checking out.
✓ Dummies.com articles: You find online articles about Macs compiled on one handy page just for you on this book’s Extras page (www.dummies.com/ extras/macs). You can read more about choosing a printer, getting your
Mac to work with the Microsoft Exchange e-mail accounts that are prevalent in business, getting iMovie and iDVD to work together (assuming you still have a copy of the since discontinued iDVD application), and working with the Mac’s Disk Utility, where some of the stuff, I admit, can get a bit geeky . . . .
✓ Updates: At the time I wrote this book, I covered every Mac model avail-able and the latest versions of Mac OS X and iLife. Apple occasionally slips in a new Mac model or a new version of OS X or iLife between book editions. For details about significant updates or changes that occur between editions of this book, go to Dummies.com, search for Macs 13th Edition, and open the Download’s tab on this book’s dedicated page.
Where to Go from Here
I’ve made every effort to get things right and present them in a coherent manner. But if I’ve erred in any way, confused you, made you mad, whatever, drop me an e-mail at [email protected]. I truly welcome your
my Twitter handle. (If you’re unfamiliar with how Twitter works, you can find out more about it in this book, too.)
One thing is for sure: Mac people aren’t shy about voicing their opinions. Oh, and because all writers have fragile egos, feel free to send complimentary
comments my way too.
✓ Get to know the lay of the Mac landscape by familiarizing your-self with the tools of the Mac trade.
✓ Find out how to do Mac basics — like turning on your Mac, working with the mouse and keyboard, and running applications
✓ See how to get around the Mac desktop and how to navigate the folder structure on your hard drive.
Adventuring into the Mac World
In This Chapter
▶ Discovering why your computer is special ▶ Conversing with your computer
▶ Introducing iLife
▶ Getting work done with iWork ▶ Going outside the box ▶ Computing safely
F
orgive me for getting too personal right off the bat, but next to your spouse or significant other, is there anyone or anything you touch more often than a computer keyboard? Or gaze at more intensely than a monitor?If this is your initial dalliance with a Macintosh, you’re probably already smitten — and quite possibly at the start of a lifelong affair.
Despite its good looks, the Mac is much more than a trophy computer. You can admire the machine for flaunting intelligent design, versatility, and tough-ness. A Mac can take care of itself. As of this writing, the Mac has avoided the scourge of viruses that plague PCs based on Microsoft Windows. Apple’s dar-lings are a lot more stable, too, so they crash and burn less often.
Mac-Spectacular Computing
You shouldn’t be alarmed that far fewer people own Macs compared with PCs. That’s like saying fewer people drive Ferraris than drive Chev ys. Strength in numbers is overrated — and even at that, the trend toward Apple’s computers is in plus territory.
Sure, these same people can be smug at times. I’ve had Mac mavens go bal-listic on me for penning positive reviews that weren’t flattering enough, or for even daring to suggest that Macs aren’t always perfect. The machines come pretty darn close, though, so you’re in for a treat if you’re new to the Mac. It’s been suggested that most Windows users go to their computers to complete the task at hand and be done with it. The Mac owner also gets things done, of course. The difference is that using machines branded with the Apple logo tends to be a labor of love. Moreover, with Intel chips inside Macs, Apple’s computer can double as a pretty darn effective Windows machine.
As of this writing, Apple was celebrating the Mac’s 30th anniversary. There’s good reason for the venerable computer’s staying power.
Checking out shapes and sizes
Apple has a tremendous advantage over the companies promoting Windows PCs because it’s the single entity responsible for producing not only the com-puter itself, but also the important software that choreographs the way the system behaves. Everything is simpatico.
This situation is in stark contrast to the ways of the PC world. Companies such as Dell and Hewlett-Packard manufacture hardware. Microsoft produces the Windows software that fuels the machines. Sure, these companies main-tain close ties, but they just don’t share Apple’s blood relationships.
You’ll find a variety of Macintoshes meant to sit on top of your desk — thus, the term desktop computer. These Macs are discussed in greater detail in
Chapter 4. Just know for now that the main examples of the breed are the iMac, the Mac mini, and the Mac Pro.
Mac laptops, so named because they rest on your lap and are portable, are
the MacBook Pro and the Twiggy-thin MacBook Air. ( You remember the svelte 1960s supermodel Twiggy, right?) They’re often referred to as notebook com-puters or just plain notebooks. Like spiral-bound paper notebooks, they can fit into a briefcase or backpack. These days, MacBook Pros are also anorexic.
Matching a Mac to your needs
Just be prepared to part with some loot. Although the gap between the cost of PCs and Macs is narrowing, you typically pay more for a Mac than for a comparable unit on the PC side.
(Uh-oh! The Mac diehards are boiling at that remark. I can practically see their heads exploding as they rant, “There’s no such thing as a comparable
Windows machine.”)
Selecting handy peripherals
As you might imagine, a full range of peripherals complement the Mac. Although much of what you create in bits and bytes, to put it in computer-speak, stays in that electronic form, at some point, you’re probably going to want to print your work — on old-fashioned paper, no less. Fortunately, a number of excellent printers work with Macs. I provide details in Chapter 8.
You may also choose a scanner, which in some respects is the opposite of a
printer. That’s because you start with an image already in paper form and then scan it — translate it into a form that your computer can understand and display. Okay, so you can also scan from slides or microfiche, but you get my point.
Some machines combine printing and scanning functions, often with copier and fax capabilities as well. These are called multifunction, or all-in-one,
devices.
Communicating with Your Mac
The Mac isn’t at all standoffish, like some human objects of affection. It’s friendly and approachable. In the following sections, I tell you how.
It’s a GUI
Every mainstream computer in operation today employs what’s called a
graphical user interface, or GUI. The Mac’s GUI is arguably the most inviting
of all. It consists of colorful objects or pictures on your screen, plus windows and menus (for more, see Chapter 3). You interact with these by using a com-puter mouse or other pointing device to tell your machine and its various pro-grams how to behave. The latest Macs also incorporate multitouch gestures
Either approach sure beats typing instructions as arcane commands or taking a crash course in programming. For that matter, OS X Mavericks, the operat-ing system that you’ll get cozy with throughout this book, lets you use voice commands and dictation as well.
With great tools for you
Given the Mac’s versatility, I’ve often thought it would make a terrific product to peddle on one of those late-night infomercials. “It slices, it dices. Why it even does more than a Ginsu Knife or Popeil Pocket Fisherman!”
Indeed, have you ever paused to consider what a computer is, anyhow? Consider a few of a computer’s most primitive (albeit handy) functions. A Mac can
✓ Tell time
✓ Display family portraits
✓ Solve arithmetic problems ✓ Play movies
✓ Let you chat with friends
I daresay that you didn’t surrender a grand or two for a simple clock, photo album, calculator, media player, or telephone, but it’s sure nice having all those capabilities in one place. And as that announcer on TV might bark, “That’s not all, folks.”
I can’t possibly rattle off all the nifty things a Mac can do in one section, and new uses are being found every day. ( The included iLife and iWork software suites get their own sections later in this chapter, and I encourage you to read the rest of the book.) But whether you bought or intend to buy a Mac for work, play, or more likely some combination of the two, some little birdie tells me that the contents of the Mac’s tool chest will surpass your expectations.
And output, too
Living the iLife
All the latest Macs are loaded with a terrific suite of software programs called
iLife to help you master the digital lifestyle you’re about to become
accus-tomed to. (On some older systems, you can purchase the upgraded iLife suite of programs.) I dig deeper into the various iLife components throughout Part IV. Here’s a sneak preview:
✓ iTunes: Apple’s popular program for buying and listening to music, and buying or renting movies and TV shows. It’s available free on all Macs, and though it’s also found on Windows computers, it’s technically a member of the iLife family.
✓ iPhoto: The great photographer Ansel Adams would have had a field day with iPhoto. This software lets you organize and share your best pic-tures in myriad ways, including placing them in calendars or in coffee-table books. You can even find pictures by where you took them and who’s in them.
✓ iMovie: Can an Academy Award be far behind? iMovie is all about apply-ing cinematic effects to turn your video into a piece of high-minded art that would make Martin Scorsese proud. Who knows? Maybe Apple will find work for you at Disney or Pixar.
✓ GarageBand: Did somebody mention groupies? GarageBand lets you make music by using virtual software instruments. The latest version also helps you create online radio shows, or podcasts.
Working with iWork
Macs of recent vintage also come with iWork software, an application suite that helps you . . . well, get work done. Consider iWork to be Apple’s answer to Microsoft’s Office productivity suite (versions of which, by the way, also work on the Mac). The Mac iterations of iWork are similar to versions on Apple’s iOS 7 devices, most notably the iPad, as well as web-browser based versions for Macs and Windows. Apple’s productive trio includes
✓ Pages: Are you writing your thesis or the great American novel? Using Apple’s polished word processor is a great way to accomplish this gigan-tic task. You can even save your finished documents as Word files to share with all the folks who still rely on Office.
✓ Keynote: Cinematic animations, Apple-designed themes, and engaging charts — such are the tools Apple provides in Keynote to help you create the kind of spiffy and professional presentations that are sure to get your point across.
Reaching Outside the Box
The modern computing experience extends well beyond the inner workings of the physical contraption on your desk. Computing is more about what occurs in the magical kingdom of cyberspace, better known as the Internet.
Getting online
In Chapter 9, you discover all there is to know about finding your way to the Internet and the many paths you can take when you get there. The Mac comes with the software you need to get started (and the circuitry required) to connect online through fast broadband methods.
If you get a hand-me-down Mac, it might still dial up the Internet through a conventional phone line — but by now, you won’t be spending much time on such ancient communication methods. Such models are increasingly scarce.
Hanging in the iClouds
So much of what we do on computers nowadays happens online — or, as it’s frequently put, in the cloud. Apple’s online service is appropriately called iCloud. It’s a place to manage photos, music, documents, contacts, calendars, and more. It’s also a place to keep all this data synchronized, not only across all the Macs you may own, but also across other devices, including Apple’s own iPhone smartphone and iPad tablet computer. iCloud is also available for Windows owners. Read Chapter 12 for details on the iCloud service.
Networking with or without wires
A Mac can help with such things, too, but that’s not the kind of networking I have in mind. Computer networks are about having two or more machines communicate with one another. Getting online to connect with various online outposts is a kind of networking (your computer connects with a web host, which is another type of computer, to put it simply). You can also set up a network that enables your Mac to share files, pictures, music, a printer, and more with other Macs or Windows computers in your home.
Even on a Mac, this second type of networking can get kind of geeky, though Apple does as good a job as anyone of helping to simplify the process. You can network by connecting certain cords and cables. The preferred method is to do so without wires. Networking is explained in Chapter 18.
Staying Safe and Trouble-Free
As noted at the beginning of this chapter, the Mac has historically been able to avoid the nasty viruses and other malevolent programs that give Windows owners the creeps. In the nastiest scenarios, those Windows machines (or certain programs) are shut down, and personal information is surreptitiously lifted. In this day and age, not even Mac owners should let their guard down. (And remember, in some instances, the Mac can double as a Windows machine.) Chapter 13 offers counsel on avoiding online dangers.
The Nuts and Bolts of Your Mac
In This Chapter
▶ Turning on the computer and getting set up ▶ Taming the mouse
▶ Keying in on the keyboard ▶ Saving your work
▶ Mastering memory
▶ Finding common ports and connectors
H
ave you taken the plunge and purchased a Mac? If so, you’ve made afabulous decision.
I bet you’re dying to get started. Maybe you began without even reading these initial instructions. Fine with me. No offense taken. The Mac is intuitive, after all, and the title on this cover notwithstanding, you’re no dummy. I know, because you had the good sense to buy a Macintosh — and this book. Besides, what would it say about Apple’s product designers if they couldn’t make you understand how to turn on the computer?
If you didn’t jump the gun, that’s cool too. That’s why your humble servant . . . um, author is here.
Turning On and Tuning In Your Mac
Finding the On button
Take a second to locate the round On, or power, button. Where it resides depends on the Mac model you purchased, but finding it shouldn’t be too taxing. I’ll even give away the secret on recently issued models. On the latest iMac, the On button is on the bottom-left back panel of the monitor (when you’re facing the monitor). On Mac laptops, the button is at the top-right corner of the keyboard.
Go ahead and press the On button now. Explosive things are about to happen. Not those kinds of explosives; it’s just that igniting your first session on the Mac makes you da bomb (translation: old-time slang for awesome or cool).
To let you know that all is peachy (or should I say Apple-y?), you hear a musical chime while the Apple logo briefly shows up on the screen in front of a gray background. A spinning gear appears just below the Apple logo.
Getting credentials
Powering up a new Mac for the first time may make you feel like you’re enter-ing the United Nations. After the Apple logo disappears, a lengthy interrogation process commences. I’ve broken it down into a (more or less) step-by-step process for you:
1. Choose your language.
You’re kindly instructed to pledge allegiance to a particular language. In fact, Apple welcomes you in more than 30 languages, with greetings like Welkom, Tevetuloa, Vitejte, Bem-vindo, Deutsch als Standardsprache verwenden, and Gebruik Nederlands als hoofdtaal. If you don’t know what
languages these phrases represent, you probably should make another choice. As you move up or down the list, you may hear an audible voice explaining how to set up your Mac. “To use English as the main language, press the Return key” is what most people will hear initially, because English is the top choice in the list. But as you highlight alternative options, you’ll hear instructions in other languages.
In fact, you have the option throughout the process to take advantage of VoiceOver, the Mac’s built-in screen reader. Press ⌘+F5 to turn it on here
(or later on to turn it on).
Make your selection by pressing Return or by clicking with the mouse (see details later in this chapter).
2. Tell your nosy computer your country or region.
don’t need to whip out a passport. But you need to click Continue to move on. Select the Show All check box to see all the possible country options — nearly 240 at my last count.
I clicked the United States and then clicked the onscreen Continue button (a right-pointing arrow inside a circle), but you can obviously select whichever language and/or nation is appropriate for your living situation. 3. Select a keyboard layout.
U.S. and Canadian English are the choices if you stuck with the English language. Again, you can choose Show All for additional choices. 4. As the cross-examination goes on select any availableWi-Fi,or
wireless Internet, service to use.
You may have to enter a network password. If you don’t connect to the Internet wirelessly or for the moment lack an Internet connection, click the Other Network Options button (a circle with right- and left-pointing arrows). That’s where you can choose a wired Ethernet connection, assuming that your Mac is so equipped and that you have an available Ethernet cable. Or you can indicate that you don’t have an available Internet connection. (For more on networking, I direct you to Chapter 18.) 5. Transfer your user settings or data to your new Mac. If you don’t have
such data or don’t want to transfer it right now, skip to Step 6.
You’re presented the option to transfer network settings, user accounts, documents, applications, files, e-mail, and various preferences from another computer to this one. The process once typically involved con-necting a FireWire cable, which you discover more about later in this
chapter. But you have other options, including the speedy Thunderbolt connector that’s now standard on new Macs.
With the introduction a few years ago of the MacBook Air notebook, Apple upgraded its software so that you could migrate from another Mac wirelessly over a computer network. The reason: Air models and most Macs introduced since then lack the FireWire option. But as I just men-tioned, the computers have a variety of other ports that I also discuss later in this chapter.
You may also be presented the option to transfer information from another partition on this Mac. Partition is a geeky term I’ll skip for now. Okay, a hint: Think of it as another volume though that’s kind of a geeky
term too. An external hard drive would be a typical example.
Also, you can migrate from another Mac volume by using OS X’s Time Machine feature. Read Chapter 13 to find out how to go back in time. 6. If this is your maiden voyage on theSS Macintosh,the previous choices
7. As the interrogation drill continues, decide whether to enable Location Services.
Through the wonders of technology, the Mac can determine your approximate location, which can help you find nearby places to eat or shop, or assist you in getting from one place to another.
Location Services works with a variety of apps, or programs, including Twitter, Reminders, and Safari. You have lots of reasons why enabling the feature can be a good thing. Heck, Apple can even choose your time zone based on the current location of your machine. If knowing your location wigs you out from a privacy perspective, Apple understands and gives you the chance to opt out. But if you’re okay with the concept (as your humble author is), select the Enable Location Services on This Mac check box and click Continue.
8. Provide your Apple ID.
Your Apple ID is the credential that lets you buy songs, books, and videos in the iTunes Store, download apps in the Mac App Store, use iCloud, and more. You can use different Apple IDs for each of these features. Chances are that you already have an Apple ID if you own an iPhone or iPad. If you don’t have an Apple ID yet, creating one is free and easy. Apple does
ask for your birthday and the year that you were born, which it says it will use to retrieve your password if you ever forget it (though that process hardly seems all that secure). Type your first and last name, and choose the e-mail address that you want to use for your Apple ID — either a cur-rent address or a new free iCloud address. In choosing a new Apple ID, enter a password and choose a security question to help you retrieve that password later — perhaps the first record album you ever owned or the first celebrity you ever met. And no, Apple won’t ask for your Social Security number or driver’s-license information.
9. Read through the legalese.
Before your setup is complete, you can read the terms and conditions required to use your Mac and all matters of legalese pertaining to OS X, iCloud, Game Center, Privacy, and more. You just knew the attorneys had to get their two cents in somewhere, right?
10. Set up your iCloud account.
You also get to turn on a feature in iCloud called Find My Mac, which (as its name suggests) is a way for you to find a computer you may have inadvertently left in a taxi or that — heaven forbid — was stolen. (You have to turn on Location Services for Find My Mac to function.) Read more about this potential life . . . um, Mac-saver in Chapter 12.
Read the next section to find out about creating your computer account.
Creating an identity
You’re almost ready to begin touring the computer, but not quite. An important step remains. You must choose an identity, or a user account, to tell the Mac that you’re the Grand Poobah of this particular computer. As this almighty administrator, you and you alone can subsequently add accounts for other members of your family or workplace, each with a password that keeps him or her from snooping into another user’s computing workspace (see Chapter 5).
To create your identity, enter the following
✓ The full name of the account holder (for example, Cookie Monster)
✓ The account name (Cookie), which will also become the name of your
“home folder”
✓ The password (chocolatechip or, better yet, something that’s harder to guess); and the password again to verify it
You can select an option that allows your Apple ID to reset this user password (another reason why picking an Apple ID is a good idea). And you can require the password when logging in.
✓ A password hint(yummy flavor) that gives you a gentle reminder should you ever forget your password
Failing to remember things may not happen to you, but it sure happens to me.
There are work-arounds for resetting a password, but you hope it doesn’t come to that. And if your Mac didn’t come with a Restore disk — the most recent Macs ditch the optical drive and, for that matter, the disc — you’ll need a second computer that has such a drive to reset the administrative account password. Starting with Mac OS X Lion and moving on to Mountain Lion and Mavericks (the current flavor as this book was being published), you can boot into a Recovery system by pressing the ⌘ and R keys.
✓ An account picture (like a photo of a chocolate chip cookie)
Clocking in
Because it probably already seems as though day is turning into night, this is as appropriate a time as any to select your time zone by clicking near where you live on the world map that appears. If you’re connected to the Internet, the computer can determine the date and time automatically, again based on knowing the location of the computer.
Registering your Mac
When all is said and done, the nice folks at Apple would also like you to regis-ter your Mac. Letting Apple know who you are gives the company the oppor-tunity to flood you with promotional e-mails. But you can register and opt out of the promotional e-mails. Or you can skip registering altogether, but then you’d be ineligible for short-duration telephone support.
Making acquaintances
Depending on how you set things up, you may see a welcome screen listing
all the people who have user accounts on the computer, each with a personal mug shot or other graphical thumbnail next to his or her name. Click the name or picture next to your thumbnail. You’re asked to enter your password (assuming that you have one). Type it properly, and you’re transported to the main working area, or Desktop.
The Desktop I’m referring to here is the interface that you see on the computer display, not to be confused with a desktop-type machine.
Shutting down
Okay. Ready? Sayonara time:
1. Choose ➪Shut Down.
Using the arrow-shaped cursor, which you control with your mouse or trackpad, stab the small logo in the top-left corner of the screen. Click once, and a drop-down menu appears. Move the cursor down until the Shut Down entry is highlighted. You know when a command or an entry is highlighted because a blue strip appears over its name.
Pressing Enter on the keyboard or clicking Shut Down brings up what’s called a dialog (see Figure 2-1). I’m no shrink, but it’s obvious, based on the question the computer asks inside this dialog, that it suffers from separa-tion anxiety (“Are you sure you want to shut down your computer now?”).
Figure 2-1: Are you sure you want to shut down?
2. When the dialog box appears, you can
• Do nothing, and the machine will indeed turn itself off. On machines that ran previous Mac operating systems — Snow Leopard and Leopard, for example — you had two minutes to change your mind. On the computers running more recent versions of OS X — such as Lion, Mountain Lion, and (the current iteration) Mavericks — you have up to a minute.
• Click the Shut Down button if you want to say “So long” immediately.
• Click Cancel. Having second thoughts? Click Cancel to return to the desktop interface.
If you hold down the Option key when choosing Shut Down, this dialog is bypassed. If you want the computer to reopen the same windows that are open when you shut the machine down, check the box that presents this option.
Giving your Mac a nap
know they’re alive because a dim light keeps blinking. As it turns out, your machine is a light sleeper. You can wake it up quickly by pressing any key on the keyboard. Best of all, whatever you happened to be working on is just where you left it. That’s also the case when you restart a Mac running Lion, Mountain Lion, or Mavericks that you’ve completely shut down, as all your open apps and documents get restored on restart by default.
If you’re going to leave the Mac on for an extended period of time, make sure that it’s plugged into a surge protector that can protect the machine from lightning. More-expensive surge protectors have backup batteries and are often referred to as UPSs, short for Uninterruptible Power Supplies.
You can make a Mac laptop go to sleep immediately by shutting its cover. Lift the cover to wake it up. To make a desktop machine go to sleep, click the Sleep command on the menu — you know, that menu at the top-left corner of the screen bearing the logo.
As part of Mountain Lion or Mavericks, some Mac notebooks (those with built-in flash storage) can exploit a feature known as Power Nap. Though you may think your Mac is in dreamland, it still periodically updates Mail, Contacts, Calendar, Reminders, Notes, Photo Stream, Find My Mac, and an iCloud feature known as Documents in the Cloud. Don’t worry if you don’t know what all these features are; I get to them throughout the book. Just take comfort in the fact that your Mac may be sleeping, but it’s not sleeping on the job.
As part of Mavericks, Apple introduces a new power-saving feature called App Nap. If an open app isn’t otherwise engaged by, say, playing music or fetching a file on your behalf, your Mac can automatically put it into a drowsy state, at least until you must summon said app back to work.
Mousing Around the Interface
By now, you’re catching on to the idea that this computing business requires a lot more clicking than Dorothy had to do to get back to Kansas. She used ruby slippers. You get to use a mouse or (increasingly) a trackpad.
A computer mouse is generally less frightening than that other kind of critter. In keeping with this Wizard of Oz comparison, not even the Cowardly Lion
would be scared of it. And though your high-tech rodent can get finicky at times, you’re unlikely to set traps to bring about its demise.
Knowing your mouse type
Older mice connect to the computer through cords. The mice included with Macs sold in the past several years are wireless. (These connect with a tech-nology called Bluetooth, which I explain in Chapter 18.) Not every Mac is sold with a mouse, however. Laptops come with trackpads. On a Mac mini, you have to supply your own mouse (and monitor and keyboard, for that matter).
That’s the cut-and-dry version, but there’s a little more to the mouse story. . . .
✓ Currently, Mac desktops (except Mac mini) come with a Magic Mouse as the default choice, though you can also go with the Magic Trackpad, which I’ll have more to say about shortly, or even select a standard Apple Mouse. Magic Mouse is a multitouch mouse without any visible buttons. (You find out what multitouch means in an upcoming section.)
✓ A vintage Mac mouse is either a one-button mouse or Mighty Mouse. The one-button mouse has a single button at the top. The Mighty Mouse (which Apple retired in favor of the Magic Mouse) was a programmable critter that behaved like a multibutton mouse. If you’re coming to a Mac from the Windows or Linux operating system, you’re probably used to a two- or multi-button mouse.
✓ If your Mac is a laptop, your Mac doesn’t include a mouse but has a
trackpad — a smooth area just below the keyboard. You glide your finger
on the trackpad to choreograph the movement of the cursor.
✓ You can attach a regular mouse to any Mac laptop, or a trackpad to your desktop. For $69, you can buy either the Magic Mouse or the Magic Trackpad. (Of course, you’d only want whichever one didn’t come with your Mac.)
You can also use what are called trackballs, though Apple doesn’t ship them. They’re available from companies such as Kensington and Logitech and they have relatively small but devoted followers. There is also a market for pen devices or styluses, made by companies such as Wacom.
Learning the basic mouse
(or trackpad) moves
If you’re new to mousing — or just Mac’s multitouch gestures, which respond to your fingers — I’ll explain:
miraculously apes the movement of your hand gliding the mouse. (Note to self: The mixed-metaphor police, aka my editor, must love the mention of a mouse and a monkey in the same breath.) If the mouse loses touch with the surface of your desk, the cursor will no longer move.
On a trackpad, set a single finger on the trackpad and move your finger
around as you would a mouse.
✓ Clicking: Clicking usually serves the purpose of selecting things on screen. When you place the cursor precisely where you want it, you’re ready for the clicking part. Place your index finger on the top portion of the mouse, press down quickly, and let go. You hear a click, and in some cases, your entire body tingles with satisfaction. You’ve mastered the fine art of clicking.
On a trackpad, you can mimic a click by tapping the surface of the trackpad itself. Or, on older Mac notebooks, the button just below the trackpad handles clicking chores.
✓ Double-clicking: Don’t get too cocky. Now try double-clicking, an action often required to get something accomplished. You’re pretty much repeating the preceding exercise, only now you’re clicking twice in rapid succession while keeping the cursor in the same location. It may take a little practice, but you’ll get it.
On a trackpad, tap twice in rapid succession.
✓ Right-clicking:Right-clicking refers to clicking with the right mouse button. You right-click to open a contextual menu, so called because the commands you see on the menu vary depending on what you click. (Apple also calls right-clicking secondary clicking.)
Although your mouse or trackpad may not have a right button, right-clicking is still no big deal:
• On a Magic Mouse, or on a one-button mouse, press Control on the keyboard while you click.
• On a trackpad, you can also press Control on the keyboard while clicking anywhere on the trackpad. But you have a few other options. You can click using two fingers simultaneously. You can click with your thumb while pressing two fingers against the sur-face of the trackpad. Or you can click in the left or bottom-right corner of the trackpad. To handle this last chore, visit System Preferences➪Trackpad and make sure the Point & Click tab has
✓ Dragging: Dragging moves things around onscreen. To drag, position the cursor on top of the symbol or icon you want to drag. Then hold down the mouse button and roll the mouse across your desk. As you do so, the icon moves to a new location on the screen.
On a trackpad, press and drag the cursor across whatever it is you want to drag to select it. Drag the cursor until it’s on top of the area you’ve selected. Press and hold the surface of the trackpad with a single finger and, without letting go of that finger, use a second finger to glide against the surface of the trackpad to move your selection elsewhere on the screen.
✓ Scrolling: While gently touching the surface of the trackpad or Magic Mouse with two fingers, move those fingers in the direction in which you want the scrolling to take place, keeping in mind that you may be able to move right or left as well as up or down.
You find more details about using the trackpad in Chapter 4.
If you use any of the Mac’s distant cousins — the iPad, iPhone, or iPod touch — you already know how cool it is to spread your fingers and then pinch them together to zoom in and out of photos and web pages, among other gestures. Macs of recent vintage are touchy, too, but only in a good way. You can employ various gestures on MacBook Pro and MacBook Air laptops with silky-smooth glass trackpads. You can swipe your fingers to flip through pictures and do such tricks as rotate images, for example.
Knowing What’s Handy
about the Keyboard
As with any computer — or an old-fashioned typewriter, for that matter — the Mac keyboard is laid out in QWERTY style (at least in the U.S.), meaning that the top row of letters starts with Q, W, E, R, T, and Y. But a computer keyboard also contains a bunch of specialized keys that the inventors of the typewriter wouldn’t have dreamed of.
Finding the major functions
The top row of the Mac keyboard carries a bunch of keys with the letter F
followed by a number. From left to right, you go from F1, F2, F3, all the way (in some cases) to F16. These keys are your loyal function keys, and their
Table 2-1 explains what you can do with these keys on newer keyboards and laptops, and with the most recent operating system.
Table 2-1
Function Keys in Mavericks
Key What’s It For For Details,
See. . . . F3 Using Mission Control Chapter 5 F4 Using Dashboard or Launchpad Chapter 5 F7, F8,
F9
Rewinding, playing, pausing, and fast-forwarding music, movies, and slideshows
Part IV
F10 Muting the sound
On older Macs (in this case, those running a pre-Lion version of the Mac OS), the F9, F10, F11, and F12 keys relate to a feature called Exposé, since folded into the Mission Control feature, which I explain in Chapter 5. And F8 used to launch a feature called Spaces, also now part of Mission Control.
On Mac laptops, the F1 and F2 keys can raise or lower the brightness of your screen. Those functions are performed by the F14 and F15 keys on other types of Apple keyboards. And just to keep your fingers on their . . . um, toes, be aware that some exceptions exist.
Those various F keys may be difficult to spot at first on a laptop. They have teeny-tiny labels and share keys. It’s a good thing that some function keys also have little pictures that help explain their purpose. You’ll have to press the fn key at the same time you press a function key to make it . . . well, function as a function key. Otherwise, such keys will perform their other duties.
The keys you use every day
Quick quiz: Guess which keys you use most often? Too easy. The keys you use every day are the ones representing vowels and other letters with low point values in Scrabble.
Naturally, these aren’t the only keys that work overtime. The spacebar, comma, and period
Pressing the keys to success
You’ll find these other keys extremely useful, but remember, not all keyboards look the same or have each and every key mentioned here:
✓ esc: The great Escape key is the equivalent of clicking Cancel in a dialog.
✓ : These keys raise, lower, or mute the volume of the computer’s
speakers, though in laptops, certain function keys perform these duties.
✓ : No doubt this key is James Bond’s favorite. Press it, and one of two
things is supposed to happen. On Macs with a CD/DVD drive (also known as an optical drive), a CD or DVD loaded inside the guts of the computer spits out of a hidden slot. On a Mac Pro with an optical drive, the tray hold-ing the disc slides out. But you won’t find this key on all models, because the optical drive is no longer standard issue on Macs.
✓ Delete and Delete: You’re not reading double. Some Mac keyboards have two Delete keys, each with a different assignment. Regular Delete is your Backspace key. Press it, and it erases the character directly to the left of the cursor. The second Delete key (which sometimes appears as Del and sometimes as delete accompanied by an x inside a small pentagon) is the
forward Delete key. It wipes out the character to the right of the cursor. Confusingly, on some laptops as well as on Apple’s aluminum keyboard, you can purge the letter to the right of the cursor by pressing fn+Delete at the same time.
✓ Home and End: These keys are the jumpiest keys you’ll come across. Press Home, and you may be instantly vaulted to the top of the document or web-page window in which you’re working. Press End, and you often plunge to the bottom, depending on the application. You won’t see Home or End on all Mac keyboards.
✓ Page Up and Page Down: These keys are keyboard alternatives for moving up or down one huge gulp or screenful at a time. Again, you won’t see these keys on all keyboards. If you don’t see them, press the fn key with the up- or down-arrow key.
✓ Option: Pressing Option (labeled Alt Option on some keyboards) while you press another key generates a symbol or accent such as an umlaut. You can’t possibly recall them all, though over time, you’ll learn the key combinations for symbols you regularly call upon. Press Option+2 for ™, Option+V for √, and Option+R for ®, for example. Feel free to play around with other combinations.
✓ ⌘: Pressing the cloverleaf key while you press another keyboard character creates keyboard shortcuts, a subject worthy of its own topic (see the next section).
Taking a shortcut
If you hold the mouse in high regard, you may want to give the little fellow time off now and then. That’s the beauty of keyboard shortcuts. When you simultaneously press ⌘ and a given key, stuff happens. You just have to
remember which combination of keys to use under which circumstances.
To understand how such shortcuts work, consider the popular act of copy-ing material from one program and reproduccopy-ing it in another. You’re about to practice copy-and-paste surgery.
I present two ways to do this. One method leaves pretty much everything up to your mouse. The other, while still using the mouse a little, mainly exploits keyboard shortcuts.
The first option follows:
1. Use the mouse to highlight, or select, the passage you want to copy.
2. From the menu bar at the top of the screen, choose Edit➪Copy.
3. Move the mouse and click to place your cursor where you want to paste the text.
4. Choose Edit➪Paste.
The copied material magically appears at its new destination.
Here’s the keyboard-shortcut method:
1. Highlight the text you want to copy.
2. Hold down the ⌘ key while you press the C key (an action often abbreviated as ⌘+C).
The result is the same as the result of choosing Edit➪Copy.
3. Move the mouse and click to place the cursor where you want to paste.
4. Press ⌘ and the V key (or ⌘+V). You’ve just pasted the text.
in the menu appear dimmed. That’s because the commands can’t be used at this particular point. Also, some shortcuts require both the ⌘ key and one or
more additional modifier keys, as in Shift+⌘+N to select New Folder.
Figure 2-2: To use a keyboard shortcut or not to? That is the question.
You can modify keyboard shortcuts in System Preferences. Choose System Preferences➪Keyboard➪Keyboard Shortcuts. Double-click the shortcut you
want to change, and hold down the new keys.
Storing Stuff on the Hard Drive or SSD
You keep lots of things on a computer. Software you’ve added. Photos, songs, movies. Your graduate thesis comparing Lady Gaga’s appeal with Madonna’s popularity. Apple left a lot of stuff behind, too, mainly the files and programs that make your Mac special.
The bottom line: Computers are a lot like houses. The longer you stick around, the more clutter you accumulate. And despite your best rainy-day intentions, you almost never seem to get rid of the junk.
You may even choose to add a second or third hard drive. You can almost always take advantage of the extra storage. What’s more, you can use an additional hard drive to back up, or keep a copy of, your most precious digi-tal keepsakes. For that matter, an additional hard drive is required for Time Machine — a feature well worth exploring, as you discover later.
Indeed, I can’t ram into your heads hard enough the following point: However you choose to do so, back up, back up, back up.
A hard drive isn’t the only form of storage on the Mac. On some models, you can substitute or add a solid-state drive, or SSD. Advantages: SSDs have no moving parts, making them more durable than hard drives in laptops you cart around, and such drives are faster than their hard-drive counterparts, so they’re useful on desktops as well. Chief down side: SSDs don’t yet offer nearly the storage capacities of most hard drives and they’re way more expensive.
When you order a Mac that has both a hard drive and an SSD, Apple preloads applications and Mac OS X itself on the SSD. The hard drive is best reserved for your documents, pictures, and other files.
On recent iMacs, Apple offers an option called a Fusion Drive, which com-bines the benefits of both: greater storage through a traditional hard drive and the speed of an SSD. Apple loads the operating system in a flash, plus all the apps, pictures, and other data you call upon most frequently. Everything is managed in the background automatically; to you, the system appears to have only one drive. Apple claims that the Fusion Drive has up to 3½ times faster performance compared with a regular hard drive, but be aware that a 1TB Fusion Drive, at this writing, added $200 to the price of the computer, and a 3TB drive added $350. Such drives aren’t cheap.
Memory Essentials, or RAM On
I’m not sure whether you caught my not-so-subtle use of the word ram in the preceding section. That’s to get you thinking about the other kind of RAM,
which stands for random access memory or (mercifully) memory for short. (I can’t help but think that accessing my own memory is random, which may explain why I can recall things from the third grade but not from yesterday.)
Just as you want to have as capacious a hard drive as possible, you want to load as much RAM into your system as you can possibly afford.